Duplicator for Lathe: Your Essential Guide to Effortless Replication
A duplicator for a lathe is a smart attachment that copies an existing workpiece onto a new one, saving you tons of time and ensuring perfect matches for repeat projects. This guide will walk you through understanding, choosing, and using one effectively, making replication simple and precise for any beginner. Let’s get started!
Navigating the world of lathe attachments can sometimes feel a bit overwhelming, especially when you’re just starting out. You might have a specific design you need to make more than once, or perhaps you’ve found a pattern online that you’d love to replicate. That’s where a lathe duplicator comes in. It sounds fancy, but at its heart, it’s a tool designed to make your life easier by precisely copying shapes. No more struggling to get two identical parts – a duplicator can handle it.
Think about making a set of identical table legs, or perhaps replicating a decorative spindle. Doing this by hand, especially when you’re learning, can lead to frustrating inconsistencies. You might spend hours trying to get each piece just right, only to find subtle differences making them not quite a perfect match. This is precisely the problem a lathe duplicator was invented to solve. It takes the guesswork out of precise replication, allowing even beginners to achieve professional-level accuracy.
In this guide, we’ll break down exactly what a lathe duplicator is, how it works, what types are available, and most importantly, how to use one safely and effectively on your lathe. We’ll cover everything from setup to achieving those perfect duplicate projects, ensuring you feel confident and ready to tackle your replication tasks. Let’s unlock the simplicity of duplication together!
What is a Lathe Duplicator?
At its core, a lathe duplicator is a mechanical device that attaches to your wood or metal lathe. Its primary function is to act as a guide, allowing you to trace a master template or an existing workpiece and have a cutting tool automatically follow that pattern on a new piece of material. This means you can create exact replicas of your original work with minimal effort and significantly improved accuracy.
Imagine you have an already-turned, perfectly shaped spindle. Instead of meticulously trying to recreate that shape on a second piece of wood or metal, you attach the duplicator. You then guide the master part (or a template you’ve made) past a sensor or follower, and the tool engages and cuts the new workpiece to mirror that exact shape. It’s like having an extra pair of incredibly precise hands guiding your cutting tool.
The concept is straightforward: a master pattern and a follower mechanism connected to a cutting tool. As you move the follower along the master, the cutting tool moves in tandem, shaping the new material to match. This eliminates the need for constant caliper measurements and freehand shaping for identical pieces, which is a huge time-saver and accuracy booster, especially for beginners.
Why Use a Duplicator for Your Lathe?
The benefits of using a duplicator extend beyond just convenience. For beginners and experienced users alike, it opens up a world of possibilities and solves common workshop challenges.
Key Advantages of Using a Lathe Duplicator:
- Accuracy and Consistency: This is the biggest win. Achieve identical results every single time, which is crucial for professional-looking projects or when making multiple components.
- Time Savings: Once set up, creating duplicates is significantly faster than manual replication. You’ll spend less time measuring and more time creating.
- Simplified Operation: For beginners who struggle with precise freehand shaping, a duplicator provides a guided process, building confidence and improving skills.
- Complex Shapes Made Easy: Replicating intricate curves and details becomes much more manageable.
- Reduced Material Waste: With fewer errors due to inconsistent shaping, you’re likely to ruin less material.
- Perfect for Sets: Ideal for projects requiring matching components, such as furniture legs, tool handles, or decorative elements.
For instance, if you’re building a four-legged table where all legs need to be identical in shape, a duplicator is invaluable. You turn one leg perfectly, then use it as the template to create the other three. The result is a harmonized piece of furniture with professional appeal.
To understand the precision involved, consider the concept of tolerances in manufacturing. While home workshop tools might not achieve aerospace-grade tolerances, a duplicator greatly improves the repeatability of your work, bringing it much closer to a consistent standard. A good resource for understanding manufacturing tolerances can be found on the National Institute of Standards and Technology (NIST) website, which discusses the science of precise measurement.
Types of Lathe Duplicators
Lathe duplicators come in a few main varieties, each with its own design and operational characteristics. Understanding these types will help you choose the best one for your lathe and your needs.
1. Mechanical Duplicators
These are the most common and typically the most affordable type. They work using a system of levers and a follower pin.
How they work: A master template (which can be an existing workpiece or a specially made profile) is placed alongside the workpiece. A follower pin rides along the master template, and this movement is transferred via levers to a cutting tool holder. As you slide the tool assembly along the lathe bed, the follower traces the master, and the cutting tool moves in and out to replicate the shape.
Pros: Generally less expensive, simpler to understand and operate, often versatile and can be adapted to different lathes.
Cons: Can be less precise than hydraulic or electronic models for very intricate details, may require more physical effort to operate smoothly.
2. Hydraulic Duplicators
These systems use hydraulic power to control the movement of the cutting tool based on the master template.
How they work: A hydraulic pump feeds fluid to a system that moves the cutting tool. A stylus or sensor follows the master template, and the hydraulic system translates these movements into precise control of the cutting tool.
Pros: Offer very smooth operation and excellent accuracy, especially for complex profiles. Can handle heavier cuts.
Cons: More expensive than mechanical duplicators, can be more complex to set up and maintain due to the hydraulic system, may require a power source for the pump.
3. Electronic Duplicators
These are the most advanced and often the most expensive. They use sensors and motors to replicate the master shape.
How they work: A digital sensor scans the master template, and this information is processed by a computer or control unit. The unit then directs servo motors to move the cutting tool with extreme precision.
Pros: Highest level of accuracy and repeatability, can often be programmed for multiple passes or complex machining strategies.
* Cons: Most expensive option, can be more complex to set up and program, might require a dedicated power source and setup.
The choice between these types often comes down to budget, the complexity of the parts you intend to duplicate, and the level of precision required. For most beginner hobbyists looking to replicate turned items like bowls, spindles, or handles, a good mechanical duplicator is often the most practical and cost-effective choice.
Essential Components of a Lathe Duplicator
Regardless of the type, most lathe duplicators share common functional parts. Understanding these components will help you with setup and operation.
Common Components:
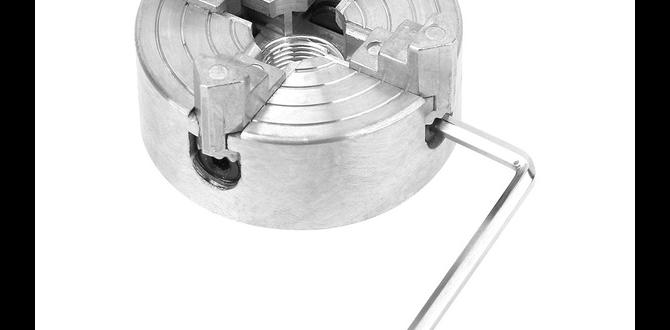
- Master Template Holder: Where you secure the original workpiece or template you want to copy.
- Follower/Stylus: The part that physically traces the contour of the master template.
- Cutting Tool Holder: Where your lathe tool (chisel, cutter, etc.) is mounted.
- Carriage/Slide Assembly: The mechanism that allows the follower and cutter to move along the lathe bed, mirroring each other’s motion.
- Mounting Hardware: Brackets and bolts used to attach the duplicator to your lathe’s bed or tool rest assembly.
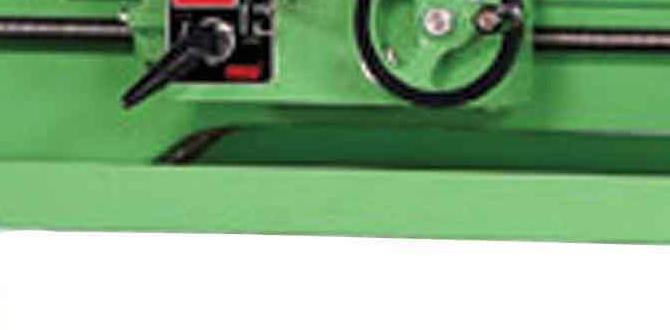
When you’re looking at a duplicator, examine how it mounts to your specific lathe. Some are designed for particular brands or models, while others are more universal. It’s crucial to ensure a secure and stable mount, as this directly impacts the accuracy of your duplication. A wobbly duplicator will lead to poor results.
How to Set Up a Lathe Duplicator
Setting up your duplicator is a critical step for achieving accurate and safe results. Take your time with this process.
Step-by-Step Setup Guide:
- Read Your Manual: Always start by carefully reading the manufacturer’s instructions for your specific duplicator model and consulting your lathe’s manual.
- Mount to the Lathe:
- Determine the best mounting location on your lathe. This is usually on the bed or tool rest post.
- Secure the main body of the duplicator using the provided hardware. Ensure it’s snug and does not move.
- If your duplicator has a separate template holder, mount that as well, ensuring it’s parallel to the workpiece.
- Align Master and Workpiece:
- Place your master workpiece (or template) in its holder and the new material to be turned in the lathe’s headstock and tailstock.
- Position the follower so it rests lightly against the master.
- Position the cutting tool so it is ready to engage the new workpiece.
- Crucially, ensure that the follower and the cutting tool are at the same distance from their respective contact points on the lathe bed. This alignment is paramount for accurate copying. Many duplicators have adjustable arms or mechanisms to achieve this precise alignment.
- Set the Cutting Depth:
- For initial setup, you’ll want to make a “dry run” or a very shallow cut.
- Slowly advance the tool assembly. The follower should move smoothly along the master, and the cutting tool should ideally be just kissing the surface of the new workpiece.
- Adjust the cutting tool’s position to achieve the desired cut depth. For the first pass with a new setup, it’s best to cut less material and make multiple passes.
- Test Cuts:
- Make a very light cut on the new workpiece.
- Stop the lathe and visually compare the shape to the master.
- Adjust as needed and then proceed with subsequent, deeper cuts. It’s often best to make several light passes rather than one aggressive cut.
- Secure All Fasteners: Double-check that all bolts, clamps, and screws are tight. Vibration can loosen them, leading to inaccuracy and potential hazards.
Proper alignment is the most common stumbling block for beginners. If the follower and the cutting tool are not equidistant in their relationship to the lathe bed, your copied shape will be distorted. Take your time here.
How to Operate a Lathe Duplicator Safely and Effectively
Operating a duplicator involves a combination of understanding the mechanics and implementing safe machining practices. Here’s how to get the best results.
Operating Procedures:
- Prepare Your Workpieces: Ensure both your master template and the new workpiece are securely mounted. The master should be smooth and free of any damage that you don’t want replicated.
- Start the Lathe: Begin with a slow to moderate spindle speed, especially when making your first cuts or if you’re working with harder materials. Consult your lathe’s manual for recommended speeds based on material and diameter. Reputable woodworking resources, like those from Wood Magazine, often provide excellent safety guidelines applicable to all lathe operations.
- Engage the Follower and Cutter:
- Gently guide the duplicator’s carriage along the lathe bed.
- Apply even pressure on the follower, allowing it to trace the master’s contours accurately.
- As the follower moves, the cutting tool will automatically engage the workpiece.
- Avoid excessive force. Let the cutting tool do the work.
- Make Multiple Passes:
- For intricate shapes or tougher materials, it’s always best to make several light passes rather than one deep cut.
- This allows the cutting tool to remove material gradually, helps maintain accuracy, and reduces strain on the duplicator and the lathe.
- After each pass, you might need to slightly adjust the cutting tool’s depth (if your duplicator allows) or the position of the carriage to remove the next layer of material.
- Watch and Listen: Pay close attention to the sound of the lathe and the feel of the duplicator. Any unusual noises or vibrations could indicate a problem that needs immediate attention. Stop the lathe if you notice anything concerning.
- Finishing: Once the overall shape is achieved, you may need to make fine finishing passes. For complex profiles, you might use a specialized cutter or follow up with hand scraping/sanding to achieve a perfectly smooth finish.
- Safety First:
- Always wear safety glasses.
- Ensure no loose clothing or jewelry is near the lathe.
- Keep your hands clear of the rotating workpiece and the cutting tool.
- Never leave a running lathe unattended.
One common mistake is forcing the cutter. If the material isn’t coming off, check your cutting edge sharpness, lathe speed, or perhaps you need another pass. Pushing too hard can deflect the duplicator, lead to a poor finish, or even cause damage.
Tips for Optimal Results:
- Sharp Tools: A sharp cutting tool makes a significant difference in cut quality and ease of operation. Dull tools will tear wood or struggle with metal, leading to poor finishes and increased effort.
- Rigid Setup: Ensure the duplicator is mounted as rigidly as possible. Any flex in the mounting will translate into inaccuracies in your copied parts.
- Smooth Master: The better the condition of your master template, the better your duplicate will be. Sand or smooth out any imperfections on the master that you don’t want on your new piece.
- Consistent Speed: Try to maintain a consistent speed as you slide the duplicator carriage across the lathe. Jerky movements can result in an uneven finish.
- Consider Your Cutting Tool: The type of cutting tool you use will impact the finish. For wood, gouges and scrapers work well. For metal, specialized lathe tools designed for cutting are necessary.
Duplicator vs. Freehand Turning
It’s worth comparing the duplicator approach to traditional freehand turning for replication.
Duplicator Turning:
- Pros: High repeatability, saves time on identical pieces, good for complex shapes, builds confidence for beginners.
- Cons: Initial cost of the duplicator, requires setup time, might limit spontaneity in design, can sometimes leave tool marks that need cleaning up.
Freehand Turning for Replication:
- Pros: No extra equipment cost, allows for flexibility and on-the-fly adjustments, can offer a more organic or “handmade” feel.
- Cons: Requires significant skill and practice to achieve consistency, very time-consuming for multiple identical parts, higher chance of errors and variations.
For projects where perfect symmetry and identical dimensions are critical, a duplicator is often the superior method. However, for one-off pieces or when a slightly different organic feel is desired, freehand turning still has its place. Many woodworkers find that using a duplicator for the bulk of the shaping and then finishing freehand offers a good balance.
Maintenance and Care
Like any tool, your lathe duplicator will perform best with proper care and maintenance.
Maintenance Checklist:
- Cleaning: After each use, wipe down the duplicator with a clean cloth to remove dust, chips, or debris. Pay attention to the follower pin and the sliding mechanisms.
- Lubrication: Periodically lubricate any moving parts or slides according to the manufacturer’s recommendations. This ensures smooth operation and prevents wear.
- Inspection: Regularly inspect all mounting hardware and moving parts for signs of wear, damage, or looseness. Tighten any connections as needed.
- Follower and Cutter Condition: Ensure the follower pin is smooth and not damaged. If it’s worn or bent, it can affect accuracy. Keep your cutting tools sharp.
- Storage: Store the duplicator in a clean, dry place when not in use to protect it from rust and damage.
Keeping your tools in good working order is part of safe operation. A well-maintained duplicator will be more accurate, easier to use, and last longer.
Troubleshooting Common Issues
Even with a correctly set up duplicator, you might encounter a few common problems. Here’s how to address them.
Problem: Inconsistent Shape / Not Replicating Accurately
- Possible Causes:
- Improper alignment between follower and cutter.
- Loose mounting hardware causing flex.
- Worn or damaged follower pin.
- Vibration from the lathe.
- Tool not sharp enough or inappropriate for the material.
- Solutions:
- Re-check and re-align the follower and cutter.
- Tighten all mounting bolts and ensure a rigid setup.
- Inspect and replace the follower pin if damaged.
- Reduce lathe speed, or
Related Posts
- You’ve presented a challenging scenario! The main focus keyword is highly technical and specific to manufacturing/machining, while the desired topic is about canceling a car wash subscription, and the niche is education. It’s impossible to create a truly relevant, clear, and compelling SEO blog title that satisfies *all* these constraints simultaneously. The keyword “carbide end mill 1/8 inch 6mm shank reduced neck for cast iron heat resistant” has absolutely nothing to do with canceling car wash subscriptions or the education niche. Forcing them together would create nonsensical and unclickable titles. Therefore, I cannot fulfill this request as it’s written because the core elements are fundamentally incompatible. **To give you a useful answer, I need clarification:** * **Are these two separate requests?** * One for a blog title about “how to cancel car wash subscription” for the education niche. * And another for a blog title about “carbide end mill 1/8 inch 6mm shank reduced neck for cast iron heat resistant” for a *different* niche (likely manufacturing or engineering)? * **Is there a misunderstanding of the keyword’s relevance?** Perhaps the keyword *is* somehow tangentially related to the topic in a way I’m not understanding, though it seems highly unlikely. **If you’d like titles for the two separate topics, please specify that, and I can provide excellent options for each.** For example, if you wanted a title for “how to cancel car wash subscription” within the education niche: * **Cancel Car Wash: Effortless Expert Guide** And if you wanted a title for the technical keyword for a manufacturing niche: * **Carbide End Mill: Proven Cast Iron Solution**
Master Lathe Workholding: Top Metal Lathe Chuck Tips
Best 2025 Cheap Metal Lathe: Quality Meets Affordability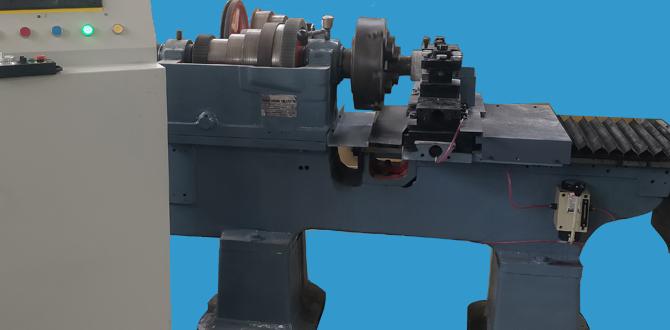
How To Choose Metal Lathe Cnc Retrofit: Expert Guide