Quick Summary
For Tool Steel A2, a face mill is generally preferred for larger surface areas and heavier cuts, offering better material removal and surface finish. A fly cutter is ideal for lighter surfacing, smaller areas, and achieving ultra-smooth finishes on A2, especially when tool accuracy is paramount. Both have their place, and understanding their differences is key to successful machining.
Welcome to Lathe Hub! Ever stare at a block of tough Tool Steel A2 and wonder which cutting tool will give you the best result without a fight? You’re not alone. Choosing between a face mill and a fly cutter for this material can feel like a big decision. Get it wrong, and you might struggle with slow material removal or a rough finish. Get it right, and you’ll be surprised how smoothly A2 can be machined. Don’t worry, we’ll break down exactly what each tool does and when to use it, especially for that tricky Tool Steel A2. We’ll make sure you have the confidence to pick the right one for your next project.
Face Mill Vs Fly Cutter for Tool Steel A2: Your Beginner’s Guide
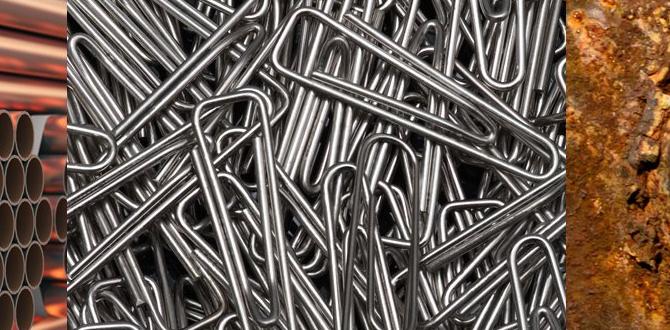
Tool Steel A2 is a fantastic material. It’s known for its toughness, good wear resistance, and excellent hardenability, making it a favorite for tooling, dies, and punches. However, this toughness also means it can be a bit stubborn to machine. For beginners, understanding the difference between a face mill and a fly cutter is crucial for achieving good results, especially when you’re trying to flatten or smooth out a surface of A2. Think of them as two different approaches to tackling the same job – cleaning up a flat surface.
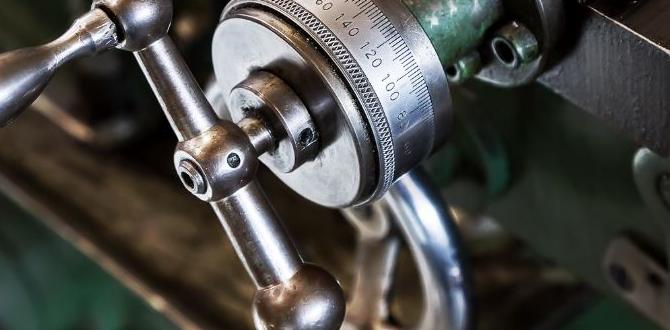
What is a Face Mill?
A face mill is a type of milling cutter that has multiple cutting teeth mounted on a circular body. These teeth are typically made of very hard materials like carbide, and the cutter itself threads or attaches onto an arbor that fits into your milling machine’s spindle. When you use a face mill, the cutting action happens across the entire face of the cutter as it rotates, and also along the edges of the inserts or teeth. This multi-tooth design allows for a significant amount of material to be removed relatively quickly.
Face mills are designed for operations like:
- Surface Machining: Creating flat, smooth surfaces by taking wide passes.
- Facing: Reducing the length or thickness of a workpiece.
- Roughing: Removing large amounts of material efficiently.
- Finishing: Achieving a good surface finish on larger areas.
For Tool Steel A2, a face mill with good quality carbide inserts is often the go-to for hogging out material and getting a generally flat surface to start with. The multiple teeth help distribute the cutting load, which is beneficial when dealing with a harder material like A2.
Parts of a Face Mill
Understanding the components of a face mill can help you appreciate how it works:
- Body: The main circular part that holds the inserts and attaches to the spindle.
- Inserts (or Teeth): These are the cutting edges. They are often replaceable and can be made from different materials like carbide, HSS, or ceramic, depending on the material being cut and the desired finish. For A2, carbide is generally recommended.
- Pocket: The slots in the body where the inserts are seated and secured, usually with screws.
- Arbor: The shaft that the face mill mounts onto, which then fits into the milling machine’s spindle.
What is a Fly Cutter?
A fly cutter, on the other hand, is much simpler. It’s essentially a single-point cutting tool mounted on an adjustable arm, which in turn is attached to a body that fits the milling machine spindle. One of the most common types has a single, radially mounted cutting insert (often a square carbide insert). As the fly cutter rotates, this single cutting edge sweeps across the workpiece, similar to how a giant single-point lathe tool would cut.
Fly cutters excel at:
- Light Surfacing: Taking light cuts to achieve a very flat and smooth finish.
- Facing Small Areas: Ideal for smaller workpieces or specific areas that need to be precisely flat.
- Achieving High Surface Finishes: The single, sharp cutting action can produce a mirror-like finish if set up correctly.
- Precision Work: Often used for fine adjustments and achieving tight tolerances on flatness.
When machining Tool Steel A2, a fly cutter can be an excellent choice for the final finishing passes. Because it acts like a single-point cutter, it can leave a very clean, smooth surface. It’s also a great tool for dialing in precise flatness and for lighter cleanup jobs where heavy material removal isn’t needed.
How a Fly Cutter Works
The key to a fly cutter’s operation is its single cutting edge. As it spins, this edge moves outwards in a spiral or circular path. The depth of cut is controlled by the radius of the cutting edge and the feed rate. The height of the tool relative to the workpiece determines the cutting depth. Often, fly cutters have an adjustable arm, allowing you to precisely set the cutting radius and the position of the insert.
Face Mill Vs Fly Cutter: Key Differences for Tool Steel A2
Now let’s get straight to how they compare when working with Tool Steel A2. The main differences boil down to the number of cutting edges, the amount of material they can remove, and the type of finish they produce.
Here’s a table that breaks down the core differences:
| Feature | Face Mill | Fly Cutter |
|---|---|---|
| Number of Cutting Edges | Multiple (inserts/teeth) | Single (or very few) |
| Material Removal Rate (MRR) | High | Low |
| Surface Finish Potential | Good to Excellent (depending on inserts and setup) | Excellent to Superior (especially for flatness and smoothness) |
| Rigidity and Stability | Generally more rigid due to multiple contact points | Can be less rigid, more sensitive to vibration |
| Setup Complexity | Moderate (insert seating, arbor mounting) | Simple (insert mounting, one-point adjustment) |
| Ideal Application for A2 | Bulk material removal, roughing, facing large areas | Finishing passes, achieving extreme flatness, small area surfacing |
| Tooling Cost | Can be higher upfront for body and multiple inserts | Generally lower upfront cost for basic models |
When to Use a Face Mill for Tool Steel A2
Think of the face mill as your heavy-duty workhorse for Tool Steel A2. If you have a large surface that needs to be flattened, or if you need to take off a significant amount of material, the face mill is your best friend.
- Roughing Out Material: When you have a casting or a pre-machined part that’s significantly overgrown, a face mill with suitable carbide inserts can quickly take down the excess material. For A2, this means getting closer to your final dimensions faster.
- Creating Large Flat Surfaces: If you need to machine, say, the base of a fixture or a large die component to be perfectly flat, a properly applied face mill will do the job efficiently over a wide area.
- Finishing Passes (with the right inserts): While fly cutters are often lauded for finishing, high-quality face mills with fine-grained carbide inserts and appropriate cutting parameters can also leave an excellent finish. This is especially true for larger surfaces where a fly cutter might take too long.
- When Rigidity is Key: Tool Steel A2 can chatter if your setup isn’t rigid. A face mill, with its multiple contact points, can help dampen vibrations compared to a single-point tool.
Important Consideration for A2: When using a face mill on Tool Steel A2, always use sharp, high-quality carbide inserts designed for hardened steels. A positive rake angle can help reduce cutting forces. Make sure you have a rigid setup, and don’t be afraid to use a good flood coolant to manage heat and chip evacuation. A typical starting point for cutting Tool Steel A2 might involve surface speeds around 150-250 surface feet per minute (SFM) with appropriate feed rates. Always consult your insert manufacturer’s recommendations.
When to Use a Fly Cutter for Tool Steel A2
The fly cutter shines when precision and a superior surface finish are the top priorities for your Tool Steel A2 part. It’s less about brute force and more about finesse.
- Achieving Ultra-Flat Surfaces: If you need to hold very tight tolerances for flatness, especially on a smaller scale, a fly cutter is often the best tool. The single, swept edge can produce a remarkably smooth and flat result.
- Finishing Touches: After roughing with a face mill, a fly cutter can be an excellent tool for the final cleanup pass. It can remove the peppery or slightly uneven finish left by the roughing operation.
- Machining Smaller Workpieces: For smaller blocks or components of Tool Steel A2, a fly cutter can be more practical and provide a better finish than a larger face mill.
- When You Need a Mirror Finish: With the right insert (often a polished carbide insert) and very light depth of cut, a fly cutter can produce a near-mirror finish on Tool Steel A2.
- For Dialing in Height: It’s an excellent tool for precisely setting the height of a component, ensuring it’s perfectly parallel to the machine table.
Setup Tip for A2: When fly cutting A2, ensure your insert is perfectly set at its radius and that the height of the cutter is adjusted accurately. A very shallow depth of cut (e.g., 0.001″ to 0.005″) combined with a fine feed rate (e.g., 0.002″ to 0.004″ per revolution) and a sharp insert is key. Use a good cutting fluid or mist coolant. Speed might be a bit lower than with a face mill, perhaps starting around 100-200 SFM for finishing passes.
Machining Tool Steel A2: General Tips for Both Tools
Tool Steel A2 is known to be difficult to machine if you don’t approach it correctly. Whether you’re using a face mill or a fly cutter, follow these general guidelines:
- Use Sharp, High-Quality Insert Tools: This is non-negotiable for A2. Dull tools will generate excessive heat, cause chatter, and lead to poor finishes. For hardened A2 (which is common), you’ll want carbide inserts specifically rated for hardened materials.
- Rigidity is Paramount: Ensure your workpiece is securely clamped. A rigid machine spindle, a rigid tool holder (arbor), and a stable setup are essential to prevent vibration and chatter.
- Coolant is Your Friend: Always use a good quality cutting fluid. For A2, a flood coolant is highly recommended to manage heat, lubricate the cut, and help flush away chips. A mist coolant can work for lighter cuts.
- Start Conservatively: It’s always better to start with slower speeds and lighter feeds and increase them as you gain confidence and observe the cutting action.
- Observe the Chips: The chips can tell you a lot. For abrasive materials like hardened steel, you often get smaller, more granular chips. If they are long and stringy, you might be cutting too slow or ineffectively. If they are blue/purple, it’s often too hot.
- Proper Workholding: Ensure your workpiece is firmly held. Using parallels or a vise with hardened jaws can prevent marring of the A2 surface.
- Be Aware of Surface Speed (SFM): This is the speed at which the cutting edge is moving across the material. Different tools and materials require different SFM. For Tool Steel A2, especially in its hardened state, you’ll generally run slower SFM than you would for softer materials like aluminum or mild steel.
Resources like the Sandvik Coromant machining handbook offer comprehensive data on machining various materials, including tool steels.
Choosing the Right Tool for Your Job
So, how do you decide? Ask yourself these questions:
- What is my main goal? Is it to remove a lot of material quickly, or is it to achieve a very precise, smooth finish?
- How large is the surface I need to machine? For large areas, a face mill is often more efficient. For small, critical surfaces, a fly cutter might be better.
- What is the current condition of the A2? Is it annealed (softer, easier to cut) or hardened (much harder)?
- What is my machine’s capability? Can my machine handle the forces generated by a larger face mill, or is it better suited for the lighter cuts of a fly cutter?
Scenario 1: You have a block of Tool Steel A2 that’s a bit oversized and needs to be made perfectly flat and parallel for a die set. You need to remove about 0.050″ of material.
Recommendation: Start with a rigid face mill using carbide inserts to remove the bulk of the material. Then, finish with a fly cutter for that final, precise flatness and smooth surface finish.
Scenario 2: You have a small jig component made from Tool Steel A2, and the mounting surface needs to be absolutely flawless for precise alignment.
Recommendation: A fly cutter, used with a light depth of cut and slow feed, is ideal here to achieve the highest level of flatness and surface finish on a smaller area.
Scenario 3: You are working with larger, annealed Tool Steel A2 pieces for a project and need to machine them down to size quickly.
Recommendation: A robust face mill with suitable carbide tooling will be much more efficient for this roughing operation.
FAQ: Face Mill vs. Fly Cutter for Tool Steel A2
1. Can I use a fly cutter on hardened Tool Steel A2?
Yes, you can, but it requires a very rigid setup, a sharp carbide insert designed for hardened materials, slow speeds, and very light depths of cut. It’s usually best for finishing or light cleanup rather than heavy stock removal.
2. What is the most common insert material for face mills cutting A2?
For Tool Steel A2, especially in its hardened state, Carbide is the most common and effective insert material. Look for grades suitable for hardened steels and tool steels.
3. Which tool will give me a better surface finish on A2?
A fly cutter, when set up and run correctly with a sharp insert and appropriate parameters, can achieve an exceptionally smooth and flat surface finish, often superior to a general-purpose face mill for smaller areas.
4. Is a face mill or fly cutter more aggressive for A2?
A face mill is generally more aggressive because it has multiple cutting edges designed for higher material removal rates. A fly cutter, with its single cutting edge, is much less aggressive and is intended for lighter cuts.
5. What cutting speeds should I start with for Tool Steel A2?
For hardened A2, start conservatively. For many face milling operations with carbide, you might begin around 150-200 SFM. For finishing with a fly cutter, you might drop to 50-150 SFM. Always check the recommendations for your specific tooling and material condition.
6. Do I need coolant when machining A2 with these tools?
Yes, it is highly recommended. Coolant helps manage the heat generated when machining tough materials like A2, lubricates the cut, and helps evacuate chips, preventing them from recutting and damaging the surface finish or tooling.
Conclusion
Choosing between a face mill and a fly cutter for Tool Steel A2 isn’t about one being universally “better” than the other. It’s about understanding