Have you ever wondered why some wood projects shine while others look dull? Many people might think sanding sealer is the best choice for finishing. But what if I told you that lathe turning finish could be even better? This method has been a favorite among woodworkers for years.
Imagine this: You’ve just created a beautiful wooden bowl. You want it to look perfect. What should you use? A lathe turning finish can give your project a stunning shine. It brings out the wood’s natural beauty while adding protection. It’s like giving your work a special coat!
Did you know that lathe turning finishes often dry faster than sanding sealer? This means less waiting and more time to enjoy your project. It can also improve the durability of your work, letting it last longer.
In this article, we will explore why lathe turning finish may be a better choice over sanding sealer. Get ready to learn some tips that can make your woodworking projects shine!

Lathe Turning Finish Over Sanding Sealer: A Complete Guide
The choice between lathe turning finish and sanding sealer can change your project. Lathe turning finishes often enhance the wood’s natural beauty and grain. They can offer a smoother feel and a durable surface. Sanding sealer, however, fills pores in the wood. This helps prepare the surface but might mask some character. Did you know that using a lathe finish can make your project really shine? Each method has unique benefits, so choose wisely for your next creation!
Understanding Lathe Turning and Its Purpose
Explanation of lathe turning processes. Importance of finishing techniques in woodturning.
Lathe turning is like a magic show for wood! It’s a process where you spin a block of wood on a lathe, creating beautiful shapes, like bowls or pens. The important part comes after that—finishing techniques. Without them, your work is like a cake without icing. Finishing makes your wood smooth, shiny, and protects it from wear. It’s the final touch that makes your creation truly special, just like adding sprinkles on top!
| Finishing Techniques | Benefits |
|---|---|
| Sanding Sealer | Prepares the wood and gives it a nice base for more finishes. |
| Oil Finish | Enhances the wood grain and adds a warm glow. |
| Polyurethane | Provides a hard and protective shell, keeping your pieces safe. |
The Role of Sanding Sealer in Wood Finishing
Definition and purpose of sanding sealer. Benefits of using sanding sealer before finishing.
A sanding sealer is a special type of finish designed for wood. Its main purpose is to fill tiny holes and create a smooth surface. This helps the final finish look better and last longer. Using a sanding sealer has many benefits:
- Prevents blotching: It stops colors from soaking unevenly into the wood.
- Enhances smoothness: It creates a silky surface for a nicer feel.
- Improves adhesion: It helps finishes stick better to the wood.
Overall, a sanding sealer is important for a great finish on wooden projects.
What does sanding sealer do for wood?
A sanding sealer prepares wood for finishing by creating a smooth, even surface. It fills small gaps to prevent uneven absorption of finish, ensuring a lovely and durable look.
Step-by-Step Guide to Applying Sanding Sealer
Preparation of the wood surface before sealing. Techniques for applying sanding sealer effectively.
Before you start sealing your wood, make sure it’s clean and smooth. Use sandpaper to remove any rough spots. No one likes splinters! Wipe away dust with a damp cloth to prepare for a perfect finish. When applying sanding sealer, go for thin coats. Too thick can turn into a gluey mess. Use a brush or a foam pad for even application. Remember, slow and steady wins the race. Here’s a handy table with some tips:
| Steps | Tips |
|---|---|
| Sand the Surface | Use fine-grit sandpaper |
| Clean the Dust | Use a damp cloth |
| Apply Sealer | Thin coats work best |
Following these steps leads you to a sturdy finish without the sticky drama! Happy sealing!
Best Practices for Finishing Over Sanding Sealer
Methods to apply finish over sanding sealer for optimal results. Tips for achieving a smooth and durable finish.
To get the best finish over sanding sealer, follow these simple methods. Apply finishes like varnish or polyurethane with a brush or spray. This helps spread the finish evenly. Make sure to thin the finish if needed for smoother application. For a durable outcome, sand lightly between coats. Here are some useful tips:
- Always clean the surface before applying the finish.
- Use fine-grit sandpaper for a smoother feel.
- Allow each coat to dry completely.
Remember, patience leads to great results!
How can I achieve a smooth finish over sanding sealer?
To achieve a smooth finish, use fine sandpaper after each coat. Clean the surface well and apply several thin coats instead of one thick layer.
Common Mistakes to Avoid
Mistakes in using sanding sealer and finishes. How to troubleshoot issues during the finishing process.
Many people make mistakes while finishing their wood projects. Using too much sanding sealer can be one of them. It may create a rough texture instead of a smooth finish. To avoid problems, remember these tips:
- Always read the instructions on the sanding sealer.
- Use thin layers to prevent buildup.
- Let each layer dry completely before adding more.
- Test on a small piece first.
If you face issues, like bubbles or streaks, sand the surface lightly and try again. Patience leads to a great finish!
What is the best way to apply sanding sealer?
To apply sanding sealer effectively, use a clean brush and apply thin coats. This allows for better results and prevents uneven texture. Always follow the product’s instructions for optimal outcomes.
Real-Life Applications and Examples
Showcase of projects using lathe turning, sanding sealer, and finishes. Case studies on achieving desired effects in final products.
Many creative people use lathe turning in their projects. This technique can make beautiful items. A few fun examples include:
- Wooden bowls that shine brightly after a finish.
- Jewelry made from turned wood, complemented by a sanding sealer.
- Unique candle holders, finished to enhance their natural beauty.
These projects show how using lathe turning can create lovely results. Creators achieve smooth surfaces and stunning colors. The final look matter a lot in crafting, and lathe turning makes it possible.
What are some cool examples of lathe turning projects?
Some cool examples include wooden bowls, candle holders, and unique jewelry pieces. These items showcase how lathe turning can bring out the best in wood.
How can finishes improve craft projects?
Finishes help enhance color and add shine to the project. They protect the item too, making it last longer.
Frequently Asked Questions (FAQs)
Common queries related to lathe turning and finishing. Quick answers and expert tips.
Many people have questions about lathe turning and finishing. Learning these tips can make the process easier. Here are common queries with quick answers:
What is lathe turning?
Lathe turning is shaping wood or metal by spinning it on a lathe. This tool creates smooth shapes quickly and easily.
Why choose lathe turning over sanding sealer?
Lathe turning makes a smooth surface while sanding sealer is used later for protection. Turning helps avoid rough edges.
How can I get better results?
- Use sharp tools for cleaner cuts.
- Adjust the speed of the lathe for better control.
- Sand the surface lightly after turning.
These tips can help you find the best way to finish your projects.
Conclusion
In conclusion, lathe turning offers a smoother finish compared to sanding sealer. You get a sleek look and better wood quality. Lathe turning saves time and reduces dust. If you’re working with wood, try lathe turning for your projects. Explore more about woodworking techniques to enhance your skills. Happy crafting!
FAQs
Here Are Five Related Questions On The Topic Of Lathe Turning Finish Over Sanding Sealer:
When you turn wood on a lathe, adding a finish helps protect it. A sanding sealer is used first to fill tiny holes and prepare the surface. After that, you can apply a finish like oil or lacquer to make it shiny. This makes your project look nice and keeps it safe from damage. Remember, finish and sealer work together for a great result!
Sure! Just give me the question you want me to answer.
What Are The Benefits Of Applying A Sanding Sealer Before Finishing A Lathe-Turned Project?
Using a sanding sealer on your lathe-turned project helps the wood absorb finish better. It fills small holes and makes the surface smooth. This means your final finish will look shinier and nicer. It also helps protect the wood from damage. Overall, a sanding sealer makes your work look great!
How Does The Choice Of Finish (E.G., Oil, Lacquer, Polyurethane) Interact With The Sanding Sealer During The Curing Process?
When we use a finish like oil, lacquer, or polyurethane, it mixes with the sanding sealer we put on first. The sealer helps the finish stick better to the wood. Each finish dries differently. Some may take longer to cure, while others can dry quickly. This means we need to choose the right finish for the best look and protection.
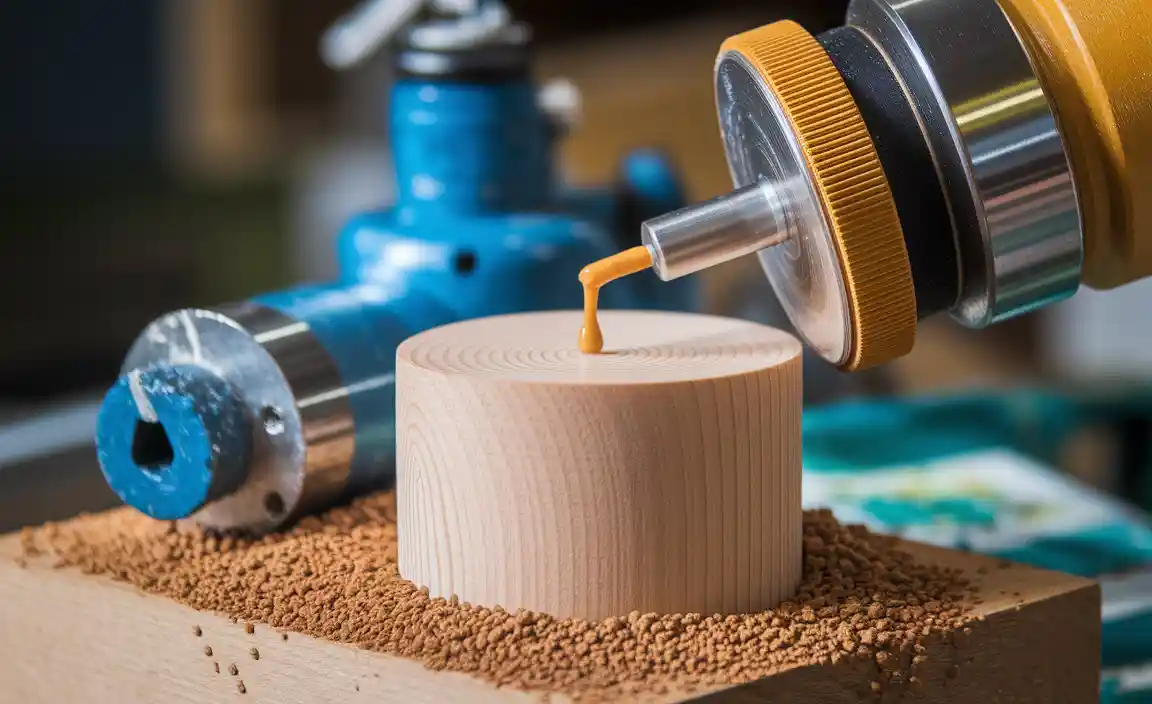
What Are The Recommended Techniques For Applying A Sanding Sealer On Turnings To Ensure An Even Finish?
To apply a sanding sealer on your turnings, start with clean wood. Use a soft cloth to wipe off dust. Pour a little sealer on a clean sponge or brush. Spread it evenly over the wood, going with the grain. Let it dry completely before sanding lightly. This makes your finish smooth and even!
Can Using A Sanding Sealer Affect The Final Appearance Of The Finish On Lathe-Turned Pieces? If So, How?
Yes, using a sanding sealer can change how your lathe-turned pieces look. It fills tiny holes and makes the surface smooth. This helps the final finish look shiny and even. If you skip it, some parts might look dull or rough. Overall, a sanding sealer can make your work look much nicer!
What Steps Should Be Taken To Prepare The Lathe-Turned Surface Before Applying Both The Sanding Sealer And The Final Finish?
First, you need to clean the lathe-turned surface. Use a cloth to wipe away dust and dirt. Next, check for rough spots or bumps. If you find any, gently sand them smooth with fine sandpaper. Then, make sure the surface is dry before you apply the sanding sealer.