Quick Summary: A milling attachment for a lathe lets you perform milling operations on your lathe, adding versatility without needing a separate milling machine. It’s a practical way to cut slots, keyways, and other shapes directly on your workpiece. This guide will show you how to find, install, and use one safely and effectively.
Ever looked at your metal lathe and wished you could do more than just turn, face, and thread? Maybe you need to cut a neat little slot for a key or create a flat surface for a set screw. The good news is, you don’t necessarily need a whole new milling machine! Many of us start in small workshops with limited space and budget. This is where a milling attachment for a lathe truly shines. It’s like giving your lathe a superpower. It can seem a bit daunting at first, wondering how these attachments work and if they’re really worth it. But stick with me, because by the end of this guide, you’ll understand exactly what a milling attachment is, how to choose the right one, and most importantly, how to use it safely to achieve fantastic results. Let’s turn your lathe into an even more capable machine shop!
What is a Milling Attachment for a Lathe?
At its heart, a milling attachment for a lathe is a device that clamps onto your lathe’s tool post or carriage and allows you to hold and rotate a milling cutter. This cutter can then be fed into a stationary or rotating workpiece held in the lathe chuck or on the faceplate. Essentially, it transforms your lathe into a makeshift milling machine, enabling you to perform operations that are typically done on dedicated vertical or horizontal milling machines.
Think of it as an adapter. Instead of a turning tool, you’re fitting a tool that can spin like a drill bit (but often with specialized cutting profiles) and move across the workpiece to remove material in a controlled, flat plane. This significantly expands the types of parts and features you can create with just your lathe.
Why a Milling Attachment? The Benefits
For home workshop enthusiasts, DIY makers, and even students learning machining, a milling attachment offers several compelling advantages:
- Space Saving: This is probably the biggest win. If you have a lathe but limited space, adding a milling attachment means you don’t need to find room for a full-sized milling machine.
- Cost-Effective: Compared to purchasing a dedicated milling machine, a good quality milling attachment is a much more affordable investment.
- Versatility: It dramatically increases the range of operations your lathe can perform. You can cut slots, keyways, T-slots, faces, and even create gears or splines.
- Convenience: For small or simple milling tasks, using an attachment on your existing lathe can be quicker and more convenient than setting up a separate machine.
- Learning Tool: It’s an excellent way to learn the principles of milling in a familiar environment, building confidence before potentially moving to a dedicated mill.
It’s important to note that while a milling attachment is incredibly useful, it won’t replace a full-fledged milling machine for heavy-duty or highly precise production work. However, for the tasks most hobbyists and makers undertake, it’s a game-changer.
Types of Lathe Milling Attachments
There are a few common designs you’ll encounter when looking for a milling attachment. Understanding these will help you choose the best fit for your lathe and your intended use.
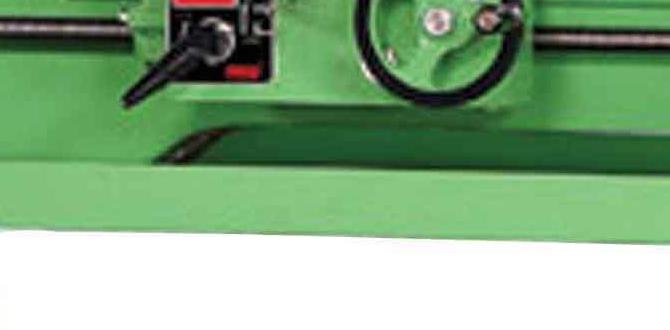
1. Tool Post Milling Attachments
These are the most common type. They typically clamp directly onto the lathe’s tool post. The attachment itself will house a spindle driven by a motor (often electric) or sometimes by a belt system connected to the lathe’s headstock (though this is less common on modern units). The cutter mounts onto this spindle.
How they work: The tool post attachment sits where your turning tool would normally go. The workpiece is typically held stationary in the chuck, and the lathe’s cross-slide is used to feed the cutter into the material. Alternatively, for light cuts, the workpiece can be rotated slowly while the attachment is fed, similar to some milling machine setups.
Pros:
- Generally the most affordable.
- Relatively easy to install and remove.
- Compact design.
Cons:
- Can sometimes have limitations in clearance or reach.
- Precision can vary depending on the model; some might flex under heavy cuts.
- Motor speed might be fixed or have limited adjustment.
2. Carriage-Mounted Milling Attachments
These attachments are larger and mount onto the lathe’s cross-slide or the carriage itself. They often incorporate their own feed mechanism and a more substantial spindle, sometimes even a motor integrated into the unit.
How they work: These are more like mini milling heads. They can often perform more aggressive cuts and may have their own Z-axis (vertical) feed. The lathe’s handwheels are used to move the carriage and/or cross-slide, positioning the cutting tool. The workpiece is typically held in the chuck.
Pros:
- Generally more rigid and capable of heavier cuts.
- Often offer better feed control and possibly Z-axis capability.
- Can sometimes accommodate larger cutters.
Cons:
- More expensive.
- Can be bulkier and more difficult to mount/store.
- May interfere with other lathe operations if left mounted.
3. Belt-Driven Attachments (Less Common Today)
Older or more specialized attachments might use a belt to transfer power from the lathe’s headstock spindle to the milling cutter spindle. This can offer variable speeds depending on the lathe’s change gears and belt drive setup.
How they work: A belt connection is made from the lathe spindle to the milling attachment’s spindle. The workpiece is usually held stationary, and the cross-slide is used for feeding. Lathe speed selection dictates cutter speed.
Pros:
- Can offer variable speeds if the lathe has them.
- No separate motor to power.
Cons:
- Belt setup can be fiddly.
- Can introduce vibration if not set up perfectly.
- Limited by the available spindle speeds of the lathe.
- Less common in new models.
When choosing, consider your lathe’s size, your budget, the types of materials you work with, and the precision required. Reading reviews and checking specifications carefully is crucial.
Key Features to Look For
Not all milling attachments are created equal. Here’s what to consider:
- Spindle Precision: Look for a spindle with minimal runout (wobble). High-quality bearings are a must for smooth operation and accuracy.
- Motor Power (if electric): For metalworking, a decent amount of power is needed. For wood, less is usually sufficient.
- Speed Range: A variable speed control is highly desirable, allowing you to match the cutter speed (RPM) to the material and cutter diameter.
- Construction Quality: Solid metal construction, good machining tolerances, and robust clamping mechanisms indicate a durable attachment.
- Compatibility: Ensure it fits your lathe’s tool post size or mounting points.
- Included Accessories: Some come with basic collets or adaptors, which can be a nice bonus.
Choosing Your Milling Attachment: A Practical Table
To help you decide, here’s a comparison of common scenarios:
| User Type | Primary Material | Typical Work | Recommended Attachment Type | Key Features to Prioritize |
|---|---|---|---|---|
| Beginner Hobbyist / DIY Maker | Wood, Soft Metals (Aluminum, Brass) | Small slots, simple keyways, chamfers | Tool Post (Electric Motor Driven) | Ease of use, variable speed, good clamping |
| Intermediate Machinist / Student | Steel, Aluminum, Brass, Plastics | Keyways, T-slots, parallel surfaces, light gearing | Tool Post or Carriage-Mounted | Rigidity, good spindle precision, adjustable speeds, robust motor |
| Advanced Hobbyist / Small Shop | Various Metals, some Plastics | Precision slots, complex profiles, small production runs | Carriage-Mounted (High Quality) or dedicated Mill Attachment | High precision, rigidity, powerful motor, excellent speed control |
Safety First! Essential Precautions
Machinery, especially when adding new attachments, demands respect. Safety should always be your top priority:
- Read the Manual: Always read and understand the instructions for both your lathe and the milling attachment.
- Personal Protective Equipment (PPE): Wear safety glasses or a face shield AT ALL TIMES. Hearing protection is also recommended, especially with electric motors.
- Secure Workpiece: Ensure your workpiece is very securely held in the chuck or on the faceplate. A milling cutter can exert significant force and dislodge poorly secured work.
- Secure Attachment: The milling attachment itself must be firmly clamped to the tool post or carriage. Loose attachments are extremely dangerous.
- Appropriate Cutters: Use the correct type of milling cutters for the material you are machining. Ensure they are sharp and undamaged.
- Slow and Steady: For most operations, especially when getting started, use slower spindle speeds and feed rates. Let the cutter do the work.
- No Loose Clothing or Jewelry: These can get caught in rotating machinery. Tie back long hair.
- Keep Hands Clear: Never touch the rotating cutter or workpiece while the machine is running.
- Emergency Stop: Know where your lathe’s emergency stop (if equipped) or power cut-off is.
- Understand Chip Evacuation: Metal chips can be sharp and hot. Use a brush or hook to clear them, never your hands. For wood, dust collection is vital.
A good resource for basic machining safety can be found on government sites like OSHA’s Machine Guarding page, which provides fundamental principles applicable to all workshops.
Setting Up Your Milling Attachment: A Step-by-Step Guide
While exact steps vary by attachment model, here is a general process. Always refer to your specific manual!
Step 1: Preparation and Inspection
- Clean Lathe and Attachment: Ensure both are free of dirt, dust, and debris.
- Inspect for Damage: Check the attachment for any cracks, bent parts, or worn components. Verify the motor runs smoothly (if electric) and the spindle turns freely.
- Gather Tools: You’ll likely need wrenches or an Allen key set for mounting, and possibly screwdrivers.
- Select Cutter: Choose the appropriate milling cutter for your task and material. Ensure it fits the attachment’s collet or arbor.
Step 2: Mounting the Attachment
This is where designs differ most, but the goal is always a secure fit.
- Tool Post Mounted:
- Remove your standard tool holder from the tool post.
- Place the milling attachment onto the tool post.
- Secure it firmly using any provided clamps, base plates, and bolts. Tighten them evenly. The attachment should not move or rotate when the tool post is tightened.
- Carriage Mounted:
- Identify the mounting points on your cross-slide or carriage.
- Align the milling attachment with these points.
- Bolt the attachment securely. This often requires specific mounting brackets that may come with the attachment or need to be fabricated.
Step 3: Installing the Cutter
- Clean Collet/Holder: Ensure any collet or arbor to be used is clean and free of debris.
- Insert Collet/Arbor: Place the correct size collet or arbor into the attachment’s spindle.
- Insert Cutter: Place the milling cutter into the collet or onto the arbor.
- Tighten: Securely tighten the collet nut or mounting screw for the cutter. Ensure the cutter is straight.
Step 4: Positioning for the Cut
This is where you line up your workpiece and the cutter.
- Mount Workpiece: Securely mount your workpiece in the lathe chuck or on the faceplate. Ensure it’s centered or positioned as required for your operation.
- Align Attachment Tool Path:
- For slots/keyways with stationary workpiece: Position the attachment so the cutter is aligned with the desired path. You might need to use the lathe’s Z-axis (tailstock) or cross-slide to make fine adjustments.
- For facing or flattening: Position the cutter to sweep across the surface.
- Set Depth of Cut: Use the lathe’s cross-slide (or the attachment’s Z-axis if it has one) to carefully bring the cutter just above the workpiece. Set your dial indicator or depth collar to zero.
Step 5: Performing the Cut
- Power Up: Turn on the milling attachment motor. Ensure it reaches its operating speed.
- Engage Cutting:
- For Tool Post Attachments: Use the lathe’s cross-slide handwheel to slowly and steadily feed the cutter into the workpiece.
- For Carriage Mounted Attachments: Use the appropriate feed mechanism (often the cross-slide or a dedicated Z-axis) to feed the cutter.
- Monitor: Watch the cutting action. Listen for any unusual noises. Control the feed rate – don’t force the cutter.
- Depth: Feed in to the desired depth. For deep cuts, take multiple passes, increasing depth slightly each time.
- Making the Slot/Path:
- If cutting a slot using the cross-slide: Once the desired depth is reached, use the lathe’s longitudinal (lead screw) feed mechanism to move the workpiece lengthwise under the cutter.
- If the attachment has its own Z-axis: You might move the carriage or use the attachment’s Z-axis for longitudinal movement.
- Retract and Power Off: Once the cut is complete, retract the cutter from the workpiece using the appropriate feed, then turn off the milling attachment motor.
Step 6: Clean Up and Inspection
- Remove Chips: Carefully clear away any chips using a brush or chip hook.
- Inspect Work: Examine your milled part for accuracy and finish.
- Clean Attachment: Clean the milling attachment and store it properly if not in continuous use.
Tips for Better Milling Results
Even with the right attachment, technique matters. Here are some tips:
Use Sharp Cutters: Dull cutters are inefficient, produce poor finishes, and put excessive stress on your machine and the attachment.
Correct Speeds and Feeds: This is critical.
- Speed (RPM): Generally, smaller cutters and harder materials require higher speeds. Larger cutters and softer materials use slower speeds. A good starting point for metal is often around 300-800 RPM, but consult machining charts for specific materials and cutter types. For wood, much higher speeds are common. Resources like Machinist’s Hobbyist offer calculators and charts.
- Feed Rate: This is how fast you push the cutter into the material. A slow, steady feed is usually best. If you hear chattering or the motor bogs down, your feed is too fast or the cut is too deep.
Take Light Cuts: Especially with tool post attachments, taking multiple shallow passes is safer and produces better results than one deep, aggressive cut. This reduces stress on the attachment and prevents tool breakage.
Use Coolant/Lubricant: For metal cutting, a suitable cutting fluid lubricates the cutter, cools the workpiece and cutter, and helps clear chips. This dramatically improves surface finish and tool life.
Rigidity is Key: Ensure everything is as rigid as possible. A wobbling attachment or workpiece will lead to poor cuts and potential danger.
Practice on Scrap: Before cutting into a valuable workpiece, practice on a piece of scrap material to dial in your speeds, feeds, and depth of cut.
Common Milling Operations with an Attachment
What can you actually do with
Related Posts

Lathe Turning Long Handled Scoop: Tips & Tricks- The provided keywords “carbide end mill 1/8 inch 6mm shank extra long for copper high mrr” are not relevant to the topic “how to cancel car wash subscription”. It seems there’s a mismatch in the information. Please provide the correct keywords related to “how to cancel car wash subscription” so I can craft an SEO-optimized title for you.
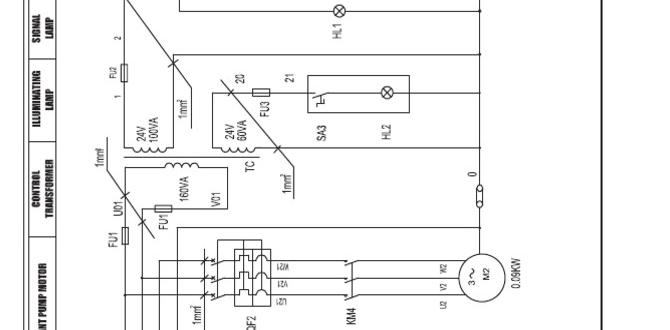
Perfect Your Lathe Workshop: Metal Lathe Wiring Diagram
Discover Milling Cutter Fine Pitch Tool Benefits Today!