Have you ever wondered how complex shapes are made from solid metal? It often starts with a milling cutter. This tool plays a huge role in machining. The plunge milling setup is especially interesting. It allows us to cut deep into materials quickly and efficiently.
Imagine a giant cake. If you wanted to create a tunnel through it, you’d need to find the right way to do it. Just like that cake, a piece of metal needs careful planning for the cut. The plunge milling setup helps achieve that perfect tunnel. But how does it all work?
In this article, we will explore the ins and outs of a milling cutter plunge milling setup. You will discover the tools you need, the steps to take, and the best practices. Get ready to dive into the world of milling!
Milling Cutter Plunge Milling Setup: A Comprehensive Guide

Milling Cutter Plunge Milling Setup
Milling cutter plunge milling setup focuses on creating deep, precise cuts. This technique is often used for complex designs. The setup involves selecting the right tool and adjusting the machine settings. Did you know plunge milling can increase productivity? By understanding the angles and speeds needed, operators can achieve smoother finishes and shorter cycle times. Knowing how to effectively set up your milling cutter can lead to better results and less material waste.Understanding Plunge Milling
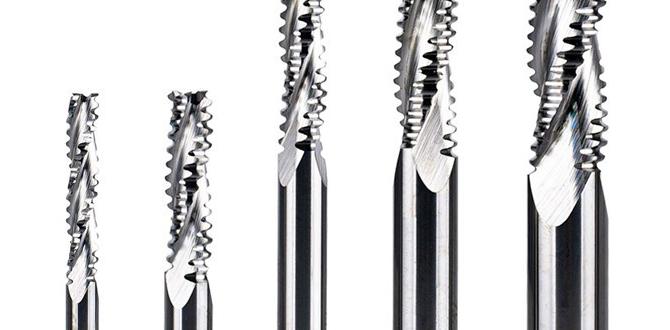
Definition and process of plunge milling. Advantages of using plunge milling in manufacturing.Plunge milling is a method used in machining. It means cutting straight down into a material using a special tool, called a milling cutter. This method is great because it can make deep cuts with speed and precision. Many manufacturers choose plunge milling because it:
- Increases accuracy in shaping materials.
- Reduces time spent on lengthy machining tasks.
- Minimizes tool wear and downtime for replacements.
This technique helps create complex shapes faster and more efficiently. In fact, factories report that plunge milling can save up to 30% in machining time!
What are the benefits of plunge milling?
The benefits of plunge milling include:
- Less waste of material.
- Ability to cut harder materials.
- More control over the depth of the cut.
Setting Up Your Plunge Milling Machine
Key components of a plunge milling setup. Stepbystep guide to machine setup for plunge milling.Getting your plunge milling machine ready is like preparing for a big cooking show: you need the right ingredients to avoid a flop! First, focus on the key parts: the milling cutter, workpiece, spindle, and table. Each has its role in creating that perfect cut. Here’s a simple step-by-step guide:
| Step | Action |
|---|---|
| 1 | Secure the workpiece on the table. |
| 2 | Attach the milling cutter to the spindle. |
| 3 | Set the cutting depth and speed. |
| 4 | Start the machine and watch the magic! |
With these steps, you’re all set to dive into plunge milling. Just remember, if it gets too noisy, you might want to wear earplugs—unless you enjoy the sound of metal singing!
Choosing the Right Parameters for Plunge Milling
Factors affecting plunge milling parameters (feed rate, speed, depth of cut). Recommendations for optimal parameters based on material type.Picking the right settings for plunge milling is key. You need to think about a few important factors. These include feed rate, speed, and depth of cut. Each affects how well the cutter works. Here are some tips based on the type of material:
- Soft materials: Go for a higher feed rate and speed.
- Hard materials: Use a slower feed rate and lower speed.
- Depth of cut: Keep it shallow for hard materials, but you can go deeper with soft ones.
Best Practices for Plunge Milling
Tips for achieving precision and efficiency in plunge milling. Common mistakes to avoid during plunge milling setups.Getting good results in plunge milling isn’t as hard as it seems. Start with the right tools and a steady hand. Set your speeds and feeds based on the material you’re using, then sharpen those cutting edges. Don’t forget to avoid mistakes like uneven depth or not securing the workpiece. Remember, a wobbly setup can lead to a wobbly job! Here’s a quick tip: Make sure everything is tight and in its place.
| Common Mistakes | Tips to Avoid Them |
|---|---|
| Uneven cutting depth | Check your depth settings! |
| Loose workpiece | Tighten everything up! |
| Incorrect speeds | Adjust based on the material! |
By following these tips, you can boost your plunge milling game. Remember, precision brings efficiency. So, keep calm and mill on!
Safety Considerations in Plunge Milling
Essential safety measures to implement during plunge milling. Importance of personal protective equipment (PPE).Plunge milling can be fun, but safety comes first. Always follow essential rules to stay safe. Wear proper personal protective equipment (PPE). This can include:
- Safety goggles to protect your eyes
- Gloves to keep your hands safe
- Ear protection to shield your hearing
What is the importance of PPE in plunge milling?
PPE protects workers from potential injuries during plunge milling. Without proper gear, accidents can happen easily. Always wear PPE to keep yourself safe and sound.
Case Studies: Successful Plunge Milling Applications
Examples of industries benefiting from plunge milling. Analysis of specific projects highlighting plunge milling success.Several industries have discovered the magic of plunge milling. For instance, the automotive sector uses this technique to create smooth and precise parts. In aerospace, it helps craft lightweight components that are super strong. A project in medical equipment showed that plunge milling cut production time by 30%. That’s like finishing a marathon in a sprinter’s speed!
| Industry | Project Example | Benefit |
|---|---|---|
| Automotive | Engine Parts | Precision and Speed |
| Aerospace | Wing Components | Weight Reduction |
| Medical | Surgical Tools | 30% Faster Production |
Overall, plunge milling is not just a fun term to say; it’s a game-changer for businesses looking to boost efficiency and quality!
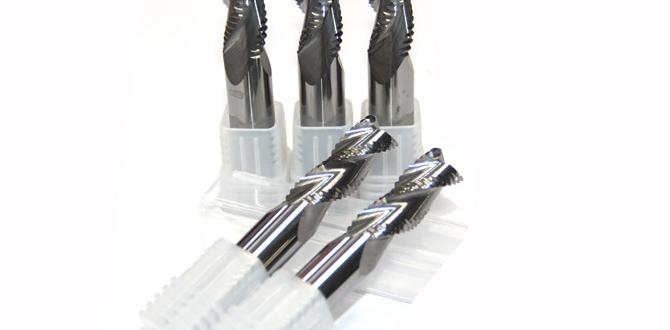
Tools and Technologies for Enhanced Plunge Milling
Latest advancements in plunge milling technology. Recommended tools and software for improved performance.New tools and technologies make plunge milling easier and more effective. Advanced machinery now provides better precision. These tools can cut materials faster and leave smoother surfaces. Some recommended tools include:
- CNC milling machines for automated accuracy.
- Solid carbide cutters for durability and sharpness.
- Specialized software to plan and track projects seamlessly.
Specialized software also helps operators monitor every step in the plunge milling process. Overall, using these modern tools can lead to improved performance and better results.
What are the best tools for plunge milling?
The best tools for plunge milling include CNC milling machines for precision and solid carbide cutters for longevity. These options enhance both speed and accuracy.
Maintenance of Plunge Milling Equipment
Routine maintenance tips for plunge milling machines. Signs that indicate your equipment needs servicing.Keeping plunge milling machines happy requires a bit of TLC! Regular checks can help them run smoothly like butter on toast. Make sure to check the oil levels, tighten loose screws, and clean out chips. A funny sign that your machine needs help? If it starts sounding like a cat stuck in a blender, it’s time to take action! Here’s a quick guide:
| Routine Maintenance Tips | Signs You Need Servicing |
|---|---|
| Check oil levels regularly | Unusual noises |
| Tighten loose screws | Inconsistent cuts |
| Clean after use | Vibrations during operation |
Remember, a happy machine makes happy cuts!
Future Trends in Plunge Milling
Innovations and trends shaping the future of plunge milling. The role of automation and AI in plunge milling processes.The future of plunge milling is bright and full of exciting changes. New technology is making plunge milling faster and better. Automation plays a big part, helping machines work with less help from people. This means less mistakes and more accuracy. Artificial Intelligence also helps by teaching machines to learn and improve over time. Here are some key trends:
- Improved machine designs for quicker cuts.
- Robots assisting in all steps of the process.
- Smart tools that adapt based on their surroundings.
These changes make plunge milling more efficient and help us create better products.
What are the benefits of automation in plunge milling?
Automation reduces errors and speeds up production. It allows machines to work continuously. This leads to higher precision and less waste, making the entire process more cost-effective.
Conclusion
In conclusion, understanding the milling cutter plunge milling setup is essential for successful machining. You need to choose the right cutter and set the correct speed. Always check your machine’s settings before starting. By practicing these tips, you’ll improve your skills. Explore more resources or tutorials to deepen your knowledge and become a better machinist. Keep learning and experimenting!FAQs
Sure! Here Are Five Questions Related To The Topic Of Milling Cutter Plunge Milling Setup:Sure! Here are five questions you might have about plunge milling setup: 1. What is a milling cutter? A milling cutter is a tool that helps shape and cut materials like metal or wood. 2. How do we start plunge milling? To start plunge milling, you first secure the material you want to cut. Then, fit the milling cutter in the machine. 3. Why is the setup important? The setup is important because it helps the cutter work correctly and creates a safe workspace. 4. How do you make sure the cutter is sharp? You can check if the cutter is sharp by looking for any dull edges. If they are worn down, we need to replace it. 5. What safety gear should you wear? You should wear safety goggles and gloves to protect your eyes and hands while working.
Sure! Just ask your question, and I’ll be happy to help you with a simple answer.
What Factors Should Be Considered When Selecting The Appropriate Milling Cutter For Plunge Milling Operations?When choosing a milling cutter for plunge milling, you should think about the material you are cutting, like metal or wood. Next, consider the size of the cutter to fit your job. The shape of the cutter also matters; some shapes work better for plunging straight down. Don’t forget the speed and feed rate, which tells us how fast to move the cutter. Lastly, think about how deep you want to cut, as this helps choose the right tool.
How Does Plunge Milling Differ From Traditional Milling Methods In Terms Of Setup And Tool Engagement?Plunge milling uses a special tool that goes straight down into the material. In traditional milling, the tool moves side to side and rolls to cut. For plunge milling, you set up the machine differently, so it can go deep right away. This way, we can cut out pockets or holes faster and more easily. It helps us make shapes better without too much back and forth.
What Are The Recommended Feed Rates And Cutting Speeds For Efficient Plunge Milling In Various Materials?For plunge milling, we need to use the right feed rates and cutting speeds. Feed rate is how fast the tool moves down into the material. A good speed for soft materials like aluminum is around 80 inches per minute. For harder materials like steel, you might go slower, about 30 inches per minute. Always check the material and tool to find the best speeds and rates!
What Type Of Coolant Or Lubrication Should Be Used During Plunge Milling To Prevent Tool Wear And Ensure Optimal Cutting Performance?During plunge milling, you should use a special liquid called coolant. It keeps the tool cool and helps it cut better. You can also use lubrication to make things slide smoothly. Water-based coolants or oil-based lubricants work well. This way, your tool won’t wear out too fast, and you’ll make clean cuts.
How Can Machine Operators Effectively Monitor And Adjust Parameters During Plunge Milling To Achieve The Desired Surface Finish And Dimensional Accuracy?To get a smooth finish and the right size when plunge milling, you can watch the machine closely. First, check the speed and feed rate, which is how fast the tool moves. Use a measuring tool to look at your pieces often. If something doesn’t look right, change the speed or how deep you cut. This helps you fix any problem right away.
{“@context”:”https://schema.org”,”@type”: “FAQPage”,”mainEntity”:[{“@type”: “Question”,”name”: “Sure! Here Are Five Questions Related To The Topic Of Milling Cutter Plunge Milling Setup:”,”acceptedAnswer”: {“@type”: “Answer”,”text”: “Sure! Here are five questions you might have about plunge milling setup: 1. What is a milling cutter? A milling cutter is a tool that helps shape and cut materials like metal or wood. 2. How do we start plunge milling? To start plunge milling, you first secure the material you want to cut. Then, fit the milling cutter in the machine. 3. Why is the setup important? The setup is important because it helps the cutter work correctly and creates a safe workspace. 4. How do you make sure the cutter is sharp? You can check if the cutter is sharp by looking for any dull edges. If they are worn down, we need to replace it. 5. What safety gear should you wear? You should wear safety goggles and gloves to protect your eyes and hands while working.”}},{“@type”: “Question”,”name”: “”,”acceptedAnswer”: {“@type”: “Answer”,”text”: “Sure! Just ask your question, and I’ll be happy to help you with a simple answer.”}},{“@type”: “Question”,”name”: “What Factors Should Be Considered When Selecting The Appropriate Milling Cutter For Plunge Milling Operations?”,”acceptedAnswer”: {“@type”: “Answer”,”text”: “When choosing a milling cutter for plunge milling, you should think about the material you are cutting, like metal or wood. Next, consider the size of the cutter to fit your job. The shape of the cutter also matters; some shapes work better for plunging straight down. Don’t forget the speed and feed rate, which tells us how fast to move the cutter. Lastly, think about how deep you want to cut, as this helps choose the right tool.”}},{“@type”: “Question”,”name”: “How Does Plunge Milling Differ From Traditional Milling Methods In Terms Of Setup And Tool Engagement?”,”acceptedAnswer”: {“@type”: “Answer”,”text”: “Plunge milling uses a special tool that goes straight down into the material. In traditional milling, the tool moves side to side and rolls to cut. For plunge milling, you set up the machine differently, so it can go deep right away. This way, we can cut out pockets or holes faster and more easily. It helps us make shapes better without too much back and forth.”}},{“@type”: “Question”,”name”: “What Are The Recommended Feed Rates And Cutting Speeds For Efficient Plunge Milling In Various Materials?”,”acceptedAnswer”: {“@type”: “Answer”,”text”: “For plunge milling, we need to use the right feed rates and cutting speeds. Feed rate is how fast the tool moves down into the material. A good speed for soft materials like aluminum is around 80 inches per minute. For harder materials like steel, you might go slower, about 30 inches per minute. Always check the material and tool to find the best speeds and rates!”}},{“@type”: “Question”,”name”: “What Type Of Coolant Or Lubrication Should Be Used During Plunge Milling To Prevent Tool Wear And Ensure Optimal Cutting Performance?”,”acceptedAnswer”: {“@type”: “Answer”,”text”: “During plunge milling, you should use a special liquid called coolant. It keeps the tool cool and helps it cut better. You can also use lubrication to make things slide smoothly. Water-based coolants or oil-based lubricants work well. This way, your tool won’t wear out too fast, and you’ll make clean cuts.”}},{“@type”: “Question”,”name”: “How Can Machine Operators Effectively Monitor And Adjust Parameters During Plunge Milling To Achieve The Desired Surface Finish And Dimensional Accuracy?”,”acceptedAnswer”: {“@type”: “Answer”,”text”: “To get a smooth finish and the right size when plunge milling, you can watch the machine closely. First, check the speed and feed rate, which is how fast the tool moves. Use a measuring tool to look at your pieces often. If something doesn’t look right, change the speed or how deep you cut. This helps you fix any problem right away.”}}]}