Have you ever wondered how to set up a milling tool holder? It’s not as tricky as it sounds! With the right guide, you can master the setup in no time. Imagine working on a project and realizing that a simple mistake with the tool holder can affect your entire work.
Milling tool holders are essential parts of many machines. They hold the cutting tools in place while they work. A well-set tool holder can make your work smoother and more efficient. Wouldn’t you want to achieve better results with less hassle?
In this article, we will explore some easy steps for a perfect milling tool holder setup. You’ll learn tips and tricks that experts use every day. Plus, you’ll discover how to avoid common mistakes. Let’s dive into the world of milling tools and unlock your potential!
Milling Tool Holder Setup Guide: Essential Tips And Techniques

Milling Tool Holder Setup Guide
Setting up a milling tool holder can be tricky, but it’s important for successful machining. First, ensure you choose the right tool holder size. Did you know that the wrong size can lead to accidents? Next, securely attach it to the machine. A loose holder might cause vibrations and reduce accuracy. Remember to check the alignment by spinning the tool. Proper setup can improve performance and extend tool life. Who wouldn’t want smoother finishes and less waste?Understanding Milling Tool Holders
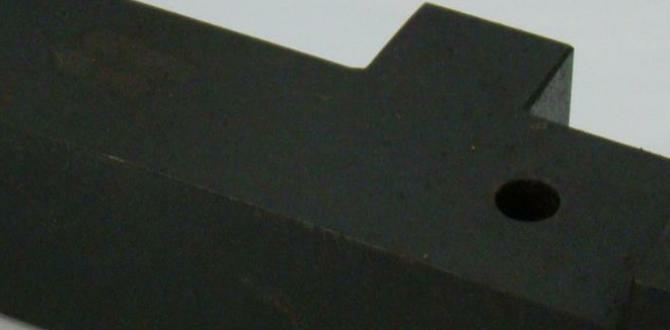
Definition and purpose of milling tool holders. Different types of milling tool holders (e.g., collet chucks, end mill holders, etc.).Milling tool holders are like the superheroes of the machining world. They hold and secure cutting tools during milling operations. There are different types of holders, each designed for a specific job. For example, collet chucks grip tools tightly, while end mill holders are perfect for larger tools. Choosing the right holder can make a big difference in your work speed and quality. Let’s say it’s like selecting the right snack for studying—some give you energy and focus, while others just make crumbs!
| Type of Milling Tool Holder | Purpose |
|---|---|
| Collet Chucks | Secure smaller tools with precision. |
| End Mill Holders | Hold larger end mills for robust cutting. |
| Tapered Holders | Enhance tool stability at high speeds. |
It’s crucial to know your options. Using the right milling tool holder means better performance and more fun in the shop. Now, who doesn’t want to be a machining wizard?
Choosing the Right Tool Holder
Factors to consider when selecting a milling tool holder. Compatibility with milling machines and tooling.Choosing the right tool holder can feel like picking a favorite ice cream flavor—there are so many options! First, make sure it fits your milling machine and tooling. If it doesn’t match, it’s like trying to fit a square peg in a round hole (not fun!). Check the size, style, and compatibility! Also, think about how it’s used. A good tool holder improves precision and speed, so you get that perfect cut without any drama.
| Factor | Importance |
|---|---|
| Size | Must fit your machine! |
| Compatibility | Work with your tools. |
| Material | Durable is best! |
Preparing for Setup
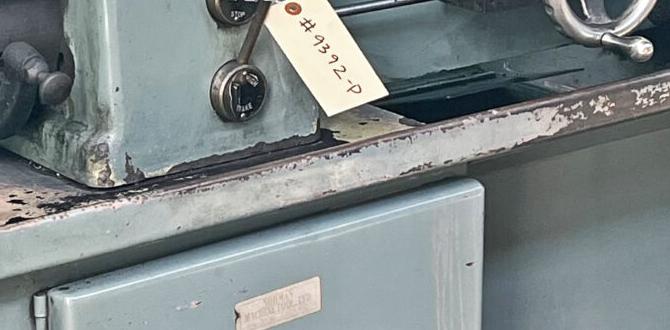
Essential tools and equipment needed for setup. Safety precautions to take before beginning.Before starting your setup, gather your tools and equipment. You will need a milling tool holder, wrenches, a screwdriver, and safety glasses. These items ensure a smooth and safe setup. Safety is key! Always wear your safety gear. Make sure your workspace is clean and organized. Remove hazards that may cause accidents. This preparation helps you work better and safer.
What tools do I need to set up my milling tool holder?
You will need several important items for your setup. Essential tools include:
- Milling tool holder
- Wrenches
- Screwdriver
- Safety glasses
Having these tools ready makes your job easier and safer.
Step-by-Step Setup Process
Detailed steps for installing the milling tool holder. Common mistakes to avoid during setup.Setting up your milling tool holder can seem tricky, but it’s simple with the right steps. Here’s what to do:
- First, check all the parts. Make sure everything is clean and ready.
- Next, place the tool holder in the spindle accurately.
- Then, tighten the holder securely using the right tool.
- Finally, test the setup. Run a quick safety check before starting work.
While setting up, avoid these common mistakes:
- Don’t rush the cleaning process.
- Ensure tools are aligned straight.
- Don’t forget to double-check the tightness.
Correct steps will ensure your milling machine works safely and effectively!
What are common mistakes to avoid during setup?
Common mistakes include rushing the alignment, overlooking cleanliness, and forgetting to check tool tightness. These errors can cause problems later on. Always take your time for the best results!
Adjustment and Calibration Techniques
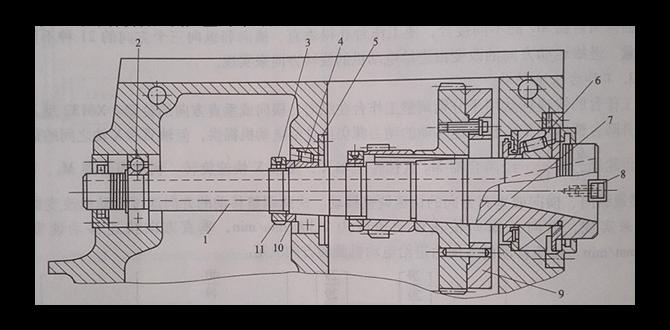
Importance of precise alignment. Methods for calibrating the tool holder for optimal performance.Getting your tool holder aligned just right is super important for smooth milling. If it’s off, you might end up with a wobbly mess or worse—wrong cuts! To keep everything humming along, you can use several methods to calibrate your tool holder.
| Calibration Method | Description |
|---|---|
| Visual Alignment | Check the tool’s position with your eyes (and maybe a magnifying glass!). |
| Dial Indicator | Use this handy tool to find any tiny shifts in your setup. |
| Test Cuts | Make a few trial cuts to see if your settings are spot on (and watch out for flying shavings!). |
Finding the right fit can often feel like dating—sometimes you have to try a few matches before you get it right! Remember, a well-calibrated tool holder leads to better performance and happier machines.
Maintenance Tips for Tool Holders
Best practices for cleaning and maintaining milling tool holders. Signs that indicate a tool holder needs replacement.Keeping your milling tool holders clean is essential for smooth performance. Regularly wipe them down with a cloth to remove chips and dust. Use a gentle cleaner for stubborn spots, but steer clear of harsh chemicals. Look for signs like chipped edges or rust; these mean it’s time for a replacement. As the saying goes, “An ounce of prevention is worth a pound of cure.” Below are some tips on maintenance:
| Task | Frequency |
|---|---|
| Clean tool holders | After each use |
| Inspect for damage | Weekly |
| Replace damaged holders | As needed |
Keeping an eye out for these signs can save you time and money in the long run!
Troubleshooting Common Issues
Identifying and addressing alignment problems. Solutions for tool holder wear and tear.Sometimes your milling tool holder might play a game of hide and seek with your alignment. Don’t worry! First, check if everything lines up straight. A slight twist can cause big trouble, like a pretzel trying to fit in a straight box. If your tool holder is showing signs of wear, it might be time for some TLC. Proper care can prolong its life, just like how we need naps! Here’s a quick table of common issues and solutions:
| Issue | Solution |
|---|---|
| Misalignment | Recheck setup and adjust angles. |
| Wear and tear | Regularly inspect and replace worn parts. |
| Tool slippage | Ensure correct tightening and fit. |
This should help keep your milling tool holder in tip-top shape and ready for action!
Conclusion
In summary, a milling tool holder setup guide helps you understand how to properly install and adjust tool holders. You learn about different types and their uses. By following these steps, you improve your machining accuracy. For better results, practice regularly and explore more resources. Happy milling, and keep experimenting to enhance your skills!FAQs
Sure! Here Are Five Related Questions On The Topic Of Milling Tool Holder Setup:Sure! Here are five questions about milling tool holder setup: 1. What is a milling tool holder? A milling tool holder is a part that keeps the cutting tool in place while we work. 2. How do you set up a milling tool holder? To setup, you first clean the holder. Then, you place the tool inside and tighten the screws. 3. Why is proper setup important? Proper setup helps us cut accurately and safely. It also keeps the tool from falling out. 4. What tools do you need for setup? You usually need a wrench to tighten screws. A cleaning cloth is also helpful to remove dirt. 5. How often should you check the setup? You should check the setup every time you start working. This ensures everything is safe and ready.
Sure! Please provide the question you’d like me to answer.
What Are The Key Specifications To Consider When Selecting A Milling Tool Holder For A Specific Machining Task?When choosing a milling tool holder, you should think about a few things. First, check the size to make sure it fits your machine. Next, look at the material—strong ones like steel last longer. Consider the type of tool you will use; it should match well. Lastly, remember how easy it is to change the tools, so you can work faster.
How Do You Properly Install And Secure A Milling Tool Holder Onto A Cnc Machine Spindle?To install a milling tool holder on a CNC (Computer Numerical Control) machine spindle, first, make sure the machine is off. Next, clean the spindle and tool holder to remove dust or oil. Then, slide the tool holder onto the spindle and push it in firmly. After that, use the locking mechanism to secure it tightly. Finally, double-check that it’s locked in place before turning on the machine.
What Methods Can Be Used To Ensure Proper Alignment And Runout When Setting Up A Milling Tool Holder?To make sure the milling tool holder is set up right, you can use a few simple steps. First, check if the holder is clean and free of dirt. Then, attach the tool tightly so it doesn’t move. You can use a dial indicator to measure if the tool spins straight. This helps us see if everything is aligned correctly. Always remember to double-check your work!
What Are The Common Types Of Milling Tool Holders, And How Do Their Designs Affect Milling Performance?Common types of milling tool holders include collet holders, end mill holders, and keyless chucks. Collet holders grip tools tightly, which helps keep them steady while cutting. End mill holders can hold bigger tools and are great for heavy work. Keyless chucks let you change tools quickly without extra tools. The design of these holders affects how well the milling machine works and how smooth the cutting is.
How Can You Maintain And Troubleshoot Common Issues With Milling Tool Holders During Operations?To keep milling tool holders in good shape, you should clean them after each use. Check them for any signs of wear or damage. If something feels loose, tighten it. You can fix many common problems by making sure everything fits snugly. If there’s still an issue, ask someone for help.
{“@context”:”https://schema.org”,”@type”: “FAQPage”,”mainEntity”:[{“@type”: “Question”,”name”: “Sure! Here Are Five Related Questions On The Topic Of Milling Tool Holder Setup:”,”acceptedAnswer”: {“@type”: “Answer”,”text”: “Sure! Here are five questions about milling tool holder setup: 1. What is a milling tool holder? A milling tool holder is a part that keeps the cutting tool in place while we work. 2. How do you set up a milling tool holder? To setup, you first clean the holder. Then, you place the tool inside and tighten the screws. 3. Why is proper setup important? Proper setup helps us cut accurately and safely. It also keeps the tool from falling out. 4. What tools do you need for setup? You usually need a wrench to tighten screws. A cleaning cloth is also helpful to remove dirt. 5. How often should you check the setup? You should check the setup every time you start working. This ensures everything is safe and ready.”}},{“@type”: “Question”,”name”: “”,”acceptedAnswer”: {“@type”: “Answer”,”text”: “Sure! Please provide the question you’d like me to answer.”}},{“@type”: “Question”,”name”: “What Are The Key Specifications To Consider When Selecting A Milling Tool Holder For A Specific Machining Task?”,”acceptedAnswer”: {“@type”: “Answer”,”text”: “When choosing a milling tool holder, you should think about a few things. First, check the size to make sure it fits your machine. Next, look at the material—strong ones like steel last longer. Consider the type of tool you will use; it should match well. Lastly, remember how easy it is to change the tools, so you can work faster.”}},{“@type”: “Question”,”name”: “How Do You Properly Install And Secure A Milling Tool Holder Onto A Cnc Machine Spindle?”,”acceptedAnswer”: {“@type”: “Answer”,”text”: “To install a milling tool holder on a CNC (Computer Numerical Control) machine spindle, first, make sure the machine is off. Next, clean the spindle and tool holder to remove dust or oil. Then, slide the tool holder onto the spindle and push it in firmly. After that, use the locking mechanism to secure it tightly. Finally, double-check that it’s locked in place before turning on the machine.”}},{“@type”: “Question”,”name”: “What Methods Can Be Used To Ensure Proper Alignment And Runout When Setting Up A Milling Tool Holder?”,”acceptedAnswer”: {“@type”: “Answer”,”text”: “To make sure the milling tool holder is set up right, you can use a few simple steps. First, check if the holder is clean and free of dirt. Then, attach the tool tightly so it doesn’t move. You can use a dial indicator to measure if the tool spins straight. This helps us see if everything is aligned correctly. Always remember to double-check your work!”}},{“@type”: “Question”,”name”: “What Are The Common Types Of Milling Tool Holders, And How Do Their Designs Affect Milling Performance?”,”acceptedAnswer”: {“@type”: “Answer”,”text”: “Common types of milling tool holders include collet holders, end mill holders, and keyless chucks. Collet holders grip tools tightly, which helps keep them steady while cutting. End mill holders can hold bigger tools and are great for heavy work. Keyless chucks let you change tools quickly without extra tools. The design of these holders affects how well the milling machine works and how smooth the cutting is.”}},{“@type”: “Question”,”name”: “How Can You Maintain And Troubleshoot Common Issues With Milling Tool Holders During Operations?”,”acceptedAnswer”: {“@type”: “Answer”,”text”: “To keep milling tool holders in good shape, you should clean them after each use. Check them for any signs of wear or damage. If something feels loose, tighten it. You can fix many common problems by making sure everything fits snugly. If there’s still an issue, ask someone for help.”}}]}