Single Flute vs. 2 Flute End Mills for Machining HDPE: The Beginner’s Cheat Sheet
Choosing the right cutting tool is key when working with High-Density Polyethylene (HDPE). For beginners drilling or milling HDPE, the common choice is between single-flute and two-flute end mills. While both can work, understanding their differences will save you frustration, improve your finish, and protect your tools. This guide breaks down which one is best for your HDPE projects.
Working with plastics like HDPE on a mill can feel a bit tricky at first. It’s different from metal or wood, and using the wrong tool can lead to melted material, rough edges, or even broken bits. Many beginners wonder: should I use a single-flute or a two-flute end mill for my HDPE project? It’s a great question! Don’t worry, it’s simpler than you might think. We’ll walk through what makes each type of end mill suitable for HDPE, making sure you get clean cuts and a smooth finish every time. Get ready to choose the perfect tool for your next project!
Understanding HDPE Machining Challenges
High-Density Polyethylene (HDPE) is a popular material for DIY projects and professional applications due to its durability, chemical resistance, and ease of forming. However, when it comes to machining, HDPE presents unique challenges. Its low melting point means it can easily soften and melt under the heat generated by friction during cutting. This melting can lead to chips welding back onto the workpiece or the tool, resulting in a poor surface finish, tool clogging, and potential damage to both the material and the cutting tool. Understanding these properties is the first step to successful machining.
The goal when machining HDPE is to remove material efficiently without generating excessive heat. This means that cutter geometry, speed, and feed rate all play critical roles. Single-flute end mills are often favored for plastics because they provide more chip clearance, which helps evacuate the softened material away from the cutting zone. Two-flute end mills, while generally more stable and capable of higher material removal rates in some materials, can sometimes struggle with chip evacuation in softer plastics like HDPE, potentially leading to the issues mentioned above.
What Are End Mills? (A Quick Refresher)
Before we dive into the specifics of single vs. two-flute end mills for HDPE, let’s quickly recap what an end mill is. Think of an end mill as a rotating cutting tool, similar to a drill bit, but with cutting edges along its sides as well as on its tip. This allows them to cut sideways (plunge cuts) and create slots, pockets, and profiles, not just holes. They come in various geometries, with different numbers of “flutes” (the spiral grooves that cut and clear chips), helix angles, and coatings, all designed for specific materials and operations. Choosing the right type is crucial for achieving clean cuts and prolonging the life of your tools.
The number of flutes on an end mill is one of its most defining characteristics. These flutes are essentially channels that help guide the removed material (chips) away from the cutting area and out of the workpiece. More flutes generally mean a more robust tool that can handle higher feed rates in rigid materials, but in softer materials like HDPE, too many flutes can lead to issues with chip packing and heat buildup.
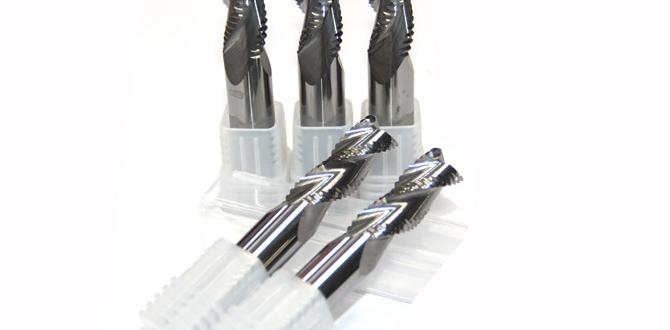
Single Flute End Mills: The Plastic Specialist
Single-flute end mills are often the go-to choice for machining plastics, and for good reason. Their design is optimized to tackle the specific challenges that materials like HDPE present.
How a Single Flute End Mill Works
A single-flute end mill has just one helical cutting edge that spirals around its body. This design might seem simple, but it’s highly effective for plastics. Here’s why:
Superior Chip Clearance: With only one flute, there’s a large space between the cutting edge and the tool body. This massive chip gullet allows melted or softened plastic chips to escape easily and quickly. This is critical for preventing the material from re-melting and re-welding onto the tool or workpiece.
Reduced Heat Buildup: Because chips are evacuated efficiently, less heat is generated at the cutting point. This is vital for HDPE, which has a low melting point. Less heat means less sticking and melting.
Gentle Cutting Action: The single flute provides a less aggressive cutting action compared to multi-flute tools. This can be beneficial for thin or flexible plastics, reducing the risk of chatter and vibration.
Pros of Using Single Flute End Mills for HDPE
Excellent for Plastics: Specifically designed to handle the chip evacuation needs of softer materials.
Low Risk of Melting: Superior chip clearance dramatically reduces heat buildup, minimizing melting and sticking.
Clean Finishes: Effective chip removal leads to smoother, cleaner cut surfaces.
Less Tool Wear: Reduced heat and sticking mean the tool stays sharper for longer.
Good for Plunge Cutting: They can often plunge cut effectively into plastics.
Cons of Using Single Flute End Mills for HDPE
Lower Material Removal Rate (MRR): Compared to a two-flute end mill of the same diameter and RPM, a single-flute will remove less material per revolution. This means longer machining times for large areas.
Less Stable: With fewer cutting edges, they can be slightly less stable than multi-flute tools, potentially leading to chatter if feed rates or depth of cuts are too aggressive.
2 Flute End Mills: The All-Rounder (But Not Always for HDPE)
Two-flute end mills are workhorses in the machining world, excelling in a wide range of materials, including metals and tougher plastics. However, their suitability for pure HDPE machining needs a closer look.
How a 2 Flute End Mill Works
A two-flute end mill has two helical cutting edges. This design offers a balance between cutting efficiency and tool stability.
Increased Engagement: With two flutes, the tool engages the workpiece twice per revolution. This allows for a higher feed rate and can lead to faster material removal in many applications.
Better Stability: The two opposing cutting edges provide more balanced forces acting on the tool, which generally leads to a more stable cut with less tendency for chatter.
Good for Slotting and Profiling: They are excellent for creating slots, pockets, and performing profile milling operations.
Pros of Using 2 Flute End Mills for HDPE
Higher Material Removal Rate (MRR): Can remove material faster than a single-flute end mill if used correctly.
Increased Stability: Generally more rigid and less prone to vibration, especially in larger diameters.
Versatile: Can be used for a broader range of materials beyond just plastics.
Cons of Using 2 Flute End Mills for HDPE
Higher Risk of Melting: The tighter chip gullets mean less space for chips to escape. In HDPE, this can quickly lead to melting and tool clogging.
More Heat Generation: Inefficient chip evacuation traps heat, increasing the likelihood of melting.
Poorer Surface Finish: Melted material sticking to the tool and workpiece can result in a rougher finish.
Potential for Tool Clogging: The chips can pack into the flutes, leading to tool breakage or poor cutting performance.
Single Flute Vs. 2 Flute: Head-to-Head for HDPE
Let’s put these two types of end mills head-to-head specifically for machining HDPE.
Chip Evacuation and Heat Management
This is where single-flute end mills truly shine for HDPE. The extra-large chip gullet means chips are flung away from the cutting zone much more effectively. For HDPE, which melts easily, this is paramount. Two-flute end mills, with their more restricted chip passages, are far more prone to packing chips and generating heat, leading to meltdowns.
Cutting Speed and Feed Rate Considerations
While a two-flute end mill can achieve a higher material removal rate due to more cutting edges, this is often counterproductive with HDPE. You might be tempted to push a two-flute faster, but the increased heat and poor chip evacuation will likely cause problems.
For HDPE, it’s generally better to run a single-flute end mill at a slightly higher RPM (speed), combined with a moderate to fast feed rate that allows for good chip formation and evacuation. The goal isn’t to hog out material quickly, but to cut cleanly and efficiently without melting.
A good starting point for single-flute end mills in HDPE might be:
Spindle Speed (RPM): 8,000 – 15,000 RPM (lower RPMs might be needed for smaller diameter bits)
Feed Rate (IPM or mm/min): 20-60 IPM (or 500-1500 mm/min), depending on diameter and machine rigidity. Adjust as needed.
You’ll need to experiment a bit, as machine rigidity, coolant usage (if any), and the specific grade of HDPE can influence optimal settings. A common recommendation is to aim for a chip load (the thickness of material each flute cuts per revolution) of around 0.003-0.005 inches per tooth (0.075-0.127 mm/tooth) for single-flute cutters in HDPE.
Surface Finish
A clean, smooth surface finish is usually the goal. Single-flute end mills typically provide a superior finish on HDPE precisely because they manage chips and heat so well. When chips don’t melt and re-weld, the cut surface remains clean and smooth. Two-flute end mills are more likely to leave a rougher, sometimes gummy or melted appearance, especially if settings aren’t dialed in perfectly.
Tool Durability
When used correctly with proper chip evacuation and by avoiding melting, both types of end mills can achieve decent tool life in HDPE. However, the tendency of HDPE to melt and clog two-flute end mills can lead to premature failure or rapid dulling. A single-flute, when used for its intended purpose on plastics, tends to last longer and maintain its sharpness due to the reduced thermal stress.
Recommendations for Machining HDPE
Based on the differences, here are our recommendations for choosing and using end mills for HDPE:
When to Choose a Single Flute End Mill:
You want the best possible finish.
You are machining typical or softer grades of HDPE.
You prioritize ease of use and minimizing melting issues.
You are performing general milling operations, profiling, or pocketing.
You are not focused on achieving the absolute highest material removal rates.
Look for “plastic cutting” or “aluminum” specific single-flute end mills. These often have polished flutes and sharper cutting edges designed for softer materials. A common choice is a straight flute single-flute end mill or a single-flute end mill with a high helix angle. The high helix helps with chip evacuation.
When a 2 Flute End Mill Might Be Considered (with Caution):
You are experienced and can precisely control speeds, feeds, and cooling.
You are machining a very thick section of HDPE and need to achieve a higher MRR, but are prepared for potential challenges.
You are using a specialized two-flute “plastic” end mill designed for better chip flow.
You are working with a composite or a reinforced HDPE where melting is less of an issue.
If you do use a two-flute end mill for HDPE, it’s often best to:
Use a lower depth of cut and a wider stepover.
Ensure excellent chip evacuation (e.g., with compressed air or coolant).
Run slightly slower feed rates than you might for other plastics.
Consider end mills with polished flutes to reduce friction.
Key Settings to Remember for HDPE:
1.
Speeds & Feeds: Start with conservative settings and increase cautiously. A good rule of thumb for single-flute in HDPE is often around 8,000-15,000 RPM and 20-60 IPM feed rate. Always listen to the cut!
2. Chip Load: Aim for a chip load that effectively clears material without generating excessive heat. Around 0.003-0.005 inches per tooth is a common range.
3. Depth of cut (DOC): Generally, it’s better to take shallower depths of cut with a wider stepover rather than deep cuts. This helps heat dissipate.
4. Cooling/Lubrication: While not always necessary, a blast of compressed air can dramatically improve chip evacuation and cooling. Some machinists use specialized plastic cutting fluids, but avoid standard petroleum-based lubricants, which can react with some plastics.
Tool Geometry Matters:
Polished Flutes: Essential for reducing friction and preventing melting. Many plastics-specific end mills will highlight this feature.
Sharp Edges: Even with polished flutes, sharp cutting edges are crucial for a clean cut.
High Helix Angle: Can aid in pulling chips out of the cut faster.
Essential Tools and Setup for Machining HDPE
To get the best results when machining HDPE with either type of end mill, proper setup is key.
Rigid Machine: A sturdy mill or CNC machine is essential to minimize vibration, which can worsen melting and surface finish.
Secure Workholding: HDPE can be slippery. Use clamps or a vise with soft jaws to hold your workpiece securely without deforming it.
Appropriate End Mill: As discussed, a single-flute, polished end mill is usually the best starting point for HDPE.
Dust Collection: Machining HDPE produces fine plastic dust that can be a nuisance and a health hazard. Ensure you have effective dust collection in place.
Personal Protective Equipment (PPE): Always wear safety glasses to protect your eyes from flying debris. Consider hearing protection and a dust mask.
Compressed Air (Optional but Recommended): A blast of compressed air aimed at the cutting zone can significantly improve chip evacuation and cooling for HDPE.
Setting Up Your Cut:
1.
Secure the Workpiece: Ensure your HDPE is firmly clamped down.
2. Install the End Mill: Place your chosen end mill (ideally a single-flute for HDPE) securely in your machine’s collet or chuck.
3. Set Zero: Accurately set your X, Y, and Z zero points on the workpiece.
4. Program/Set Speeds & Feeds: Input your chosen speeds and feeds. For beginners Machining HDPE, a good starting point for a 1/4″ diameter single-flute end mill might be 10,000 RPM and 30 IPM (inches per minute).
5. Set Depth of Cut: Start with a shallow depth of cut. For a 1/4″ end mill, try 0.060″ to 0.100″ (1.5mm to 2.5mm).
6. Engage Compressed Air: Turn on your compressed air blast directed at the cutting area.
7. Initiate the Cut: Start the spindle and carefully begin your milling operation. Observe the chip formation – they should be like thin shavings, not stringy melted pieces.
Comparison Table: Single Flute vs. 2 Flute for HDPE
To help you visualize the differences, here’s a comparison table:
Feature
Single Flute End Mill (for HDPE)
2 Flute End Mill (for HDPE)
Primary Use Case
Machining plastics (especially low melting point like HDPE)
General purpose machining, metals, harder plastics
Chip Clearance
Excellent (Large gullet space)
Fair to Good (More restricted space)
Heat Generation
Low (due to efficient chip evacuation)
Moderate to High (risk of melting)
Melting/Clogging Risk
Very Low
High
Surface Finish (on HDPE)
Excellent
Fair to Good (can be rough or melted if not careful)
Material Removal Rate (MRR)
Lower
Higher (but often not practical for HDPE due to melting)
Tool Stability
Good
Very Good
Recommended for Beginners on HDPE
Yes, strongly recommended
Use with caution; less forgiving
External Resources for Further Learning
To deepen your understanding of machining principles and best practices, consider these authoritative resources:
National Institute of Standards and Technology (NIST): The NIST is a great source for metrology and manufacturing research. While they might not have specific HDPE guides readily available, they offer foundational knowledge on precision manufacturing.
Society of Manufacturing Engineers (SME):** The SME (sme.org) provides a wealth of industry knowledge, standards, and educational materials relevant to machining and manufacturing professionals.
When looking for specific material data, always refer to the manufacturer’s datasheet for the grade of HDPE you are using. These datasheets often contain recommended machining parameters.
Frequently Asked Questions (FAQ)
Here are some common questions beginner machinists have about choosing end mills for HDPE:
Q1: Can I use a standard end mill for HDPE?
A: While you can sometimes get away with a standard end