Quick Summary: The Tialn ball nose end mill with a 35-degree helix angle is a fantastic choice for roughing operations, especially on materials like Delrin. Its design efficiently removes material while providing a stable cut, making it ideal for beginners tackling complex shapes and rapid material reduction.
So, you’ve got a project that needs some serious material removed, maybe a complex curve or a deep pocket in something like Delrin. You’ve heard about ball nose end mills, and specifically, the 35-degree helix angle ones. It sounds a bit specific, right? Don’t worry, it’s simpler than it seems! These tools are like the workhorses of your milling machine, designed to tackle the “heavy lifting” of shaping your workpiece efficiently. We’re going to break down exactly why this particular end mill is so good for roughing and how you can use it with confidence, even if you’re just starting out. Get ready to transform your raw material into something amazing, one chip at a time!
Why a 35-Degree Helix Angle Matters for Roughing
When we talk about the “helix angle” on an end mill, we’re essentially talking about the slant of the cutting edges. Think of it like the threads on a screw – they’re angled. For a ball nose end mill, this angle plays a crucial role in how it cuts.
A standard ball nose end mill often has a 30-degree helix angle. While good, it can sometimes chatter or vibrate, especially in softer plastics like Delrin or when you’re trying to remove a lot of material quickly (which is what roughing is all about!). A 35-degree helix angle offers a slight advantage. It provides a more stable engagement with the material, meaning less vibration and a smoother initial cut.
For roughing, especially in materials like:
- Delrin (Acetal)
- Nylon
- ABS
- Certain softer aluminum alloys
- Wood (though specialized wood end mills exist)
This 35-degree angle helps lift and clear chips more effectively. This is super important during roughing because you’re removing a lot of material. If chips don’t clear, they can recut, overheat the tool, and lead to a poor finish or even tool breakage. It’s like trying to dig with a shovel that’s constantly getting clogged – not very efficient!
What is Roughing in Machining?
Before we dive deeper into the tool itself, let’s quickly define “roughing.” In machining, roughing is the first step in shaping a workpiece. The primary goal is to remove the bulk of the material quickly and efficiently to get the part close to its final shape. Think of it as the initial sculpting of a block of clay.
During roughing, we’re not usually aiming for a super-smooth finish. Instead, we focus on:
- Rapid Material Removal: Getting rid of excess material as fast as possible.
- Creating the Basic Form: Shaping the part to be close to its final dimensions.
- Reducing Stress: Sometimes, roughing can be done in a way that helps relieve stress within the material.
The tools used for roughing are often designed to be robust and aggressive. This is where our 35-degree helix angle ball nose end mill shines. It’s built to handle the demands of breaking down material quickly and effectively.
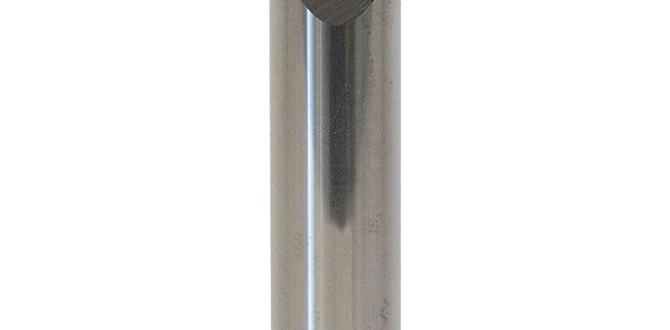
Understanding the “Ball Nose” Feature
The “nose” of an end mill is the very tip. A “ball nose” end mill has cutting edges that form a perfect hemisphere at the tip. This is different from a flat end mill, which has a completely flat cutting surface.
Why is a ball nose so useful, especially for roughing complex shapes?
- 3D Contouring: Ball nose end mills are perfect for creating curved surfaces, rounded fillets, and complex 3D shapes. They can plunge into material and move in any direction, allowing for intricate designs.
- Pocketing with Rounded Bottoms: When you need to create a pocket that has rounded corners at the bottom, a ball nose is your go-to.
- Finishing Operations (sometimes): While we’re focusing on roughing, ball nose end mills are also versatile and can be used for finishing passes to create smooth, rounded surfaces.
The 35-degree helix angle, combined with this ball nose shape, gives you a tool that can efficiently carve out those complex forms while maintaining stability.
The “Tialn” Coating: What Does it Mean for You?
You might see end mills advertised with different coatings, and “Tialn” is one you’ll come across. Coatings are applied to the tool surface to improve its performance and lifespan. Think of it like a protective shield.
Tialn is a type of physical vapor deposition (PVD) coating. It’s known for being:
- Hard: This increases wear resistance, meaning your tool stays sharp for longer.
- Lubricious: It reduces friction between the tool and the workpiece. This is great for cutting materials that can be gummy or sticky, like some plastics or softer metals, as it helps prevent material buildup on the cutting edges.
- Oxidation Resistant: It helps the tool withstand higher temperatures generated during cutting.
For roughing operations, a Tialn coating is a big plus. It means your tool can handle the higher speeds and feeds often used when removing a lot of material, and it will last longer, saving you money and the hassle of frequent tool changes. This is especially beneficial when working with materials like Delrin, which can generate heat.
Choosing the Right Tialn Ball Nose End Mill for Delrin Roughing
When you’re ready to pick out your 35-degree Tialn ball nose end mill, here are a few things to consider, especially for materials like Delrin:
Diameter
The diameter of the end mill is crucial. For roughing, a slightly larger diameter can help remove material faster. However, you need to ensure it fits within the features you’re creating. For typical CNC router or milling machine projects, you might see diameters ranging from 1/8 inch to 1 inch (or larger). For Delrin, starting with a common size like 1/4 inch or 1/2 inch is often a good bet.
Flute Count
Flutes are the helical grooves that spiral around the cutting end of the mill. For roughing, especially in softer materials or plastics, a 2-flute end mill is often preferred. Why?
- Better Chip Clearance: With fewer flutes, there’s more space between them for chips to escape. This is vital for preventing clogging and overheating in materials like Delrin.
- Lower Heat Buildup: Less friction generally means less heat.
- Easier to Machine Soft Materials: The fewer cutting edges engage with the material at any given time, leading to a less aggressive cut that can be easier to manage.
While 3-flute or 4-flute end mills are great for finishing or harder metals, stick to 2-flute for aggressive plastic roughing.
Coating
As we discussed, Tialn is a great choice. Look for it specifically if you can. If Tialn isn’t available, other highly regarded coatings like TiCN (Titanium Carbonitride) or AlTiN (Aluminum Titanium Nitride) can also serve you well for general-purpose plastic machining, though Tialn often has a slight edge in lubricity for gummy materials.
Helix Angle
This is your main focus: 35 degrees. Specifically look for end mills advertised with a 35-degree helix.
Shank Diameter
This is the smooth part of the tool that goes into your collet or tool holder. It needs to match your machine’s collet system. Common shank diameters are 1/4 inch, 3/8 inch, 1/2 inch.
Basic Machining Parameters for Delrin with a 35-Degree Ball Nose End Mill
Getting the parameters right is key to success. These are starting points; you might need to adjust based on your specific machine, the rigidity of your setup, and the exact grade of Delrin. Always start conservatively and increase if your machine can handle it smoothly.
Here’s a general guide. These values are typically for a 1/4-inch diameter, 2-flute, 35-degree helix Tialn coated ball nose end mill in Delrin:
| Operation | Surface Speed (SFM) | Feed Per Tooth (IPT) | Chip Load (Inches) | Depth of Cut (DOC) | Width of Cut (WOC) |
|---|---|---|---|---|---|
| Roughing (Plunge/Ramp) | 300-600 | 0.002 – 0.005 | 0.004 – 0.025 (for ball end) | 0.05 – 0.10 inches (or 50% of tool diameter) | 50% – 100% of tool diameter |
| Roughing (Contour/Pocket) | 300-600 | 0.003 – 0.006 | 0.006 – 0.030 (for ball end) | 0.05 – 0.10 inches (or 50% of tool diameter) | 50% – 100% of tool diameter |
Important Notes on Parameters:
- Surface Speed (SFM): This is the speed at which the cutting edge moves. For Delrin with a Tialn coating, you can generally use higher speeds, but always listen to your machine.
- Feed Per Tooth (IPT): This is how much material each flute cuts on one rotation. Too low, and it can rub; too high, and you risk breaking the tool.
- Chip Load: This is the actual amount of material removed by each flute. It’s closely related to Feed Per Tooth and Surface Speed. A good chip load helps clear chips effectively.
- Depth of Cut (DOC): How deep the end mill cuts into the material in a single pass. For aggressive roughing, you can take larger depths, but be mindful of your machine’s rigidity.
- Width of Cut (WOC): How much of the tool’s diameter is engaged with the material. For roughing, taking a full-width cut (100%) is common, but sometimes a slightly narrower cut (50-75%) can reduce the load on the tool and machine, especially for very hard materials or less rigid setups.
Always consult reliable machining resources for specific material recommendations. For instance, the Machining Doctor Speed and Feed Calculator can be a helpful tool to estimate parameters.
Step-by-Step: Using Your Tialn Ball Nose End Mill for Roughing
Let’s walk through a typical roughing scenario. Imagine you need to create a concave spherical pocket in a block of Delrin.
Step 1: Secure Your Workpiece
This is the MOST IMPORTANT step for safety and accuracy. Mount your Delrin block securely to your milling machine’s table or vise. Ensure it cannot move or vibrate during the cut. For plastics, using soft jaws in a vise can prevent marring the material.
Step 2: Install the End Mill
Ensure your milling machine spindle is off. Insert the 35-degree Tialn ball nose end mill into a clean collet that properly fits its shank diameter. Tighten the collet securely in the spindle. Make sure the end mill is inserted to an appropriate depth – not too shallow, to avoid it pulling out, but not so deep that you can’t see the cutting flutes.
Step 3: Set Your Zero Point (Work Offsets)
This tells your machine where the “home” position is on your workpiece. For a ball nose end mill, you’ll typically set your X, Y, and Z zero on the surface of the material or at a specific datum point. For Z, this is usually the top of the material.
Step 4: Program Your Roughing Pass
Using your CAM software (or by manually defining tool paths if you’re doing simple shapes), create the toolpath for your roughing operation. For a pocket, this might involve:
- Define the Tool: Select a ball nose end mill, input its diameter, and specify the 35-degree helix angle if your software allows for it (many advanced CAM packages can account for tool geometry).
- Set Parameters: Enter the feed rate, spindle speed, depth of cut, and stepover (which dictates the width of cut for contouring passes). For roughing a pocket, you’ll often use a stepover of 50-100% of the tool diameter to remove material quickly.
- Cutting Strategy: You might choose a spiraling helix motion for plunging into the pocket, or a ramp move if entering from the side. For subsequent passes, you’ll define how the tool moves to clear the material.
Refer to your CAM software’s documentation or online tutorials for specific guidance on setting up roughing operations. Many resources are available, for example, Fusion 360 has extensive tutorials for beginners.
Step 5: Perform a Dry Run (Optional but Recommended!)
Before cutting into your material, run the program with the spindle off. This allows you to watch the tool path and ensure there are no collisions or unexpected movements. It’s a great way to catch errors before they cause damage.
Step 6: Execute the Roughing Cut
Once you’re confident, start the spindle and run the machining program.
Safety First! Always wear safety glasses. Keep your hands away from the spinning tool and moving machine parts. Ensure your work area is clear of debris.
- Observe the chip formation. Are they small and powdery, or are they stringy and taking too much heat? Adjust feed rates or spindle speeds if necessary.
- Listen to the machine. Grinding noises or excessive chatter are signs that something is wrong – stop the machine and check your setup or parameters.
Step 7: Inspect and Proceed
After the roughing pass is complete, stop the machine. Carefully inspect the workpiece. The surface won’t be perfectly smooth, and that’s okay for a roughing operation. Check if the material has been removed to the required approximate dimensions.
Step 8: Finishing Passes (if needed)
Once roughing is done, you’ll typically follow up with finishing passes using the same or a different end mill to achieve the desired surface finish and final dimensions. This might involve smaller depths of cut and a smaller stepover.
Pros and Cons of Using a 35-Degree Tialn Ball Nose End Mill for Roughing
Like any tool, there are advantages and disadvantages to consider.
Pros:
- Efficient Material Removal: Designed for aggressive material removal, getting your part closer to its final form faster.
- Improved Stability: The 35-degree helix angle offers better chatter resistance compared to lower angles, leading to smoother cuts and reduced vibration.
- Excellent for Curves and Pockets: The ball nose shape is ideal for 3D contours, fillets, and rounded-bottom pockets.
- Good Chip Evacuation: Particularly with a 2-flute design, it helps clear chips effectively, reducing the risk of recutting and overheating, especially in plastics.
- Tialn Coating Benefits: Enhances tool life, reduces friction, and helps with heat resistance.
- Versatile: Can be used in various materials, with particular benefits in plastics like Delrin.
Cons:
- Not for Finishing Smooth Surfaces: Because it’s designed for heavy material removal, the surface finish left by a roughing pass will not be smooth enough for most final applications.
- Requires Specific Setup: Like all machining, proper speeds, feeds, and workholding are essential to avoid issues.
- Can Be More Expensive: Coated tools with specific helix angles might have a higher initial cost than basic uncoated end mills.
- Tool Wear: Even with a coating, aggressive roughing will eventually wear down the tool.
Alternatives to Consider (and why this one is often better for beginners)
While the 35-degree Tialn ball nose end mill is excellent for its intended purpose, it’s good to know what else is out there.
Standard 30-Degree Ball Nose End Mill: This is more common. It’s perfectly capable for many tasks. However, for Delrin and aggressive roughing, it might be more prone to chatter than the 35-degree version.
Flat End Mill: Great for cutting pockets with square bottoms and sharp inside corners,