Tialn Ball Nose End Mill 35 Degree: Effortlessly Master Ramping for Smooth Curves and Complex Shapes in Delrin. This specialized tool offers superior performance, reducing chatter and improving finish quality for your projects.
Working with plastics, especially materials like Delrin®, can sometimes feel like you’re wrestling with the material rather than guiding it. One common challenge is creating smooth, flowing curves and complex 3D shapes. Traditional machining methods can lead to chatter, rough surfaces, and frustrating rework. But there’s a secret weapon many experienced machinists use: the right cutting tool for the job. Specifically, a Tialn coated ball nose end mill with a 35-degree helix angle can be a game-changer.
This article will walk you through exactly why this tool is so effective and how you can use it to achieve those sought-after smooth finishes and effortless ramping operations. We’ll break down the benefits, essential setup steps, and some practical tips. Get ready to transform your machining capabilities!
Understanding the Tialn Ball Nose End Mill with 35-Degree Helix
Let’s break down what makes this specific tool so great for ramping and creating smooth contours.
What is a “Ball Nose” End Mill?
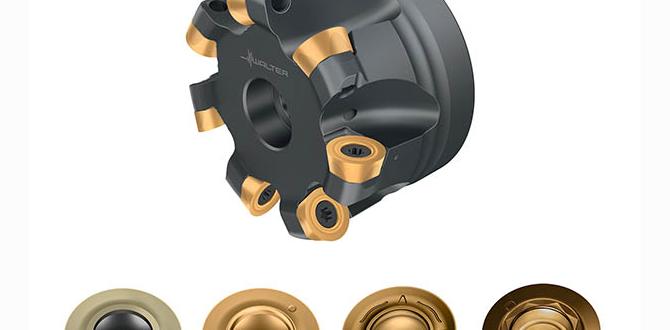
Unlike a flat-bottomed end mill, a ball nose end mill has a hemispherical tip. This means it can cut in any direction, making it perfect for creating rounded profiles, fillets, and complex 3D surfaces. The “ball” shape allows for smooth engagement with the material, minimizing sharp corners that can lead to stress points or poor surface finish.
What is a 35-Degree Helix Angle?
The helix angle refers to the slant of the cutting flutes around the tool. A standard end mill might have a steeper helix angle (like 30 or 45 degrees). A 35-degree helix angle is a bit of a sweet spot for many materials, including Delrin.
Reduced Chatter: A moderate helix angle helps to break up the cutting forces, leading to a smoother cut and less vibration (chatter). This is crucial when working with softer materials like Delrin that can easily grab and chatter.
Improved Chip Evacuation: The angle helps to progressively lift and clear chips away from the cutting zone. Efficient chip removal is vital to prevent the tool from overheating or re-cutting chips, which degrades surface finish and tool life.
Balanced Cutting Action: The 35-degree angle strikes a good balance between the aggressive material removal of steeper angles and the smoother finish of shallower angles.
What is “Tialn” Coating?
Tialn (Titanium Aluminum Nitride) is a high-performance coating applied to the cutting tool. It provides several benefits:
Increased Hardness: Makes the tool more resistant to wear and abrasion.
High-Temperature Resistance: Allows the tool to withstand higher cutting temperatures without losing its cutting edge, which means faster cutting speeds are possible.
Reduced Friction: Helps to prevent material from sticking to the cutting edge (built-up edge), leading to a cleaner cut and better surface finish, especially on plastics.
Extended Tool Life: Overall, Tialn coating significantly extends how long the end mill will remain sharp and effective.
When you combine these features – the ball nose shape for contouring, the 35-degree helix for smooth cutting, and the Tialn coating for durability and performance – you get a highly capable tool for tasks like ramping.
Why Ramping is Easier with This Tool
Ramping, in machining terms, is the process of feeding an end mill into a workpiece at an angle to create a sloping surface or a pocket with angled walls. This is where a 35-degree Tialn ball nose end mill truly shines, especially in materials like Delrin.
Effortless Engagement
The ball nose tip allows the tool to enter the material gradually. When ramping, the tool is essentially plunging at an angle. A flat-bottomed end mill plunging at an angle can create a lot of stress right at the center of the tip, leading to breakage or a poor finish. The ball nose distributes this load more evenly.
Continuous Cutting Action
The 35-degree helix angle provides a smooth, continuous cutting action as the tool engages and disengages from the material during the ramp. This continuous engagement is key to preventing the sudden impacts that cause chatter.
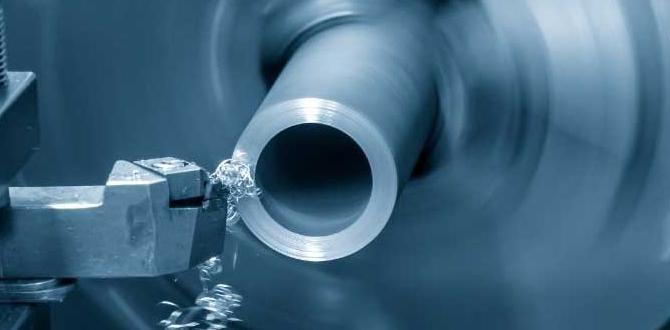
Ideal for Delrin
Delrin (Acetal) is a strong and dimensionally stable plastic, but it can be prone to melting and chipping if not machined correctly. The Tialn coating minimizes heat buildup, and the balanced cutting action of the 35-degree helix prevents excessive grabbing, leading to a cleaner, more precise cut without melting.
Imagine cutting a smooth, gentle slope into a piece of Delrin for a custom part. With the right tool, it feels like the end mill is gliding through, leaving a polished surface behind. Without it, you might get a rough, step-like finish that requires a lot of sanding.
Setting Up for Success: Essential Steps
Proper setup is crucial for any machining operation, and using a Tialn ball nose end mill for ramping is no different. Here’s what you need to consider:
1. Secure Workholding
Your workpiece must be held extremely securely. Any movement will ruin your cut and can be dangerous.
Vise: A solid machine vise is often sufficient for smaller parts. Ensure the jaws are clean and the workpiece is seated firmly against the vise anvil.
Clamps: For larger or irregularly shaped parts, consider using clamps. Make sure they don’t interfere with the tool path.
Double-Sided Tape/Adhesives: For very light duty or prototyping, strong double-sided tape can sometimes work, but it’s less reliable for significant cuts.
I always recommend over-clamping rather than under-clamping. It’s better to take a little extra time to ensure your part is rock-solid than to deal with a ruined piece or a dangerous situation.
2. Tool Engagement and Runout
Tool Holder: Use a clean, high-quality tool holder. A collet chuck is generally preferred over a Weldon shank holder for milling operations as it offers better runout control.
Runout: Check your tool’s runout. Excessive runout means the tool isn’t spinning perfectly true, which will lead to an inconsistent cut and poor surface finish. Aim for minimal runout – ideally less than 0.001 inches (0.025 mm).
3. Spindle Speed and Feed Rate (The Golden Rule)
This is where much of the “effortless” feel comes from. Finding the right balance between how fast the tool spins (spindle speed, RPM) and how fast you push it into the material (feed rate, IPM or mm/min) is key.
There isn’t a single magic number because it depends on your specific machine, the size of the end mill, the depth of cut, and the exact type of Delrin. However, we can provide some starting points.
General Guidelines for Delrin with a Tialn Ball Nose End Mill (e.g., 1/4″ or 6mm diameter):
| Parameter | Recommended Range (Approximate) | Notes |
| :———— | :—————————— | :————————————————————————————– |
| Spindle Speed | 8,000 – 15,000 RPM | Higher speeds are often good for plastics to minimize heat buildup. |
| Feed Rate | 0.001 – 0.003 inches/tooth | This is the feed per tooth. Total feed rate = Feed per tooth Number of flutes RPM. |
| Depth of Cut | 0.010 – 0.050 inches (0.25-1.25 mm) | Start shallow and increase if conditions allow. For ramping, consider a shallow lead angle. |
| Lead Angle | 1 – 5 degrees | This is how aggressively the tool ramps into the material for each step on the XY plane. |
Important Note: These are starting points! Always listen to your machine and the cutting sound. A smooth, consistent hum is good. Squealing or chattering means you need to adjust your speed or feed.
Tools like the Machining Rate Calculator developed by NIST can be helpful for more precise calculations, though for beginners, starting with conservative estimates and making adjustments is perfectly fine.
4. Cutting Lubricant/Coolant (Optional but Recommended)
While Delrin doesn’t chip like metal, it can still melt. A light mist of coolant or a specialized plastic cutting fluid can help keep the cutting edge cool, reduce friction, and improve surface finish.
Mist Coolant: Ideal for plastics as it provides cooling without flooding the workpiece.
Air Blast: A steady stream of compressed air can also help clear chips and cool the cutting zone.
Avoid Alcohols: Many alcohols can react poorly with plastics. Stick to recommended cutting fluids.
Performing the Ramp Cut: Step-by-Step
Let’s get to the cutting! Here’s how you can approach ramping with your Tialn ball nose end mill. This assumes you have a CNC machine or a milling machine with a DRO (Digital Readout) and the ability to control axis movement precisely.
Step 1: Program or Manually Set Up the Ramp Path
You’ll need to define the path your tool will take. For a simple ramp, this involves defining a start point and an endpoint and specifying the Z-axis movement relative to the XY movement.
CNC: In your CAM software, you would typically use a 3D contour or pocketing operation, defining the start and end points of your ramp. You’ll specify the tool, the desired surface, and the cutting parameters. The software will generate the toolpath, including the ramp motion.
Manual Mill: You’ll need to manually set your X and Y zero points. Then, you’ll set the Z zero to the top of your material. You’ll then manually feed the X or Y axis while simultaneously feeding the Z axis down to create the ramp. This requires a steady hand and a good DRO.
Step 2: Set the Depth of Cut and Lead Angle
When programming or setting up manually, you define how deep the tool cuts per pass and the angle at which it enters the material.
Depth of Cut (Z-axis): Start conservatively. For a 1/4″ (6mm) ball nose end mill, a depth of cut of 0.020″ to 0.050″ (0.5mm to 1.25mm) is often a good starting point for Delrin.
Lead Angle (XY movement during Z plunge): This is crucial for ramping. Instead of plunging straight down, the tool moves across XY while plunging. A very small lead angle (e.g., 1-2 degrees) is usually sufficient for Delrin. This means for every 0.050″ of depth, the tool moves about 1.4″ in X or Y. You might adjust this based on the finish you’re achieving.
Step 3: Engage the Spindle and Begin the Cut
Start Spindle: Bring your spindle up to the programmed RPM.
Flood Coolant/Mist: Turn on your coolant or mist system if you’re using one.
Feed: Begin feeding the tool into the material. On a CNC, this is automated. On a manual mill, this requires carefully coordinating the movement of the X/Y handwheel with the Z handwheel.
Safety First! Always ensure your hands and any loose clothing are clear of the rotating tool and the workpiece. Wear safety glasses!
Step 4: Monitor the Cut
As the tool ramps through the material, pay close attention to:
Sound: Listen for a smooth, consistent cutting sound. Any high-pitched squealing or grinding indicates a problem.
Vibration: Feel for excessive vibration through the machine.
Chip Formation: Are the chips small and curling away nicely, or are they large and stringy (indicating potential melting)?
Surface Finish: Visually inspect the surface being created. It should look smooth, not rough or torn.
Step 5: Complete the Ramp and Retract
Once the tool reaches its programmed endpoint and depth, it will typically retract.
Retract: The tool will usually retract straight up, or in some cases, follow a programmed retract path.
Post-Cut Inspection: Once the spindle stops and the tool is clear, inspect the ramped surface. It should be smooth and consistent.
Tips for Achieving a Superior Finish
Even with the right tool, a few extra tips can elevate your results:
Tool Sharpness: Tialn coating is durable, but even the sharpest tools eventually dull. If you notice a degradation in finish, consider if the tool needs replacing or has been damaged.
Climb Milling vs. Conventional Milling: For most plastic milling, especially with ball nose end mills, climb milling (where the cutter rotates in the same direction as the feed) is generally preferred. It tends to produce a better surface finish and reduces the tendency for the tool to pull into the cut. Most modern CNC controllers default to climb milling for pocketing and contouring.
Multi-Pass Ramping: For very deep or steep ramps, breaking the entire ramp into multiple shallower passes is much better than trying to cut it all at once. Each pass would have its own depth of cut and lead angle. This significantly reduces the load on the tool.
Abrasive vs. Smooth: Delrin can sometimes produce a slightly “soft” finish that can be improved with a secondary operation. If you need a mirror finish, you might consider a ball nose end mill with a higher flute count (e.g., 4-flute) and a very fine step-over in a finishing pass, or a specialized finishing tool. However, for most functional parts, the finish from a good Tialn ball nose end mill is excellent.
Experiment: Don’t be afraid to experiment with slightly different speeds and feeds. Every machine and material behaves a little differently. Keep diligent notes on what works best for you.
When to Use a Steeper Helix Angle (and When Not To)
While we’re focusing on the 35-degree helix, it’s worth noting that other angles exist.
Steeper Angles (e.g., 45 degrees): Can offer more aggressive material removal and better chip evacuation in some applications, but can also be more prone to chatter and may not provide as smooth a surface finish as a moderate angle.
Shallower Angles (e.g., ~20 degrees): Tend to provide a very smooth finish but with less aggressive material removal.
For Delrin, especially when ramping, the 35-degree angle strikes an excellent balance. It’s aggressive enough to avoid rubbing and melting but shallow enough to prevent chatter and deliver a good finish. For a material that can be a bit gummy, a sharper (steeper) angle can sometimes cause the plastic to “dig in” more.
Alternatives and When They’re Better
While the Tialn ball nose with a 35-degree helix is fantastic for Delrin ramping, other tools exist for different scenarios.
Flat-Bottom End Mill: Good for creating flat-bottomed pockets or pockets with vertical walls. Not ideal for smooth ramping or contoured surfaces. They can be used for stepping down in a pocket, but the ramps themselves would need a different tool.
Engraving/V-Groove Bits: Used for text or line engraving. Not suitable for broad ramping.
Corner Rounding End Mills: These are specialized for creating consistent corner radii, but they aren’t typically used for general ramping operations in the way a ball nose end mill is.
The beauty of the ball nose end mill is its versatility. It can be used for 3D contouring, pocketing at an angle, and creating fillets.
Troubleshooting Common Issues
Even with the best tools, things can go awry. Here are some common problems and how to fix them:
Chatter/Vibration:
Cause: Too aggressive feed rate, too deep a cut, loose workholding, worn tool, or tool runout.
Solution: Reduce feed rate, reduce depth of cut, check/improve workholding, inspect tool for damage, check tool holder for runout. Try a slightly different spindle speed.
Melting Plastic:
Cause: Too slow a spindle speed, too slow a feed rate (causing rubbing), poor chip evacuation, or insufficient cooling.
Solution: Increase spindle speed, increase feed rate slightly, ensure effective chip evacuation (air blast is good), use a mist coolant.
Rough Surface Finish:
Cause: Dull tool, tool runout, insufficient spindle speed, incorrect feed rate, or debris in the cut.
Solution: Use a sharp tool, check and correct runout, optimize spindle speed and feed rate, ensure good chip clearing.
Tool Breaking (especially during ramping):
Cause: Plunging too fast into the material, excessive depth of cut, inadequate workholding allowing part movement, or hitting an obstruction. Ball nose mills are stronger when cutting sideways than when plunging axially.
Solution: Ensure a shallow lead angle during ramping, reduce depth of cut per pass, verify workholding is extremely secure, program safe retract moves.
It’s important to remember that machining is an iterative process. Learning to diagnose and fix these issues is part of becoming a proficient machinist. The National Institute of Standards