For the discerning woodworker, the allure of creating identical shapes and patterns with ease is a powerful one. Achieving perfect symmetry and repeatability can be a challenge, especially when tackling multiple identical pieces for a project. This is where the magic of a wood lathe duplicator comes into play. While commercially available options can be expensive, building your own wood lathe duplicator homemade guide offers a rewarding and cost-effective solution for any serious hobbyist or professional. This comprehensive guide will walk you through the process, from understanding the principles to selecting materials and assembly, empowering you to bring precision to your lathe work.
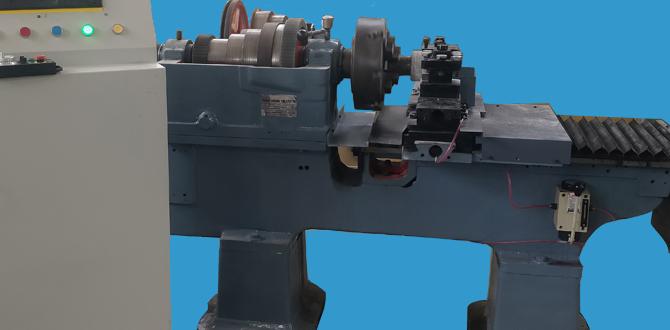
At its core, a wood lathe duplicator is a device that mechanically links your cutting tool to a template or master piece. As you move the cutting tool along the template, a corresponding movement is translated to the tool bit, faithfully replicating the shape onto your workpiece. This eliminates the tedious and often imprecise nature of freehand duplication, guaranteeing consistent results every time, whether you’re crafting chair legs, balusters for a staircase, or a series of identical decorative elements.
Understanding the Mechanics of Replication
The fundamental principle behind any wood lathe duplicator, homemade or otherwise, relies on a pivoting arm mechanism. Typically, this involves two main components: a master pattern or template and your cutting tool. The template is usually a precisely shaped piece of wood, metal, or even hard plastic. The cutting tool is mounted on a movable carriage. A crucial element is the follower, which rides along the edge of the template. This follower is connected via an articulated arm to the cutting tool’s holder. As the follower traces the contours of the template, the connected arm guides the cutting tool along a parallel path on your workpiece, mirroring the template’s shape.
There are several popular designs for homemade duplicators. Some mount directly to the lathe bed, while others utilize a separate frame. The complexity of the mechanism can vary, from simple single-axis systems for basic profiles to more intricate designs capable of handling three-dimensional curves. Choosing the right design for your needs will depend on the types of projects you plan to undertake and your available resources. Considering a robust and adjustable design from the outset will offer greater versatility in the long run.
Essential Materials for Your Homemade Wood Lathe Duplicator
When embarking on your wood lathe duplicator homemade guide project, careful material selection is paramount. Durability, rigidity, and ease of machining are key factors.
The Frame and Bed: For the main structure, steel or thick aluminum are excellent choices. They offer excellent rigidity and can withstand the forces generated during the cutting process. Angle iron, square tubing, or even repurposed metal scraps can be utilized. If you opt for wood, select a dense hardwood like oak or maple and ensure it’s well-seasoned to prevent warping.
The Pivoting Arm and Carriage: Precision is crucial here. Cold-rolled steel or hardened aluminum rods are ideal for the sliding carriage and locating pins. Bearings, such as linear ball bearings or even simple bronze bushings, will ensure smooth and precise movement along the rails. The arm connecting the follower to the tool holder should be made from a strong yet lightweight material like aluminum or steel.
The Template Material: For your master template, choose a material that is dimensionally stable and can be easily shaped. Hardwood, MDF (medium-density fiberboard), or even a thick plastic like acrylic can serve this purpose. Ensure the edge that the follower will ride against is perfectly smooth and accurately reflects the desired final shape.
Fasteners and Hardware: High-quality bolts, nuts, washers, and screws are essential for a secure and stable build. Don’t skimp on these; they are critical for the overall integrity of the duplicator.
Construction Steps: Bringing Your Design to Life
Building your own wood lathe duplicator is a multi-step process. Precision in each stage will directly impact the performance of your finished tool.
1. Design and Planning: Before cutting any material, thoroughly research and finalize your design. Sketch out your plans, considering the dimensions of your lathe, the types of shapes you want to duplicate, and the available materials. Many excellent plans and detailed guides can be found online and in woodworking magazines, offering a fantastic starting point for your wood lathe duplicator homemade guide journey.
2. Fabrication of the Frame: Construct the main frame that will support the sliding carriage and the template holder. Ensure all joints are square and securely joined. If using metal, welding offers the strongest connection; otherwise, robust bolting techniques are necessary.
3. Building the Sliding Carriage: This component will house your cutting tool. It needs to slide smoothly and precisely along linear rails. Precision is key here, so ensure the rails are parallel and the carriage moves without binding.
4. Creating the Pivoting Arm and Follower: Fabricate the articulated arm that connects the follower to the cutting tool. Accuracy in the pivot points and the length of the arm components is vital for faithful replication. The follower itself should be designed to smoothly glide along the template.
5. Mounting the Template Holder: This should be a sturdy and adjustable mount that securely holds your master template in the correct position relative to the workpiece.
6. Assembly and Alignment: Carefully assemble all the components. During assembly, pay meticulous attention to alignment. Any misalignment will be translated into imperfections in your duplicated workpieces.
7. Testing and Calibration: Once assembled, thoroughly test the duplicator. Mount a piece of scrap wood and run the duplicator through its full range of motion. Observe the cutting tool’s path and make any necessary adjustments to ensure smooth operation and accurate replication. It’s often beneficial to make a test template first to fine-tune the mechanism before committing to your final pattern.
Tips for Success and Advanced Considerations
Smoothness is Key: Every moving part should operate with minimal friction. Lubricate bearings and sliding surfaces regularly.
Rigidity is Paramount: A flex in the frame or the carriage will lead to inaccurate duplicates. Over-engineer for strength rather than under-build.
Template Accuracy: The precision of your template directly dictates the precision of your duplicated pieces. Take extra care in creating your master patterns.
Tooling: Ensure your cutting tools are sharp and appropriate for the wood you are working with. The duplicator guides the tool, but the sharpness of the tool does the actual cutting.
* Safety First: Always wear appropriate safety gear, including eye protection. Understand the mechanics of the duplicator and your lathe before operating.
Building a homemade wood lathe duplicator is a project that combines engineering, problem-solving, and craftsmanship. It’s a journey that will not only equip you with a powerful tool for your woodworking endeavors but also provide an immense sense of accomplishment. By following this wood lathe duplicator homemade guide, you’ll be well on your way to unlocking a new level of precision and efficiency in your lathe projects, turning the dream of perfect replication into a tangible reality.


