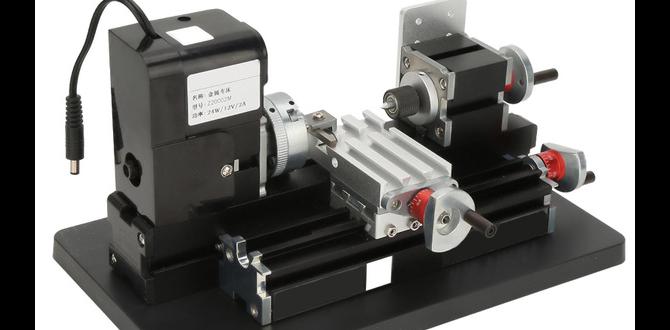
Boring bars for lathes are essential tool holders used to create precise internal diameters, like holes, within a workpiece mounted on the lathe. They are crucial for achieving accurate, smooth, and well-finished bores, transforming rough openings into functional components.
Welcome to Lathe Hub! If you’ve ever looked at the seemingly simple holes in your projects and wondered how they get so perfectly round and smooth, you’ve likely stumbled upon the magic of boring bars. These often-overlooked tools are the unsung heroes of internal machining on your lathe. Without them, achieving those clean, precise bores for bearings, shafts, or intricate passages would be a frustrating guessing game. But don’t worry, it’s not as complicated as it sounds! This guide will demystify boring bars, showing you how they work and how to use them effectively. We’ll break down everything you need to know, from choosing the right one to making those perfect cuts. Get ready to elevate your turning skills!
What Exactly is a Boring Bar for a Lathe?
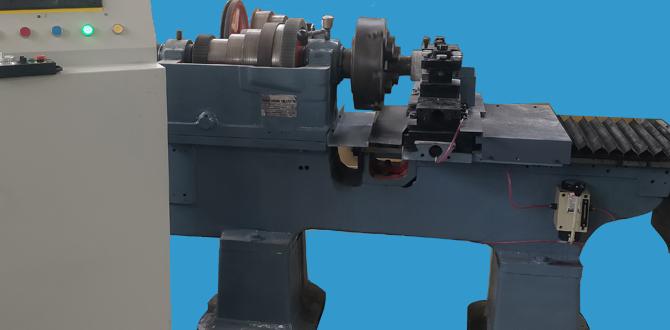
At its core, a boring bar for a lathe is a specialized cutting tool designed specifically for machining the inside diameter of a workpiece. Think of it as the opposite of a turning tool that cuts the outside. While a standard turning tool protrudes out from the tool post to shape the exterior, a boring bar is designed to fit inside a pre-drilled or cored hole (the bore) and enlarge or refine it to a precise diameter and finish.
The main components of a typical boring bar setup include:
- The Bar: This is the long, rigid shank that holds the cutting insert. It needs to be strong and stiff to minimize vibration and deflection, which are the enemies of accurate boring. Bars come in various materials, sizes, and styles.
- The Cutting Insert: This is the business end of the boring bar. It’s a small, often indexable, piece of carbide or high-speed steel that actually does the cutting. Inserts come in different geometries and coatings for various materials and operations.
- The Holder/Shank: This is the part of the boring bar that clamps into your lathe’s tool post. Some boring bars are integrated into a rigid shank, while others use a system where the bar itself is held within a larger tool holder.
The primary function of a boring bar is to achieve accurate internal diameters. This is vital for fitting mating parts, ensuring smooth operation, and creating functional spaces within your workpiece. Whether you’re making a housing for a bearing, a passage for a hydraulic line, or simply refining a rough hole, a boring bar is your go-to tool.
Why Use a Boring Bar? The Advantages
You might be thinking, “Can’t I just use a drill bit to make a hole?” While drilling is a great way to create an initial hole, boring bars offer several significant advantages for precision work:
- Accuracy & Precision: Boring bars allow you to achieve very tight tolerances and exact diameters. You can repeatedly bore to the same size with confidence.
- Surface Finish: They produce a much smoother and cleaner internal surface finish than most drill bits, which is essential for many mechanical applications.
- Hole Straightness & Roundness: A properly used boring bar creates a straighter and more perfectly round hole than drilling alone can typically achieve.
- Enlarging Existing Holes: They are perfect for precisely enlarging an existing hole to a specific size, especially if the original hole is slightly off-center or not perfectly round.
- Finishing Operations: Boring bars are used for the final “sizing” cut, ensuring the hole is exactly the diameter you need.
- Versatility: With different inserts and bar styles, you can perform various operations like threading internal diameters, creating grooves, or chamfering the edges of holes.
For anyone serious about achieving professional-quality results on their lathe, mastering the use of boring bars is a fundamental skill.
Types of Boring Bars for Lathes
Boring bars come in a variety of types, each suited for different tasks and workpiece materials. Understanding these distinctions will help you pick the right tool for the job:
Solid Boring Bars
These are the simplest and often the most rigid type. The bar and the holder are a single, solid piece of metal. They are excellent for general-purpose boring and when high rigidity is paramount.
- Pros: Very strong, good vibration dampening, generally less expensive.
- Cons: Limited adjustability, can be heavy and cumbersome.
Indexable Boring Bars
These bars have a specialized head or shank designed to securely hold a replaceable cutting insert. When the insert becomes dull, you simply rotate or replace it, rather than grinding the entire tool. This is a huge advantage for efficiency and consistency.
- Pros: Easy insert replacement, consistent cutting geometry, wide variety of insert types available for different materials, can be more cost-effective in the long run due to insert longevity.
- Cons: Can be more complex to set up, the connection between the insert and the bar can be a point of potential flex if not robust.
Carbide Boring Bars
Carbide is a very hard and brittle material, making bars made entirely from solid carbide extremely rigid and excellent for high-speed boring and achieving a superb surface finish. However, they can be more prone to chipping or breaking if subjected to shock or excessive force.
- Pros: Extremely stiff, excellent for high-speed and high-finish cuts, good for smaller diameter bores where rigidity is critical.
- Cons: Brittle, can be expensive, susceptible to damage from impact.
Steel Boring Bars
Made from high-speed steel (HSS) or other tool steels, these bars are less rigid than carbide but offer better toughness and shock resistance. They are a good choice for general-purpose work, especially on smaller lathes where extreme rigidity might not be as critical, or when working with materials that are less demanding.
- Pros: Tougher and more forgiving of minor impacts, often less expensive than carbide.
- Cons: Less rigid than carbide, may not achieve the same level of surface finish at higher speeds.
Vibration-Dampening Boring Bars
For deep boring operations (where the bar has to extend a long way from the tool post), vibration is a major issue. These specialized bars incorporate a mechanism (often a tungsten carbide mass or a hydraulic system) inside the bar that actively counteracts vibrations, allowing for longer reaches and cleaner cuts without chatter.
- Pros: Significantly reduces vibration, allowing for much deeper cuts and better surface finish on long bores.
- Cons: Very expensive, can be more complex to use correctly.
Specialty Boring Bars
This category includes bars designed for specific tasks like:
- Internal Threading Bars: Designed to hold inserts specifically shaped for cutting internal threads.
- Grooving Bars: For cutting internal grooves or snap ring grooves.
- Boring Heads: These are adjustable attachments that hold boring tools. They allow for precise adjustment of the cutting diameter by rotating a calibrated dial. They are excellent for setting exact sizes and offset capabilities.
Choosing the Right Boring Bar for Your Lathe
Selecting the correct boring bar depends on several factors. Here’s a breakdown to help you decide:
1. Lathe Size and Rigidity
Smaller, hobbyist lathes generally have less power and rigidity. In these cases, a smaller diameter, solid steel or carbide boring bar might be best to maintain rigidity. Larger, industrial lathes can handle larger diameter bars and may benefit from specialized indexable or vibration-dampening bars for deeper bores.
2. Bore Diameter and Depth
The ratio of the boring bar’s length to its diameter (L/D ratio) is critical. A higher L/D ratio means the bar is much longer than it is thick, making it prone to vibration and deflection. For deep holes, you’ll need a smaller diameter bar or a vibration-dampening bar.
3. Material Being Machined
Carbide inserts are effective for most metals, including steel, stainless steel, and aluminum. High-speed steel (HSS) inserts are often better for softer metals or when you need a tougher edge. Ceramic or CBN (Cubic Boron Nitride) inserts are for very hard materials and require specialized knowledge.
4. Required Accuracy and Surface Finish
For high precision and mirror-like finishes, carbide or specialized finishing bars with sharp inserts are essential. For roughing or less critical dimensions, a simpler steel bar might suffice.
5. Budget
Solid steel bars are often the most affordable. Indexable bars with carbide inserts offer good value over time due to insert life. Vibration-dampening bars are the most expensive but necessary for certain applications.
Pro Tip: For beginners, starting with a small set of indexable boring bars with common insert geometries (like general purpose CNMG or TPG inserts) is a great way to get started. Ensure you get bars that fit your lathe’s tool post size.
Essential Boring Bar Accessories and Inserts
While the bar itself is key, having the right inserts and accessories makes all the difference:
Cutting Inserts
These are the disposable or indexable cutting edges. They come in many shapes and grades:
- Geometry: Common shapes include triangular (T), square (S), and diamond (D). Round inserts (R) are also used. The shape affects the strength of the insert and the type of corner it can produce.
- Materials:
- Carbide: Most common for metals. Available in various grades (e.g., P, M, K categories) for different materials:
- P (Steel): Coated carbide for steel and stainless steel.
- M (Stainless Steel/Exotic Alloys): Tougher coatings for interrupted cuts.
- K (Cast Iron/Non-ferrous): Uncoated or finely coated carbide for abrasive materials.
- High-Speed Steel (HSS): Good for softer metals and general use.
- Ceramic: For very hard steels and cast iron at high speeds.
- CBN (Cubic Boron Nitride): For hardened steels and exotic alloys.
- Coatings: TiN (Titanium Nitride), TiAlN (Titanium Aluminum Nitride), AlTiN, etc., improve hardness, reduce friction, and prolong insert life.
Always match the insert type to the material you are cutting and the type of operation (roughing vs. finishing). Reputable manufacturers like Sandvik Coromant offer extensive guides on insert selection.
Insert Clamping Screws and Wrenches
Indexable boring bars use small screws to hold the insert firmly in place. You’ll need the correct size Torx or Allen wrench for your specific bar. Keep spares; these tiny screws can be easy to lose!
Tool Holders
Some boring bars mount into a generic tool holder that then clamps into the tool post. These holders provide a way to easily adjust the height and position of the boring bar and can sometimes offer different shank sizes.
Coolant System
For most metal boring operations, a coolant system (either flood coolant or a through-spindle coolant system if your lathe is equipped) is highly recommended. It lubricates the cutting edge, cools the workpiece and tool, and helps evacuate chips, leading to better finishes and longer tool life. You can learn more about machining coolants from resources like the National Association of Manufacturers (while not directly about coolants, it highlights the industry context of metalworking).
How to Use a Boring Bar: Step-by-Step
Using a boring bar might seem intimidating at first, but by following these steps, you’ll gain confidence and achieve excellent results.
Step 1: Select the Right Boring Bar and Insert
Based on the bore diameter, depth, material, and required finish, choose your bar and insert. Ensure the insert holder is clean and free from debris.
Step 2: Mount the Insert Securely
If using an indexable bar, carefully place the insert into its pocket. Ensure it sits flush. Fasten the clamping screw securely using the correct wrench. Do not overtighten, but ensure there’s no play.
Step 3: Mount the Boring Bar in the Tool Post
- Position the boring bar shank (or holder) in the lathe’s tool post.
- Crucially, set the boring bar’s cutting edge to the exact centerline of the lathe spindle. This is paramount for correct cutting geometry and achieving the intended diameter. Use a height gauge, a dial indicator, or even a small block of material to precisely align the tip with the spindle center.
- Tighten the tool post securely.
Step 4: Measure Your Starting Bore
Before you begin boring, measure the existing hole’s diameter using calipers or a bore gauge. This will tell you how much material you need to remove.
Step 5: Set Your Cutting Depth (Dial Indicator Method)
Dial indicators are invaluable for precise boring. Here’s a common method:
- With the boring bar just touching the edge of the hole’s opening and the lathe spindle OFF, set your cross-slide dial (which controls the boring bar’s in-feed) to zero.
- Mount a dial indicator so its probe touches the face of the workpiece near the hole.
- Slowly advance the boring bar into the hole. As it enters, watch the dial indicator.
- When boring the first pass, you’ll typically advance the boring bar a specific distance inward. For example, if you want to remove 0.020″ from the diameter, you usually only need to advance the boring bar about 0.010″ along its axis from the edge because you are cutting into the bore. Be aware that some depth of cut settings might need to be calculated from the cross-slide dial directly. A common rule for small bores is that 0.010″ movement on the cross slide dial removes approximately 0.010″ from the bore diameter. Always confirm with your specific lathe’s manual.
- For precision: Set your cross-slide dial to zero where the boring bar starts to cut the edge of the blind hole. Then, advance the boring bar to the desired cutting depth. The reading on your cross-slide dial will correspond to the depth of cut. For diameter, if you advance the tool 0.010″ axially, you remove 0.020″ from the diameter. Always double-check your lathe’s dial graduations.
Step 6: Set Your Spindle Speed and Feed Rate
Consult machining charts or manufacturer recommendations for appropriate speeds and feeds for your material and insert type. For beginners, err on the side of slower speeds and moderate feed rates to gain control and avoid damaging the insert.
- Surface Speed (SFM or m/min): This is the speed at which the cutting edge moves relative to the workpiece.
- Feed Rate (IPM or mm/rev): This is how fast the tool advances into the cut.
You can find excellent resources on machining speeds and feeds from organizations like the American Measuring Tool Manufacturers.
Step 7: Apply Coolant
Start your coolant flow before you begin cutting.
Step 8: Make the Cut
With the spindle running at the correct speed and coolant flowing, engage the feed. Advance the boring bar smoothly into the workpiece to the pre-determined depth. Listen for any unusual sounds or vibrations.
Step 9: Retract the Tool
Once the cut is complete, disengage the feed and retract the boring bar completely out of the bore before stopping the spindle. This prevents leaving a witness mark on the bore surface.
Step 10: Measure and Repeat (if necessary)
Measure the newly bored diameter. If it’s not yet to size, adjust your cross-slide position slightly and repeat the cutting process. For final sizing, take light finishing passes.
A Table of Common Boring Bar Operations and Considerations:
| Operation | Boring Bar Type Recommendation | Insert Type Consideration | Key Setup Tip |
|---|---|---|---|
| General Purpose Boring (Roughing) | Solid Steel or Indexable Bar | Durable carbide, positive rake geometry | Set tool on centerline, use moderate depth of cut. |
| Precision Sizing / Finishing | Indexable Bar, preferably carbide bar for high rigidity | Fine-grain
Related Posts |