Get the longest possible life from your carbide end mills with these proven tips for optimal performance and durability.
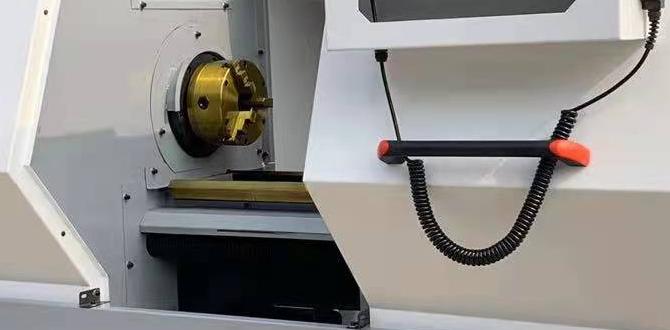
Are your carbide end mills wearing out faster than you’d like? It’s a common frustration for anyone getting into milling, whether it’s on a metal lathe repurposing for milling, a dedicated milling machine, or even a CNC. A worn-out end mill means inaccurate cuts, rough finishes, and more money spent on replacements. But don’t worry! With a few smart adjustments and a bit of know-how, you can dramatically extend the life of these vital cutting tools. We’ll walk through simple, effective strategies to help you get the most out of every carbide end mill, ensuring smoother cuts and more successful projects.
Understanding Your Carbide End Mill
Before we dive into extending its life, let’s quickly understand what makes a carbide end mill special. Carbide, or tungsten carbide, is an incredibly hard composite material. It’s much harder than high-speed steel (HSS), which allows carbide end mills to cut faster, handle tougher materials, and generally perform better. However, this hardness also makes it more brittle. This means while it can take more abuse in terms of cutting speed and material hardness, it can be susceptible to chipping or breaking if misused. Knowing this balance is key to keeping them sharp and effective.
Why Tool Life Matters for Beginners
For those just starting out with milling, tool life is more than just saving money. It’s about building confidence. When your tools perform reliably, your projects turn out better, and you learn more effectively. A dull or broken end mill can lead to frustration, potentially causing you to give up on a project or even doubt your abilities. By understanding how to care for your end mills, you’re investing in your own learning process and ensuring your machining journey is rewarding.
Key Factors Affecting Carbide End Mill Life

Several elements play a crucial role in how long your carbide end mill will last. Let’s break down the most impactful ones:
- Material Being Cut: Harder materials naturally wear down cutting tools faster.
- Cutting Speed and Feed Rate: Incorrect speeds generate excessive heat or put too much stress on the tool.
- Depth of Cut: Taking too deep a bite can overload the end mill.
- Coolant/Lubrication: Proper fluid application reduces heat and friction, extending tool life.
- Workholding: Chatter caused by a loose workpiece can quickly damage an end mill.
- Tool Condition: Using a chipped or already dull end mill exacerbates wear.
- End Mill Geometry: Different end mills are designed for specific tasks and materials.
The Importance of Selecting the Right End Mill
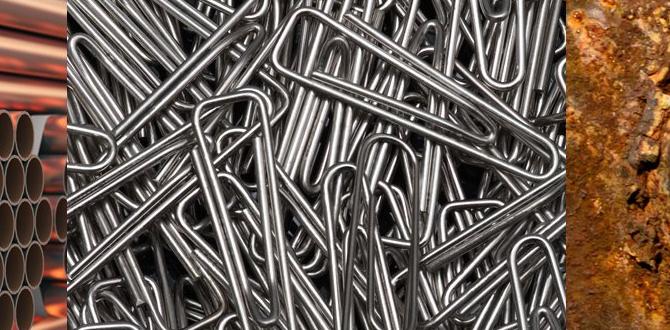
You wouldn’t use a hammer to screw in a bolt, and the same logic applies to end mills. Choosing the right type for your material and operation is the first step to long tool life. For instance, a stub-length end mill with a 1/4-inch shank and a 1/4-inch cutting diameter is excellent for rigidity and is a popular choice for general-purpose machining, especially in carbon steel, where strong, precise cuts are needed without excessive flex.
Types of Carbide End Mills
While we’re focusing on carbide, even within carbide, there are variations:
- Square End Mills: The most common type, used for slotting, profiling, and face milling.
- Ball Nose End Mills: Have a rounded tip, ideal for 3D contouring and creating radiused corners.
- Corner Radius End Mills: Feature a small radius at the cutting edge to strengthen the corners and reduce chipping.
- Roughing End Mills: Have serrated edges to break chips into smaller, manageable pieces, ideal for heavy material removal.
Optimizing Cutting Parameters: The Sweet Spot

This is where many beginner machinists can make the biggest improvements. Finding the right cutting speed (how fast the tool spins) and feed rate (how fast the tool moves through the material) is crucial. Too fast, and you’ll burn up the tool; too slow, and you’ll rub the material, causing heat and wear inefficiently.
Cutting Speed (Spindle RPM)
Carbide generally allows for much higher cutting speeds than HSS. A good starting point for a 1/4-inch carbide end mill in general-purpose steels might be around 200-400 surface feet per minute (SFM). To convert this to RPM for your specific machine:
Formula: RPM = (SFM 3.4) / Diameter (in inches)
For a 1/4-inch end mill at 300 SFM:
RPM = (300 3.4) / 0.25 = 4080 RPM
Always consult your end mill manufacturer’s recommendations for specific coatings and carbide grades, as these can significantly alter optimal speeds. Many manufacturers provide charts or online calculators.
Feed Rate
The feed rate determines how much material each cutting edge removes with each rotation (chip load). Too high a chip load and you risk chipping or breaking the tool. Too low, and you’re rubbing, generating heat without efficient cutting. A common starting point for a 1/4-inch, 4-flute end mill in mild steel might be around 0.002 – 0.005 inches per tooth (ipt).
Formula: Feed Rate (IPM) = RPM Number of Flutes Chip Load (ipt)
Using our example RPM of 4080, with 4 flutes, and a chip load of 0.003 ipt:
Feed Rate = 4080 4 0.003 = 48.96 inches per minute (IPM)
It’s always better to start conservatively and adjust upwards based on the sound of the cut and the chip formation. Listening to the machine is a vital skill for machinists.
The Role of Depth of Cut (DOC) and Width of Cut (WOC)

How much material you try to remove with each pass is critical, especially for smaller end mills like the common 1/4-inch shank variety. Taking shallow cuts is generally safer for tool life and for the rigidity of your setup.
Depth of Cut (DOC)
For carbide end mills, a radial depth of cut (how deep you cut sideways) is often more critical than axial (how deep you cut down). However, for full-width slotting, a good rule of thumb is to keep the axial DOC to no more than one to two times the end mill’s diameter. For a 1/4-inch end mill, this means cuts of 1/4 inch to 1/2 inch deep are generally manageable, assuming other parameters are correct. For lighter passes or profiling, you might use a much shallower DOC.
Width of Cut (WOC)
When profiling or pocketing where the end mill isn’t cutting full width, aim for a width of cut that is between 25% and 50% of the end mill’s diameter. This prevents the tool from being overloaded radially. A 1/4-inch end mill should ideally be engaging no more than 0.060 to 0.125 inches of its diameter into the material at any given time.
Coolant and Lubrication: The Unsung Heroes
Heat is the enemy of cutting tools. Carbide can withstand high temperatures better than HSS, but excessive heat will still degrade its cutting edge and coatings, leading to premature wear and chipping. Proper use of coolant or lubrication is non-negotiable for achieving long tool life, especially when cutting harder materials or at higher speeds.
When and How to Use Coolant
- Flood Coolant: For high-volume production or aggressive cuts, a flood coolant system is ideal. It provides excellent cooling and chip flushing.
- Mist Coolant: A good compromise for many shops, mist coolant delivers a fine spray of fluid and air, providing effective cooling and lubrication with less mess than flood systems.
- Cutting Fluid/Paste: For manual milling or light operations, applying a cutting fluid (oil-based) or paste directly to the cut can significantly help. This is essential when dry cutting is not an option due to heat buildup.
- Air Blast: In some cases, especially with softer materials like aluminum, a strong blast of compressed air can help evacuate chips and provide some cooling.
Always ensure the coolant is reaching the cutting zone effectively. For end milling, directing the stream or mist at the point where the flutes engage the material is best.
Workholding: A Stable Base for Success

A rigid setup is paramount. If your workpiece or the end mill itself can move or vibrate excessively (chatter), it will dramatically shorten the tool’s life. Chatter puts immense stress on the cutting edge, causing chipping and rapid wear.
Tips for Secure Workholding
- Use a Vise: Ensure your vise is clean, in good condition, and tightened securely around the workpiece. Use soft jaws if necessary to avoid marring delicate parts.
- Clamping: When not using a vise, use appropriate clamps, T-nuts, and bolts to firmly secure the workpiece to the milling table. Distribute clamping forces evenly.
- Rigid Tool Holders: Use a good quality tool holder for your end mill. A 1/4-inch shank end mill is best held in a collet or a shrink-fit holder for maximum rigidity and runout control. Avoid set-screw style holders if possible for critical operations, as they can cause runout.
- Avoid Protrusion: Keep the length of the end mill sticking out of the tool holder (stick-out) to the absolute minimum required for the job. Longer stick-out increases the potential for vibration and deflection.
Chip Evacuation: Don’t Let Chips Clog the Cut
Chips are the byproducts of cutting, but if they aren’t properly cleared from the cutting zone, they can cause problems:
- Re-cutting Chips: Dull chips getting re-cut create friction and heat, dulling the tool further.
- Chip Packing: In deep slots or pockets, chips can jam, leading to tool breakage.
- Poor Surface Finish: Re-cut stringy chips can get dragged across the finished surface, leaving a rough finish.
Strategies for Better Chip Evacuation
- Use the Right Number of Flutes: For slotting and deep pockets, 2-flute or 3-flute end mills are often preferred because they have more open flute space for chip evacuation compared to 4-flute mills.
- Peck Drilling/Engraving: For deep pockets, programmers and operators often use a “peck” drilling cycle. This involves plunging the end mill to a certain depth, retracting it to clear chips, and then plunging again. This is done repeatedly until the desired depth is reached.
- Through-Spindle Coolant: If your milling machine has through-spindle coolant capabilities, use it! It blasts coolant directly through the tool and out of the flutes, effectively clearing chips.
- Air Blast: As mentioned before, a directed stream of air can help push chips away, especially in materials that produce small, granular chips.
Coated End Mills: An Extra Layer of Protection
Many high-quality carbide end mills come with specialized coatings. These coatings serve multiple purposes, but a primary benefit is increased hardness and reduced friction, both of which contribute to longer tool life and better performance.
Common Coatings and Their Benefits
- TiN (Titanium Nitride): A general-purpose coating, gold-colored. It adds hardness and reduces friction, good for a range of materials.
- TiCN (Titanium Carbonitride): Dark gray. Harder than TiN, offering better abrasion resistance, good for steels and cast iron.
- TiAlN (Titanium Aluminum Nitride): Purple-black. Excellent for high-temperature applications, especially in hardened steels and exotic alloys, as it forms a ceramic layer at high heat.
- AlTiN / Alu-MagneSIUM-Nitride: Similar to TiAlN, but can withstand even higher temperatures.
- ZrN (Zirconium Nitride): Often used for aluminum and non-ferrous materials, it’s “non-reactive” with these softer metals, preventing built-up edge.
When selecting an end mill, consider the material you’re cutting and choose a coating designed for it. For example, if milling carbon steel, a TiAlN or TiCN coated end mill might offer superior life compared to an uncoated one.
Preventive Maintenance and Inspection
Treating your end mills like the precision tools they are means regular inspection and basic maintenance. This isn’t about sharpening them yourself (which is a specialized skill), but about recognizing when they need replacement.
What to Look For
- Chipped Edges: Look closely at the cutting edges for any small nicks or chips. Even minor damage can lead to a rougher finish and increased stress on the remaining edge.
- Wear Land: A shiny band forming on the flank of the cutting edge indicates wear. If this wear land becomes too wide (often more than about 0.010 inches), the tool is becoming dull.
- Heat Discoloration: Any blue or purple tint on the cutting edges or flutes suggests the tool has been run too hot, compromising its hardness and future life.
- Built-Up Edge (BUE): Soft materials like aluminum can stick to the cutting edge, forming a hardened “built-up edge.” If this isn’t controlled, it can lead to poor surface finish and breakage.
If you notice any of these issues, it’s time to consider replacing the end mill or sending it out for professional reconditioning if it’s a valuable tool.
Example Scenario: Milling Carbon Steel with a 1/4″ Carbide End Mill
Let’s put this into practice. Imagine you’re using a 1/4-inch, 4-flute, TiAlN coated carbide end mill to mill a pocket in 1018 carbon steel.
Material: 1018 Carbon Steel
Tool: 1/4″ 4-Flute TiAlN Coated Carbide End Mill (Square End)
Setup: Rigid vise on a manual milling machine. Using a mist coolant system.
- Choose the Right Tool: The 1/4″ 4-flute carbide is suitable. TiAlN coating helps with the heat generated by steel.
- Calculate RPM: Let’s aim for 350 SFM. RPM = (350 3.4) / 0.25 = 4760 RPM. Set spindle to 4750 RPM or as close as possible.
- Calculate Feed Rate: Start with a conservative chip load of 0.003 ipt. Feed Rate = 4750 RPM 4 Flutes * 0.003 ipt = 57 IPM.
- Set Depth of Cut (DOC): For pocketing, take a radial DOC of 0.100″. Axial DOC for the first pass can be 0.250″ (1x diameter).
- Engage Coolant: Turn on the mist coolant, directing it at the cutting zone.
- Workholding: Ensure the workpiece is securely clamped in the vise, and the end mill is properly seated in its holder with minimal stick-out.
- Make the Cut: Start the spindle, then engage the feed. Listen to the sound of the cut. If it sounds smooth and the chips are being cleared, it’s a good sign.
- Adjust as Needed: If the cut is too aggressive, you might reduce the feed rate slightly. If it sounds like rubbing, you might increase feed rate or DOC slightly, provided the machine is rigid enough.
By following these parameters and observing the cut, you’re well on your way to achieving good tool life.
Comparison: Coated vs. Uncoated End Mills
Understanding the benefits of coatings can help justify their slightly higher initial cost. Here’s a simplified comparison:
| Feature | Uncoated Carbide End Mill | Coated Carbide End Mill (e.g., TiAlN) |
|---|---|---|
| Initial Cost | Lower | Higher |
| Hardness | High (inherent to carbide) | Increased due to coating layer |
| Heat Resistance | Good | Excellent (especially TiAlN/AlTiN) |
| Friction Reduction | Relies on material being cut | Significantly reduced by coating |
| Tool Life |
Related Posts |