Carbide end mills are perfect for dry cutting 1/8 inch Delrin when you need clean, precise results with minimal hassle. This guide shows you exactly how to use them effectively for your projects.
Hey there, fellow makers! Daniel Bates here from Lathe Hub. Ever tried to cut Delrin and ended up with a melty, gummy mess? It’s a common frustration, especially when you’re just starting out with your mill. That sticky residue can gum up your tools and ruin your workpiece. But don’t worry, there’s a simple, effective solution: using the right 1/8 inch carbide end mill for dry cutting Delrin. In this guide, I’ll walk you through everything you need to know to get clean, sharp cuts every time, making your projects look professional and saving you a ton of headaches. Let’s get those wheels turning and your parts looking sharp!
Why 1/8 Inch Carbide End Mills Are Your Best Friend for Delrin
Delrin, also known as acetal or POM (polyoxymethylene), is a fantastic engineering thermoplastic. It’s strong, rigid, and has low friction, making it ideal for gears, bearings, and many other functional parts. However, it has a relatively low melting point. This means that if you use the wrong tool or technique, especially in a milling operation, the heat generated can melt the plastic. This leads to what we call “chip welding,” where the softened plastic sticks to your cutting edges and the workpiece, leaving a messy, often unusable result.
Enter the carbide end mill. Here’s why a 1/8 inch carbide end mill is particularly well-suited for dry cutting Delrin:
- Heat Resistance: Carbide is significantly harder and more heat-resistant than high-speed steel (HSS). This means it can withstand the heat generated during cutting much better, preventing the Delrin from melting and welding to the tool.
- Sharpness and Edge Retention: Carbide tooling holds an incredibly sharp edge and retains it longer. This is crucial for achieving clean cuts on plastics like Delrin, where a dull tool will push and distort the material.
- Small Diameter Advantage: A 1/8 inch (or 3.175mm) diameter is small enough to get into intricate details and can be run at higher rotational speeds (RPMs) without generating excessive heat for a given feed rate. This allows for smaller chip loads, which also helps manage heat.
- Dry Cutting Capability: While coolant can be used on plastics, dry cutting is often preferred for Delrin. Coolants can sometimes react with plastics or create a slippery mess that’s difficult to manage. With the right carbide end mill and speeds/feeds, dry cutting is not only possible but often the best method.
Many users specifically look for a “carbide end mill 1/8 inch 10mm shank long reach for Delrin dry cutting.” The 10mm shank provides extra rigidity compared to a standard 1/4 inch shank, especially important for longer reach cutters. Long reach allows you to cut deeper into the material without hitting your machine’s spindle or tool holder, offering more flexibility in your designs.
Choosing the Right 1/8 Inch Carbide End Mill for Delrin
Not all carbide end mills are created equal, especially when it comes to plastics. For Delrin, you’ll want to look for specific features:
Types of End Mills
For cutting Delrin dry, the sweet spot is usually a dedicated plastic or “O-flute” end mill, or a high-performance general-purpose end mill designed for non-ferrous materials. We’ll focus on carbide.
- O-Flute End Mills (Single Flute): These are often the absolute best for plastics. They have a highly polished, single cutting edge and typically no chip breaker. This design creates a large chip, lifts it away cleanly, and minimizes friction and heat buildup. Think of it like a router bit for plastics – it scrapes and peels rather than trying to shear.
- Two-Flute End Mills (General Purpose): A good quality two-flute carbide end mill designed for aluminum or plastics can also work well. Look for mills with high helix angles (around 30-45 degrees) and a polished flute finish. The higher helix helps to evacuate chips efficiently, and the polished flutes reduce friction.
- Ball Nose vs. Flat Nose: For general pocketing and contouring, a flat-nose (square) end mill is common. For creating fillets or 3D shapes, a ball-nose end mill is used. Both can work for Delrin, but the key is the flute design and finish.
Key Features to Look For:
When shopping for your 1/8 inch carbide end mill, keep an eye out for these specific characteristics:
- Material: Solid Carbide.
- Number of Flutes: 1 or 2 are generally best for Delrin. More flutes can lead to chip packing.
- Helix Angle: High helix (30° to 45°) is beneficial for chip evacuation.
- Flute Finish: Highly polished or mirror finish. This is critical! A polished flute reduces friction and prevents material from sticking.
- Coating: Generally, coatings are not needed or even desirable for Delrin. Coatings on carbide can sometimes increase friction or chip welding on plastics. Stick with uncoated, polished carbide.
- Shank Diameter: You’re looking for a 1/8 inch cutting diameter. For the reasons mentioned earlier, a 10mm shank (or 3/8 inch if metric isn’t an option) is often preferred for stability, especially for longer tools.
- Reach: Consider if you need a standard length or a “long reach” end mill. Long reach tools have a longer flute length and an extended neck, allowing for deeper cuts without interference.
Here’s a quick comparison of end mill types:
| End Mill Type | Best For Delrin Dry Cutting | Pros | Cons |
|---|---|---|---|
| O-Flute (Single Flute, Polished) | Excellent | Minimal heat, excellent chip evacuation, clean cuts, prevents melting. | Can chatter if speeds/feeds are not dialed in, may have less material removal rate than multi-flute tools. |
| 2-Flute (High Helix, Polished) | Good to Very Good | Good chip evacuation, can offer higher MRR than O-flute, versatile. | Slightly more potential for heat and chip welding than O-flute, requires careful speed/feed selection. |
| Multi-Flute (e.g., 4-Flute) | Poor | Good for metal, high MRR. | Poor chip evacuation for plastics, high risk of melting and chip welding. Not recommended for Delrin dry cutting. |
Setting Up Your Machine for Delrin
Before you even think about touching the Delrin with an end mill, proper setup is key. This is where many beginners run into trouble.
Spindle Speed (RPM) and Feed Rate
This is probably the most critical part. Too slow an RPM or too fast a feed rate will generate heat and melt your Delrin. Conversely, too fast an RPM with too slow a feed will also cause issues.
The goal is to take small, efficient “bites” of material (small chip load) that the flutes can carry away easily. For a 1/8 inch carbide O-flute or 2-flute end mill cutting Delrin dry, here are some starting points:
- Spindle Speed (RPM): Aim for higher RPMs. A good starting range is 10,000 – 25,000 RPM, but this can vary greatly depending on your machine’s capabilities and the specific end mill. Higher RPMs allow for faster surface speeds, which can help get the chips moving out quickly.
- Feed Rate (IPM – Inches Per Minute): This is directly tied to your RPM and the chip load. For a 1/8 inch end mill, a starting chip load might be between 0.001″ and 0.003″ per flute.
- Calculation Example: If you have a 1/8″ 2-flute end mill, run at 15,000 RPM, and aim for a chip load of 0.002″ per flute:Feed Rate = RPM × Number of Flutes × Chip Load per Flute
Feed Rate = 15,000 RPM × 2 flutes × 0.002 in/flute = 60 IPM
- Calculation Example: If you have a 1/8″ 2-flute end mill, run at 15,000 RPM, and aim for a chip load of 0.002″ per flute:Feed Rate = RPM × Number of Flutes × Chip Load per Flute
- Depth of Cut (DOC): Keep this relatively shallow. For a 1/8 inch end mill, a 1/8″ or even a 1/16″ DOC is often a good starting point. Taking deeper cuts increases the chip load and heat.
- Stepover (for pocketing): When clearing out an area (pocketing), the stepover is the percentage of the end mill’s diameter that it moves sideways on each pass. For Delrin, aim for a stepover of 25% to 50% of the end mill’s diameter. Smaller stepovers reduce the cutting load and friction.
Important Note: These are starting points! The best speeds and feeds depend on your specific machine rigidity, material stock, end mill brand, and desired finish. Always start conservatively and listen to your machine.
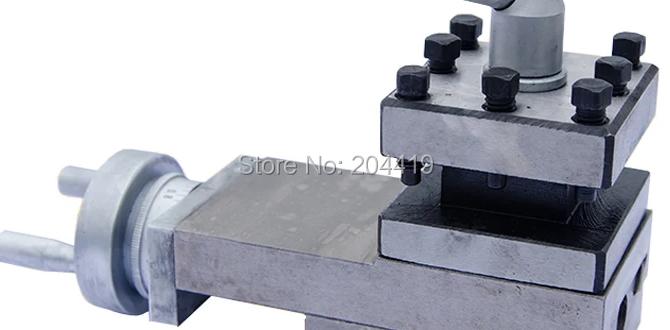
Workholding the Delrin
Securely holding your Delrin workpiece is paramount. Since Delrin is plastic, it can be easily deformed or crushed if clamped too tightly. However, it also needs to be held firmly enough so it doesn’t move during cutting, which can lead to catastrophic tool breakage or poor part quality.
- Use soft jaws or thin stock: If you’re milling from a larger block, consider using aluminum soft jaws on your vise. These can be machined to perfectly grip your part without marring it. If milling thin sheet stock, ensure it’s well-supported underneath to prevent flexing.
- Avoid over-tightening: Wrench down your vise firmly, but don’t crank on it. You want it secure, not deformed. Test by trying to wiggle the part; it shouldn’t move.
- Consider double-sided tape or a vacuum table: For very thin or delicate parts, high-strength double-sided tape (like VHB tape) or a vacuum table can provide excellent holding force without any clamping pressure that could deform the material. Always ensure your vacuum table is compatible with plastics and provides enough hold-down.
- Fixturing: For repetitive parts, designing a custom fixture or “jig” can be the most effective way to hold your Delrin consistently and securely.
Step-by-Step: Cutting Delrin with Your 1/8 Inch Carbide End Mill
Let’s get down to business. Here’s how to approach a typical milling job on Delrin using your 1/8 inch carbide end mill.
1. Design and Model Preparation
Ensure your CAD model is ready and that your CAM software is set up correctly. For Delrin, you generally don’t need to worry about coolant considerations in your toolpaths.
2. Select Your End Mill
As discussed, a 1/8 inch carbide O-flute or a 2-flute, high-helix, polished end mill is your best bet. Ensure it’s clean and free of any residue from previous jobs.
3. Set Up Your Machine
- Secure the Workpiece: Mount your Delrin block or sheet firmly using appropriate workholding.
- Install the End Mill: Insert the 1/8 inch carbide end mill into your collet or holder. Ensure it’s seated properly and tightened securely. A common issue is a slightly loose collet, which can cause runout and vibration.
- Set Zero and Tool Length Offset: This is crucial for accurate machining. Carefully set your machine’s X, Y, and Z zero points. Use a reliable tool length setter for your Z-axis.
4. Program Your CAM or Set Manual Speeds/Feeds
Input your chosen speeds and feeds into your CAM software. If you’re manually controlling, have your target RPM and feed rate ready.
- Starting Point: Use the recommended starting values from earlier in the guide. For example, 15,000 RPM, 60 IPM, 1/8″ DOC, 0.002″ chip load.
5. Perform a Dry Run (Air Cut)
Before cutting into your material, always run your toolpath in the air. This is a vital safety check. Watch the tool move through its programmed path to ensure there are no collisions with the workpiece, clamps, or other parts of your machine. Check that your programmed depths are correct.
6. Perform the First Plunge
With the dry run complete and everything looking good, it’s time to cut. Most CAM software will have a “plunge” move to get the end mill into the material before starting the cutting path. Ensure this plunge rate is also controlled and not excessively fast. A good plunge rate is typically slower than your XY feed rate, perhaps 10-30 IPM.
7. Execute the Cutting Path
Start the program. Listen carefully to the sound of the cut.
- Ideal Sound: A consistent, light “whirring” or “shaving” sound is good.
- Bad Sounds: A high-pitched squeal often indicates feeding too slowly or tool chatter. A loud grinding or “thumping” sound means you’re likely feeding too fast, taking too deep a cut, or have chip packing.
Observe the chips being produced. They should be small, free-moving shavings, not thin, stringy melted plastic. If you see any signs of melting or sticking, stop the machine immediately! You may need to decrease your feed rate, decrease your depth of cut, or increase your spindle speed (if possible). Conversely, if the cut seems too light and doesn’t seem to be removing material effectively, you might be able to slightly increase your feed rate or depth of cut.
8. Chip Evacuation
For dry cutting Delrin, chips should be flowing out of the flutes. If you have a chip control system on your CNC, ensure it’s set up to blow air or vacuum effectively. Avoid letting chips build up in pockets, as this will trap heat. If necessary, program “peck drilling” moves for deep pockets, where the tool retracts periodically to clear chips.
9. Finishing Passes
For critical dimensions or smooth surface finishes, consider taking a final “finish pass” with a very light depth of cut (e.g., 0.005″ to 0.010″) and a slightly reduced feed rate. This can help achieve a cleaner, more precise final part.
10. Inspection and Cleaning
Once the machining is complete, carefully remove the part from the machine. Inspect it for any signs of melting, burning, or rough edges. Use a soft brush or compressed air (wear eye protection!) to remove any residual dust or chips.
Troubleshooting Common Delrin Machining Issues
Even with the best tools, you might encounter a few hitches. Here’s how to address them:
Problem: Melting and Chip Welding
- Cause: Too much heat generated. This could be due to slow feed rates, deep cuts, dull tool, insufficient RPM, or high friction from a poorly finished tool.
- Solution:
- Increase feed rate (take bigger “bites”).
- Decrease depth of cut.
- Increase spindle RPM (if your machine allows).
- Ensure you are using a polished O-flute or 2-flute carbide end mill.
- Improve chip evacuation (clear chips more often from pockets).
Problem: Excessive Tool Chatter or Vibration
- Cause: Machine rigidity, loose workholding, incorrect speeds/feeds (often feeding too slowly for the RPM), or too aggressive a cut. Also, an end mill with excessive runout (not spinning perfectly true).
- Solution:
- Ensure your workholding is very secure.
- Reduce depth of cut and/or stepover.
- Try slightly increasing the feed rate.
- Check your collet and ensure the end mill is properly seated.
- If using a longer reach tool, ensure it’s not flexing excessively. A stiffer, shorter tool might be needed if your machine can’t handle the reach.
Problem: Poor Surface Finish
- Cause: Feeding too fast, dull tool, excessive runout, or not enough spindle speed.
- Solution:
- Take a dedicated finishing pass with a lighter depth of cut and potentially a slightly slower feed.
- Ensure your speeds