Quick Summary: A carbide end mill’s life is significantly extended in wood by using proper feeds and speeds, effective cooling and chip evacuation, and choosing the right cutter for the job. Taking these simple steps prevents premature wear and ensures smoother cuts for longer.
Carbide End Mill: Genius Extra Long Wood Tool Life
Hey there, fellow makers and woodworkers! Daniel Bates here from Lathe Hub. Have you ever felt that sting when your trusty end mill, especially those fancy carbide ones, starts to dull out way too soon when working with wood? It’s a common frustration, right? You invest in good tools, and you want them to last. Worn-out cutters mean rougher finishes and more work for you. But don’t worry! Today, we’re going to dive into some simple, yet genius, ways to make your carbide end mills live a much longer, happier life when cutting wood. We’ll cover everything from how you use them to what you can do to keep them sharp and effective.
Getting the most out of your tools isn’t just about saving money; it’s about achieving those crisp, clean cuts that make your projects shine. It’s about working smarter, not harder. We’ll break down the easy steps you can take, no complex theories needed. Let’s get those end mills performing at their best!
Why Carbide End Mills for Wood?
Before we talk about extending their life, let’s quickly touch on why carbide end mills are often a fantastic choice for woodworking, even though they are harder and more brittle than high-speed steel (HSS). Their extreme hardness means they can cut through tough materials and maintain a sharp edge for much longer than HSS, especially at higher speeds. However, this hardness also means they can chip or break if mishandled, which is whereProper care and usage become super important.
The Advantages in Woodworking:
- Superior Edge Retention: Carbide stays sharper for significantly longer periods compared to HSS. This means fewer tool changes and consistent cutting performance.
- Higher Cutting Speeds: Because they resist heat better, you can often run carbide end mills at faster spindle speeds, speeding up your machining time.
- Cutting Hardwoods and Composites: They excel at cutting dense hardwoods, engineered wood products, and even some plastics, where HSS might struggle or dull quickly.
Understanding Wood and Tool Wear
Wood isn’t as forgiving as some metals. It has grain, knots, and can vary greatly in density. These factors create unique challenges for cutting tools:
- Abrasiveness: Some woods, especially exotic hardwoods or those with silica content, are naturally abrasive and can quickly wear down even hard materials if not managed.
- Resin and Sap: Sticky resins can build up on the cutting edges, causing friction, increasing heat, and dulling the tool prematurely.
- Chip Formation: Wood chips can be stringy or gummy, and if not cleared away properly, they can recut, creating more heat and stress on the end mill.
Key Strategies for Extending Carbide End Mill Life
Now, let’s get to the good stuff – how to make those carbide end mills sing for longer! It doesn’t take a whole lot of mystery, just a few smart practices.
1. Optimize Your Feeds and Speeds
This is arguably the most critical factor. Running your end mill too fast or too slow, or pushing it too hard into the material, can drastically shorten its life and even cause catastrophic failure.
Spindle Speed (RPM): This is how fast the tool rotates. For carbide in wood, you can often run these at higher RPMs than you might with HSS. However, “too fast” depends on your machine’s rigidity and the specific wood. Start conservatively and listen to the cut.
Feed Rate: This is how fast the tool moves through the material. A feed rate that’s too slow can cause the tool to rub rather than cut, generating excessive heat and dulling the edge. Too fast, and you risk chipping the carbide or overloading the motor.
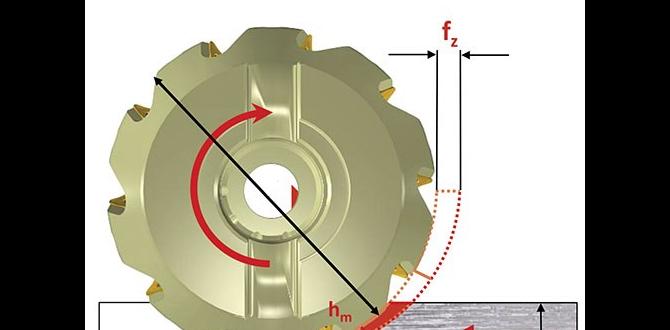
Chip Load: This is the thickness of the chip produced by each cutting edge (flute) of the end mill. It’s a crucial metric! A good chip load means the tool is efficiently removing material without excessive heat or force. You can calculate chip load using this formula:
Chip Load = Feed Rate / (Spindle Speed Number of Flutes)
For general woodworking with a 1/8″ or 3/16″ carbide end mill, aim for a chip load between 0.002″ and 0.006″. This is a starting point, and you’ll need to adjust based on the wood type, cutter diameter, and your machine’s capabilities.
Starting Point Recommendations
These are general guidelines. Always consult the end mill manufacturer’s recommendations if available and adjust based on your results.
| Wood Type | End Mill Type | Typical RPM Range | Typical Feed Rate (IPM) | Target Chip Load (Inches) |
|---|---|---|---|---|
| Softwoods (Pine, Cedar) | 2-Flute Straight or Spiral | 12,000 – 18,000 | 20 – 40 | 0.003 – 0.005 |
| Hardwoods (Oak, Maple) | 2-Flute Spiral | 12,000 – 18,000 | 15 – 30 | 0.002 – 0.004 |
| Plywood/MDF | 2-Flute Spiral | 12,000 – 18,000 | 20 – 40 | 0.003 – 0.005 |
| Exotic Hardwoods (Kanvas) | 2-Flute Spiral (High Quality) | 10,000 – 15,000 | 10 – 25 | 0.002 – 0.003 |
Note: IPM stands for Inches Per Minute. For example, an 8mm shank end mill would follow similar guidelines to a 3/8″ shank, adjusting for its smaller diameter.
2. Effective Chip Evacuation
Carbide end mills want to cut, not rub. If chips build up in the flutes, they get recut, which generates heat. Heat is the enemy of carbide’s sharp edge.
- Correct Tool Geometry: For wood, spiral flute end mills are usually preferred over straight-flute ones. The helical flute design helps to lift and clear chips more effectively from the cutting zone. Look for tools with generous flute gullets (the space between the flutes) to accommodate more chips.
- Air Blast or Vacuum: If your CNC router or mill has an air blast system, use it! Aiming a focused stream of compressed air at the cutting point blows chips away. Similarly, a dust collection system connected to a nozzle near the cutter can help immensely.
- Pecking (for deep holes): If you’re plunging a long end mill deep into the material, use a “peck” drilling motion. This means plunging a short distance, retracting to clear chips, and repeating. This is vital for preventing chip packing in deep pockets.
- Climb Milling vs. Conventional Milling: While both can be used, climb milling (where the cutter rotates in the same direction as the feed) can sometimes lead to better chip evacuation and a smoother finish, reducing stress. However, it’s crucial to ensure your machine has minimal backlash for this to be effective.
3. Coolant and Lubrication (Yes, Even for Wood!)
While we don’t typically use flood coolant like in metalworking, a little bit of help can go a long way.
- Compressed Air: As mentioned, this is the most common “coolant” for wood. It cools the cutting edge and blows away chips.
- Cutting Fluid (occasionally): For very dense or gummy woods, you might consider a mist coolant or a very light application of a specialized cutting fluid designed for wood or plastics. A very small amount of WD-40 sprayed lightly on the cutter before and during cutting can help resins from sticking. Be cautious, as too much can create fire hazards with fine dust. Always ensure proper dust collection and ventilation when using any sprays. You can learn more about general machining safety at OSHA’s machine guarding standard, which covers principles applicable to preventing accidents.
- Material Choice: Some woods are just plain gummy! If a specific wood continuously gums up your bit, you might need to adjust your speeds/feeds or consider a bit designed for sticky materials.
4. Choose the Right End Mill for the Job
Not all carbide end mills are created equal, especially when it comes to woodworking. For an extra-long tool life, the geometry matters.
Types of Carbide End Mills for Wood
- Single Flute: Excellent chip evacuation, good for softer woods and when dust collection is superb. Can load up in gummy woods.
- Double Flute (2-Flute): The most common and versatile. Offers a good balance of cutting action and chip clearance. Ideal for hardwoods, ply, and MDF.
- Compression Bits: These have both up-cutting and down-cutting flutes. They are fantastic for sheet goods (like plywood and MDF) to prevent tear-out on both the top and bottom surfaces, providing a clean edge all around.
- Up-Cut Spiral: Pulls chips up out of the cut. Good for clearing pockets but can lift the material.
- Down-Cut Spiral: Pushes chips down. Can provide a cleaner top surface finish but may pack chips in pockets.
- Straight Flute: Less common for wood these days, as they don’t evacuate chips as well as spirals.
“Extra Long” End Mills: When you need to cut deeper or reach further, extra-long end mills are essential. However, they also present greater challenges. When using an extra-long end mill (like a 3/16 inch 8mm shank extra long carbide end mill), you need to be particularly mindful of rigidity. They are more prone to vibration and deflection. Use slower feed rates and shallower depth-of-cut per pass than you would with a standard length cutter.
Coating: While less common for wood applications, some specialized coatings might offer minimal benefit for extremely abrasive materials, but generally, a sharp, uncoated carbide edge is king for wood.
5. Depth of Cut (DOC)
Never try to cut the full depth of your material in a single pass. This is a recipe for tool breakage and poor finish.
- Rule of Thumb: For general cutting, aim for a depth of cut that is no more than 0.5 times the diameter of your end mill. So, for a 1/4″ end mill, a depth of 0.125″ per pass is a good starting point.
- Longer End Mills: For those extra-long end mills, you need to be even more conservative. The further the cutting edge is from the collet, the less rigid the setup. A DOC of 0.25 to 0.3 times the diameter might be more appropriate.
Experimentation is Key: Start with conservative settings. If the cut is smooth, the chips look good (not wispy or burnt), and the tool isn’t making excessive noise, you can gradually increase your feed rate or depth of cut until you find the sweet spot.
6. Machine Rigidity and Tool Holding
A wobbly machine or a loose tool in the collet will destroy an end mill in no time. Carbide is brittle!
- Collet Quality: Ensure your collet is clean, correctly sized for the shank (an 8mm shank needs an 8mm collet!), and that the tool is inserted to the correct depth. A 3-jaw chuck is generally NOT recommended for end mills on a mill, but for some CNC routers, a good quality 8mm collet system is essential.
- Machine Stability: If your CNC router or milling machine shakes and rattles, it’s introducing vibration. This vibration gets amplified through the end mill, leading to premature wear and potential chipping. Regular maintenance and ensuring everything is tight is crucial. A well-maintained machine, like those often discussed in hobbyist engineering forums such as those found on Practical Machinist forums, will always perform better.
- Workpiece Clamping: Make sure your workpiece is held down firmly. If the wood moves during the cut, it’s like a sudden surge in cutting force, which can be disastrous for the tool.
7. Maintenance and Inspection
Just like any tool, regular attention pays off.
- Visual Inspection: Before and after each use, inspect your end mill for any signs of chipping, excessive wear on the cutting edges, or build-up of resin.
- Resin Removal: Keep a brass brush handy. You can gently brush the flutes to remove any resin build-up. For stubborn build-up, a specialized tool cleaner or even a bit of denatured alcohol on a cloth can help.
8. When to Sharpen or Replace
Even with the best care, every tool eventually wears out. Knowing when to sharpen or replace is part of maximizing life.
- Signs of Dullness:
- Increased friction and heat.
- Screeching or chattering noises during cutting.
- Rougher finish than usual.
- Wood is being burned rather than cut cleanly.
- Excessive force required to push the tool through the material.
- Sharpening: Carbide end mills can* be sharpened, but it’s a specialized process. For most hobbyists and DIY makers, especially with smaller end mills, the cost and complexity of professional carbide grinding might outweigh the cost of a new tool. However, if you have a particularly expensive or specialized carbide end mill, professional sharpening is an option.
- Replacement: For common sizes like a 3/16 inch 8mm shank extra long cutter, it’s often more economical and convenient to replace it when it becomes significantly dull or damaged.
Using an Extra Long End Mill Safely
Extra long end mills, particularly those with an 8mm shank, are incredibly useful for reaching deeper pockets or cutting thicker materials. However, their length introduces a significant challenge: increased potential for deflection and vibration.
Specific tips for Extra Long End Mills:
- Use a High-Quality Collet: A snug-fitting, precise 8mm collet is non-negotiable. Ensure it’s clean and properly seated in your spindle.
- Reduce Depth of Cut (DOC): As mentioned, be very conservative. A good rule is to take only 0.25 to 0.3 times the cutter diameter per pass. For a 3/16″ (approx 4.76mm) end mill, this would mean around 0.05″ to 0.06″ (1.2mm to 1.5mm) per pass.
- Lower Feed Rate: To compensate for reduced rigidity, you’ll generally need to use a slower feed rate. This reduces the force applied to the tool.
- Consider Climb Milling: When rigidity is a concern, climb milling (where the cutter direction matches the feed direction) can sometimes provide a smoother cut and better chip evacuation, provided your machine has minimal backlash.
- Listen and Watch Carefully: Pay very close attention to the cutting sound and the finish. Any signs of chatter or vibration mean you need to back off on your DOC or feed rate immediately.
By respecting the increased flexibility of long end mills and adjusting your cutting parameters accordingly, you can achieve successful cuts and extend their usable life.
FAQ: Your Carbide End Mill Questions Answered
Q1: Can I use carbide end mills for plywood and MDF?
A1: Absolutely! Carbide end mills are excellent for plywood, MDF, and other sheet goods. For the best finish and to prevent tear-out on both sides of the material, compression bits are highly recommended. Ensure you have good dust collection as these materials create fine dust.
Q2: How do I know when my carbide end mill is dull?
A2: You’ll notice signs like increased heat, rougher cuts, burn marks on the wood (instead of clean cuts), chattering or screeching noises, and requiring more force to cut. If your finish degrades significantly, it’s time to consider replacement or sharpening.
Q3: Should I use a 2-flute or 4-flute carbide end mill for wood?
A3: For most woodworking applications, a 2-flute end mill is preferred. The larger flute gullets provide better chip clearance, which is crucial for preventing heat buildup. 4-fl


