Carbide end mills make removing chips super easy. Proper chip evacuation prevents tool damage, improves your cuts, and keeps your workpiece clean. This guide shows you how to pick the right end mill and use it for smooth chip removal, even with tricky materials like wood.
Ever looked at a finished part and seen little notches or rough edges that weren’t supposed to be there? Or maybe your cutting tool gets gummed up with material, making it hard to get a clean finish? This is usually because the chips—the little bits of material that fly off during cutting—aren’t getting out of the way properly. When chips build up, they can jam the cutting edges, overheat the tool, and leave behind a messy, inaccurate cut.
But don’t worry! There are smart ways to handle this, especially when using carbide end mills. We’re going to break down exactly how carbide end mills are designed for “genius” chip evacuation and what you can do to make it work for you. Get ready to learn how to keep those chips flowing out so you can achieve smoother cuts and cleaner workpieces, every time.
Understanding Chip Evacuation: Why It Matters
Chip evacuation is basically how well your cutting tool can clear away the small pieces of material it makes as it cuts. Think of it like a tiny excavator clearing dirt as it digs. If the dirt piles up too fast, the excavator gets stuck. The same thing happens with your end mill.
When chips aren’t cleared effectively, they can:
- Cause Recutting: Chips get pushed back into the cut before they’re fully removed, leading to rough surfaces and tool wear.
- Overheat the Tool: Chips hold heat. If they can’t escape, they bake onto the tool, reducing its lifespan and performance.
- Damage the Workpiece: Bunched-up chips can gouge or scratch your material, ruining the finish.
- Increase Cutting Forces: A clogged tool requires more force to cut, which can lead to tool breakage or inaccurate machining.
- Shorten Tool Life: All these issues add up to a carbide end mill that wears out much faster than it should.
For beginners, mastering chip evacuation can feel like a secret handshake. But once you understand the principles, it’s straightforward. It’s all about making sure the chips have a clear path to escape the cutting zone.
Carbide End Mills: Designed for Performance
Carbide end mills are the workhorses for many machining tasks because carbide (a type of superhard ceramic) holds its edge much better and cuts faster than traditional high-speed steel (HSS). But even with carbide, good chip evacuation is key. Several design features contribute to this:
Flute Design
The flutes are the spiral grooves that run along the cutting edges of the end mill. Their geometry is critical for chip removal.
- Number of Flutes:
- 2-Flute End Mills: Generally offer the best chip clearance. They have larger open spaces between the flutes, allowing chips to exit more easily. These are excellent for softer materials and deep cuts where chip packing is a concern.
- 3-Flute End Mills: A good balance between chip clearance and tool rigidity. They can handle slightly more material than 2-flute mills and are often used for general-purpose machining.
- 4-Flute and More End Mills: Provide better surface finish and are more rigid, but have less flute volume for chip evacuation. They are best for harder materials or finishing passes where shallow cuts are made and chip load is lower.
- Helix Angle: This is the angle of the spiral flute. A higher helix angle (steeper spiral) can help “pull” chips up and out of the cut more effectively, especially in softer materials. Lower helix angles are generally more rigid.
- Flute Shape: Some end mills have polished or deep, open flute geometries specifically designed to reduce friction and allow chips to slide away more freely.
Coatings
While not directly part of the chip evacuation design, coatings on carbide end mills play a role in reducing friction and heat, which indirectly aids chip flow.
- PVD (Physical Vapor Deposition) Coatings: Like TiN (Titanium Nitride), TiAlN (Titanium Aluminum Nitride), or AlTiN (Aluminum Titanium Nitride), these coatings create a harder, smoother surface. A smoother surface means less material sticks to the tool, and heat is dissipated more effectively, helping chips flow away cleaner.
Specialty Designs
Some end mills are engineered with chip evacuation as a primary goal:
- Coolant-Through Holes: High-end carbide end mills often have small holes that run through the center of the tool, delivering coolant directly to the cutting edge and flushing chips out of the flutes. This is exceptionally effective for deep pockets or difficult-to-machine materials.
- Reduced Neck or Shank: For specific applications, you might see end mills with a necked-down shank or a slightly reduced diameter behind the cutting flutes. This is common on tools like finishing end mills or those designed for specific profiles. While not solely for chip evacuation, the reduced diameter can sometimes provide a slightly easier path for chips to escape, especially if the primary cutting diameter is large and the shank is narrower. A router bit, which shares similarities with end mills, often features designs that optimize chip flow for softer materials.
- Ball Nose and Radius End Mills: These have rounded tips. The smooth transition from the cutting edge to the shank can help chips flow more easily from the tip area compared to a sharp square corner.
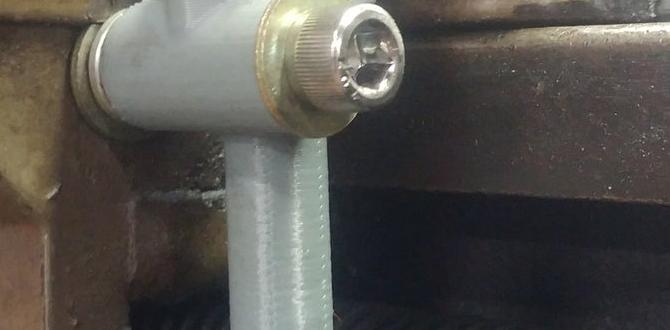
Carbide End Mill 3/16 Inch 8mm Shank Reduced Neck for Wood Chip Evacuation
Let’s talk about a specific type of carbide end mill you might encounter, especially if you’re working with softer materials like wood, plastics, or composites. Often, you’ll find tools described as “carbide end mill 3/16 inch 8mm shank reduced neck for wood chip evacuation“. This description tells us a lot:
- Carbide End Mill: The material and type of tool, giving it hardness and durability.
- 3/16 Inch: This is likely the cutting diameter. It’s a common size for detailed work.
- 8mm Shank: The diameter of the part that goes into your collet or tool holder. Note that the shank is larger (8mm is about 0.315 inches) than the cutting diameter (3/16 inch or 0.1875 inches). This is common to provide a sturdy grip while allowing for a finer cutting edge.
- Reduced Neck: This is the key feature for chip evacuation in this context. The area just behind the cutting flutes (the “neck”) is slightly smaller in diameter than the shank. This creates a more open space, giving chips more room to escape as they are generated and transported up the flutes.
- For Wood Chip Evacuation: Explicitly states its intended use. Wood, especially certain types, can produce long, stringy chips that are prone to packing. The reduced neck design is specifically to combat this, ensuring that finer detail work in wood can be done cleanly without the tool getting clogged.
This type of end mill is fantastic for your CNC router, especially for carving, engraving, or creating intricate patterns in wood. The larger shank (8mm) provides good rigidity in the tool holder, while the smaller cutting diameter (3/16″) and the reduced neck work together to let those wood chips fly out.
Choosing the Right End Mill for Chip Control
Selecting the correct end mill is your first line of defense for good chip evacuation. Here’s a quick guide:
| Material Being Machined | Recommended End Mill Type for Chip Evacuation | Key Features to Look For |
|---|---|---|
| Soft Metals (Aluminum, Brass) | 2-Flute or 3-Flute End Mill (Bright or TiN coated) | High helix angle, polished flutes, potentially with coolant-thru for aggressive cutting. |
| Hard Metals (Steel, Stainless Steel) | 4-Flute or More End Mill (TiAlN or AlTiN coated) | Lower helix angle for rigidity, robust construction. Chip evacuation is managed by precise feed rates and coolant. |
| Plastics | 2-Flute or Specialty Plastic End Mill (Single Flute is common) | Highly polished flutes, often with a sharp, aggressive geometry to prevent melting. Large flute volume. |
| Wood | 2-Flute End Mill or Reduced Neck End Mill (Often with a steeper helix) | Designed for bulk material removal. The specific “carbide end mill 3/16 inch 8mm shank reduced neck for wood chip evacuation” is excellent. Consider compression or up-spiral bits for cleaner top/bottom finishes. |
| Composites | Specialty ‘O’ Flute, ‘Bird’s Beak’, or Up-cut Bits | Designed to prevent delamination and clear abrasive dust effectively. Often have polished or specific geometries. A vacuum system is critical for dust. |
Material Compatibility and Machining Parameters
Even with the best end mill, your machining parameters must be set correctly. Consider:
- Chip Load: This is the thickness of the chip being removed per tooth. Too high, and you overload the flutes; too low, and you generate excessive heat (burning chips). Manufacturers provide recommended chip loads.
- Spindle Speed (RPM): Affects the cutting speed and how quickly chips are generated.
- Feed Rate: The speed at which the tool moves through the material. It needs to be coordinated with RPM and chip load to ensure proper chip thickness.
- Depth of Cut (DOC) and Width of Cut (WOC): Deeper or wider cuts generate more chips. You might need to use a “high-efficiency machining” (HEM) strategy (also known as trochoidal milling) for deep pockets. This involves taking shallow radial (width) cuts with a large axial (depth) engagement, spiraling around the pocket. This keeps the chip load consistent and ensures chips are evacuated more easily than a single deep cut.
Practical Tips for Genius Chip Evacuation
Now that you understand the “why” and “what,” let’s get into the “how” to ensure your carbide end mills perform brilliantly.
1. Keep it Clean: The Importance of Lubrication and Coolant
Even with carbide, heat is the enemy. Lubrication and coolant serve multiple vital purposes:
- Cooling: They absorb heat generated by friction, preventing the tool from overheating and losing its hardness.
- Lubrication: They reduce friction between the chip, the tool, and the workpiece, allowing chips to slide away more easily.
- Chip Flushing: A stream of coolant acts like a power washer, forcing chips out of the flutes and away from the cutting zone.
For wood, a blast of compressed air is often the most practical method. It blows chips away and also cools the bit. For plastics and metals, specific cutting fluids, mister systems, or flood coolant are highly recommended. Always consult the material manufacturer’s recommendations (carbide cutter manufacturers often provide detailed grade selection charts) and your end mill supplier for the best fluid choice.
2. Understand Your Feed Rate and Speed
This is where many beginners struggle. It’s a balancing act:
- Too Fast a Feed Rate: Creates overly thick chips that can jam the flutes.
- Too Slow a Feed Rate: Creates thin, wispy chips that generate a lot of heat due to rubbing rather than cutting, potentially melting plastic or dulling the tool on metal.
Start with the manufacturer’s recommended speeds and feeds, often found on their website or packaging. If you’re using a CNC machine, you can use calculators readily available online by searching “CNC speeds and feeds calculator.” Always err on the side of caution and test in scrap material first. The goal is to hear a good “sizzle” (sounds like frying bacon) rather than a loud screech or a smoky grind.
3. Peck Drilling and Plunge Cutting
When you need to cut downwards into material (plunge cutting), chips can pack very easily because there’s no sideways motion to help them escape. This is especially true in deep holes.
- Peck Drilling: This is a technique where you program the tool to plunge into the material a short distance, retract partially or fully to clear chips, and then plunge again. This repetitive action ensures chips are broken up and cleared effectively. Most CNC controllers have a “peck drilling” cycle for this purpose.
- Chip Breaking Passes: For manual milling, it’s good practice to chip break. After milling a certain depth, retract the tool slightly, reposition, and take a small “air cut” or very shallow pass to break any chips trying to adhere.
4. Air Blast and Vacuum Systems
For woodworking and plastics where coolant can be problematic or messy, a strong blast of compressed air is incredibly effective. It does two things:
- Clears Chips: Physically blows chips out of the flutes and away from the work area.
- Cools the Tool: The air helps dissipate heat.
On CNC routers, a downdraft or dust collection system is also essential. While primarily for dust control, the airflow can contribute to chip evacuation, especially for lighter materials like foam or plastic.
5. Visual Cues: What to Watch and Listen For
Your senses are your best tools:
- Sound: A consistent, pleasant cutting sound is good. A high-pitched squeal often means the tool is rubbing (too slow a feed or RPM for the material). A rattling or grinding sound indicates chips are packing or the tool is damaged.
- Smoke: Indicates excessive heat. Slow down your feed rate or increase coolant/air blast.
- Chip Appearance: Are they nice, curled chips (ideal for metals)? Or are they dusty, stringy, or melted goo? Dusty means too shallow a cut; stringy or melted means too much heat and friction.
- Workpiece Finish: A rough finish, notches, or burn marks are all signs of poor chip evacuation.
6. Tool Stick-out
The amount of the end mill that extends from your tool holder (stick-out) can affect rigidity and vibration. For best chip evacuation and accuracy, use the shortest practical stick-out. Too much stick-out can lead to chatter, which makes it harder to clear chips cleanly.
7. Climb Milling vs. Conventional Milling
How the tool rotates relative to its feed direction impacts chip formation:
- Conventional Milling: The tool rotates against the direction of feed. This tends to push chips away from the cutting edge but can lead to longer, stringier chips in softer materials, and can cause tool deflection.
- Climb Milling: The tool rotates in the same direction as the feed. This creates smaller, more manageable chips, reduces cutting forces, and generally results in a better surface finish and tool life. It’s often preferred for CNC machining. However, it requires a machine with zero backlash (or a system that accounts for it), as tool deflection can be amplified if play exists, leading to tool breakage.
For materials like wood and plastics, climb milling is generally superior for chip evacuation and finish. Always ensure your machine is capable of stable climb milling.
Troubleshooting Common Chip Evacuation Issues
Even with the best intentions, you might run into problems. Here’s how to fix them:
<td style=”border: 1px solid #ddd; padding: 8px
| Problem | Possible Cause | Solution |
|---|---|---|
| Chips packing in flutes |