Quick Summary:
A long reach carbide end mill is your secret weapon for machining tough D2 tool steel to a good depth. It helps minimize deflection and vibration, giving you cleaner cuts and longer tool life, even with less rigid machines.
Machining D2 tool steel can feel like wrestling a bear sometimes. It’s incredibly hard and tough, which is great for its intended use, but it makes cutting a real challenge. One of the biggest headaches is tool deflection – when your cutting tool bends or wobbles under the stress. This leads to rough surfaces, inaccurate dimensions, and a very unhappy machinist. But what if there was a way to get deeper into the material without fighting constant chatter and deflection? That’s where a specialized carbide end mill with a long reach comes into play, especially for materials like D2. Let’s dive into how this clever tool can make your life much easier and your D2 projects a success.
Why D2 Tool Steel is a Beast (and Why You Need the Right Tool)
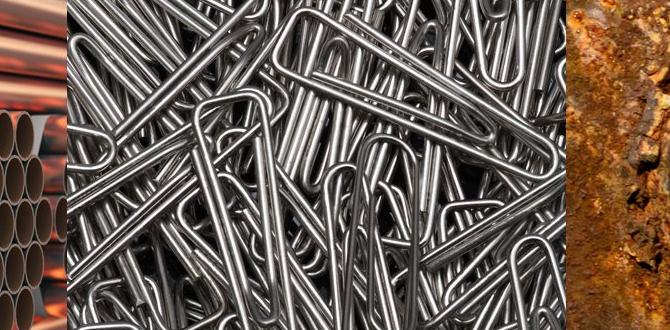
D2 tool steel is a high-carbon, high-chromium steel prized for its excellent wear resistance and toughness. Think of the cutting edges on dies, punches, and high-performance knives – that’s often D2 at work. Its hardness is its strength, but it also means it’s prone to work hardening, which is when the material near the cut becomes even harder. This rapid increase in hardness makes machining D2 incredibly difficult with standard tooling or setups.
The problem is compounded when you need to machine deeper slots or pockets. The further your end mill extends from its holder, the more leverage there is for forces to push it around. This leverage causes deflection. Imagine trying to push a spaghetti noodle against a hard surface versus a sturdy wooden dowel – the noodle bends easily (deflects), while the dowel resists much better. Your end mill, especially in a longer configuration, can behave a lot like that noodle when cutting tough materials.
This deflection can cause:
- Rough surface finishes.
- Inaccurate part dimensions.
- Increased tool wear (the cutting edge isn’t engaged properly).
- Chatter and vibration, which can damage the workpiece or the machine.
- Increased risk of tool breakage.
The Genius of Long Reach Carbide End Mills for D2
So, how does a “long reach” end mill help? It seems counterintuitive, right? More length, more reach, more leverage for deflection? The magic lies in the combination of factors:
1. Carbide: The Material Matters
First, let’s talk about carbide. Carbide (specifically tungsten carbide) is a composite material known for its extreme hardness and stiffness. It can withstand higher temperatures than high-speed steel (HSS) and retains its cutting edge much longer, especially when cutting hard materials like D2. This is crucial because D2 generates a lot of heat and requires a tool that can take the punishment without dulling or softening. For D2, carbide is non-negotiable.
2. “Long Reach” Design: More Than Just Length
The “long reach” aspect of these end mills isn’t just about having a longer shank. These tools are specifically engineered to handle the challenges of deeper cuts:
- Optimized Flute Length: While the overall tool is longer, the cutting flutes are often proportional. However, the design allows for a greater “stick-out” from the tool holder while maintaining structural integrity.
- Reduced Core Diameter: Sometimes, the core diameter (the part of the end mill behind the cutting flutes) is slightly reduced. This can reduce the amount of material the tool has to push through, potentially lowering cutting forces.
- Specialized Coatings: High-performance coatings like TiAlN (Titanium Aluminum Nitride) or TiCN (Titanium Carbonitride) are often applied to further enhance hardness, reduce friction, and improve heat resistance.
- Helix Angle and Chip Breakers: The geometry of the flutes is important. A higher helix angle (e.g., 30-45 degrees) can help with chip evacuation and reduce cutting forces. Some long reach end mills might also feature chip breakers, which are small notches in the cutting edge that break chips into smaller pieces, preventing them from accumulating and causing issues.
3. Minimizing Deflection: How It Works
Even though they have a longer reach, these end mills are designed to resist deflection better than a standard end mill that’s simply extended too far. Here’s a breakdown of how this is achieved:
- Increased Rigidity through Design: While a longer tool is inherently less rigid than a shorter one, the advanced carbide materials, coatings, and precise manufacturing tolerances make them significantly more rigid than what you’d get by just running a standard end mill “long.
- Controlled Engagement: The specific flute geometry and cutting edge design aim to minimize the cutting forces that cause deflection. By engaging the material in a way that reduces sideways pressure, the tool stays straighter.
- Vibration Damping: The specific materials and densities of carbide end mills can also help to damp out vibrations. Chatter is a common symptom of deflection, and these tools are designed to mitigate it.
Choosing the Right Long Reach Carbide End Mill for D2
Selecting the correct tool is key to success. For D2, you’ll want to consider these specifications:
Shank Diameter vs. Cutting Diameter: Finding the Balance
One common setup for D2 is a smaller cutting diameter with a more standard or even slightly larger shank diameter to provide rigidity where it counts. For instance, a carbide end mill 3/16 inch cutting diameter with an 8mm shank is a popular choice. The 8mm shank provides a good, rigid interface in common collets or holders, while the smaller 3/16″ (approx. 4.76mm) cutting diameter allows for deeper cuts with less torsional stress compared to a larger diameter tool at the same relative extension.
Key Specifications to Look For:
- Material: 100% Solid Carbide.
- Coating: TiAlN or similar high-performance coating for heat and wear resistance.
- Number of Flutes: For D2, a 2-flute or 3-flute end mill is generally recommended. More flutes can create more heat and chip packing issues in tough materials. 2-flute tools are good for slotting as they provide clearance for chips. 3-flute tools can sometimes offer a smoother finish in 2D contouring if chip evacuation is managed well.
- Helix Angle: Look for something in the 30-45 degree range. Some specialized tools might even have variable helix angles for improved vibration damping.
- Reach (Overall Length vs. Effective Reach): Pay attention to the overall length of the tool and, more importantly, the length of the flutes. You need enough flute length to make your desired cut depth, but you also need to consider how much “stick-out” you will have from your tool holder.
- Specific Design for Hard Materials: Manufacturers often have lines of end mills specifically designed for hardened steels. Look for descriptions like “for hardened steels,” “high-performance,” or “die and mold.”
Here’s a quick rundown of some important dimensions on a long reach end mill:
| Dimension | Description | Why It Matters for D2 |
|---|---|---|
| Cutting Diameter | The actual diameter of the cutting edges. | A smaller diameter (like 3/16″) with a longer reach can often be more rigid than a larger diameter tool at the same extension. |
| Shank Diameter | The diameter of the part that goes into the tool holder or collet. | An 8mm shank offers good stability in common holders, ensuring a secure grip and minimizing runout. It needs to match your collet or tool holder size. |
| Flute Length | The length of the cutting edges. | Must be sufficient for your desired cut depth. Longer flute length means more potential for deflection if not designed correctly. |
| Overall Length | The total length of the end mill. | Determines how far the tool can reach into a cavity or over an obstruction. |
| Reach (Effective Working Length) | Often refers to the distance from the back of the flutes to the tip. It’s a critical factor when calculating potential deflection. | This is the critical “stick-out.” The longer this is, the more stress the tool endures. Long reach cutters are engineered to handle this better. |
Setting Up for Success: Machining D2 Safely and Effectively
Even with the best tool, how you use it is paramount when machining tough materials like D2. Here are key considerations:
1. Tool Holding is Everything
This is perhaps the MOST critical factor for long reach tools. A standard collet chuck might not be sufficient. You need a tool holder that provides excellent concentricity (runout) and gripping force.
- High-Precision Collet Chunks: ER collet systems are very common. Ensure you are using a high-quality ER collet (e.g., DIN 6499) and a matching high-precision chuck for your milling spindle. This will grip the shank evenly and minimize wobble. A runout of 0.0005″ (0.012mm) or less is desirable.
- Shrink-Fit Holders: For ultimate rigidity and accuracy, shrink-fit tool holders are the gold standard. They provide a very precise and strong grip on the tool shank.
- Set Screw Holders: While sometimes used, these can be less ideal for long reach tools as they can create uneven pressure points and are prone to the tool slipping or wobbling if not tightened perfectly. Use with caution.
The goal is to present the tool to the material as straight and true as possible. Any wobble at the shank will be amplified at the cutting tip, especially with a long reach tool.
2. Spindle Speed (RPM) and Feed Rate (IPM/mm/min)
Machining parameters are crucial. Rushing the process or using incorrect settings will lead to failure. These are starting points and will require adjustment:
- Lower RPMs: D2 is hard, so you generally want to run at lower spindle speeds compared to softer steels. This reduces the heat generated by friction. For a 3/16″ carbide end mill, you might start in the range of 1000-3000 RPM, depending on your machine and the specific tool’s recommendations.
- Appropriate Feed Rate: This is where you remove material. Overfeeding will overload the tool, while underfeeding can cause rubbing and work hardening. For D2, aim for a moderate to aggressive feed rate that allows the tool to cut cleanly without excessive chatter. A good rule of thumb is to aim for a chip load of 0.001″ – 0.003″ (0.025mm – 0.075mm) per flute. So, for a 2-flute end mill, your feed per minute (FPM) would be: RPM x Number of Flutes x Chip Load per Flute.
- Example Calculation: Let’s say you set your RPM to 2000. You have a 2-flute end mill. You aim for a chip load of 0.002″ per flute.Feed Rate (IPM) = 2000 RPM 2 Flutes 0.002″ = 8 inches per minute.
Always consult the end mill manufacturer’s recommendations if available. Resources like the Sandvik Coromant Machining Calculator can be invaluable for determining optimal parameters. Remember that these are starting points; listen to your machine and your tool.
3. Cutting Strategy: Embrace Climb Milling and Light Cuts
The way you approach the cut significantly impacts tool life and accuracy:
- Climb Milling: Whenever possible, use climb milling (also known as conventional milling in some contexts, but the geometry here is where the tool engages the material with the rotation pushing the chip away). In climb milling, the cutter rotates in the same direction as the feed. This tends to produce a smaller chip load, reduces the tendency for the tool to “dig in” and climb over the material, and can result in a better surface finish. Traditional (up) milling can be very aggressive and has a higher tendency to cause deflection and tool breakage in hard materials.
- Step-overs and Step-downs: Don’t try to hog out all the material in one go.
- Step-over: For 2D contouring, keep your step-over (the distance the tool moves sideways) relatively small, especially when machining D2. A step-over of 20-40% of the tool diameter is often a good starting point.
- Step-down: For pocketing or slotting, use conservative step-downs. While long reach end mills allow for deeper cuts, you might not need to take the full depth in a single pass. If you can achieve your desired depth with fewer passes, that’s often better than one very deep, high-stress pass. For D2, a step-down of 0.1-0.2 times the tool diameter might be appropriate, depending on your setup’s rigidity.
- Avoid Ramping into Material in an Arc: If your CAM software allows, use a trochoidal milling strategy or a helical interpolation to enter a pocket or slot. This involves a series of small, controlled arcs that continuously engage and disengage the cutting edges, reducing the shock load on the tool compared to plunging straight down.
4. Coolant and Lubrication: Essential!
Machining D2 generates significant heat. Without proper cooling, your carbide tool will lose its hardness, chip evacuation will be poor, and you risk thermal shock, which can crack the tool.
- Flood Coolant: A good flood coolant system is highly recommended. It flushes chips away, cools the cutting zone, and lubricates the cut.
- MQL (Minimum Quantity Lubrication): For some setups, an MQL system can be effective, delivering a fine mist of lubricant and coolant directly to the cutting edge.
- Air Blast: While better than nothing, a simple air blast is usually insufficient for D2.
Ensure the coolant is appropriate for machining steel and that it’s directed precisely at the cutting zone.
5. Machine Rigidity is King
A long reach end mill can only do so much if your machine is wobbly. A rigid machine tool, like a well-maintained milling machine with tight ways and a sturdy frame, is essential for successful machining of hard materials. Check for backlash in your machine’s axes and ensure all gibs are properly adjusted. For hobbyists on lighter machines, you might need to take even lighter cuts or opt for a slower, more deliberate approach.
Troubleshooting Common Issues with Long Reach End Mills in D2
Even with the best practices, you might encounter problems. Here’s how to address them:
Issue: Excessive Chatter or Vibration
- Solution 1: Adjust Feed Rate. Try increasing the feed rate slightly. This encourages the tool to take a bigger bite and reduces rubbing.
- Solution 2: Adjust Spindle Speed. Sometimes, a small change in RPM can “tune out” harmonic vibrations. Experiment with slightly higher or lower speeds.
- Solution 3: Reduce Depth of Cut. Take shallower cuts axially (step-down) or radially (step-over).
- Solution 4: Check Tool Holder. Ensure your collet and holder are clean, tight, and providing minimal runout.
- Solution 5: Use an Insert Stabilizer Bar: For very deep cuts on larger machines, specialized boring bars with vibration damping capabilities exist. (Less common for small end mills, but the principle applies).
- Solution 6: Consider a Different Tool Geometry: Some tools have variable helix angles designed specifically to break up harmonics.
Issue: Poor Surface Finish
- Solution 1: Lighten the Chip Load. If the finish is rough and torn, you might be taking too heavy a cut. Reduce feed rate or RPM slightly.
- Solution 2: Check for Tool Wear. A worn edge will lead to a poor finish. Inspect the end mill.
- Solution 3: Improve Coolant Flow. Ensure coolant is reaching the cutting edge effectively.
- Solution 4: Ensure Proper Tool Centering. Worn spindle bearings or a poorly gripped tool can cause inaccuracies.
- Solution 5: Climb Milling. Double-check that you are using climb milling where appropriate.
Issue: Tool Breakage
- Solution 1: Reduce Feed Rate. You’re likely pushing too hard.