Lathe Turning Olive Wood Bowl Techniques: A Comprehensive Guide

Understanding Olive Wood Characteristics
Unique properties and grain patterns of olive wood. Durability and resistance to moisture.
Olive wood is not just pretty; it’s like nature’s superstar! Its unique grain patterns bring a special touch to every bowl. You’ll spot swirls and lines that look like they were painted by an artist. Plus, this wood is tough! It stands strong against moisture, making it perfect for kitchen items. So, if your bowl accidentally gets a splash of water, it won’t weep. Just wipe it down and move on – no drama here!
| Property | Description |
|---|---|
| Grain Patterns | Unique swirls and lines |
| Durability | Strong and moisture-resistant |
| Use | Ideal for kitchen items |
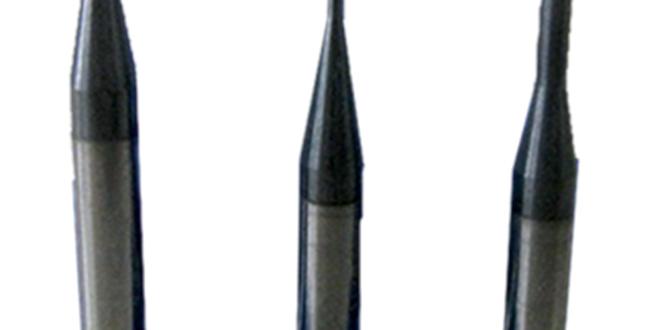
Tools and Equipment for Lathe Turning
Essential tools needed for turning olive wood. Recommended lathe specifications for optimal results.
Creating stunning olive wood bowls starts with having the right tools. You’ll need a reliable lathe, chisels, and a good set of sanding pads. Look for a lathe that runs smoothly at about 1,000 RPM. This is a sweet spot for turning olive wood. Always remember, it’s not the size of your tool that matters, but how you use it. Happy turning!
| Tool | Purpose |
|---|---|
| Lathe | Turns wood into shape |
| Chisels | Carves and details your bowl |
| Sanding Pads | Smooths the surface for a nice finish |
Preparation of Olive Wood for Turning
Best practices for selecting and harvesting olive wood. Techniques for drying and preparing the wood.
Choosing olive wood for turning is important. Look for pieces that are solid and free of cracks. Harvesting while the wood is fresh helps. This wood is dense, which makes it beautiful and strong for bowls. Drying the wood correctly is also key. First, cut it into smaller pieces. Then, let it air dry slowly. This can take weeks but prevents cracking. Another method is using a drying kiln for faster results.
Best Practices for Selecting and Harvesting Olive Wood
Always pick healthy trees. The best time to harvest is in the winter. This is when the sap is lower. It helps the wood stay strong and prevent breaking.
Techniques for Drying and Preparing the Wood
- Cut the wood into smaller sections.
- Air dry to prevent moisture problems.
- Use a drying kiln for quicker preparation.
Basic Lathe Turning Techniques
Stepbystep guide for initial shaping of the bowl. Tips for achieving a smooth finish on the interior and exterior.
Start by placing your olive wood blank securely on the lathe. Turn on the lathe and slowly shape the bowl’s outer curve. Next, work on the inside, keeping it gentle and even. To get a smooth finish:
- Use sharp tools for clean cuts.
- Sand the surface regularly to remove rough spots.
- Finish with a soft cloth and wax for shine.
These steps create a beautiful, functional bowl. The right technique makes a big difference!
What is the best way to ensure a smooth finish?
To ensure a smooth finish, always use sharp tools and sand all surfaces. This helps remove any bumps and gives your bowl a nice look.
Advanced Turning Techniques
Exploring various shaping and detailing methods. Techniques for creating decorative elements.
Turning wood can be fun and creative. You can use advanced turning techniques to shape wood in cool ways. Here are some methods to explore:
- Shaping Strategies: Try using different tools to create smooth curves and angles.
- Detailing Methods: Use chisels and sanders to add fine details.
- Decorative Elements: Consider adding carvings, patterns, or colors to make your bowl unique.
These techniques help bring your ideas to life. Skilled woodturners can create amazing designs that catch the eye!
What are the benefits of advanced turning techniques?
Advanced techniques improve your skills and make your projects more interesting. They help you create better designs and add personal flair.
Sanding and Finishing the Bowl
Best sanding practices for olive wood. Recommended finishes to enhance and protect the wood.
Sanding is important for olive wood bowls. It makes the wood smooth and ready for finishing. Start with a rough grit sandpaper, like 80 or 120. Then, move to finer grits, like 220, for a silky feel. Remember to sand with the grain, not against it. This helps avoid scratches.
To protect and enhance your bowl, consider these finishes:
- Food-Safe Mineral Oil: Great for a natural look.
- Beeswax: Adds shine and protects from moisture.
- Shellac: Creates a hard and glossy finish.
Each option brings out the beauty of olive wood. Choose one that suits your style!
What are the best sanding techniques for olive wood?
For a smooth finish, use fine sandpaper like 220-grit. Sand with the grain to avoid scratches. Keep sanding until you feel a soft surface.
Common Mistakes to Avoid
Frequently encountered issues during turning. Solutions and preventative measures.
Common problems can happen while turning an olive wood bowl. Here are some mistakes to avoid:
- Uneven Cuts: This can occur if the tool is not sharp. Keep your tools well-maintained to prevent this.
- Cracks in Wood: Sudden changes in temperature can cause wood to crack. Store your wood in a stable environment.
- Improper Speed: Too fast or too slow can ruin your design. Find the right speed for your lathe.
Paying attention to these details can help create beautiful bowls. Turn wisely and enjoy the art!
What is the best way to ensure a smooth finish?
The best way to achieve a smooth finish is to sand the bowl gradually. Start with a coarse grit and work your way to a fine grit. This makes the surface feel nice and smooth.
Care and Maintenance of Olive Wood Bowls
Tips for cleaning and preserving the bowl. Recommended oils and treatments for longevity.
To keep your olive wood bowl beautiful, clean it gently. Use warm water and mild soap. Avoid soaking or using harsh chemicals. For preservation, apply mineral oil or beeswax regularly. This helps keep the wood moist.
- Clean with warm, soapy water.
- Dry it immediately with a soft cloth.
- Apply mineral oil every month.
- Use beeswax for extra shine.
These simple steps ensure your bowl lasts and looks great!
How often should you oil an olive wood bowl?
You should oil your olive wood bowl every month. This keeps the wood healthy and prevents drying out.
What oils are good for olive wood bowls?
Mineral oil and food-grade carnauba wax are great choices. They protect and enhance the wood’s beauty.
Conclusion
In summary, mastering lathe turning techniques for olive wood bowls can bring great satisfaction. You learn to shape, sand, and finish beautiful pieces. Remember to choose quality wood and use proper tools. Practice regularly to improve your skills. We encourage you to explore more resources or videos online. Get started on your own olive wood bowl today!
FAQs
Sure! Here Are Five Related Questions On The Topic Of Lathe Turning Olive Wood Bowls:
Sure! Here are five interesting questions about turning olive wood bowls on a lathe: 1. What tools do we need to turn olive wood bowls? 2. How do we start turning a bowl on the lathe? 3. Can we decorate our olive wood bowls? 4. What are the best tips for finishing the bowl? 5. Why is olive wood a good choice for bowls? Let me know if you want more details on any of these!
Sure! Just give me the question you’d like me to answer, and I’ll be happy to help.
What Are The Best Tools And Techniques For Efficiently Turning Olive Wood Into A Bowl On A Lathe?
To make a bowl from olive wood on a lathe, you’ll need a few tools. A good bowl gouge helps shape the wood. You should also have a parting tool for cutting away extra wood. Use sandpaper to smooth the bowl’s surface when you’re done. Remember to wear safety gear, like goggles, to protect your eyes!
How Does The Moisture Content Of Olive Wood Affect The Turning Process And The Final Product?
The moisture content in olive wood can change how we shape it. If the wood is too wet, it can be hard to turn. Wet wood may crack or split while we work with it. When the wood is dry, it’s easier to shape and gives a smoother finish. This means our final product looks better and lasts longer.
What Safety Precautions Should Be Taken When Lathe Turning Olive Wood To Avoid Injury And Damage To The Wood?
When using a lathe to turn olive wood, always wear safety goggles to protect your eyes. Use gloves to keep your hands safe from splinters. Be careful and keep your hair tied back to avoid it getting caught in the machine. Make sure the wood is tight and secure to prevent it from flying off. Finally, keep your workspace clean to avoid tripping or getting hurt.
Are There Specific Finishing Techniques Recommended For Enhancing The Natural Beauty Of Olive Wood Bowls After Turning?
To make your olive wood bowls look beautiful, you can use some simple finishing techniques. First, you can sand the bowl smooth with fine sandpaper. Then, apply food-safe mineral oil to bring out the wood’s color. You can also use beeswax for a nice shine. These steps help the bowl look pretty and keep it safe to use.
How Does The Grain Pattern Of Olive Wood Impact The Design And Aesthetics Of Turned Bowls?
The grain pattern of olive wood makes each bowl unique. You see beautiful swirls and lines that create interesting designs. When we turn the bowls, these patterns stand out and catch the eye. This makes the bowls not just useful, but also really pretty to look at. Olive wood bowls can be special pieces in your home!
{“@context”:”https://schema.org”,”@type”: “FAQPage”,”mainEntity”:[{“@type”: “Question”,”name”: “Sure! Here Are Five Related Questions On The Topic Of Lathe Turning Olive Wood Bowls:”,”acceptedAnswer”: {“@type”: “Answer”,”text”: “Sure! Here are five interesting questions about turning olive wood bowls on a lathe: 1. What tools do we need to turn olive wood bowls? 2. How do we start turning a bowl on the lathe? 3. Can we decorate our olive wood bowls? 4. What are the best tips for finishing the bowl? 5. Why is olive wood a good choice for bowls? Let me know if you want more details on any of these!”}},{“@type”: “Question”,”name”: “”,”acceptedAnswer”: {“@type”: “Answer”,”text”: “Sure! Just give me the question you’d like me to answer, and I’ll be happy to help.”}},{“@type”: “Question”,”name”: “What Are The Best Tools And Techniques For Efficiently Turning Olive Wood Into A Bowl On A Lathe?”,”acceptedAnswer”: {“@type”: “Answer”,”text”: “To make a bowl from olive wood on a lathe, you’ll need a few tools. A good bowl gouge helps shape the wood. You should also have a parting tool for cutting away extra wood. Use sandpaper to smooth the bowl’s surface when you’re done. Remember to wear safety gear, like goggles, to protect your eyes!”}},{“@type”: “Question”,”name”: “How Does The Moisture Content Of Olive Wood Affect The Turning Process And The Final Product?”,”acceptedAnswer”: {“@type”: “Answer”,”text”: “The moisture content in olive wood can change how we shape it. If the wood is too wet, it can be hard to turn. Wet wood may crack or split while we work with it. When the wood is dry, it’s easier to shape and gives a smoother finish. This means our final product looks better and lasts longer.”}},{“@type”: “Question”,”name”: “What Safety Precautions Should Be Taken When Lathe Turning Olive Wood To Avoid Injury And Damage To The Wood?”,”acceptedAnswer”: {“@type”: “Answer”,”text”: “When using a lathe to turn olive wood, always wear safety goggles to protect your eyes. Use gloves to keep your hands safe from splinters. Be careful and keep your hair tied back to avoid it getting caught in the machine. Make sure the wood is tight and secure to prevent it from flying off. Finally, keep your workspace clean to avoid tripping or getting hurt.”}},{“@type”: “Question”,”name”: “Are There Specific Finishing Techniques Recommended For Enhancing The Natural Beauty Of Olive Wood Bowls After Turning?”,”acceptedAnswer”: {“@type”: “Answer”,”text”: “To make your olive wood bowls look beautiful, you can use some simple finishing techniques. First, you can sand the bowl smooth with fine sandpaper. Then, apply food-safe mineral oil to bring out the wood’s color. You can also use beeswax for a nice shine. These steps help the bowl look pretty and keep it safe to use.”}},{“@type”: “Question”,”name”: “How Does The Grain Pattern Of Olive Wood Impact The Design And Aesthetics Of Turned Bowls?”,”acceptedAnswer”: {“@type”: “Answer”,”text”: “The grain pattern of olive wood makes each bowl unique. You see beautiful swirls and lines that create interesting designs. When we turn the bowls, these patterns stand out and catch the eye. This makes the bowls not just useful, but also really pretty to look at. Olive wood bowls can be special pieces in your home!”}}]}