Quick Summary: Upgrade your lathe with a quick change tool post (QCTP) to dramatically speed up tool changes. This essential upgrade eliminates the need for re-aligning tools for every operation, boosting efficiency and accuracy for both beginners and experienced machinists. It simplifies your workflow, making turning much more enjoyable and productive.
Hey there, fellow makers! Daniel Bates from Lathe Hub here. If you’ve spent any time at all with a metal lathe, you know the drill: you finish one cut, then you have to loosen a bolt, swap out your tool, tighten it again, and meticulously re-align it to the center of your workpiece. This can be tedious, time-consuming, and frankly, a bit frustrating, especially when you’re learning. It slows down your project and can even lead to minor inaccuracies if your alignment isn’t perfect each time. But what if I told you there’s a way to make this whole process a breeze? Enter the quick change tool post for your lathe. It’s a game-changer, and in this guide, I’ll show you exactly why it’s an essential upgrade and how it can transform your machining experience. Get ready to make your lathe sing!
What is a Quick Change Tool Post (QCTP) and Why You Need One
At its heart, a quick change tool post (QCTP) is a clever system designed to hold various lathe tools and allow you to swap them out incredibly fast. Instead of fiddling with a standard tool post that holds just one tool at a time, a QCTP features multiple tool holders that you can pre-set and then quickly, accurately lock into place on the lathe’s cross slide. Think of it like a high-tech holster for your cutting tools.
For beginners, this means less time spent fumbling with wrenches and more time actually cutting metal or shaping wood. It significantly reduces the margin for error because once you’ve set a tool holder, subsequent insertions of that same holder will return the tool to the exact same position and height. This consistency is crucial for achieving precise results and building confidence with your lathe.
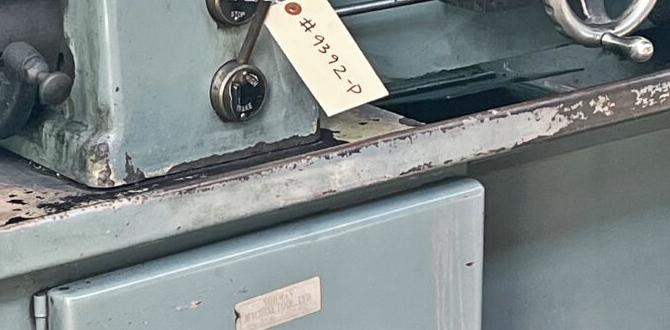
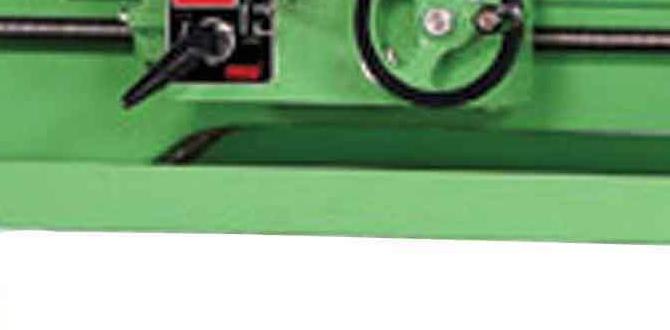
The Frustration of the Standard Tool Post
Let’s chat about the stock tool post that usually comes with a lathe. It’s the familiar wedge-type or T-slot type that holds a single tool bit. While functional, it has some inherent drawbacks:
- Tedious Tool Changes: Swapping between operations like facing, turning, and threading requires removing the tool, adjusting its height, and re-tightening. This can take several minutes for each change.
- Alignment Woes: Getting the tool bit precisely on the spindle centerline is critical. With a standard post, you might need shims or careful adjustments every single time, which can be frustrating and time-consuming, especially for new users.
- Limited Flexibility: You can only have one tool set up at a time. This means if you want to switch from roughing to finishing, or from turning to drilling with a tailstock tool, you’re back to square one with setup.
- Accuracy Issues: Even slight errors in re-aligning the tool can affect the final dimensions of your workpiece.
Imagine you need to face off the end of a piece, then turn it down, then cut internal threads. With a standard post, that’s at least three separate, time-consuming setups for just one part. For hobbyists and those learning, this can quickly lead to projects taking much longer than anticipated and can be a major deterrent.
How a Quick Change Tool Post Works
The magic of a QCTP lies in its two main components: the tool post body (which mounts to the lathe’s cross slide) and the various tool holders. The post body has slots or locking mechanisms that accept the tool holders. The holders themselves have internal mechanisms that ensure tools are seated firmly and at the correct height.
Here’s a simplified breakdown of the common types and how they operate:
Common QCTP Types
While there are several variations, the most popular types for DIY and hobbyist lathes are:
| Type | Description | Pros | Cons |
|---|---|---|---|
| Aloris / bxa Style | This is perhaps the most common and widely recognized system. It uses a cone-shaped stud on the holder that fits into a mating cone-shaped slot on the post body. A lever or cam mechanism locks the holder securely. | Very rigid, excellent repeatability, widely available tool holders, robust. | Can be more expensive, might require a slightly larger tool post body depending on the size. |
| KDK / Dorian Style | Similar in principle to Aloris, often featuring a dovetail mating surface between the post and holder, locked by cams or screws. | Also very rigid and repeatable, excellent quality, often found on higher-end machines. | Can be even more expensive if buying official holders, less common in the DIY market. |
| No. 10 / Econo Style | These are typically simpler, often using a T-slot on the post body and a corresponding T-shaped base on the holder. They are secured by a bolt or clamp from the side or top. | More affordable, very simple design, easy to understand. | May not be quite as rigid or offer the same level of super-fine repeatability as higher-end systems. |
For most hobbyists and beginners, the Aloris or bxa style (often available in compatible, more affordable versions) is an excellent choice. They offer a fantastic balance of performance, durability, and cost. You can often find “clones” or compatible systems that perform just as well for a fraction of the cost of the originals.
The Simple Mechanism
Let’s take the common bxa style as an example. The tool post body attaches to your lathe’s compound rest. It has a vertical slot with a tapered or conical shape. Each tool holder also has a mating tapered or conical stud on its base. When you insert a tool holder into the post body and engage the locking mechanism (usually a lever or a cam), it draws the holder tightly into the post, creating a very solid connection. Because the taper is precisely machined, no matter how many times you remove and re-insert that holder, it will always go back to the exact same position. This is the “quick change” and “accuracy” magic!
Essential Tools and Components You’ll Need
To get started with a QCTP, you’ll need a few key things. The good news is that once you have this system, the ongoing costs are minimal. The biggest initial investment is the QCTP set itself.
The Quick Change Tool Post Set
A typical QCTP set includes:
- The Tool Post Body: This is the main unit that mounts onto your lathe’s cross slide.
- A Set of Tool Holders: This is where the versatility comes in. You’ll want a variety of holders for different operations. Common types include:
- V-Block Holders: For holding round shank tools like drills or reamers in tandem with a cutting tool.
- Standard Tool Holders: For holding standard square tool bits (e.g., HSS or carbide).
- Knurling Tool Holders: Specifically designed for knurling operations.
- Parting Tool Holders: For holding narrow parting blades.
- Boring Bar Holders: For holding internal boring bars.
When purchasing a QCTP, it’s crucial to get the correct size for your lathe. QCTPs are typically designated by letters (like bxa, cxp, axa, etc.) which correspond to the size of the tool post body and the maximum size of the workpiece your lathe can handle. Check your lathe’s manual or measure your T-slot width and cross slide travel to ensure compatibility. A good starting point for many small to medium hobby lathes is a bxa-2 or bxa-3 size.
Optional but Recommended Accessories
- Shims: While QCTPs are designed for precise height, sometimes minor adjustments are needed, especially with different tool bit heights. A set of thin metal shims can be very useful.
- Wrenches/Allen Keys: For mounting the tool post body and for some tool holder adjustments.
- Measuring Tools: A dial indicator, calipers, and a height gauge are invaluable for setting up tools precisely.
Step-by-Step: Installing Your QCTP
Installing a QCTP is usually a straightforward process. It involves replacing your existing tool post with the new QCTP body and then setting up your first tool holder.
Step 1: Remove Your Old Tool Post
First things first, ensure your lathe is powered off and the chuck is secure. Remove any existing tool post and tool bits from the tool post mounting stud on your compound rest.
Step 2: Mount the QCTP Body
Your QCTP body will typically have a threaded stud or a tapered shank that fits into the mounting bore on your compound rest. If it has a stud, you’ll usually secure it with a nut from above. If it has a tapered shank, it will seat directly into a mating taper on the compound rest. Ensure the QCTP body is oriented correctly, usually with the locking mechanism accessible from the front.
Tip: Many QCTP bodies are round and can be rotated. For initial setup, you might want to align its locking mechanism in a convenient position. For subsequent adjustments, you’ll use shims under a nut or a dedicated locking screw to ensure it can’t rotate.
Step 3: Setting the Initial Tool Holder Position
This is where we introduce the tool holder. Select the tool holder you want to use first, perhaps a standard tool holder for a straight turning tool. Insert the tool holder into the QCTP body. Engage the locking mechanism to secure it. The goal here is to get your tool bit, when placed in the holder, to the correct height.
How to Set Tool Height:
- Insert Tool Bit: Place a standard tool bit into your chosen tool holder.
- Position Holder: Insert the holder into the QCTP body and lock it loosely.
- Rough Alignment: Carefully advance the compound slide so the tip of the tool bit is near the spindle centerline. You can often eyeball this for a rough start, or use a small piece of stock in the chuck and bring the tool over it.
- Fine Tuning: Now, lock the tool post body securely in place (if it wasn’t already). With the tool bit in place, use your lathe’s carriage and compound slide to move the tool bit up or down until its cutting tip is exactly on the spindle centerline. You can verify this by placing a center in the tailstock and bringing the tool bit against it, or by using a dial indicator placed on the compound rest and checking for zero reading when touching across the spindle nose.
- Shim if Necessary: If your tool bit is slightly too high or too low, you might need to adjust the height of the QCTP body itself by adding or removing thin shims between the QCTP base and the compound rest, or by adjusting screws if your post design allows. The goal is to have the tool holder correctly positioned so that any tool bit you put in it will be at the centerline height.
Reference: For a deeper understanding of lathe tool setup and centerline alignment, the Machine Shop Trade Mathematics from 1918 (a public domain resource from the US Department of State!) offers fundamental principles of lathe operations, including ideal tool geometry and alignment, which are still relevant today.
Step 4: Secure and Test
Once your QCTP body is firmly bolted down (with any necessary shims) and aligned so that tools in holders will be on the centerline, tighten all fasteners securely. Now, take your first tool holder with a tool bit, insert it, lock it down, and give it a quick test. Try turning a piece of stock. Then, remove the holder, re-insert it, and check that the tool is still perfectly aligned. You’ll quickly appreciate how fast and accurate this is!
Performing Different Machining Operations with a QCTP
The beauty of a QCTP is how it streamlines every type of lathe operation. Let’s look at how you’d use different tool holders for common tasks.
Facing
For facing operations, you’ll use a standard tool holder with a facing tool bit. Mount the holder, position the tool bit to extend slightly beyond the workpiece face, and lock it in. You can then feed it across the face of the material.
Turning (External)
Use a standard tool holder with a straight-turning tool bit or a round-nose turning tool bit. Set the holder, lock it, and perform your cuts. If you need to switch to a forming tool or a grooving tool, pop out the first holder and pop in the second – no re-alignment needed for the holder’s position.
Parting Off
A dedicated parting tool holder is excellent for this. These holders are designed to hold a thin parting blade very rigidly and at the correct height. Insert the holder, position the blade, and make your cut. The rigidity of a QCTP setup is crucial here to prevent chatter and ensure a clean cut.
Knurling
You’ll want a knurling tool holder, which typically mounts on the compound slide or has its own mechanism. Some QCTPs have specific holders for knurling tools. You’ll insert the holder and then use the compound slide to press the knurling wheels into the workpiece.
Threading
Threading requires a specific threading tool bit held in a tool holder. The accuracy of the QCTP is vital here, as even a slight misalignment can lead to improperly formed threads. Mount the holder, set the tool to the correct height and angle, and proceed with threading passes, indexing the starting point each time.
Drilling and Boring
For drilling with a tailstock drill, you can either have a drill chuck in the tailstock or use a V-block holder in the QCTP to hold a drill shank. For internal boring, you’ll use a dedicated boring bar holder. These holders are designed to hold the boring bar securely and accurately.
Example Workflow: Part Creation
Let’s say you need to make a simple shaft with a shoulder:
- Stock Setup: Mount your stock in the chuck.
- Facing: Use a facing tool in Holder A. Mount Holder A, lock, face the end.
- Turning: Remove Holder A, insert Holder B with a turning tool. Lock, turn the shaft diameter.
- Shoulder: You might need a different tool for a sharp corner. Remove Holder B, insert Holder C with a detail or grooving tool for the shoulder. Lock, cut the shoulder.
- Finishing: Perhaps you’ll then use Holder D with a finishing tool for a smooth surface.
Each tool is ready to go in its holder. The time saved is immense, and the repeatability means your dimensions will be consistent.
Advantages of a QCTP Summarized
Let’s recap why this is such a popular and worthwhile upgrade:
| Key Benefit | Description |
|---|---|
| Speed & Efficiency | Massively reduces tool change time, allowing for quicker project completion. |
| Accuracy & Repeatability | Tools return to the exact same position and height every time, leading to precise parts. |
| Versatility | Easily swap between multiple tools for different operations without major setup. |
| Ease of Use | Simplifies the workflow, making complex machining tasks more manageable, especially for beginners. |
| Reduced Frustration | Eliminates the tedious and error-prone process of re-aligning tools constantly. |
| Professional Results | Helps achieve better surface finishes and tighter tolerances. |
Choosing the Right QCTP for Your Lathe
Selecting the correct QCTP is important to ensure it fits your lathe and meets your needs without overpowering its capabilities.
Lathe Size Matters
The primary consideration is the size of your lathe. QCTPs are categorized by their capacity, often indicated by letters like AXA, 100, BXA, 200, CXA, 300, etc. These designations generally correlate to the maximum workpiece diameter the