Quick Summary
Use a TiAlN ball nose end mill with a high helix angle for smoother, cleaner acrylic contouring. This specialized tool prevents melting and chipping, creating precise curves and detailed finishes effortlessly for beginner and advanced users alike.
Working with acrylic can be a dream or a nightmare, especially when you need to create smooth, flowing curves. Many beginners find themselves battling melted plastic or frustratingly chipped edges, wondering if there’s a better way. If you’ve struggled to get that perfect contoured finish on your acrylic projects, you’re not alone. The good news is, the right tool can make all the difference. We’re going to dive into how a TiAlN coated ball nose end mill, particularly one with a high helix angle, can revolutionize your acrylic contouring, making it simpler and more effective than ever before. Get ready to achieve those clean, crisp lines and beautiful rounded edges you’ve been aiming for!
Understanding Ball Nose End Mills for Acrylic
Before we talk about the magic of TiAlN and high helix angles, let’s get clear on what a ball nose end mill is. Imagine a milling cutter that tapers to a perfectly rounded tip, like a tiny ball. That’s a ball nose end mill! Because of its rounded tip, it’s fantastic for creating curved surfaces, detailed pockets, and those smooth, contoured edges we’re after in acrylic.
When you’re working with materials like wood or even softer metals, a standard end mill might do the job for basic cuts. But acrylic is a bit different. It’s a thermoplastic, which means it can get soft and melt when friction builds up. This is where selecting the right cutting tool becomes crucial. Using the wrong type of end mill on acrylic can lead to:
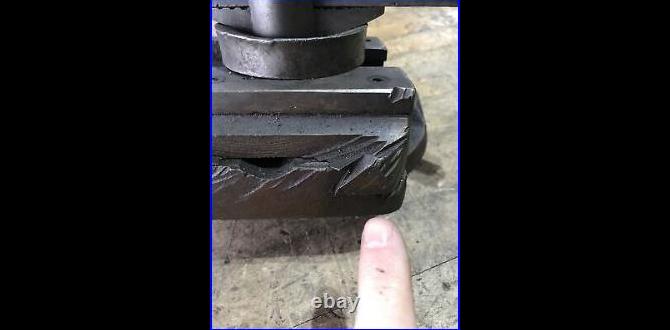
- Melting: The plastic softens and gums up the flutes of the cutter.
- Chipping: Brittle areas can break away, leaving rough edges.
- Poor Surface Finish: Instead of a clean cut, you get a smudged or rough surface.
- Tool Wear: The cutter gets dull quickly, making future cuts even worse.
This is why a specialized approach is necessary for beautiful acrylic contouring, and that’s where our TiAlN ball nose end mill with a high helix angle comes into play.
Why a Ball Nose? Genius for Contours
The rounded tip of a ball nose end mill is its superpower when it comes to contouring. Think about drawing a curve. With a regular, flat-tipped tool (like a square end mill), you’d have to take a series of small, overlapping straight cuts to try and approximate a curve. This often leaves behind visible step marks, even with a fine stepover. A ball nose end mill, however, can directly engage the material with its curved surface. This allows for:
- Smooth Surface Generation: It creates a continuous curve, reducing or eliminating the visible “stair-step” effect seen with flat-bottomed tools.
- 3D Machining: Essential for creating complex shapes, reliefs, and rounded features that are impossible with straight-edged tools.
- Edge Blending: Perfect for creating soft, blended transitions between surfaces or softening sharp corners.
For any project requiring a sophisticated or aesthetically pleasing curved surface on acrylic, a ball nose end mill is the go-to choice. It simplifies the machining process for these shapes significantly.
The TiAlN Coating Advantage
Now, let’s talk about that “TiAlN” part. TiAlN stands for Titanium Aluminum Nitride. It’s a mouthful, but it represents a significant upgrade for your cutting tools, especially when cutting plastics like acrylic.
Imagine a super-thin, incredibly hard shield applied to the surface of your end mill. That’s essentially what TiAlN coating does. It’s a PVD (Physical Vapor Deposition) coating that offers several key benefits:
- Extreme Hardness: TiAlN is exceptionally hard, which means it resists wear much better than uncoated carbide. This translates to a longer tool life, meaning fewer tool changes and more consistent results.
- High-Temperature Resistance: One of the biggest problems with cutting acrylic is heat. TiAlN coatings help the end mill withstand higher temperatures without degrading. This is crucial for preventing heat buildup that causes melting.
- Reduced Friction: The coating creates a smoother surface on the cutting edge, which reduces friction between the tool and the material. Less friction means less heat generated.
- Improved Lubricity: It helps materials like acrylic slide off the cutting edges more easily, preventing them from sticking and building up.
When cutting acrylic, the TiAlN coating acts like a sacrificial layer, protecting the carbide tool underneath from the heat and friction, allowing for cleaner cuts and a much better-finished surface. It’s like giving your end mill a super-suit for battling the challenges of machining plastic!
The Power of the High Helix Angle
This is where things get really specific and incredibly beneficial for acrylic. You’ll often see ball nose end mills described by their geometry, and “helix angle” is a big one. The helix angle is the angle at which the cutting flutes are twisted around the tool’s body.
Standard end mills might have helix angles of 30 to 45 degrees. For acrylic, especially when contouring, you want to look for end mills with a high helix angle, often 60 degrees or more.
Why is a high helix so good for acrylic?
- Aggressive Cutting Action: A steeper helix angle means the cutting edge engages the material at a more acute angle. This leads to a shearing action rather than a scraping action. Think of a sharp knife slicing through a tomato versus a dull knife pressing down. The slicing action from a high helix is much cleaner.
- Improved Chip Evacuation: Acrylic can produce long, stringy chips. The steeper twist of a high helix flute helps to pull those chips up and away from the cutting zone more effectively. Better chip evacuation means less chance of chips getting recut or building up and causing heat.
- Reduced Heat Generation: Because of the shearing action and better chip flow, high helix cutters typically generate less heat compared to lower helix or straight-fluted tools. This is a critical factor in preventing acrylic from melting.
- Smoother Finish: The combination of shearing and efficient chip removal results in a much smoother surface finish. You’ll notice a significant reduction in chatter and a more polished look right off the machine.
When you combine the rounded tip of the ball nose with the aggressive shearing and chip evacuation of a high helix, you get a tool that’s perfectly engineered to tackle the unique challenges of contouring acrylic. For precise, melt-free results, a high helix ball nose end mill is hard to beat.
Choosing the Right TiAlN High Helix Ball Nose End Mill for Acrylic
Now that you understand why this type of end mill is so effective, let’s talk about how to choose one. It’s not just about grabbing the first one you see!
Material
For acrylic, you’ll almost always want a solid carbide end mill. Carbide is strong and rigid, which is essential for precise cuts. While some tools might have carbide bodies with other coatings, sticking with solid carbide ensures maximum performance and tool life.
Coating
As we discussed, TiAlN (Titanium Aluminum Nitride) is your best friend here. Look for tools specifically stating they have a TiAlN coating. Other coatings like AlTiN (Aluminum Titanium Nitride) can also work well, often offering even higher temperature resistance, but TiAlN is a very common and effective choice for acrylic.
Helix Angle
This is your differentiator. For acrylic contouring, aim for 60 degrees or higher. The higher the helix, the more aggressive the shearing action, leading to cleaner cuts and less heat. Some specialized tools might even go up to 70 degrees.
Number of Flutes
This is an important consideration for plastics:
- 2-Flute: Generally preferred for plastics. With fewer flutes, there’s more open space for chip evacuation. This is key to preventing melting and ensuring a cleaner cut. For contouring, where smooth chip flow is vital, 2 flutes are often ideal.
- 3-Flute: Can be used, but may require slower feed rates or more aggressive cooling to manage heat and chip buildup in acrylic. They offer a slightly smoother finish in some applications but can be trickier with softer plastics.
- 4-Flute: Typically not recommended for acrylic. The tighter flutes are more prone to clogging and overheating with softer materials.
Recommendation: Start with a 2-flute TiAlN high helix ball nose end mill for your acrylic contouring needs.
Geometry (Ball Radius)
The “ball nose” refers to the radius at the tip. This will depend entirely on the curvature you need to achieve. Common ball nose radii include:
- 0.5mm
- 1mm
- 2mm
- 3mm
- 5mm
- 10mm
Choose a radius that matches the contours you want to machine. For fine details, a smaller radius is needed. For broader, sweeping curves, a larger radius might be suitable.
Shank Diameter and Overall Length
Ensure the shank diameter fits your collet or tool holder. Overall length matters for reach, especially if you’re machining deep pockets or complex shapes.
Brand Reputation
While not strictly a technical spec, choosing reputable tool manufacturers can ensure you’re getting quality materials and coatings. Brands known for their end mills often provide more consistent performance.
Recommended Parameters for Machining Acrylic
Even with the best tool, incorrect machining parameters can spell disaster for acrylic. These are general guidelines, and you may need to fine-tune them based on your specific machine, acrylic type, and end mill. Always perform test cuts on scrap material first!
Spindle Speed (RPM)
Acrylic is sensitive to heat. You generally want to run relatively slower spindle speeds compared to metals to minimize friction and heat buildup. A good starting range for a 1/8” or 1/4” end mill might be 10,000 to 18,000 RPM. Higher speeds can work with excellent cooling, but slower is often safer for beginners.
Feed Rate
This is how fast the tool moves through the material. You want a feed rate that allows the high helix to shear the acrylic cleanly without overloading the flutes or generating excessive heat.
A general starting point could be:
- For 1/8” end mill: 15-30 inches per minute (IPM) or 380-760 mm/minute.
- For 1/4” end mill: 20-40 inches per minute (IPM) or 500-1000 mm/minute.
Listen to your machine and the tool. If you hear squealing or see signs of melting, increase the feed rate or decrease the spindle speed. A consistent, audible “whispering” or a light “swishing” sound is often a good indicator of proper feed and speed.
Depth of Cut (DOC)
This is how deep the tool cuts in a single pass. For acrylic, it’s generally best to take shallower depths of cut. This reduces the load on the tool and helps manage heat.
- Slotting (full width of the tool): Start with a DOC of 0.5x the tool diameter.
- Contouring/Pocketing (less than full width): You can often use a DOC close to the tool diameter (1x) or slightly more, as chip evacuation is usually better.
For precise contouring, you might be taking very shallow passes (e.g., 0.010” to 0.020”) to build up a complex surface or create a fine finish with a small ball nose end mill.
Key takeaway: Take lighter cuts to keep heat down and chips flowing.
Stepover
This is how much the tool shifts sideways between passes when creating a surface. For smooth contours, you want a fine stepover. A smaller stepover means more overlapping passes, resulting in a finer, smoother surface finish.
For high-quality contouring:
- Roughing (optional): 20-40% of tool diameter.
- Finishing: 5-15% of tool diameter.
For example, with a 1/4” (0.25”) ball nose end mill, a finishing stepover of 0.025” (10%) will yield excellent results. A smaller stepover (e.g., 5% or 0.0125”) will produce an even smoother, more polished surface but will take longer.
Cooling/Lubrication
This is arguably one of the most critical factors for machining acrylic without melting:
- Compressed Air: A steady blast of compressed air directed at the cutting zone is often the best solution for acrylic. It cools the tool and blows chips away without introducing unwanted lubrication that can sometimes soften acrylic further.
- Through-Spindle Coolant (with a suitable fluid): If your machine has this capability, using a mist coolant system with a specific plastic-cutting fluid can be very effective. Avoid flood coolants with water, as the rapid cooling can sometimes cause acrylic to craze (develop fine cracks).
- Isopropyl Alcohol: Some machinists use a light mist of Isopropyl Alcohol (IPA). It evaporates quickly, provides some cooling, and doesn’t leave a residue. Use with caution and ensure good ventilation.
Never use standard cutting oils or waxes designed for metal, as they can react poorly with acrylic. The primary goal is to keep the tool and the acrylic cool.
Material Fixturing
Ensure your acrylic sheet is securely clamped to prevent movement. Vacuum tables are excellent for holding acrylic sheets flat. If using clamps, place them strategically to avoid interfering with the cutter path.
Step-by-Step: Contouring Acrylic with Your TiAlN Ball Nose End Mill
Ready to put your new tool to work? Follow these steps for successful acrylic contouring:
Step 1: Prepare Your Workspace and Machine
Safety first! Ensure you have safety glasses, hearing protection, and any other PPE required for your machine. Clear your work area of any unnecessary items. Make sure your CNC machine’s dust collection or air blast system is ready to go.
Step 2: Secure Your Acrylic Material
Firmly clamp your acrylic sheet to the machine bed. Use a vacuum table if available, or ensure clamps are outside the cutting path and secure the material without bowing or deforming it.
Step 3: Install the End Mill
Insert the TiAlN coated, high helix ball nose end mill into your collet. Make sure it’s fully seated and the collet is tightened securely. Ensure the shank nut is properly torqued. Check that the tool is running true – no wobble.
Step 4: Set Your Work Coordinate System (WCS)
Home your machine and establish your X, Y, and Z zero points. For Z zero, you can use an edge finder or touch plate. It’s often best to set Z zero on the top surface of the acrylic sheet you are cutting.
Step 5: Load Your CAM Toolpath
Import your 3D model into your CAM software. Select the TiAlN ball nose end mill with the appropriate specifications (diameter, ball radius, number of flutes, high helix angle). Define your machining strategy: contouring, 3D finishing, or pocketing curves. Set your cut depths, stepover (finishing stepover is key for smooth contours!), and ensure your cooling strategy (e.g., air blast) is enabled.
A common toolpath for smooth contours is a waterline or parallel finishing pass, controlled by the ball nose radius. Ensure your “climb milling” or “conventional milling” setting is appropriate; climb milling is generally preferred for a better finish.
External Resource: For a deeper dive into CAM software strategies, check out resources like Autodesk’s Fusion 360 CAM programming guide to understand common toolpath types.
Step 6: Perform a Dry Run (Optional but Recommended)
Before cutting acrylic, run your program with the spindle off. Watch the machine’s movements to ensure the toolpath is correct, there are no collisions, and the machine’s axes are moving as expected. This is a crucial safety check.
Step 7: Set Cutting Parameters and Cooling
Input the recommended (or your tested) spindle speed, feed rate, and depth of cut into your CNC controller or CAM software. Verify your air blast or mist coolant system is active and correctly positioned to blow directly onto the cutting point