
Homemade Wood Lathe Duplicator: Easy DIY
Building your own wood lathe duplicator homemade tool can be a surprisingly achievable and incredibly rewarding project for the hobbyist woodworker. If you’ve ever found yourself meticulously trying to replicate a turned component – be it a table leg, a spindle, or decorative finial – you know the frustration that can arise from subtle inconsistencies. A duplicator attachment for your wood lathe dramatically simplifies this process, allowing you to achieve near-perfect reproductions with far less effort. Forget expensive commercial units; with a bit of dedication and some readily available materials, you can craft a functional and effective duplicator right in your own workshop.
The core principle behind a wood lathe duplicator is simple: it guides a cutting tool along a template, effectively mirroring the shape onto your workpiece. This means you only need to turn one perfect master piece, and the duplicator will do the heavy lifting of replicating it multiple times. This not only saves time and reduces errors but also opens up possibilities for more complex and detailed duplicate turnings.
Understanding the Basic Components of a Wood Lathe Duplicator
Before diving into construction, it’s important to grasp the fundamental parts that make up most DIY duplicator designs. At its heart, you have a template, which is essentially your master piece turned to the exact desired shape. Next, there’s a carriage that moves parallel to the lathe bed, carrying both the template and the workpiece. Mounted onto this carriage is a follower (or stylus) that traces the contours of the template. Finally, a tool holder is attached, positioned so that the cutting tool it holds follows the exact same path as the follower. As the follower traverses the template, the tool holder movements are transferred to the cutting tool, shaping the raw material into an identical replica.
The beauty of a homemade design lies in its adaptability. You can choose to build a simpler, less sophisticated unit for basic profiles or opt for a more complex design that offers greater precision and the ability to handle intricate shapes. Regardless of the complexity, the fundamental mechanics remain the same.
Designing Your Wood Lathe Duplicator Homemade Tool
When conceptualizing your own wood lathe duplicator homemade tool, consider a few key design elements. Firstly, stability is paramount. The entire duplicator assembly needs to be rigid and securely clamped to your lathe’s bed. Any wobble or play will directly translate into inaccuracies in your turned pieces. Look for ways to incorporate sturdy materials like hardwood or metal into your build.
Secondly, think about the movement. Most DIY duplicators utilize a sliding mechanism. This could be as simple as wooden runners on a wooden track, or you could opt for more robust solutions like drawer slides or even linear rails if you’re feeling ambitious. The smoother the slide, the better the results. The follower mechanism also requires careful consideration. It needs to be able to pivot or slide freely, with minimal friction, to accurately track the template’s shape.
Finally, the tool holder should be adjustable. This allows you to fine-tune the position of your cutting tool relative to the follower, compensating for tool geometry and ensuring precise duplication. Many homemade designs use simple clamps or bolts to secure various types of lathe tools.
Gathering Your Materials for the Project
The beauty of a homemade wood lathe duplicator is that it can be constructed from a variety of materials, often those you might already have lying around your workshop. Common choices for the main structure include sturdy hardwoods like oak, maple, or ash. Plywood can also be a good option for larger panels, provided it’s of good quality.
For the sliding mechanisms, consider:
Drawer Slides: These offer smooth, predictable movement and are readily available at hardware stores.
Metal Angle or Square Tubing: These can be used to create a more robust track system, requiring the addition of nylon or brass sliders to reduce friction.
Hardwood Runners: If you’re opting for an all-wood build, carefully planed and waxed hardwood runners can work well, though they may require more maintenance.
Other essential materials will include:
Fasteners: Wood screws, bolts, nuts, and washers.
Clamps: To secure the duplicator to your lathe bed.
Follower Material: A metal rod, a ball bearing, or even a smooth dowel can serve as the follower.
* Cutting Tool: You’ll need a standard wood lathe cutting tool for the duplicator to guide.
Construction Tips for Your Homemade Wood Lathe Duplicator
When embarking on the construction, take your time and prioritize accuracy. Measure twice, cut once. Start by building the main frame or carriage that will mount to your lathe bed. Ensure it’s square and sturdy. Then, fabricate the sliding track system. If using drawer slides, mount one set on the lathe bed and the mating set on the carriage.
The template and workpiece mounts are critical. They need to be securely clamped and aligned with each other and the lathe’s center line. Adjustable clamps or simple wooden jaws can often suffice. The follower assembly should be mounted to the carriage in such a way that it can smoothly trace the template’s profile.
The tool holder should be positioned to mirror the follower’s movement. Consider building in some adjustability here, perhaps through slots and bolts, to allow for fine-tuning. Once assembled, test the movement of the carriage and follower without any wood. It should glide freely and smoothly along the entire length of the lathe bed.
Using Your New Wood Lathe Duplicator
The process of using your wood lathe duplicator homemade tool is straightforward. First, turn your “master” piece to the exact desired shape. Mount this master piece onto the template holder of your duplicator. Then, mount a piece of raw stock onto the workpiece holder. Position your cutting tool in the tool holder.
With the lathe running at a safe speed, gently engage the follower with your template. The cutting tool, guided by the follower’s movement, will begin to shape the raw stock. You’ll likely need to make multiple passes, gradually removing wood, just as you would when turning without a duplicator. The key is to let the duplicator do the guiding. Don’t force the tool; allow the template to dictate the shape.
Final Thoughts on the DIY Wood Lathe Duplicator
Creating your own wood lathe duplicator homemade tool is a fantastic way to enhance your turning capabilities without breaking the bank. It’s a project that combines woodworking skills with ingenuity, resulting in a practical addition to your workshop. While commercial duplicators offer convenience and sometimes advanced features, a well-built DIY version can provide excellent results for a fraction of the cost. The sense of accomplishment from building your own tool and then using it to create perfect duplicates is truly a rewarding experience for any woodworking enthusiast.
Related Posts
Ultimate Metal Lathe Spindle Speed Chart For Precision Machining- Carbide End Mill: Genius For Titanium Precision
- Carbide End Mill 3/16 Inch: Essential for Plywood

Master Metal Lathe Steady Rest Alignment In 5 Easy Steps

Turning Brass On A Wood Lathe – A Complete Tutorial- This keyword is unrelated to the topic of “how to cancel car wash subscription.” I can provide a blog title if you provide a keyword that is relevant to the topic.

Master Lathe Tool Grinding: Metal Lathe Compound Rest Guide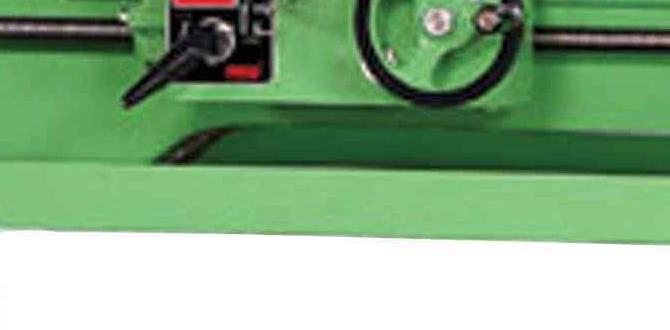
Master Lathe Machine Learning: Metal Lathe Chuck Key Guide