Wood lathe live center alignment ensures smooth operation and prevents workpieces from wobbling or flying off. Proper alignment is crucial for safety and achieving precise results. This guide offers easy tips for beginners to get it right every time, leading to cleaner cuts and a more enjoyable woodworking experience.
Wood Lathe Live Center Alignment: Essential Tips for Beginners

Welcome to Lathe Hub! If you’re new to woodworking, you’ve probably encountered the term “live center” on your wood lathe. It’s that spinning thingy that supports your workpiece, and sometimes, it doesn’t feel quite right. A bit of wobble, a concerning vibration, or a slightly off-center turn can make any beginner feel uneasy. Don’t worry, this is super common! Getting your live center perfectly aligned is one of those fundamental skills that makes a huge difference. It’s not as tricky as it sounds, and with a few simple checks and adjustments, you’ll be turning with confidence. Let’s dive in and make sure yours is running true!
What is a Wood Lathe Live Center and Why Does Alignment Matter?

Think of your wood lathe as a powerful spinning tool that lets you shape wood into beautiful forms, like bowls or spindles. To do this, your wood needs to be held securely. For longer pieces or when making bowls, you often need support at both ends. That’s where centers come in!
Your lathe typically has two main points that hold the wood:
- Drive Center (or Spur Center): This is usually at the headstock (the end with the motor). It has sharp spurs that dig into the wood, providing the rotational force to spin it.
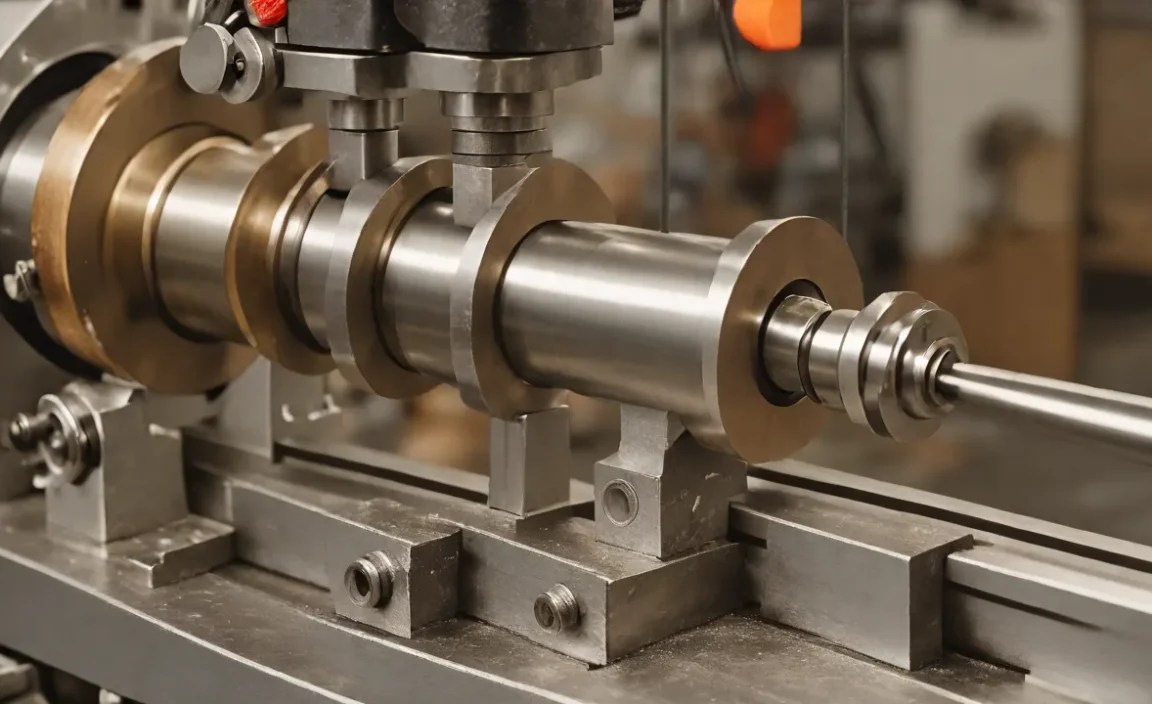
- Live Center: This is mounted on the tailstock (the movable end). It has a bearing that allows the point to spin freely with the wood. This means it doesn’t create friction with the rotating workpiece, reducing heat and wear. Its main job is to provide stable support.
So, why is aligning the live center so important? If it’s out of alignment, several problems can arise:
- Vibration and Wobble: An off-center live center will make your workpiece vibrate. This leads to a rough surface finish and can even make the lathe feel unstable.
- Increased Friction and Heat: If the live center isn’t perfectly aligned, it can bind up or not spin freely. This generates heat, which can scorch your wood and wear out the live center’s bearing prematurely.
- Inaccurate Turning: When the live center is off, your workpiece isn’t spinning on a true axis. This means your cuts won’t be perfectly round or concentric, making detailed work very difficult.
- Safety Hazard: In severe cases, severe vibration or binding can cause the workpiece to loosen or even be ejected from the lathe. This is dangerous for the operator and anyone nearby.
Getting this alignment right is a foundational skill that will make all your turning smoother, safer, and more enjoyable. Let’s look at how to do it.
Types of Live Centers

Before we get into alignment, it’s good to know the common types of live centers you’ll encounter. They all serve the same purpose but have slight variations:
- Standard Live Center: This is the most common type, featuring a simple pointed cone with a bearing inside. It’s great for general spindle turning and supports the end of the workpiece.
- Cup Live Center: Similar to a standard live center, but the point is slightly more rounded or cupped. This can offer a bit more support for certain types of wood or turning operations.
- Ball Bearing Live Center: This is essentially a standard live center, but the name emphasizes that it uses ball bearings for smooth, low-friction rotation. Most modern live centers are ball bearing types.
- Revolving Spur Drive Center: While primarily a drive center, some versions have a rotating spur that digs in, and the entire head can sometimes be used in a pinch as a live center if accurately aligned. However, it’s best used for its intended purpose.
- Cole Jaws (Chuck Accessory): These aren’t live centers themselves but are accessories for chucks that resemble a live center. They are used for faceplate turning and can require precise alignment with the chuck’s jaws.
For most beginner applications, you’ll be using a standard ball-bearing live center. The alignment principles discussed here apply to all types that mount into the tailstock.
Tools You’ll Need

Don’t worry, you don’t need a whole workshop full of specialized tools to align your live center. Most of what you need is probably already on your lathe or within easy reach:
- Your wood lathe
- The workpiece you plan to turn (or a scrap piece for practice)
- Your live center
- Your drive center (spur center)
- A ruler or measuring tape
- A pencil or marker
- A straight edge (a metal ruler works well)
- Safety glasses (always!)
The Basic Alignment Principle: Tailstock to Headstock Alignment
The alignment of your live center is primarily about ensuring that the axis of your tailstock is perfectly parallel to the axis of your headstock. When these two axes are parallel, and the live center is centered in the tailstock spindle, it will be precisely in line with wherever you want to turn your piece. Conversely, if the tailstock is angled, the live center will follow a slightly different path than the drive center, leading to all those pesky problems.
There are two main scenarios for tailstock alignment:
- Perfectly Parallel: When turning spindles (long, cylindrical projects), you want the tailstock perfectly parallel to the bed.
- Slight Angle for Taper: When turning bowls or other items where you want a significant taper, you’ll intentionally angle the tailstock away from the headstock. The live center will then support the workpiece off-center.
This guide focuses on the first scenario – getting your tailstock perfectly parallel for general turning. This is the “neutral” position and the one you’ll use most often when learning.
Step-by-Step Guide to Wood Lathe Live Center Alignment
Let’s walk through the process of making sure your live center is perfectly aligned with your drive center. This is a crucial step for any turning project where you want a true cylinder.
Step 1: Mount the Drive Center
First, ensure your drive center (the spur center) is securely mounted in the headstock spindle. Check that it’s clean and the spurs are sharp.
Step 2: Mount the Tailstock
Next, bring the tailstock up close to the headstock. You don’t need to mount a piece of wood yet; we’re just aligning the two points. Make sure the tailstock is locked in place on the lathe bed.
Step 3: Mount the Live Center in the Tailstock
Insert your live center into the tailstock spindle. It should fit snugly. If your live center has a threaded shaft, it will screw into the spindle. If it has a Morse taper, it will slide in. Ensure it’s seated properly.
Step 4: Bring the Tailstock Close and Extend the Live Center
Using the tailstock handwheel, advance the live center so its point is very close to, but not quite touching, the point of the drive center. You should have a small gap between them.
Step 5: Check for Parallelism (The Paper Test)
This is a classic and very effective method:
- Take a thin strip of paper (like copy paper).
- Gently place it between the point of the drive center and the point of the live center.
- Carefully advance the tailstock handwheel so the live center gently grips the paper. You don’t want to rip it, just hold it firmly.
- Now, try to pull the paper out.
What to Look For:
- Perfect Alignment: The paper should pull out smoothly and without tearing. This indicates the points are exactly in line.
- Too Tight (Tailstock Angled Away): If the paper rips easily or the live center is pressing so hard it’s difficult to grip, your tailstock is likely angled slightly towards the headstock. This is common if you were previously turning a taper.
- Too Loose (Tailstock Angled Towards): If the paper doesn’t feel held at all around its edge, or if it’s only gripped on one side, your tailstock is likely angled slightly away from the headstock.
This paper test is surprisingly accurate for getting an initial alignment. You might need to repeat this a couple of times.
Step 6: Adjust the Tailstock Position
If the paper test reveals misalignment, you’ll need to adjust the tailstock alignment mechanism.
- First, release the tailstock locking lever or bolt that secures it to the lathe bed.
- On most lathes, there’s a mechanism (often a screw or a plate with slots) that allows you to pivot the tailstock slightly left or right.
- Make a small adjustment in the direction indicated by your paper test. For example, if the paper ripped easily (too tight), you might need to angle the tailstock slightly away from the headstock.
- Gently slide the tailstock on the bed to bring the points closer together again, and re-apply the paper test.
- Repeat these small adjustments and tests until the paper slides out smoothly all the way around.
- Once aligned, re-tighten the tailstock lock firmly.
Step 7: The Ruler or Straight Edge Test (Optional but Recommended)
For an even more visual confirmation, especially on longer lathes, try this:
- With the tailstock aligned and locked, remove both centers.
- Insert a long, straight metal ruler or a dowel rod into the headstock spindle (like a makeshift drive center).
- Measure the distance from the end of the ruler to the end of the tailstock spindle.
- Now, insert the same ruler or dowel into the tailstock spindle (like a makeshift live center point).
- Measure the distance from the end of the ruler (or dowel) to the end of the headstock.
If the measurements are the same, and the ruler sits parallel to the bed in both instances, your tailstock is aligned correctly with the headstock. This is a more precise check for longer bed lathes.
Step 8: Mount a Scrap Piece and Test the Turn
Once you are confident in your alignment:
- Mount a small, scrap piece of wood between the live center and the drive center.
- Advance the tailstock to bring the live center into firm contact with the wood. Ensure it’s snug but not so tight that it’s binding.
- Lock the tailstock in position.
- Turn on the lathe at a slow speed.
- Listen and feel for any unusual vibrations. A perfectly aligned setup should run very smoothly.
- If everything feels smooth, you can proceed with your turning!
Troubleshooting Common Live Center Alignment Issues
Even with the best intentions, you might run into a few snags. Here’s how to deal with them:
Issue 1: Persistent Vibration
Cause: Tailstock is still slightly out of parallel, or the workpiece is not balanced. The live center bearing might also be worn or damaged.
Solution: Re-do the paper test and make finer adjustments. Ensure your workpiece is mounted as securely as possible. Check your live center for smooth rotation; if it feels gritty or resists spinning, it might need cleaning or replacement. You can find replacement parts and maintenance guides on manufacturer websites or reputable woodworking forums.
Issue 2: Live Center Feels Tight or Resists Spinning
Cause: Tailstock is angled too far towards the headstock. The live center bearing is being squeezed.
Solution: Adjust the tailstock alignment mechanism to angle it slightly away from the headstock. You want just enough grip on the paper. Never force the live center; it should spin freely with the wood.
Issue 3: Workpiece Wobbles Severely
Cause: Major misalignment of the tailstock. The drive center spurs might not be digging in properly. The tailstock lock might be loose.
Solution: Double-check the tailstock lock is secure. Re-perform the paper test and make more significant adjustments. Ensure the drive center spurs are biting into the wood – they are essential for keeping the wood from spinning on the drive center.
Issue 4: Marking or Scoring on the Wood at the Live Center
Cause: Live center is not spinning freely, or the tailstock is angled such that the stationary point (if it were a dead center) would be dragging. A worn or seized bearing is a common culprit.
Solution: Clean and lubricate your live center. If cleaning doesn’t help, the bearing may be damaged and needs replacement. You can often find information on bearing replacement for specific live center models by visiting tool manufacturer websites, such as JET Tools or Powermatic.
Issue 5: Difficulty Achieving Perfect Roundness
Cause: Even minor misalignment can prevent perfect roundness. Also, tool rest position and cutting technique play a role.
Solution: For perfect roundness during spindle turning, ensure your tailstock is perfectly parallel. For bowl turning, intentionally angle the tailstock to create the desired taper – the live center point will be off-center, which is correct for this application. Always ensure your cutting tools are sharp and your tool rest is set at the correct height, typically with a small gap at the 12 o’clock position. This is vital for achieving an even surface finish.
When to Intentionally Misalign Your Tailstock
While we’ve focused on achieving perfect alignment for spindle turning, there are times when you want to angle your tailstock. The most common reason is for turning bowls or platters.
When turning a bowl, you use a faceplate or chuck at the headstock to hold the back of the bowl. The tailstock, fitted with a live center, supports the far edge of the wood. To allow for the curve of the bowl, the tailstock must be angled away from the headstock. This means the live center is not directly opposite the drive center. The amount of angle determines the slope of the bowl.
To do this:
- Mount your workpiece (e.g., a rectangular block for a bowl blank) between the headstock and tailstock.
- Ensure the tailstock is locked onto the bed.
- Loosen the tailstock alignment screw or plate.
- Using the tailstock handwheel, screw the tailstock away from the headstock (to create a taper).
- Make a small turn, then re-tighten the alignment.
- Check the angle. For rough work, you can use a protractor. For precise work, you might use a jig or observe the resulting shape. Many woodworkers develop a feel for this over time.
The key takeaway is that for spindle turning, parallel is perfect. For bowl turning, an angle is necessary and correct.
Maintenance for Longevity
Keeping your live center in good condition will ensure it performs accurately and lasts a long time. Here are a few tips:
- Regular Cleaning: After each use, wipe down the live center point and shaft. Wood dust and debris can impede the bearing’s movement.
- Lubrication: Periodically, check the manufacturer’s recommendations for lubrication. A small drop of light machine oil or grease can often help keep the bearing running smoothly. Too much can attract dust, so use sparingly.
- Inspect the Bearing: If your live center feels rough, catches, or doesn’t spin freely even after cleaning, the bearing may be damaged or worn out. Many live centers can be disassembled to replace bearings. You can find replacement bearings at most industrial supply stores or online retailers like McMaster-Carr.
- Avoid Impact: Treat your live center with care. Dropping it or impacting the point can easily damage the bearing.
Live Center Alignment Table: Quick Check Guide
Here’s a simple table to help you quickly diagnose alignment issues:
| Symptom | Likely Cause | Solution |
|---|---|---|
