A wood lathe sanding pad polishing kit helps achieve a smooth, professional finish on your turned projects. It includes specialized pads and compounds for removing tool marks and bringing out the wood’s natural beauty, making the finishing process easier and more effective for beginners.
Turning a beautiful piece of wood on your lathe is only half the battle; the real magic happens during the finishing stages. Many beginners find themselves frustrated with swirl marks, minor imperfections, and a less-than-perfect sheen. That’s where a good wood lathe sanding pad polishing kit comes in. Think of it as your secret weapon for transforming your turned creations from “almost there” to “absolutely stunning.”
This guide is designed to demystify the world of sanding pad polishing kits. We’ll break down what they are, why they’re essential, and how to use them effectively on your wood lathe. We aim to build your confidence so you can tackle any finishing challenge and make your projects shine. Let’s dive in and get your turned work looking its absolute best!
Why a Sanding Pad Polishing Kit is a Game-Changer

As you gain experience with your wood lathe, you’ll notice that achieving a truly professional finish requires more than just a few passes with sandpaper. Standard sandpaper can remove tool marks, but it often leaves its own set of subtle scratches or a dull appearance. This is especially true when working with finer grits or delicate woods.
A wood lathe sanding pad polishing kit is specifically designed to overcome these limitations. These kits typically include a range of abrasive pads, often made from foam, felt, or specialized synthetic materials, along with polishing compounds. The difference lies in how they interact with the wood surface and the compounds they use. Unlike flat sandpaper, many of these pads have a bit of give, allowing them to conform slightly to the curves of your turned piece. This ensures more even contact and reduces the chance of overwriting or creating new scratch patterns.
Moreover, the polishing compounds included in these kits are formulated to work synergistically with the pads. They contain very fine abrasives that actively cut away any remaining imperfections and simultaneously polish the surface to a high luster. This two-in-one action is incredibly efficient and far more effective than trying to achieve the same level of smoothness and shine with progressively finer grits of traditional sandpaper alone. For beginners, this means a much lower learning curve for achieving impressive results quickly.
What’s Inside a Typical Kit?
While brands and specific offerings can vary, most comprehensive wood lathe sanding pad polishing kits will contain a core set of items designed to take you from initial sanding through to a high-gloss polish. Understanding what each component does is key to using the kit effectively.
Abrasive Pads
These are the workhorses of the kit. They come in various grits and materials, each serving a specific purpose in the process.
- Foam Pads: These are often the most versatile. Their compressible nature allows them to conform to irregular surfaces, making them excellent for both sanding and applying polishes. They typically come in a range of grits, from coarser ones for initial smoothing to very fine ones for final polishing.
- Felt Pads: Primarily used for the final polishing stages. Felt is softer and less abrasive, making it ideal for buffing in polishing compounds to achieve a mirror-like finish.
- Suede/Microfiber Pads: Some kits may include these for applying waxes or final buffing. They are very gentle and excellent for creating a deep shine without adding any abrasive action.
- Hook-and-Loop (Velcro) Backing Pads: These are specialized pads that have a hook-and-loop surface on one side to attach to a corresponding backing pad that fits onto your lathe’s spindle or a drill attachment. The other side is where you attach the abrasive discs or pads.
Polishing Compounds
These are the agents that do the actual “polishing.” They contain incredibly fine abrasive particles suspended in a carrier (like a wax or paste).
- Cutting Compounds: These are the first compounds you’ll likely use. They have a slightly coarser abrasive and are designed to quickly remove any remaining sandpaper scratches or minor imperfections.
- Polishing Compounds: These are finer than cutting compounds and are used to refine the surface further, removing any dullness left by the cutting compound and starting to build shine.
- Finishing/Gleaming Compounds: The finest compounds in the kit. These are used for the final stage to bring out the deepest luster and create that “wet look” finish.
Backing Pad and Shank
For most kits designed to be used on a lathe, you’ll need a backing pad and a shank.
- Backing Pad: This is a rigid or semi-rigid disc that attaches to your lathe. It typically has a hook-and-loop (Velcro) surface. The abrasive pads or discs stick to this.
- Shank: This is the threaded rod that screws into the backing pad’s center and then into your lathe’s headstock spindle or tailstock, depending on how you’re set up. It’s crucial that this is securely attached.
Other Potential Items
Some kits might include:
- Applicator Brushes or Cloths: For applying compounds evenly.
- Instruction Manual: A guide to using the specific products in the kit.
- Storage Case: To keep everything organized.
The Core Concept: Progressive Abrasives and Lubrication

At its heart, a wood lathe sanding pad polishing kit works on the principle of progressively finer abrasives, much like traditional sandpaper, but with key differences. The pads are designed to work with specific compounds, creating a slurry that both sands and polishes simultaneously.
Traditional sanding on a lathe involves using grits from coarse (around 100-150) to very fine (up to 400 or 600). Each grit removes the scratches left by the previous one. However, even very fine sandpaper can leave microscopic scratches and a generally dull surface.
A polishing kit elevates this process. The “sanding” pads in the kit are often very fine grits (e.g., equivalent to 600-1000 grit) and are used with a cutting compound. This compound, combined with the pad, effectively erases any remaining sandpaper marks and begins to smooth the surface on a microscopic level.
Then, you move to finer polishing pads and compounds. These contain even tinier abrasive particles that further refine the surface, smoothing out any microscopic imperfections left by the cutting compound. This action is more about “polishing” and “burnishing” the wood fibers than aggressively removing material. The final stages use very fine compounds and soft polishing pads (like felt or microfiber) to bring out the wood’s natural luster and create a deep, glossy finish.
The key advantage here is efficiency and effectiveness. You can often achieve a superior finish in fewer steps compared to solely relying on sandpaper and traditional finishes like wax or shellac. The pads’ conformity also helps maintain an even surface, reducing the risk of missed spots or uneven sheen.
How to Use Your Wood Lathe Sanding Pad Polishing Kit: A Step-by-Step Guide

Using a sanding pad polishing kit correctly will ensure you get the best results and avoid common pitfalls. Safety first: always wear eye protection and a dust mask when operating a lathe. Ensure your workpiece is securely mounted.
Preparation is Key
Before you even think about polishing pads, your workpiece needs to be properly prepared.
- Rough Turning: Complete your rough turning to the desired shape.
- Shaping and Detail: Refine the shape of your piece. Remove any significant tool marks or deep scratches.
- Initial Sanding: This is crucial. Start with a moderate grit sandpaper (e.g., 120-150 grit) and work your way up. The goal here is to remove all the prominent tool marks and get to a consistent surface.
- Progress to Finer Grits: Continue sanding with progressively finer grits (e.g., 220, 320, 400 grit). The smoother you make the surface with traditional sandpaper, the easier and better your polishing kit will perform. A good rule of thumb is to sand up to at least 400 grit, and better yet, 600 grit, before moving to the polishing kit. Ensure you remove all dust between grits. A tack cloth or a blast of compressed air is excellent for this.
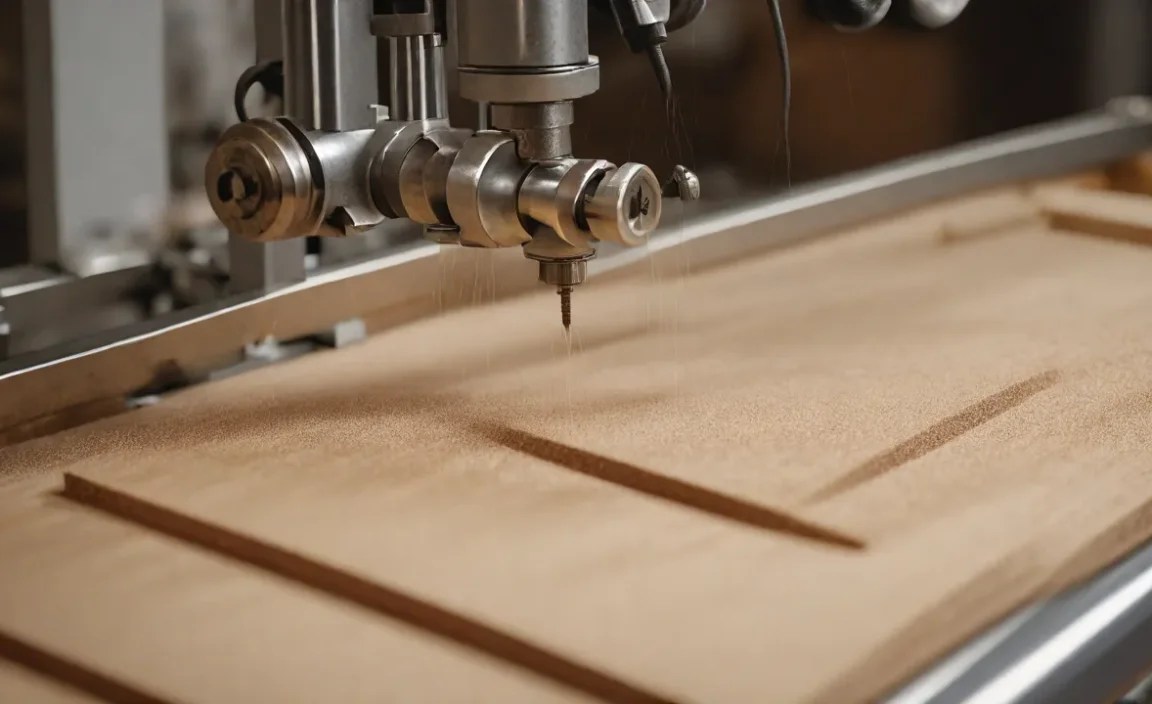
Step 1: Fitting the Backing Pad and Shank
If your kit came with a backing pad and shank, attach them securely. The shank should screw firmly into the center of the backing pad. Then, screw the assembly onto your lathe’s headstock spindle (if power sanding) or tailstock (for some applications, though headstock is more common for polishing). Ensure it’s tightened properly. Some backing pads have a central screw, while others use a threaded post to screw directly into a matching receptacle on the lathe spindle.
Step 2: Selecting Your First Pad and Compound
For most kits, you’ll start with a medium-grit abrasive pad and a “cutting compound.” Examine your kit; the pads are often color-coded or labeled with grit equivalents. The cutting compound is usually the first one you’ll apply. It’s designed to remove the very fine scratches left by your highest grit sandpaper.
Step 3: Applying the Compound
This step requires care. Put on your safety glasses and dust mask.
- Attach Pad: Securely attach the chosen abrasive pad (e.g., a medium-grit foam pad) to the hook-and-loop backing pad.
- Apply Compound: Apply a small amount of the cutting compound directly onto the surface of the pad. You don’t need much – a few pea-sized dots is sufficient.
- Lathe Speed: Mount your workpiece securely. Set your lathe to a relatively slow speed. For larger pieces, start around 500-800 RPM. For smaller pieces, you might go a bit faster, but always err on the side of caution. The goal is not to generate heat but to allow the pad and compound to work.
- Apply to Wood: Carefully bring the spinning pad into contact with the stationary or slowly rotating workpiece. Move the pad across the surface of the wood, applying light to moderate pressure. Work in one direction or a consistent pattern until the entire surface has been contacted by the pad and compound. You will see a slurry form.
- Check and Reapply: Periodically stop the lathe and check your work. If the pad starts to dry out or you’re not seeing the compound work, reapply a small amount. Avoid letting the pad run dry.
Step 4: Moving to Finer Polishing Pads and Compounds
Once you’ve gone over the entire piece with the cutting compound and pad, you’ll notice the surface is smoother but likely still has a dull sheen. Now it’s time to refine.
- Clean Surface: Briefly stop the lathe and wipe away any remaining compound slurry from both the workpiece and the backing pad. A clean cloth is essential.
- Switch Pads: Remove the cutting pad and attach a finer grit polishing pad (e.g., a fine-grit foam or even a suede pad).
- Switch Compounds: Apply a “polishing compound” to the new pad. This compound has finer abrasives and is designed to remove any slight dullness left by the cutting compound.
- Repeat Process: With the lathe at a similar or slightly increased speed, apply the polishing compound and pad to the workpiece, moving it consistently. The goal is to create a more uniform, increasingly shiny surface.
Step 5: The Final Gleam
For the ultimate finish, you’ll use your finest polishing compound and the softest pads (like felt or microfiber).
- Clean Again: Thoroughly clean the workpiece and your equipment. Any residue from previous stages can hinder the final polish.
- Fine Pad: Attach your designated final polishing pad (often felt or microfiber).
- Finishing Compound: Apply the “finishing” or “gleaming” compound. These usually contain very minimal abrasives and are more about building a brilliant sheen and protecting the surface.
- Buffing: Bring the pad into contact with the workpiece at a slightly higher speed (e.g., 800-1200 RPM, but always be mindful of friction and heat). Gently buff the entire surface. You should see a significant increase in shine. Some people like to do a final buffing with a clean, soft cloth and no compound at all, running the lathe at a moderate speed.
Ensure you cover every inch of the turned surface for a uniform shine.
Step 6: Optional Wax or Sealant Application
After achieving your polished finish, you might choose to apply a final coat of paste wax or a dedicated wood sealant. This offers an extra layer of protection and can enhance the depth of the shine. Many kits include a product for this stage, or you can use your favorite finishing wax.
- Apply Wax: Apply a thin layer of wax using a soft cloth or applicator pad at a very low lathe speed, or even by hand.
- Buff Off: Allow the wax to haze slightly, then give it a final buff with a clean, soft cloth or a dedicated buffing pad on the lathe at a moderate speed until it shines.
Choosing the Right Kit for Your Needs

With various brands and types of sanding pad polishing kits available, how do you choose the best one for your skills and projects? Consider these factors:
Kit Contents and Quality
First, look at what’s included. Does it have a good range of grit equivalents and polishing compounds? Are the pads made from durable materials that will last? A kit with multiple foam pads of varying densities and grits, along with dedicated cutting, polishing, and finishing compounds, will offer more flexibility.
Backing Pad Type
Ensure the kit comes with a backing pad and shank that fits your lathe. Most common are hook-and-loop (Velcro) systems, which are very convenient. Check the thread size of the shank to make sure it matches your lathe’s headstock spindle.
Material Compatibility
Some kits are geared more towards specific wood types. If you primarily work with very soft woods, you might need less aggressive compounds or pads. For hardwoods, you might benefit from more robust cutting compounds initially. Most beginner-friendly kits are designed for general wood use.
Price vs. Value
Don’t automatically go for the cheapest option. While you don’t necessarily need the most expensive brand, a slightly higher investment often means better quality pads, more effective compounds, and a longer-lasting kit. Read reviews from other woodturners to gauge performance and durability.
Brand Reputation
Reputable woodworking tool brands often offer high-quality polishing kits. Look for brands known for their lathe accessories and finishing products. For instance, products from companies like Klingspor, 3M, or specialized woodworking tool suppliers often meet high standards.
Ease of Use
For beginners, a kit that clearly labels its pads and compounds, and includes good instructions, is invaluable. Some kits are designed for simpler, fewer-step processes, which can be ideal when you’re just starting out.
A good starting point for many beginners might be a kit that offers clear grit equivalencies and a simple progression from one stage to the next. For example, look for kits that explicitly state something like “System for 400 grit to mirror finish.”
Troubleshooting Common Issues
Even with the best tools, you might encounter a few snags. Here’s how to deal with them:
Swirl Marks Persist
Cause: Insufficient sanding before using the polishing kit, or using a polishing pad that’s too fine too early.
Solution: Go back a step. Ensure you have thoroughly sanded with progressively finer grits (up to at least 400, preferably 600) before starting the polishing kit. If swirl marks are still apparent after the cutting compound stage, you might need to use a slightly more aggressive cutting compound or a pad with a slightly coarser grit equivalent, or simply spend more time with the cutting compound.
Dull Finish
Cause: Not using the correct compounds for each stage, insufficient buffing time, or contamination.
Solution: Make sure you’re following the recommended pad and compound progression. If the finish is dull after the polishing compound stage, move to the finest finishing compound and a soft pad.
