Quick Summary: For A2 tool steel, a carbide end mill is essential. Its hardness and heat resistance allow efficient cutting, preventing the steel from work-hardening and ensuring a clean finish. Specifically, a 1/8 inch or 1/4 inch shank standard length carbide end mill is your go-to tool for achieving a mirror finish on this tough material.
Working with A2 tool steel can feel like a challenge, especially when you’re starting out. This material is known for its toughness and ability to hold an edge, which is great for making durable tools. However, it can also be difficult to machine without the right tools, leading to frustrating results like work hardening, tool breakage, and a rough surface finish. Many beginners find themselves wondering what specific cutting tool will make the job easier and yield better results. You’re not alone in this! The good news is that with the right approach and the correct end mill, machining A2 tool steel becomes a much more manageable and rewarding process. We’ll walk through exactly why A2 is tricky and how a carbide end mill is your secret weapon. Get ready to understand how to get that smooth, professional finish you’re aiming for.
Why A2 Tool Steel is a Machinists’ Puzzle
A2 tool steel boasts a fantastic combination of properties: excellent wear resistance, good toughness, and it can be heat-treated to achieve high hardness. This makes it a popular choice for applications like punches, dies, blanking dies, and even some cutting tools. However, these very qualities that make it desirable also present a machining challenge. A2 steel hardens significantly when worked, meaning that if you use the wrong cutting speed or feed rate, or the wrong type of cutting tool, the material can become even harder as you cut it. This is called work hardening, and it can quickly ruin your end mill and your workpiece.
The high hardness of A2 also means it generates a lot of heat during machining. Standard high-speed steel (HSS) end mills can struggle in these conditions. They can soften, leading to premature wear or even melting, and they don’t cut as cleanly. This struggle often results in a poor surface finish that requires extensive post-machining work, if it can be fixed at all. The goal for any machinist, especially a beginner, is to achieve a clean, accurate cut with a good surface finish the first time around, saving you time and frustration. This is where the right tooling becomes absolutely critical.
The Champion: Carbide End Mills for A2 Tool Steel
When it comes to tackling A2 tool steel, carbide end mills are widely recognized as the superior choice, and for good reason. They offer several advantages over traditional HSS tools that make them essential for this type of material.
What Makes Carbide So Special?
- Superior Hardness: Tungsten carbide, the primary component of these end mills, is significantly harder than high-speed steel. This means it can cut through tough materials like A2 tool steel without deforming or wearing down as quickly.
- Higher Heat Resistance: Machining generates heat. Carbide can withstand much higher temperatures than HSS before losing its hardness. This is crucial for A2, which produces a lot of heat. Better heat dissipation means a cooler cut and a longer tool life.
- Rigidity: Carbide tools are more rigid than HSS. This reduced flex means they can maintain a more precise cutting path, leading to better dimensional accuracy on your workpiece and less chatter.
- Faster Cutting Speeds: Because of their hardness and heat resistance, carbide end mills allow you to use faster cutting speeds and feed rates. This translates to significantly shorter machining times, a major benefit for any workshop.
- Better Surface Finish: The combination of edge retention and rigidity allows carbide end mills to produce a much cleaner and smoother surface finish on tough materials like A2. This is especially important if you’re aiming for a mirror finish.
Carbide vs. HSS on A2 Tool Steel: A Quick Comparison
To really highlight why carbide is the go-to, let’s look at how it stacks up against HSS when machining A2 tool steel.
| Feature | Carbide End Mill | High-Speed Steel (HSS) End Mill |
|---|---|---|
| Hardness | Very High | Moderate |
| Heat Resistance | Excellent | Good, but can soften at high temperatures |
| Rigidity | High | Moderate |
| Cutting Speed Capability | High (requires rigid setup) | Lower |
| Tool Life on A2 | Much Longer | Shorter, prone to rapid wear |
| Surface Finish on A2 | Superior, less prone to work hardening | Can be rougher, higher risk of work hardening |
| Cost | Higher initial cost | Lower initial cost |
While the initial investment for a carbide end mill is higher, the benefits in terms of performance, tool life, and the quality of the final product when working with materials like A2 tool steel make it a worthwhile and often necessary expenditure for any serious hobbyist or professional. For achieving a mirror finish, carbide is almost always the answer.
Choosing the Right Carbide End Mill for A2 Success
Not all carbide end mills are created equal, and selecting the right one for your specific A2 tool steel project is crucial. When you’re aiming for that elusive mirror finish, or just trying to get a clean cut without a fight, a few key specifications matter:
Key Specifications to Consider:
- Material (Carbide Grade): For general machining of tool steels like A2, a sub-micron or micro-grain carbide is often preferred. These grades offer a good balance of wear resistance and toughness. Some manufacturers might specify grades like YG8, K20, or similar for tougher steels.
- Number of Flutes: This is important. For A2, you generally want an end mill with either 2 or 4 flutes.
- 2-Flute End Mills: These provide more chip clearance. This is a big advantage when machining materials that tend to produce long, stringy chips that can clog flutes and cause overheating or poor surface finish. They are often recommended for slotting and profiling.
- 4-Flute End Mills: These offer better stability and a smoother finish due to more cutting edges engaging the material. They are excellent for finishing passes and general milling where chip evacuation isn’t the primary concern. For achieving a mirror finish, a 4-flute end mill is often the preferred choice for the final pass.
A wise approach might be to use a 2-flute for roughing and a 4-flute for finishing.
- Coating: While not always necessary for A2 with a good carbide, specialized coatings can offer significant benefits.
- Uncoated: A good quality uncoated carbide will work, but it relies on the material properties of the carbide itself.
- TiN (Titanium Nitride): A common, cost-effective coating that adds a bit of hardness and lubricity, reducing friction.
- TiCN (Titanium Carbonitride): Harder than TiN, offering better wear resistance, especially for abrasive and harder materials.
- AlTiN (Aluminum Titanium Nitride): One of the best choices for machining hardened steels like A2, as it forms a protective aluminum oxide layer at high temperatures, further increasing heat resistance. This is often the top recommendation for your particular task.
- Helix Angle: A standard helix angle of 30 degrees is common and works well for A2. Higher helix angles (e.g., 45 degrees) can allow for higher feed rates and a smoother cutting action, but might be less rigid. For beginners, a standard 30-degree helix is a safe and effective choice.
- End Type:
- Square End: The most common type, used for general milling, slots, pockets, and profiles.
- Ball End: Used for creating rounded profiles, contours, and is essential for 3D surfacing.
- Corner Radius: A square end mill with a small radius on the corners. This adds strength to the corners and can improve surface finish by preventing chipping. A small corner radius (e.g., 0.010″ or 0.020″) can be beneficial on A2 to prevent corner chipping.
- Shank Diameter and Length: For hobbyist machines and general work on A2, a 1/8 inch or 1/4 inch shank is very common. Stick to “standard length” end mills. “Extended reach” or “extra long” end mills are less rigid and should be avoided unless absolutely necessary for specific deep cavity work, as they can increase the chance of chatter and deflection with tough materials.
Getting That Mirror Finish: Specifics for A2
To achieve a true mirror finish on A2 tool steel, you’ll likely need to use a combination of techniques and tooling. This often involves multiple passes:
- Roughing Pass: Use a 2-flute carbide end mill (possibly AlTiN coated) to remove the bulk of the material. Use conservative speeds and feeds, ensuring good chip evacuation.
- Semi-Finishing Pass: Switch to a 4-flute straight or corner radius end mill. Increase spindle speed and reduce feed rate slightly. This pass refines the surface and prepares it for the final cut.
- Finishing Pass: This is where the magic happens. Use a sharp, high-quality 4-flute carbide end mill (ideally AlTiN coated). Reduce the depth of cut significantly (e.g., 0.001″ – 0.003″). Increase spindle speed and use a very fine feed rate. The goal here is to lightly skim the surface. Generous coolant or lubrication is essential. A common recommendation for achieving a mirror finish might involve a specialized finishing end mill with very fine pitch flutes, but a standard 4-flute carbide end mill used correctly can also achieve excellent results.
The keyword “carbide end mill 1/8 inch 1/4 shank standard length for tool steel a2 mirror finish” perfectly captures the ideal tool: a carbide end mill, likely in a common 1/8″ or 1/4″ shank size, standard length, specifically chosen for its capability to mill A2 tool steel to a high-quality, mirror-like surface. If you are buying for this specific purpose, look for options marketed as “finishing end mills” or those with a high-quality AlTiN coating.
Setting Up Your Machine for Success
Having the right carbide end mill is only half the battle. The setup of your milling machine or lathe’s milling attachment, and the cutting parameters you choose, are equally critical for successfully and safely machining A2 tool steel. Let’s break down what you need to consider to get the best results and avoid common pitfalls.
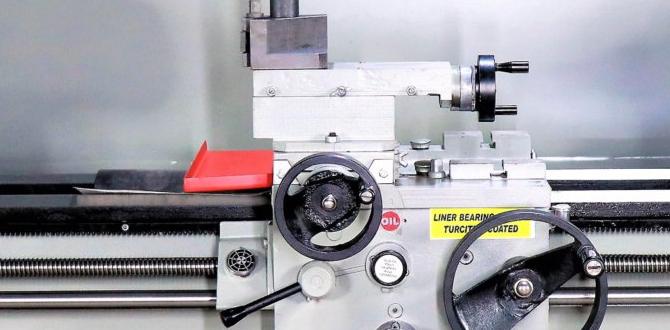
Machine Rigidity is Key
A2 tool steel is tough, and it fights back. This means your milling setup needs to be exceptionally rigid. Any flex in the machine, tooling, or workpiece can lead to chatter, poor surface finish, and tool breakage. Ensure:
- The end mill runout is minimal: Use a collet chuck or high-quality collets that are clean and properly seated. A runout greater than 0.0005″ (0.012mm) can cause problems.
- The workpiece is rigidly clamped: Use strong vises, clamps, or fixtures. Avoid workholding that can flex or shift during the cut. For smaller parts, consider using parallels to provide a stable base.
- The machine itself is in good condition: Check for play in the table or spindle bearings. A wobbly spindle is a recipe for disaster with tough materials. If you’re using a benchtop mill, understand its limitations.
Cutting Parameters: Speeds and Feeds
This is where many beginners struggle. A2 tool steel requires a careful balance of spindle speed (RPM) and feed rate (how fast the tool moves through the material). There’s no single magic number, as it depends on your machine, the end mill, and lubrication. However, here are some general guidelines and principles:
- Start Conservatively: It’s always better to start with slower speeds and feeds and incrementally increase them until you find the sweet spot.
- Spindle Speed (RPM): For carbide end mills on A2, you’ll typically be in the range of 200-800 SFM (Surface Feet per Minute). To convert this to RPM, use the formula: RPM = (SFM 3.25) / Diameter (in inches). For example, for a 1/4″ (0.25″) end mill at 400 SFM: RPM = (400 3.25) / 0.25 = 5200 RPM.
- Feed Rate (IPM – Inches Per Minute): This is directly related to the chipload, which is the amount of material removed by each cutting edge of the end mill. A good starting chipload for a 1/4″ carbide end mill on A2 might be around 0.002″ – 0.005″ per tooth. The formula for feed rate is: Feed Rate (IPM) = Chipload (in/tooth) Number of Flutes RPM. For example, using the 4-flute end mill example above (RPM 5200) and a chipload of 0.003″ per tooth: Feed Rate = 0.003 4 5200 = 62.4 IPM.
- Depth of Cut (DOC): This is crucial for managing heat and chip load.
- Roughing: Start with a relatively shallow DOC, perhaps 0.050″ to 0.100″ for a 1/4″ end mill, depending on machine rigidity.
- Finishing: For a mirror finish, the DOC should be very small, often 0.001″ to 0.003″. This is a light “skim” cut.
- Coolant and Lubrication: Absolutely essential for A2. A good quality cutting fluid or coolant will help with chip evacuation, cool the cutting zone, and reduce friction. Flood coolant is best, but a mist coolant or even a high-quality cutting paste or spray can help. Avoid dry machining.
It’s highly recommended to consult the end mill manufacturer’s website for recommended speeds and feeds for A2 tool steel. They often provide charts based on their specific carbide grades and coatings. Resources like the MetalCAM Speeds and Feeds Calculator or similar engineering data sites can be incredibly helpful for getting starting points.
Tooling for the Best CNC Machining on A2 Steel
When you start looking for specific end mills, you’ll see terms like “high-performance carbide end mills.” These are usually what you want. They are designed for difficult-to-machine materials like hardened steels. Pay attention to the specifications listed by the manufacturer:
- Material: Typically solid carbide.
- Grain Size: Micro-grain or sub-micro-grain for added toughness.
- Coating: AlTiN or TiCN are excellent choices for A2 steel.
- Number of Flutes: 2 for roughing, 4 for finishing.
- Geometry: Some end mills have specialized geometries for improved chip control or surface finish.
Always remember that achieving a mirror finish on A2 tool steel is an advanced machining goal. Patience, precision, and the right tools are paramount. Don’t be discouraged if your first attempts aren’t perfect. Every cut is a learning opportunity.
Step-by-Step Guide: Milling A2 Tool Steel to a Mirror Finish
Let’s walk through a typical process for milling A2 tool steel, focusing on achieving a smooth, almost mirror-like finish. This guide assumes you have a basic understanding of your milling machine and safety procedures. Remember, safety first – always wear safety glasses and be aware of your machine’s operation.
Tools and Materials You’ll Need:
- A2 Tool Steel workpiece
- Rigid Milling Machine (Benchtop or larger)
- Quality Collet Chuck or Collets
- Carbide End Mills:
- 1/4″ Shank, 2-Flute, Square End, AlTiN Coated (for roughing)
- 1/4″ Shank, 4-Flute, Corner Radius (e.g., 0.010″), AlTiN Coated (for semi-finishing/finishing)
- (Optional) 1/8″ Shank versions if working with tight tolerances or smaller setups.
- Machinist’s Vise or appropriate fixture