A 1/8 inch carbide end mill with excellent chip evacuation design is crucial for clean cuts and preventing tool breakage when machining materials like stainless steel. Features like specialized flute geometry, coatings, and proper speeds/feeds are key to success.
Hey everyone, Daniel Bates here from Lathe Hub! Ever tried cutting stainless steel with a tiny 1/8 inch end mill and ended up with a gummy mess or even a snapped tool? It’s a common frustration for anyone getting started with milling, especially with smaller bits. These little guys work hard, and if they can’t get rid of the metal chips they’re making, things can go south fast. But don’t worry, managing chip evacuation with a 1/8 inch carbide end mill is totally achievable. We’ll break down what makes a good chip-evacuating end mill and how to use it effectively. Get ready to mill with confidence!
Why Chip Evacuation Matters for Small End Mills
When you’re milling, especially with a small 1/8 inch end mill, the chips you create are tiny. If these chips don’t get cleared away from the cutting area efficiently, they can pile up. This is called “re-cutting chips,” and it’s a big problem. The fresh chips get pushed back into the cut, causing a few issues:
- Increased Heat: Re-cutting chips generates a lot of extra friction and heat. This heat can rapidly dull the cutting edges of your end mill, making it cut poorly and eventually leading to tool failure.
- Poor Surface Finish: When chips get packed into the cut, they can scratch the surface of your workpiece. This results in a rough, undesirable finish that’s hard to clean up.
- Increased Cutting Force: A pile-up of chips makes it harder for the end mill to cut. This means your machine needs to work harder, and you might experience chatter or vibration.
- Tool Breakage: The combination of heat, increased cutting force, and wedged chips significantly increases the stress on the end mill. For small tools like a 1/8 inch end mill, this can easily lead to catastrophic failure – a broken tool.
For delicate materials or thin-walled parts, poor chip evacuation can ruin the entire piece. It’s like trying to clear snow with a tiny shovel – if it keeps falling faster than you can move it, you’ll get buried!
Understanding Carbide End Mills: The Basics
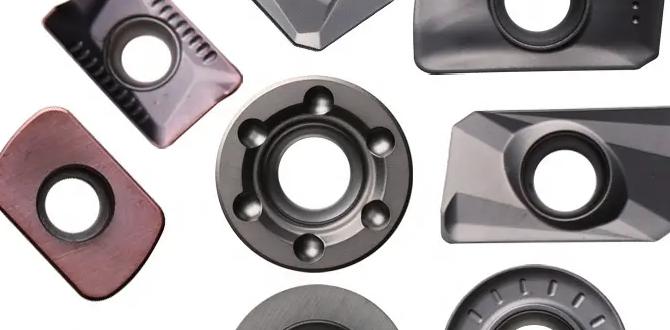
Carbide end mills are specialists in the machine shop. Made from tungsten carbide mixed with a binder (usually cobalt), they are incredibly hard and can withstand higher cutting speeds and temperatures than High-Speed Steel (HSS) tools. This hardness makes them ideal for tougher materials like hardened steel, stainless steel, and exotic alloys. For a 1/8 inch end mill, carbide is usually the go-to choice because of its durability and ability to hold a sharp edge.
What Makes a Carbide End Mill “Good”?
A good carbide end mill, especially one designed for effective chip evacuation, has several key characteristics:
1. Flute Design: The Lifeblood of Chip Removal
The flutes are the spiral grooves that run up the body of the end mill. Their geometry is the most critical factor in how well chips are cleared. For chip evacuation, especially with smaller end mills, certain flute designs are superior:
- High Helix Angle: A steeper spiral (higher helix angle) helps to “screw” the chips out of the flutes and away from the cutting zone more aggressively.
- Deep Flutes: Wider and deeper flutes provide more volume for chips to reside in before being ejected. This is vital for preventing pack-up.
- Polished Flutes: Flutes that are highly polished offer a smoother surface for chips to slide on. This reduces friction and helps chips exit more easily, preventing them from sticking.
- Number of Flutes: For general milling and good chip evacuation, tools with 2 or 3 flutes are often preferred in smaller sizes. A 4-flute end mill has less open space for chips to evacuate, making it more prone to clogging in some applications. For stainless steel, 2 or 3 flute tools are generally recommended for better chip clearance.
2. Coatings: The Protective Shield
Coatings add an extra layer of performance to carbide end mills. While not directly responsible for evacuating chips, they significantly help manage the heat and wear that result from chip issues:
- AlTiN (Aluminum Titanium Nitride): A very popular coating for machining steels and stainless steels. It creates a hard, oxidation-resistant layer that performs exceptionally well at high temperatures.
- TiB₂ (Titanium Diboride): Known for its extremely low coefficient of friction and good wear resistance, making it excellent for gummy materials like aluminum and some steels.
- ZrN (Zirconium Nitride): Often used for machining aluminum and plastics, it provides good lubricity and is biocompatible.
While coatings might add to the cost, they drastically extend tool life and improve performance, especially when dealing with challenging materials and potential chip evacuation issues.
3. Geometry and Tolerances: Precision Matters
Even with great flute design, a tool that isn’t manufactured precisely will struggle. Tight tolerances on diameter, concentricity (how perfectly round and centered the cutting edges are), and runout are crucial for predictable cutting and effective chip shedding.
When to Choose a 1/8 Inch Carbide End Mill
A 1/8 inch cutter is incredibly versatile for detailed work. You’d typically reach for one for:
- Engraving: Creating fine details, text, or patterns.
- Slotting: Machining narrow slots.
- Contouring small parts: Following complex outlines on small workpieces.
- Deburring: Removing small burrs from machined features.
- Working in confined spaces: Accessing areas where larger tools won’t fit.
- Precision drilling (in some cases): Though a drill bit is better, an end mill can be used for shallow holes or pre-drilling.
The 1/8 inch diameter means it’s easy to over-stress it if used improperly. This is where proven chip evacuation features become indispensable.
Proven Chip Evacuation: Key Features to Look For
When shopping for a 1/8 inch carbide end mill, particularly for materials like 304 stainless steel, keep these “proven chip evacuation” features in mind. You might see them listed in product descriptions:
1. Specialized Flute Geometry for Small Diameters
Manufacturers are keenly aware of the challenges with small tools. Look for end mills specifically marketed for:
- “High chip removal”
- “Excellent chip evacuation”
- “Gummy material applications”
These often incorporate a more aggressive flute hook angle, a higher helix, and wider chip gullets than standard general-purpose end mills. For example, an end mill designed for stainless steel often has a higher helix angle (e.g., 30-45 degrees) compared to a general-purpose tool (e.g., 30 degrees) or an aluminum-specific tool (which might have a lower helix and polished flutes).
2. Through-Spindle Coolant (TSC) Compatibility
This is a more advanced feature, typically found on CNC milling machines, but worth understanding. If your machine can supply coolant directly through the spindle and out of the center of the end mill, it’s a game-changer for chip evacuation and cooling. The high-pressure coolant blasts chips out of the flutes and keeps the cutting edge cool. While not a feature of the end mill itself, if you have a TSC-capable machine, choosing an end mill that’s designed to work with it (often indicated by coolant-fed holes) is paramount for difficult materials.
3. Roughing End Mills
While we’re talking about precise finishing, sometimes aggressive material removal is needed first. Roughing end mills have a more aggressive cutting edge, often with serrations or a “dish” shaped profile on the flanks. These break up chips into smaller, more manageable pieces, which can aid evacuation. However, they leave a rougher surface finish and are typically used for bulk material removal before a finishing pass with a different tool.
4. Corner Radii and Chamfers
A sharp 90-degree corner on an end mill can be prone to chipping and can create larger, more stubborn chips. Many end mills feature a small corner radius or a slight chamfer. These can help strengthen the cutting edge and sometimes influence chip formation, though their primary role is to strengthen the tool and improve surface finish rather than direct chip evacuation.
Optimizing Your 1/8 Inch Carbide End Mill for Stainless Steel
Machining 304 stainless steel with a 1/8 inch end mill is a perfect example of where chip evacuation is critical. Stainless is also known as “auto-harden” steel; it work-hardens rapidly, making it tough and gummy. Here’s how to set up your cuts for success:
1. Feed Rates and Speeds: The Golden Ratio
Getting your speeds and feeds right is crucial. Too slow, and you risk rubbing and creating heat. Too fast, and you can chip the tool.
- Surface Speed (SFM): For 1/8 inch carbide end mills machining 304 stainless steel, a starting point for surface speed might be around 150-250 SFM (Surface Feet per Minute). This translates to RPM (Revolutions Per Minute) like this:RPM = (SFM 12) / (π Diameter)For a 1/8″ (0.125″) end mill at 200 SFM: RPM = (200 12) / (3.14159 0.125) ≈ 6111 RPM.
Always check the tool manufacturer’s recommendations. You’ll likely be running these small tools at the higher end of your milling machine’s RPM capability.
- Feed Rate (IPM): The feed rate is how fast the tool moves into the material. A good starting point for feed per tooth (FPT) for a 2-flute end mill in stainless steel might be around 0.0005 to 0.001 inches per tooth.Feed Rate (IPM) = FPT Number of Flutes RPMUsing our example RPM of 6111 and 0.0007 FPT for a 2-flute end mill: Feed Rate = 0.0007 2 6111 ≈ 8.55 IPM.
It’s vital to start conservatively and increase if the cut sounds good and the chip load looks right.
Table: Starting Speeds and Feeds for 1/8″ Carbide End Mill in 304 Stainless Steel
| Parameter | Value (Typical Range) | Notes |
|---|---|---|
| Surface Speed (SFM) | 150 – 250 | Higher SFM requires better cooling and rigidity. |
| RPM for 1/8″ (0.125″) Tool | 4,000 – 8,000 | Depends on your machine’s max RPM. Consult SFM for calculation. |
| Feed Per Tooth (FPT) | 0.0005 – 0.0010 (for 2-flute) | Start low, listen to the cut, adjust. |
| Feed Rate (IPM) | Calculated based on FPT, Flutes, RPM | Example: ~5-15 IPM |
| Depth of Cut (DOC) | 0.010″ – 0.030″ (Axial) | Use shallow cuts, especially radial. |
| Width of Cut (WOC) | 0.010″ – 0.050″ (Radial) | Keep step-over small (max 50% of diameter). |
2. Cutting Strategy: Step-Overs and Depths
For chip evacuation, how you actually approach the cut matters:
- Shallow Axial Depth of Cut (DOC): Don’t try to plunge deep. For a 1/8 inch end mill, keep your vertical cut depth shallow, maybe 10-25% of the tool diameter (0.010″ to 0.030″). This allows chips more room to exit freely.
- Conservative Radial Width of Cut (WOC): When slotting or profiling, don’t use the full 1/8 inch diameter. Aim for a step-over (radial engagement) of no more than 50% of the tool diameter, and often even less (20-30%) for stainless steel. This reduces the cutting load and allows chips to evacuate more easily from the sides. Consider “high-efficiency milling” (HEM) or “adaptive clearing” toolpaths if using CAM software – these strategies maintain a small, consistent chip load and radial engagement, which is excellent for chip control.
- Climb Milling vs. Conventional Milling: For most operations with modern CNCs, climb milling is preferred. The cutter rotates in the same direction as the feed. This results in a thinner chip at the start of the cut and can help lift chips away. Conventional milling can drag the chip, potentially causing issues.
3. Lubrication and Coolant: The Unsung Heroes
Machining stainless steel without cooling is a recipe for disaster. Even with good chip evacuation features, friction will build up.
- Flood Coolant: If your machine has it, use it! A good flow of water-based coolant will flush chips away, cool the tool, and lubricate the cut.
- Mist Coolant / Air Blast: For machines without flood coolant, a mist coolant system or a strong air blast directed at the cutting zone can provide essential lubrication and cooling.
- Cutting Fluid / Paste: For manual mills or very precise applications, a high-quality cutting fluid or paste specifically designed for stainless steel can make a huge difference. Apply it to the workpiece or tool as needed. For small manual jobs, a drop on the tool or a good quality cutting paste can be very effective.
Choosing the Right 1/8 Inch Carbide End Mill: Specs to Check
When browsing tool catalogs or websites, here are the specific terms and specifications you should look for on a product page for a 1/8 inch carbide end mill that excels at chip evacuation, especially for stainless steel:
Table: Key Specifications for Chip Evacuation-Focused End Mills
| Specification | What to Look For | Why it Matters for Chip Evacuation |
|---|---|---|
| Material | Carbide (Solid Carbide) | Hardness and heat resistance for tough materials. |
| Coating | AlTiN, TiB₂, ZrN (depending on specific material) | Reduces friction, increases heat resistance, aiding in cooler cuts and less sticky chips. |
| Number of Flutes | 2 or 3 Flutes | More chip room compared to 4-flute tools, ideal for sticky materials like stainless steel. |
| Helix Angle | 30° to 45° (or higher) | Steeper angle “screws” chips out of the flute more effectively. |
| Flute Count/Type | Deep, wide flutes; polished or high-finish | Provides increased volume for chips and a smoother surface for easier ejection. |
| End Type | Square, Ball, or Corner Radius | Square is general purpose. Ball for contoured surfaces. Corner radius strengthens the edge and can influence chip breaking. |
| Shank Diameter | 1/8″ (0.125″) standard | Standard for small tools. Ensure it fits your collet taper. |
| Overall Length | Standard or Extended | Standard length is typical. Extended may be needed for reach but can reduce rigidity. |
| Application | Stainless Steel,” “High Temp Alloys,” “Gummy Materials,” “Finishing,” “Slotting | Manufacturers |