A 1/8 inch carbide end mill is your go-to tool for clean, precise dry cutting of MDF. This essential guide breaks down how to use this versatile bit effectively for your projects.
Cutting Medium Density Fiberboard (MDF) can be tricky. It’s a fantastic material for a variety of projects, from detailed cabinet doors to intricate signs, but it’s also prone to chipping and creating a lot of dust. Getting a clean edge, especially with smaller details, can feel like a real challenge when you’re just starting out. You might be wondering if there’s a better way than wrestling with standard router bits that leave fuzzy lines. The good news is, there is! A specific tool, the 1/8 inch carbide end mill, is a real game-changer for MDF dry cutting. We’ll walk you through exactly why it’s so great and how to use it to get those perfectly crisp cuts you’re after. Get ready to transform your MDF projects!
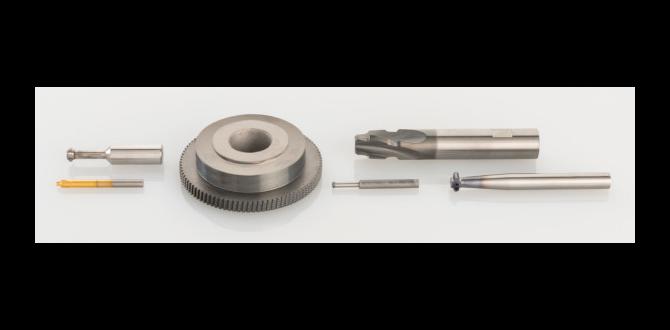
What is a 1/8 Inch Carbide End Mill and Why is it Great for MDF?
Let’s dive into what makes this little tool so special. A 1/8 inch carbide end mill is a type of cutting tool used in milling machines, CNC routers, and even some rotary tools. The “1/8 inch” refers to its diameter, meaning it can create very fine details. “Carbide” is the material it’s made from – specifically, tungsten carbide. This super-hard material is significantly tougher and more wear-resistant than high-speed steel (HSS), which is what many standard router bits are made from. This hardness is crucial when cutting materials like MDF.
MDF is essentially a composite wood product made from wood fibers, resin, and wax, pressed together under heat and pressure. While it’s smooth and stable, it’s also abrasive and can wear down softer cutting tools quickly. This is where the carbide end mill shines. Its extreme hardness means it can slice through MDF cleanly without getting dulled too fast, and it holds its sharp edge much longer. The result? Cleaner cuts, less tear-out, and a much more pleasant working experience, especially when you’re dry cutting (meaning without any coolant, as is common with wood and MDF).
The 1/8 inch size is particularly valuable for several reasons:
- Fine Detail: Allows for intricate designs, small text, and tight internal corners that larger bits simply can’t achieve.
- Reduced Material Removal: For delicate cuts or scoring lines, a smaller diameter means less material is removed per pass, offering more control.
- Less Stress on Material: A smaller bit exerts less force on the MDF, reducing the risk of breakage, especially in thinner sheets.
- Versatility: While ideal for intricate work, it’s also capable of general cutting tasks, making it a workhorse in many workshops.
When we talk about a “carbide end mill 1/8 inch 1/4 shank standard length for mdf dry cutting,” we’re specifying the key characteristics for this particular application. The 1/4 inch shank is a standard size that fits most common collets and tool holders in routers and CNC machines. Standard length” generally refers to the fluted length and overall tool length suitable for typical routing operations – not excessively long or short.
Choosing the Right 1/8 Inch Carbide End Mill for MDF
Not all carbide end mills are created equal, and for MDF, you’ll want to look for specific features. The most important choice is the number of flutes (the cutting edges). For MDF, two-flute (2-flute) end mills are generally preferred for dry cutting.
Why Two Flutes?
Here’s a breakdown of why 2-flute end mills are ideal for MDF:
- Superior Chip Ejection: MDF, especially when being cut dry, produces a lot of fine dust and chips. A 2-flute end mill has larger flute gullets (the space between the flutes). This open design allows the chips to escape more easily. If chips get trapped, they can overheat the bit, clog the flutes, and lead to a rough cut or even damage the workpiece.
- Less Heat Buildup: With fewer spiraling edges cutting at any given moment, there’s less friction and therefore less heat generated. This is crucial for MDF, which can scorch easily.
- Better for Softer Materials: While 4-flute end mills are great for finishing harder metals, they can sometimes struggle with chip evacuation in softer materials like MDF, leading to chip recutting and a messy finish. The 2-flute design is optimized for materials that produce a lot of chips.
Other Features to Consider:
- “Up-cut” vs. “Down-cut” vs. “Straight Flute”:
- Up-cut: The most common type. Flutes spiral upwards, pulling chips out of the cut and away from the workpiece. This is excellent for general cutting and helps with chip evacuation in MDF.
- Down-cut: Flutes spiral downwards, pushing chips down onto the workpiece. These are often used for creating a clean top surface finish in wood or plastics but can cause chip buildup in MDF.
- Straight Flute (or Compression): These have less helix angle and are often used for very clean cuts on materials where chip evacuation isn’t a primary concern, or in specific applications. For general MDF dry cutting, up-cut is usually the best bet due to its chip clearing ability.
- Coating: While not always necessary for MDF, some coatings (like TiN or TiCN) can further improve wear resistance and reduce friction, leading to even cleaner cuts and longer tool life. However, for basic MDF work, uncoated carbide is usually sufficient and more cost-effective.
- Material Quality: Opt for reputable brands. Good quality carbide will be more consistent, hold its edge better, and be less prone to chipping itself.
For an 1/8 inch carbide end mill specifically for MDF dry cutting, a 2-flute, up-cut spiral, standard length end mill with a 1/4 inch shank is your ideal starting point. Some even have special geometries optimized for plastics and composites, which work very well on MDF.
Essential Tools and Setup for MDF Dry Cutting
Before you even touch the MDF, having the right setup is key to safety and a good result. Here’s what you’ll need:
Your Milling Machine or CNC Router:
This could be anything from a small desktop CNC to a larger mill. Ensure your machine is calibrated and running smoothly. For CNC routers, a sturdy frame and reliable stepper motors are important for precision.
The 1/8 Inch Carbide End Mill:
As discussed, a 2-flute, up-cut, carbide end mill with a 1/4 inch shank is your primary tool.
Collet and Collet Nut:
These hold the end mill securely in your machine’s spindle. Make sure you have a 1/4 inch collet that fits your spindle. Precision collets are worth the investment for accurate runout.
Dust Collection System:
This is absolutely critical when cutting MDF. MDF dust is incredibly fine, airborne, and can be harmful to your respiratory system. It also creates a mess and is a fire hazard if allowed to accumulate. A good dust collector with a fine particulate filter (HEPA filter is ideal) connected via a hose to your router or spindle is essential. You can find detailed guides on effective dust collection for workshops from organizations like OSHA (Occupational Safety and Health Administration) for general workshop safety practices, or from reputable woodworking and CNC communities.
Learn more about workshop dust control from: OSHA Woodworking Safety Information
Workholding:
You need to secure your MDF sheet firmly to your machine’s table. Common methods include:
- Clamps: For machines with a suitable table edge.
- Vacuum Table: If your machine is equipped, this is often the simplest and most effective method for holding flat sheets.
- Screws: In waste areas or designated hold-down points, especially for CNC machines with MDF spoilboards.
- Double-sided Tape: For smaller pieces or delicate operations, though less secure.
Ensure your workpiece is completely stationary. Any movement during cutting will result in inaccurate dimensions and poor edge quality.
Safety Gear:
- Safety Glasses: Always wear impact-resistant safety glasses to protect your eyes from flying dust and debris.
- Respirator Mask: A good quality dust mask or respirator designed for fine particulates is non-negotiable when working with MDF.
- Hearing Protection: Milling machines and routers can be loud.
- Work Gloves: When handling materials, especially if they have rough edges.
Your Design File (CAD/CAM Software):
You’ll need your design created in CAD (Computer-Aided Design) software and then translated into toolpaths using CAM (Computer-Aided Manufacturing) software, which generates the G-code for your CNC machine to follow. For manual milling, you’ll be setting up the cut manually.
Key CAM considerations for MDF:
- Toolpaths: You’ll typically use “profile” or “contour” toolpaths for cutting out shapes.
- Lead/In & Lead/Out: For CNC, setting up smooth entry and exit points for the end mill is important to avoid marking your workpiece.
- Tabs: For full cutouts, you’ll need to program small “tabs” – sections of MDF left uncut – to hold the part in place until the very end of the cut. This is crucial for safety and preventing the cut-out piece from being thrown by the spinning bit.
Step-by-Step: Dry Cutting MDF with a 1/8 Inch Carbide End Mill
Let’s get cutting! This guide assumes you’re using a CNC router, as this is where the precision of an end mill is most often leveraged for MDF. The principles are similar for manual milling, but the execution will differ.
Preparation:
- Prepare Your MDF: Ensure your MDF sheet is clean, flat, and free of debris.
- Secure the Workpiece: Firmly clamp, vacuum, or screw your MDF sheet to the machine bed. Double-check that it won’t move.
- Install the End Mill:
- Ensure your spindle is off!
- Insert the 1/4 inch collet into the spindle collet nut.
- Gently screw the collet nut with the collet into the spindle.
- Insert the 1/8 inch carbide end mill into the collet, pushing it up as far as it will comfortably go.
- Tighten the collet nut securely using appropriate wrenches.
- Connect Dust Collection: Ensure your dust collection hose is attached to your spindle/router and the system is powered on.
Setting Up Your CAM Software and Machine:
- Import Your Design: Load your DXF, SVG, or other design file into your CAM software.
- Define Material: Set the thickness of your MDF accurately.
- Select Tool: Create a tool definition for your 1/8 inch, 2-flute carbide end mill. Specify its diameter as 1/8 inch (or 3.175mm).
- Create Toolpaths:
- Profiling: For cutting out shapes, use a profile toolpath.
- Outside/Inside/On-Center: Choose “Outside” if you want to cut the exact exterior dimension, or “Inside” if you want the cut to be within your drawn line.
- Depth of Cut: This is crucial for clean cuts and tool longevity. For MDF with a 1/8 inch end mill, it’s generally best to cut in multiple shallow passes rather than trying to cut the full thickness at once. A good starting point for a 1/8″ bit is a depth of cut around 1/8″ to 1/4″ (3-6mm) per pass, depending on the MDF quality and machine rigidity. Always refer to the end mill manufacturer’s recommendations if available.
- Spindle Speed (RPM): This depends on your machine and the MDF. A common range for MDF with a 1/8″ carbide end mill is between 15,000 and 20,000 RPM. Experimentation might be needed. A good starting point is often around 18,000 RPM.
- Feed Rate: This is how fast the machine moves through the material. For MDF and a 1/8″ bit, a feed rate between 20-50 inches per minute (500-1270 mm/minute) is a common starting range. Too fast can chip the MDF or stress the bit; too slow can burn the MDF.
- Tabs: If cutting a part completely out, add tabs. Select where you want them placed and set their width and height (e.g., 0.25″ width, 0.1″ height). These will hold the part in place.
- Lead In/Out: Set smooth lead-in and lead-out moves to prevent scallops at the start and end of your cuts. A small arc or a straight line of a few millimeters is usually sufficient.
- Simulate: Always run a simulation in your CAM software to visually check that the toolpaths look correct, avoid collisions, and will cut as intended.
- Generate G-Code: Save the generated G-code file.
Running the Job:
- Load G-Code: Transfer the G-code file to your CNC controller.
- Set Zero (Home Position): Carefully set your X, Y, and Z zero points on your MDF material according to your CAM setup. For Z zero, it’s typically set to the top surface of the MDF.
- Test Run (Air Cut): Before cutting into the MDF, run the program with the spindle OFF but the machine moving, a few inches above the material. This lets you visually confirm travel paths and speeds without risk.
- Start the Spindle and Dust Collector: Turn on your dust collection system and then carefully start the spindle.
- Begin the Cut: Initiate the G-code program.
- Monitor the Cut: Stay with your machine while it’s running. Listen for unusual noises, watch for excessive dust buildup (indicating poor chip evacuation), and observe the cut quality. Be ready to hit the “Pause” button or E-stop if anything seems wrong.
- At the End of the Cut: Once the machine finishes, keep the spindle running until the dust collector has cleared most of the airborne dust.
Post-Cutting:
- Remove Tabs: Carefully use a chisel, flush-cut saw, or your end mill (on a very low setting, if you’re skilled) to break or cut the tabs holding your part.
- Clean: Brush away any remaining dust from your workpiece and machine.
- Inspect: Examine your cut edges for smoothness and accuracy.
Tips for Achieving Crisp Edges and Avoiding Problems
Even with the right tool, a few fine-tuning tips can make a big difference in your MDF cutting results.
Feed Rate and Spindle Speed Balance (“Chipped Tooth”):
Getting the right balance between feed rate and spindle speed is key to avoiding a phenomenon often called “chipping” or “chipped tooth.” This is where the cutter hammers the material instead of shearing it cleanly, leading to a rough, fuzzy, or even burnt edge. MDF is particularly susceptible.
General Rule:
- If you hear a noisy, chattering, or “rattling” sound, you might be going too fast with your feed rate, or your spindle speed might be too low.
- If you see smoke, burning, or a melted/sticky edge, your feed rate might be too slow, or your spindle speed too high.
Finding the Sweet Spot: Start with conservative settings (e.g., 18,000 RPM, 30 IPM). Listen and watch. If it’s clean, you can gradually increase the feed rate until you hear minimal chatter or see slight discoloration, then back it off slightly. Conversely, if it’s rough or burning, reduce the feed rate or spindle speed.
Depth of Cut (DOC):
As mentioned, shallow depths of cut are almost always better for MDF. This puts less stress on the end mill, reduces heat, allows for better chip evacuation, and results in a smoother cut. For an 1/8″ end mill, a 1/8″ (3mm) DOC is a very safe and effective starting point for full thickness cuts.
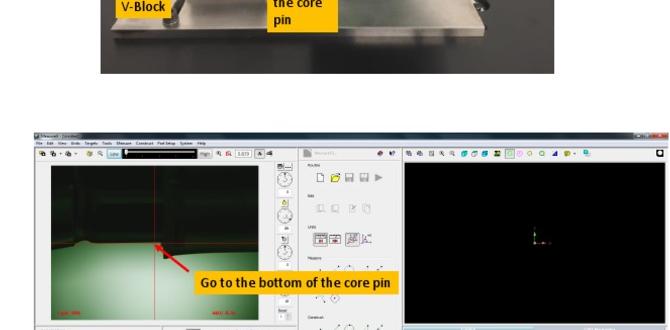
Tool Runout and Tramming:
Even a tiny bit