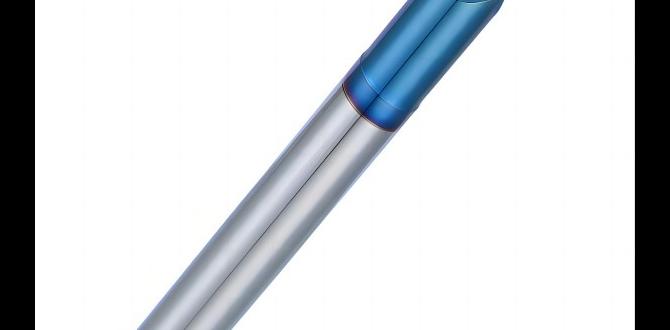
A 1/8 inch carbide end mill is an essential, proven tool for precise cuts in various materials, perfect for detailed work on milling machines.
Welcome to Lathe Hub! If you’re just starting out with your milling machine, you might be looking at a dizzying array of cutting tools. Don’t worry, we’ve all been there! Today, we’re going to focus on a small but mighty tool that will quickly become indispensable in your workshop: the 1/8 inch carbide end mill. This little powerhouse is your ticket to making intricate cuts, chamfers, and profiles with precision. We’ll break down exactly what it is, why it’s so useful, and how you can get the most out of it. Get ready to simplify your machining!
Why the 1/8 Inch Carbide End Mill Deserves a Spot in Your Toolbox
When you’re starting out with milling, the sheer variety of end mills can be overwhelming. You’ll see different diameters, lengths, numbers of flutes, and materials. But trust me, understanding the 1/8 inch carbide end mill is a fantastic first step. It’s like learning to ride a bike with training wheels – it builds your confidence and skill for more complex tasks later on.
So, what’s so special about this particular size and type of end mill? It boils down to its versatility, precision, and the material it’s made from: carbide.
Understanding the “Carbide” Advantage
Before we dive into the specifics of the 1/8 inch size, let’s talk about why carbide is king in the machining world.
Durability: Carbide (specifically tungsten carbide) is incredibly hard. This hardness means it can withstand higher temperatures and pressures compared to high-speed steel (HSS) tools. HSS tools can soften and lose their cutting edge if they get too hot, but carbide stays sharp for much longer, even during demanding operations.
Cutting Speed: Because carbide is so hard and heat-resistant, you can often run your milling machine at much faster spindle speeds when using carbide tools. This translates to quicker machining times, which is a big win for any project.
Material Versatility: Carbide excels at cutting harder materials, including many steels, stainless steels, titanium, and even hardened alloys. It’s also excellent for plastics and composites. While it might seem like overkill for softer materials like aluminum or mild steel, its longevity often makes it a cost-effective choice in the long run.
Precision and Finish: The hardness of carbide also means it holds a very sharp edge. This sharpness is crucial for achieving precise dimensions and a smooth surface finish on your workpiece, which is exactly what we want for those detailed projects.
The Magic of 1/8 Inch
Now, let’s talk about the 1/8 inch (approximately 3.175mm) diameter. Why is this specific size so incredibly useful for beginners and experienced machinists alike?
Intricate Details: A 1/8 inch end mill is perfect for creating fine details, small slots, intricate patterns, and sharp corners that larger end mills simply can’t achieve. Think about engraving, making small pockets for components, or creating detailed decorative elements.
Accessibility: Many entry-level milling machines, especially desktop or hobbyist models, have limited rigidity or spindle power. A smaller end mill like the 1/8 inch requires less cutting force, making it ideal for these machines. You can achieve great results without straining your equipment.
Material Removal Control: For beginners, controlling the amount of material being removed is key to avoiding mistakes. The smaller diameter of a 1/8 inch end mill naturally lends itself to taking lighter passes, giving you more control over the cutting process and reducing the risk of errors.
Versatile Shank Sizes: While the cutting diameter is 1/8 inch, you’ll often find these with common shank sizes like 1/8 inch, 1/4 inch, or 6mm and 8mm for a more rigid connection. The 1/8 inch shank is common for smaller machines, while a 10mm shank (which is roughly 3/8 inch) offers a bit more rigidity if your machine can accommodate it. For extremely fine detail or very light cuts, a 1/8 inch shank is perfectly appropriate.
What About “Long Reach” and “Heat Resistant”?
You might see specifications like “long reach” and “heat resistant” when looking for carbide end mills.
Long Reach: A “long reach” end mill has an extended flute length relative to its shank diameter. This allows you to machine deeper features or reach into areas of your workpiece that a standard end mill can’t access. For a 1/8 inch end mill, a true “long reach” would still be quite delicate due to the small diameter, but it can be useful for specific deep slotting applications where extreme precision is needed.
Heat Resistant: While all carbide is inherently more heat-resistant than HSS, some coatings are applied to carbide tools to further enhance their performance at high temperatures and reduce friction. For general-purpose machining with a 1/8 inch end mill, standard un-coated carbide is usually sufficient, especially if you’re not pushing the envelope with extremely aggressive cuts or high speeds. However, if you are working with difficult-to-machine materials like titanium or certain stainless steels, a coated, heat-resistant carbide end mill can be a worthwhile investment.
Key Specifications to Look For
When you’re ready to buy your first 1/8 inch carbide end mill, here are a few things to consider:
Types of 1/8 Inch Carbide End Mills
End mills come in various configurations, each suited for different tasks. For a 1/8 inch carbide end mill, you’ll typically find these common types:
Center Cutting vs. Non-Center Cutting:
Center Cutting: These end mills have cutting edges that extend to the center of the tool. This allows them to plunge straight down into the material, like a drill bit, as well as cut horizontally. Most general-purpose 1/8 inch end mills are center cutting.
Non-Center Cutting: These have a raised center and cannot plunge directly into the material. They must be fed into the material from the side. These are less common for general hobbyist use.
Number of Flutes: Flutes are the helical grooves that spiral around the cutting end of the tool.
2 Flutes: Generally preferred for softer materials like aluminum and plastics because they provide better chip clearance. This is great for preventing chip packing.
4 Flutes: Better suited for harder materials like steel and cast iron. They offer more cutting edges and better surface finish but produce less chip clearance. For general-purpose use, especially if you’re working with a mix of materials or a machine with limited rigidity, starting with a 2-flute end mill is often a good bet. A 4-flute carbide end mill can be excellent for cast iron, offering good chip evacuation with its hardness.
Coating: As mentioned, coatings can improve performance.
Uncoated: Good for general use on softer metals and plastics.
TiN (Titanium Nitride): A common, general-purpose coating that adds hardness and lubricity, improving tool life and allowing slightly higher cutting speeds.
TiCN (Titanium Carbonitride): Offers greater hardness and abrasion resistance than TiN, suitable for harder materials and higher speeds.
AlTiN (Aluminum Titanium Nitride): Excellent for machining high-temperature alloys and steels, as it forms a protective oxide layer at high temperatures.
Understanding the Shank
The shank is the part of the end mill that fits into your milling machine’s collet or tool holder. For a 1/8 inch end mill, you’ll commonly encounter:
1/8 inch Shank: This matches the cutting diameter. It’s common for micro-milling or on very small machines. It offers less rigidity than a larger shank.
1/4 inch Shank: A very common size that provides significantly more rigidity than a 1/8 inch shank and fits many standard collets.
6mm or 8mm Shank: Metric equivalents, also offering good rigidity.
10mm Shank: This is a bit larger (nearly 3/8 inch) and offers excellent rigidity for its size, allowing for more aggressive cuts while maintaining stability, which can be beneficial when working with materials like cast iron.
A Quick Guide to Common 1/8 Inch Carbide End Mill Specs:
| Feature | Description | Best For |
| :————– | :————————————————————————- | :—————————————————————————————- |
| Material | Carbide (Tungsten Carbide) | Hardness, heat resistance, longevity |
| Diameter | 1/8 inch (approx. 3.175mm) | Fine details, small slots, intricate work |
| Flutes | 2 or 4 | 2: Softer materials (aluminum, plastic), better chip clearance. 4: Harder materials (steel, cast iron), better finish. |
| Shank | 1/8″, 1/4″, 6mm, 8mm, 10mm | 1/8″ for micro-mills. Larger shanks (1/4″, 10mm) for better rigidity. |
| Cutting Type| Center Cutting | Plunging, slotting, profiling |
| Coating | Uncoated, TiN, TiCN, AlTiN | General purpose (uncoated/TiN). Harder materials (TiCN/AlTiN). |
| Reach | Standard or Long | Standard for most tasks. Long for deeper features. |
How to Use Your 1/8 Inch Carbide End Mill Safely and Effectively
Now that you know what it is, let’s get to work! Using any milling tool requires care and attention, and a small carbide end mill is no exception. Safety is always the top priority in the workshop.
Essential Safety Gear
Before you even think about turning on the machine, make sure you have the right Personal Protective Equipment (PPE):
Safety Glasses: Absolutely non-negotiable. Always wear ANSI Z87.1 compliant safety glasses or a full face shield to protect your eyes from flying chips and debris.
Hearing Protection: Milling machines can be noisy. Earplugs or earmuffs will protect your hearing in the long run.
Gloves (with caution): While gloves can protect your hands from minor nicks and scrapes, never wear loose-fitting gloves when operating a milling machine. They can easily get caught in the rotating spindle or workpiece, leading to serious injury. Wear snug-fitting, cut-resistant gloves if chosen, but be extremely mindful of entanglement hazards. Many experienced machinists choose to work without gloves when running a machine.
Appropriate Clothing: Wear close-fitting clothing. Avoid loose sleeves, ties, jewelry, or anything that could get caught. Tie back long hair.
Work Boots: Sturdy, closed-toe footwear is a must in any workshop.
Setting Up Your Machine
1. Secure the Workpiece: This is paramount. Use clamps, a vise, or other appropriate workholding methods to firmly secure your material to the milling machine table. A loose workpiece can shift or be ejected violently, causing damage or injury.
2. Install the End Mill:
Ensure your milling machine has a suitable collet for a 1/8 inch shank (or whatever shank size you are using).
Insert the end mill shank into the collet. Make sure it’s seated properly and fully gripped by the collet.
Tighten the collet securely using the appropriate wrench. Do not overtighten, but ensure it’s snug.
If you have a tool holder, install the collet into the tool holder and then install the tool holder into the spindle.
3. Set Your Zero Point: You’ll need to establish your X, Y, and Z zero points on your workpiece. Use your machine’s DRO (Digital Readout) or CNC controls for precision. For the Z-axis, it’s common to “kiss” the top surface of your workpiece with a touch probe or by carefully lowering the tool until it just touches the surface.
Machining Techniques with Your 1/8 Inch End Mill
The beauty of a 1/8 inch carbide end mill is its capability for detailed work. Here’s how to approach common tasks.
1. Profiling (Cutting around an outline)
Profiling involves cutting along the edge of a shape. You can cut “climb milling” or “conventional milling.” For beginners, conventional milling is often easier to control.
Conventional Milling: The cutter path moves against the direction of feed. This tends to push the workpiece away from the cutter and is generally safer for lighter machines.
Climb Milling: The cutter path moves in the same direction as the feed. This pulls the workpiece into the cutter and can result in a better surface finish and longer tool life. However, it requires a rigid machine and precise backlash control in the machine’s leadscrews.
Steps for Profiling (Conventional Milling Example):
1. Set Tool Path: Program or manually set your machine’s path to follow the desired outline. For simple shapes, you might use a CAD/CAM software program, or for basic cuts, you can manually move the axes.
2. Calculate Depth of Cut: For a 1/8 inch end mill, especially in harder materials, take shallow passes. A good rule of thumb for depth of cut is often no more than 10-25% of the tool diameter for general milling. For harder materials like cast iron or steel, start with very light passes.
3. Apply Coolant/Lubricant: For metals, using a cutting fluid or lubricant is highly recommended. It cools the tool, lubricates the cut, and helps evacuate chips, preventing them from welding to the cutting edge. For harder materials like cast iron or steel, a flood coolant or mist system is ideal. For lighter work, a squirt from a bottle can help. Aluminum can be machined dry or with a light oil.
4. Engage the Spindle: Turn on your spindle to the appropriate speed. For a 1/8 inch carbide end mill, you can often run at high speeds, but always check recommended feeds and speeds for your specific material and tool. A good starting point for steel might be 10,000-20,000 RPM. For aluminum, you can often go faster. Consult resources like the Sandvik Coromant Feed and Speed Calculator for guidance.
5. Feed into the Material: With the spindle at speed, begin feeding the end mill into the workpiece using your machine’s handwheels or CNC controls. For conventional milling, approach the edge from the side.
6. Follow the Path: Move the end mill along your programmed or manually set tool path, maintaining a consistent feed rate and depth of cut.
7. Ramp In (for slots/pockets): If you need to plunge the end mill in, use a ramping motion rather than a straight plunge. This gradually lowers the tool into the material, reducing stress on the bit. Many CAM programs can generate ramp moves automatically.
8. Back Off: Once the profile is cut, retract the end mill from the workpiece.
Example: Cutting a square pocket for an electronic component.
If you need to create a 1/4″ x 1/4″ pocket for a component, a 1/8″ end mill is perfect. You would set your machine to plunge the end mill into the material (using a ramp or a slow, controlled plunge if center cutting) and then mill out the material along the pocket’s perimeter. You’d likely need to take multiple passes to reach the full depth, removing material incrementally.
2. Slotting (Cutting deep, narrow grooves)
Slotting is similar to profiling but typically involves creating a channel or slot within the workpiece.
Steps for Slotting:
1. Establish Slot Width: Your 1/8 inch end mill will create a 1/8 inch wide slot. If you need a wider slot, you’ll have to mill it in multiple overlapping passes.
2. Set Depth: Decide on the desired depth of your slot.
3. Plunge or Ramp: Carefully plunge the end mill into the material at the start of your slot. Again, ramping is preferred over straight plunging to reduce stress.
4. Feed Along the Slot: Move the end mill along the length of the slot at your chosen feed rate.
5. Chip Evacuation: For deep slots, chip packing can be a major issue. Ensure you have good chip evacuation. This can involve using a coolant jet, using a 2-flute end mill for better chip clearance, or taking breaks to clear chips.
6. Back Out: Once the slot is complete, retract the end mill.
3. Creating Chamfers and Fillets
A 1/8 inch end mill can be used to create small chamfers (angled edges) or fillets (rounded corners) on your workpiece.
Chamfering: To create a chamfer, you would typically position the center of the end mill slightly off the edge and at a slight angle, or use a specialized chamfer end mill. For a simple chamfer with a standard end mill, you might be able to achieve a minor chamfer by slightly offsetting the tool from the edge at a shallow depth.
Fillet: Creating a precise fillet radius is best done with a ball-end mill (a type of end mill with a rounded tip). However, a standard 1/8 inch end mill can create a small internal corner radius. The radius of the


