Making wooden spoons with a wood lathe is achievable for beginners! This guide breaks down the process into simple steps, covering tool selection, safety, and turning techniques. Learn how to transform a wood blank into a beautiful, functional spoon using your lathe safely and effectively.
Welcome to Lathe Hub! Ever looked at a beautifully crafted wooden spoon and thought, “I wish I could make that”? It’s a common desire, especially for those of us who love working with our hands and appreciate the beauty of well-made objects. Many beginners find the idea of using a wood lathe for something as delicate as a spoon a bit intimidating. You might worry about the speed, the tools, or simply how to even start shaping the wood. Don’t let that stop you! Creating wooden spoons on a lathe is a rewarding project that’s surprisingly accessible, even if you’re new to turning. In this guide, we’ll demystify the process, taking you step-by-step from selecting your wood to achieving that smooth, finished spoon. Get ready to turn everyday wood into kitchen essentials you’ll be proud to use or gift!
Why Make Wooden Spoons on a Wood Lathe?
Making wooden spoons on a wood lathe offers a unique blend of tradition and modern tooling. While hand-carving has its own charm, a lathe allows for incredible symmetry, speed, and a consistent finish that’s hard to replicate otherwise. For beginners, it’s a fantastic way to practice fundamental turning skills like faceplate turning and hollowing, all on a manageable scale. You’ll gain confidence with your lathe and its tools while producing something practical and beautiful. Plus, the therapeutic rhythm of turning wood can be incredibly satisfying.
Essential Tools and Materials
Before we jump in, let’s gather what you’ll need. Having the right tools makes all the difference and ensures a smoother, safer experience.
Wood Selection
Choosing the right wood is crucial for both aesthetics and food safety. For kitchen utensils, hardwoods are generally preferred because they are durable, less porous, and don’t impart strong flavors.
Recommended Woods:
Maple: Hard, fine-grained, and durable. A very popular choice for kitchenware.
Cherry: Beautiful color, easy to work with, and ages gracefully.
Walnut: Rich, dark color and good durability. Excellent for contrast.
Birch: Moderately hard with a fine, even texture. Affordable and common.
Oak (White Oak): Very strong and water-resistant, but its open grain can sometimes be a concern for food if not sealed properly.
Woods to Avoid:
Softwoods (Pine, Fir, Cedar): Too soft, prone to splintering, and can impart unwanted flavors.
Exotic Woods: Some exotic woods can be toxic or have unpredictable reactions when used for food. Always research thoroughly.
Lathe and Accessories
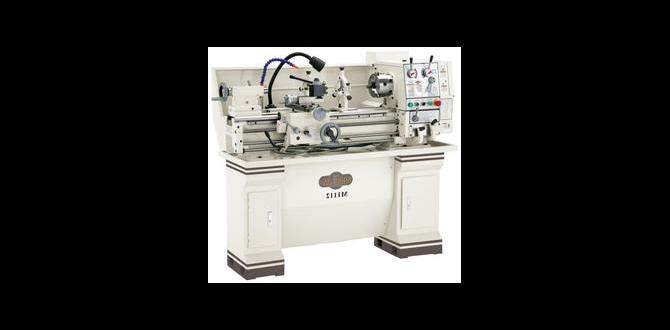
Wood Lathe: Any functional wood lathe will do, from a small benchtop model to a larger floor-standing unit. Ensure it’s in good working order.
Faceplate: This attaches your wood blank securely to the lathe’s spindle using screws. A 3-inch or 4-inch faceplate is common for spoon turning.
Drive Center: For spindle turning (if you choose to do part of the handle this way).
Live Center: To support the tailstock end of the wood.
4-Jaw Chuck: While not strictly necessary for a beginner, a 4-jaw chuck offers excellent holding power and flexibility for various shapes. If you have one, it can make securing the blank easier.
Tool Rest: Essential for supporting your turning tools.
Turning Tools
For spoon making, you’ll primarily use a few key tools. Investing in decent quality tools will make turning much easier and safer.
Gouges:
Spindle Gouge (1/4″ to 3/8″): Useful for shaping the handle if you’re turning it conventionally.
Bowl Gouge (1/2″ to 3/4″): Can be used for roughing out the bowl area and shaping.
Scrapers:
Round Nose Scraper: Indispensable for hollowing out the spoon bowl.
Curved Scraper: Can be helpful for shaping the outside of the bowl.
Parting Tool: For cutting the spoon free from the waste block.
Skew Chisel (small size, e.g., 1/4″ or 3/8″): Can be used for refining the handle shape and creating crisp details.
Hollowing Tools (Optional but Recommended): Specialized hook tools designed specifically for hollowing bowls and spoons can be more efficient than using a scraper.
Safety Gear (Non-Negotiable!)
Safety Glasses or Face Shield: Always protect your eyes from flying wood chips. A full face shield is recommended for turning.
Dust Mask or Respirator: Wood dust can be harmful to your lungs.
Hearing Protection: Lathes can be noisy.
Appropriate Clothing: Avoid loose clothing, jewelry, or anything that could get caught in the lathe. Roll up sleeves.
Work Gloves (Optional, with caution): Some turners avoid gloves due to the risk of them getting caught. If you do wear them, ensure they fit snugly and you are highly aware of the risks.
Finishing Supplies
Sandpaper: A range of grits from 80 to 400.
Food-Safe Mineral Oil or Butcher Block Conditioner: For finishing the spoon to protect the wood and make it food-safe. Avoid vegetable oils as they can go rancid.
Safety First: Lathe Operation Basics
Before you even think about wood, let’s talk safety. Woodturning involves fast-rotating machinery, and safety must be your absolute top priority.
Know Your Lathe: Read your lathe’s manual thoroughly. Understand its controls, speed settings, and any safety features. A great resource for understanding lathe safety is the Woodworkers Guild of America’s safety guidelines.
Secure Everything: Make sure the workpiece is securely mounted between centers or on the faceplate. Ensure the tool rest is positioned correctly – no more than 1/8 inch away from the wood – and locked in place.
Start Slow: Begin turning at a low speed (around 500-800 RPM) and gradually increase as you become comfortable and the wood becomes more balanced.
Tool Presentation: Always present your tools to the spinning wood from the correct angle. For most operations, the tool should be presented to create a shearing cut. Never use a tool where the bevel is digging into the wood.
Stand Correctly: Stand in a stable position, slightly off to the side of the lathe’s path. Avoid standing directly in front of the spinning workpiece.
No Distractions: Focus completely on what you’re doing. Turn off the lathe when you need to make adjustments, measure, or sand.
Watch for “Catching”: Be aware of any wobbles or unusual sounds. These can indicate an unbalanced workpiece or a tool digging in too deeply, which can lead to the tool being “caught” and potentially thrown.
Choosing Your Spoon Blank and Mounting It
For making spoons on a lathe, we often use a technique called faceplate turning. This involves attaching a rectangular block of wood to a faceplate, which then mounts to your lathe’s spindle. This allows you to turn the entire spoon from a solid block.
Preparing the Wood Blank
1. Select Your Wood: Choose a piece of hardwood that’s at least 1-2 inches thicker than you want your finished spoon to be long. For example, for a 12-inch spoon, a 14-inch long block is a good starting point. The width should be enough to accommodate your spoon’s widest point.
2. Cut to Size: Cut your wood to the desired length and width. It doesn’t need to be perfectly square, but a relatively rectangular shape is easiest to work with.
3. Drill for Screws: On the underside of the blank (which will become the back of the spoon), mark where you will drill pilot holes for the faceplate screws. Usually, 3-4 screws are sufficient. Ensure these holes are countersunk so the screw heads sit flush or slightly below the surface.
4. Attach the Faceplate: With the lathe turned OFF, center the faceplate onto your wood blank and screw it securely in place. Ensure the wood is firmly attached to the faceplate.
Mounting the Blank on the Lathe
1. Install the Faceplate: Screw the faceplate (with the attached wood blank) onto your lathe’s headstock spindle. Make sure it’s snug.
2. Position Tool Rest: Place your tool rest about 1/8 inch away from the widest part of the blank.
3. Spin Test: Turn the lathe on at its lowest speed. Gently push the blank with your hand (carefully!) to ensure it’s securely mounted and doesn’t wobble excessively. If it wobbles significantly, turn off the lathe and re-mount it.
Step-by-Step Guide: Turning Your Wooden Spoon
Now for the satisfying part – turning! We’ll focus on the faceplate turning method, which is ideal for spoon blanks.
Step 1: Roughing Out the Basic Shape
The goal in this stage is to turn your rectangular blank into a cylindrical or slightly tapered shape, and then begin defining the perimeter of your spoon.
1. Round the Blank: Start the lathe at a low speed (around 500-800 RPM). Using a skew chisel or a roughing gouge, begin to round the block. Make light, scraping cuts, working from the center outwards. Gradually increase the speed slightly as the blank becomes more symmetrical.
2. Define Spoon Outline: Once rounded, you can start to mark or freehand the outline of your spoon onto the spinning wood. Imagine the handle and the bowl. You can use a pencil held against the spinning wood to draw the shape.
3. Shape the Handle and Bowl Perimeter: Using your skew chisel (held in a scraping cut) or a bowl gouge, begin to shape the approximate form of the spoon. Think about the overall length, the thickness of the handle, and the width of the bowl. Don’t worry about fine details yet. You’ll be removing waste wood to create the iconic spoon shape. Many turners leave the handle end slightly thicker to eventually turn it down more precisely or even prepare it for some spindle turning.
Step 2: Shaping the Bowl Area
This is where the spoon starts to take its recognizable form.
1. Position the Blank: You might need to re-orient the blank on the faceplate for easier access to the bowl area, or you can work from an angled position.
2. Hollowing the Bowl:
Using a Scraper: The round-nose scraper is your best friend here. Position the tool rest so the scraper can be brought down into the wood at a slight angle, with the cutting edge angled to shear the wood. Start at the center of where your bowl will be and work outwards in small, controlled movements. Remove wood gradually.
Using a Hollowing Tool: If you have a dedicated spoon hollowing tool or a small bowl gouge used in a scraping fashion, you can use it here similarly to the scraper.
3. Depth and Profile: Aim for a consistent depth across the bowl. Think about the desired curve – some spoons have a deep bowl perfect for soup, while others have a shallower bowl ideal for salt or sugar. You can refine the outside curve of the bowl with a curved scraper or chamfer scraper.
Step 3: Refining the Handle
The handle is where you can add personal style.
1. Taper and Form: Use a skew chisel or spindle gouge to refine the shape of the handle. You can taper it, give it a slight curve, or add decorative details like beads or coves. Remember to use shearing cuts for a smooth finish.
2. Thickness: Ensure the handle is comfortable to hold and suitably proportioned to the bowl.
3. Neck (Optional): If your design includes a distinct neck between the handle and the bowl, use your tools to carve a smooth transition.
Step 4: Detailing and Final Shaping
At this stage, you’re cleaning up the shapes and preparing for sanding.
1.
Smooth Transitions: Use scrapers and your skew chisel to ensure all transitions between the handle, neck, and bowl are smooth and flowing.
2. Check Symmetry: Visually inspect your spoon. Make minor adjustments as needed to ensure it looks balanced and symmetrical.
3. Remove Waste Wood: Identify any areas where excess wood is still attached and remove it carefully.
Step 5: Cutting the Spoon Free
This is a critical step where you separate your spoon from the faceplate.
1.
Mark the Cut Line: Use a pencil to draw a line on the wood where you’ll make the cut. This is typically at the base of the handle where it meets the faceplate mounting.
2. Use a Parting Tool: Use a parting tool or a narrow skew chisel to create a kerf (a narrow cut) along your line. Cut slowly and steadily.
3. Final Separation: Once the kerf is deep enough, you can use a saw (like a coping saw or a small handsaw) to finish cutting the spoon free. Alternatively, you can carefully use a skew chisel to shear the remaining wood. Be prepared for the spoon to become slightly unbalanced as it’s separated.
4. Clean Up the Mount Area: After the spoon is free, there will be remaining wood attached to the faceplate. Carefully turn off the lathe. You can then remove the faceplate from the lathe and use a chisel or sandpaper to clean up the area where the spoon was attached. Some turners leave a small disc for decorative purposes or sand it flush.
Step 6: Sanding
Good sanding is key to a professional finish.
1.
Lathe Sanding: Mount the spoon back on the lathe, perhaps between centers if you’ve shaped the handle end, or you might need to hold it carefully by hand (at very low speeds!) or use a sanding jig. Start with a coarser grit (around 80-120) to remove tool marks.
2. Progress Through Grits: Gradually move to finer grits (180, 240, 320, 400). Sand thoroughly with each grit. Feel the wood with your fingers; if you can still feel any roughness, continue sanding. For highly detailed areas like the inside of the bowl, you might need to use folded sandpaper or sanding sticks.
3. Wipe Down: After sanding with each grit, wipe the spoon with a cloth dampened with mineral spirits. This raises the grain slightly, allowing you to sand out any fuzzies and achieve a smoother finish.
Step 7: Finishing
The final step to making your spoon food-safe and beautiful.
1. Apply Finish: While the spoon is still on the lathe (or held carefully by hand at very low RPM), apply a generous coat of food-safe mineral oil or a dedicated butcher block conditioner using a clean cloth.
2. Let it Soak: Allow the oil to soak into the wood for 10-15 minutes.
3. Wipe Off Excess: Wipe off any excess oil.
4. Buff: For a slight sheen, you can buff the spoon with a clean, soft cloth. Some turners apply multiple coats for better protection.
Table: Sandpaper Grit Guide for Wooden Spoons
Selecting the right sandpaper grits is crucial for achieving a smooth, professional finish on your wooden spoons. Here’s a general guideline:
| Grit Range | Purpose | Notes |
|---|---|---|
| 80 – 120 | Initial Shaping & Rough Removal of Tool Marks | Use for removing significant imperfections and shaping. Can be skipped if initial turning is very clean. |
| 150 – 220 | Smoothing & Removing Coarser Grit Marks | Begins to refine the surface, making it feel smoother to the touch. |
| 240 – 320 | Fine Smoothing & Preparation for Finishing | Removes most remaining imperfections from previous grits. Leaves a very smooth surface. |
| 400+ | Ultra-Fine Finishing & Sheen | Optional, but can enhance the smoothness and bring out a beautiful luster with the finish. |
Tips for Success
Practice on Scrap Wood: Before your best piece of hardwood, practice on softer, cheaper wood to get a feel for the tools and techniques.
Keep Tools Sharp: Sharp tools make cleaner cuts and are safer to use. Learn how to sharpen your turning gouges and scrapers.
Work with the Grain: Pay attention to the direction of the wood grain. Cutting with the grain generally produces smoother surfaces.
Don’t Rush: Take your time, especially when hollowing the bowl. Gradual removal of wood is safer and yields better results.
Experiment: Don’t be afraid to try different shapes for handles and bowls. The beauty of lathe turning is its ability to create perfect symmetry.
Consider Alternative Mounting: For very small or intricate spoon shapes, a 4-jaw chuck can be invaluable for holding the workpiece securely while allowing


