Quick Summary: Learn to build your own mini wood lathe chuck for small projects at home. This essential guide breaks down the process with clear steps, material lists, and safety tips, making this advanced woodworking technique accessible for beginners.
Hey there, fellow makers! Daniel Bates here from Lathe Hub. Have you ever looked at those amazing turned pieces and thought, “I wish I could do that, but a proper chuck is too expensive for my little lathe?” I get it. For hobbyists and beginners, a good chuck can feel like a big step. But what if I told you you could make a perfectly functional one yourself? It’s not as daunting as it sounds! We’re going to walk through building a simple, effective mini wood lathe chuck. Get ready to expand your turning possibilities!
Why Build a Homemade Mini Wood Lathe Chuck?
There are a few excellent reasons why tackling a homemade mini wood lathe chuck project is a fantastic idea, especially if you’re just starting out or working with a smaller woodworking lathe. It’s a great way to learn more about your machine and the principles of workholding.
- Cost-Effective: Professional chucks, especially for smaller lathes, can represent a significant investment. Building one yourself can save you a substantial amount of money, allowing you to put those savings towards other tools or materials.
- Learning Opportunity: The process of designing and building a chuck from scratch is incredibly educational. You’ll gain hands-on experience with metalworking basics like drilling, tapping, and precise assembly. This knowledge transfers to many other workshop projects.
- Customization: While we’ll cover a standard design, building your own means you can adapt it. Need a specific jaw size or configuration for unusual workpieces? A homemade chuck offers that flexibility.
- Grip and Control: A well-made chuck provides a secure grip on your workpiece, offering much better control and safety than just screwing a faceplate directly to your project. This is crucial for achieving clean, consistent results and preventing disasters.
- Fulfilling Project: There’s immense satisfaction in using a tool you’ve made with your own hands. It adds a personal touch to your finished projects and boosts your confidence as a maker.
This guide is designed for those of you with a basic understanding of tools and a willingness to learn. We’ll break down every step so you can confidently assemble your own mini wood lathe chuck and start turning with more precision and confidence.
Understanding the Basic Design of a Mini Lathe Chuck
Before we grab any tools, let’s understand what makes a chuck work. Most mini wood lathe chucks, especially the DIY kind, operate on a scroll or jaw system. For a simple homemade version, we’ll focus on a jam chuck or a simple screw-type chuck that grips the inside or outside of a workpiece. These are fantastic for smaller bowls, spindle turning, or holding irregularly shaped blanks.
A common and effective design for a homemade chuck involves a threaded body that mounts onto your lathe’s spindle, and a way to grip the workpiece. For a beginner-friendly project, we’ll look at a design that uses either threaded rods for expansion/contraction or a simple screw mechanism. This allows you to tighten the chuck onto or into your material.
Think of it like this: the chuck attaches to the lathe, and then the chuck grips your wood. The magic is in how it grips. For our purposes, we’re aiming for something robust enough for small to medium-sized pieces where safety and a firm hold are paramount.
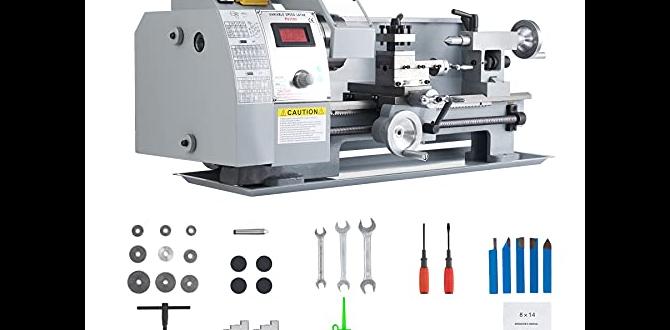
Materials and Tools You’ll Need
Gathering your materials and tools upfront is key to a smooth build. Don’t worry if you don’t have everything; many items can be improvised or borrowed. The focus here is on a sturdy, functional design.
Essential Materials:
- Metal Stock for the Body: Typically, a short length of steel pipe or a solid round bar with the correct internal or external threads to match your lathe’s spindle is ideal. For example, if your lathe spindle is 1 inch x 8 TPI (Threads Per Inch), you’ll need stock that can be threaded to match.
- Threading Rods/Bolts: These will act as your “jaws” or gripping mechanism. You’ll need two to four threaded rods or bolts. The diameter depends on the size of your chuck and workpiece.
- Nuts and Washers: To secure the threaded rods and provide a smooth action.
- Wood Blanks: For testing and initial use.
- Adhesive (Optional): A strong wood glue if you’re making a jam chuck style from wood and metal.
Essential Tools:
This project might involve some metalworking, so ensure you have access to these tools or can use them safely:
- metal lathe (Recommended): While not strictly necessary for all homemade chuck designs, having a metal lathe significantly simplifies and improves the precision of the main chuck body threading. If you don’t have one, look for pre-threaded pipe nipples that match your lathe’s spindle threads.
- Drill Press or Hand Drill: For precise hole drilling.
- Drill Bits: A set of sharp drill bits, including sizes appropriate for pilot holes and for tapping.
- Taps and Dies: Crucial for creating threads. You’ll need a tap set that matches the threads of your chosen bolts/rods and potentially a die if you need to thread your own spindle adapter.
- Wrenches or Socket Set: For tightening nuts and bolts.
- Measuring Tools: Calipers, ruler, or tape measure for accuracy.
- Marking Tools: Center punch, scribe, or permanent marker.
- Safety Gear: Safety glasses are non-negotiable! Gloves, hearing protection, and a sturdy apron are also highly recommended.
- Files: For deburring edges and smoothing rough spots.
- Grinder (Optional): For shaping or modifying parts if needed.
I always recommend checking out resources like OSHA’s general industry safety standards to ensure you’re working in a safe environment, especially when using power tools.
Step-by-Step Guide: Building a Simple Screw-Type Mini Chuck
Let’s get hands-on! This design uses a threaded body that screws onto your lathe spindle. Gripping power comes from threaded rods that move in and out of the chuck body. This provides a compact and effective way to hold smaller wood pieces.
Overview of the Design Goal
We aim to create a chuck with a main body that threads onto your lathe’s spindle. This body will have holes drilled and tapped to accept several threaded rods. By turning these rods, you can make them extend or retract, gripping your workpiece from the inside (gripping a hollowed piece) or from the outside (gripping a solid piece with a recess). For simplicity and safety, we’ll focus on an internal grip design first, as it’s often more stable for beginners.
Step 1: Prepare the Chuck Body
This is perhaps the most critical step for securely mounting your chuck to the lathe. The success of the chuck depends on this threading being perfect.
- Acquire Spindle-Threaded Stock: The easiest way for beginners is to buy a short (2-4 inch) piece of pipe or a solid steel rod that already has threads matching your lathe’s spindle. For instance, if your lathe has a 1″ x 8 TPI spindle, you’d look for a 1″ x 8 threaded pipe coupling or a similarly threaded machined part. This bypasses the need for threading your own stock on a metal lathe, which can be tricky.
- If Threading Your Own: If you’re using a metal lathe, turn down a piece of steel bar stock so it’s the precise diameter for your desired thread, then cut the threads to match your lathe spindle (e.g., 1″ x 8 TPI). This requires precision.
- Clean and Deburr: Ensure the threads are clean, free of burrs, and that it screws onto your lathe spindle smoothly.
Step 2: Plan and Mark the Jaw Holes
Now we prepare the chuck body to hold the gripping rods. For a 3-jaw chuck (which is common and stable), we’ll drill three holes arranged in a triangle. For a 4-jaw chuck, four holes in a square pattern. For simplicity and better clearance on some mini lathes, starting with 2 or 3 gripping points is often best. We’ll aim for 3 jaws for this guide.
- Determine Jaw Count: Let’s go with 3 gripping jaws for an even grip.
- Mark Hole Centers: Use a center punch to mark the locations for your jaw holes. Space them equidistant around the chuck body. For a 3-jaw chuck, imagine a triangle. For a 4-jaw, a square.
- Consider Jaw Movement: The holes should be positioned so the jaws can effectively grip your workpiece without the chuck body itself obstructing too much.
Step 3: Drill the Jaw Holes
This is where accuracy is important. The holes must be straight and aligned for the jaws to move in and out smoothly.
- Drilling: Use a drill press for maximum accuracy. Mount the chuck body securely. Drill the marked holes. The diameter of these holes should be slightly larger than the diameter of the threaded rods you plan to use, allowing them to slide freely.
- Pilot Holes (if tapping): If you will be tapping threads directly into the chuck body for your jaws, drill pilot holes according to your tap drill chart. If you’re using nuts later, you might only need clearance holes for the bolts, but internally tapped holes are more robust.
Step 4: Tap the Jaw Holes (or Prepare for Nuts)
This step creates the threads that the jaw bolts will engage with.
- Tapping: If you drilled pilot holes and are tapping directly into the chuck body, use a tap wrench and the appropriate tap to cut threads into the drilled holes. Go slowly, use cutting fluid, and back the tap out frequently to clear chips. Ensure you tap straight.
- Using Nuts (Alternative): If tapping is not feasible or if you prefer, you can drill larger clearance holes and then drill and tap corresponding holes on the side of the chuck body to attach nuts that will retain the jaw bolts. This is a bit less elegant but can be simpler. For this guide, we assume tapping directly into the body.
Step 5: Prepare the Jaws (Threaded Rods)
These are the parts that will actually grip your wood.
- Cut Rods: Cut your threaded rods to length. You’ll need enough length for them to extend well into the chuck and grip your workpiece effectively, but also short enough that they don’t bottom out prematurely. The exact length depends on your chuck body size and anticipated workpiece dimensions.
- Thread Ends: If your rods aren’t threaded the full length, ensure the ends you’ll be turning are threaded. If you’re buying simple bolts, you might need to cut off the heads and thread the end that will engage with the chuck body.
Step 6: Assemble the Jaw Mechanism
Now we bring the body and jaws together.
- Insert Rods: Screw one of your threaded rods through each tapped hole in the chuck body.
- Add Nuts (Optional but Recommended): On the inside of the chuck body, thread a nut onto each rod.
- Add Washers (Optional): Place a washer between the nut and the inside surface of the chuck body.
- Secure Nuts: Tighten these nuts against the inside of the chuck body. These nuts will prevent the threaded rods from simply spinning out entirely when you retract them. You want them snug but allowing the rods to turn. You can also use lock nuts for added security.
- Test Movement: Gently turn the threaded rods. They should extend and retract smoothly. If they bind, check your drilling and tapping for straightness, or ensure the rod diameter is correct for the hole.
Step 7: Design and Attach Gripping Surfaces (Optional but Recommended)
The bare threaded rods can mar wood and might not grip well enough. Adding a simple gripping surface is a good idea.
- Simple Wood Pads: Cut small blocks of wood to fit onto the ends of your threaded rods (the parts that will contact the workpiece). Drill a hole in each block to match the rod thread, and glue them onto the rod ends.
- Metal Jaws: For more durability, you could machine small metal jaws.
- Rubber Grips: For very delicate work, you could glue rubber stoppers or even heat-shrink tubing onto the rod ends.
Step 8: First Test Fit and Safety Check
Before turning any wood, perform a thorough safety check.
- Mount to Lathe: Carefully screw your new chuck onto your lathe’s spindle. Ensure it threads on smoothly and fully.
- Turn Lathe On (Low Speed): With the lathe OFF, manually rotate the spindle to ensure the chuck is running true and doesn’t wobble badly. Then, turn the lathe on at its absolute lowest speed.
- Expand Jaws: While the lathe is OFF, practice expanding the jaws. Then, with the lathe OFF, practice retracting the jaws.
- Safety First: Familiarize yourself with how the jaws operate. This is a homemade tool, so always err on the side of caution. Use lower speeds than you might with a commercial chuck, especially when starting out.
Alternative Design: The Jam Chuck
A jam chuck is an even simpler concept, ideal for small bowls or irregular shapes that you want to turn on the outside. It’s often made of wood and relies on friction and a snug fit to hold the workpiece.
Concept:
You effectively turn a mounting block that fits your lathe’s spindle. Then, you attach a larger piece of wood to this block. You turn this larger piece to create a recess that is a very tight press fit for your actual workpiece. You then “jam” your workpiece into this recess.
Basic Steps:
- Create a Spindle Adapter: Turn a piece of wood or metal that has threads to screw onto your lathe spindle (or a threaded faceplate).
- Attach a Blank: Glue and/or screw a larger piece of wood to this adapter.
- Turn the Recess: With the lathe running at a safe, slow speed, turn this larger block to create a hollow or recess. The key is to turn this recess so it’s slightly smaller than your workpiece, creating a force-fit.
- Press in Workpiece: Once the recession is made, remove the jam chuck from the lathe. Carefully and firmly “jam” your workpiece into the recess.
- Re-mount and Turn: Re-mount the jam chuck with the workpiece. Double-check it’s secure. You can now turn the outside of your workpiece.
Note: Jam chucks are best for specific tasks and may require making a new one for different sized workpieces. They are also generally limited to lower speeds. For external work specifically, a jam chuck is a wonderfully simple homemade solution.
Safety Considerations for Homemade Chunks
This bears repeating: working with a homemade tool requires vigilance. Safety is paramount. Never compromise on safety for the sake of a project.
- Low Speeds: Always start with your lathe running at the lowest possible speed, especially when mounting a workpiece or testing.
- Secure Mounting: Ensure the chuck threads onto your spindle fully and is tight. Never force it.
- Workpiece Security: Double and triple-check that your workpiece is firmly gripped. If there’s any doubt, stop immediately.
- Inspect Regularly: Before each use, inspect your chuck for any signs of wear, cracks, or damage to the threads or jaws.
- Clear Workspace: Keep your work area clean and free of clutter.
- Personal Protective Equipment (PPE): Always wear safety glasses. Gloves can prevent splinters but should be used cautiously around rotating machinery.
- Know Your Limits: Don’t push your homemade chuck beyond what it’s designed for. It’s likely not intended for heavy-duty faceplate turning or bowls larger than what your lathe comfortably handles.
- Listen to Your Machine: Strange noises or vibrations are warning signs. Stop the lathe and investigate.
A helpful resource for lathe safety is always your machine’s manual. If you’ve lost it, many manufacturers offer PDF versions online. For general woodworking safety, the Woodworking Safety website is an excellent portal for best practices.
Chuck Types and Their Applications
Understanding different chuck types can help you decide what kind