Wood lathe headstock bearing replacement is a straightforward maintenance task that ensures smooth, vibration-free operation and extends the life of your turning machine. This guide will walk you through the process step-by-step, making it easy for any woodworker to tackle.
Wood Lathe Headstock Bearing Replacement: An Essential Guide

Is your wood lathe noisy or vibrating more than usual? Often, the culprit is worn-out headstock bearings. Replacing them might sound daunting, but it’s a common maintenance job that even beginners can handle with a little guidance. Don’t let a rough-running lathe hold back your creativity. This guide will break down exactly what you need to do, step by step, so you can get back to smooth, satisfying turning. We’ll cover everything from identifying the problem to getting your lathe purring like new again. Ready to bring your lathe back to life?
Why Replace Your Headstock Bearings?
The headstock is the heart of your wood lathe, housing the motor and driving the spindle. Inside, bearings are crucial for its smooth rotation. Over time, these hard-working components can wear out. You might notice:
- Increased Noise: Grinding, humming, or squealing sounds that weren’t there before.
- Vibration: The entire lathe shakes or bounces when you turn it on or run it at speed.
- Rough Spindle Action: The spindle might feel stiff or uneven when you try to turn it by hand.
- Reduced Turning Quality: Workpieces might come out less smooth, with chatters or tool marks that are hard to eliminate.
- Potential for Damage: Severely worn bearings can lead to spindle misalignment, causing further damage to your lathe.
Regular inspection and timely replacement of worn bearings are key to maintaining your lathe’s performance, ensuring safety, and producing high-quality work. Think of it like changing the oil in your car – it’s essential preventative maintenance.
Understanding Your Lathe’s Headstock Bearings

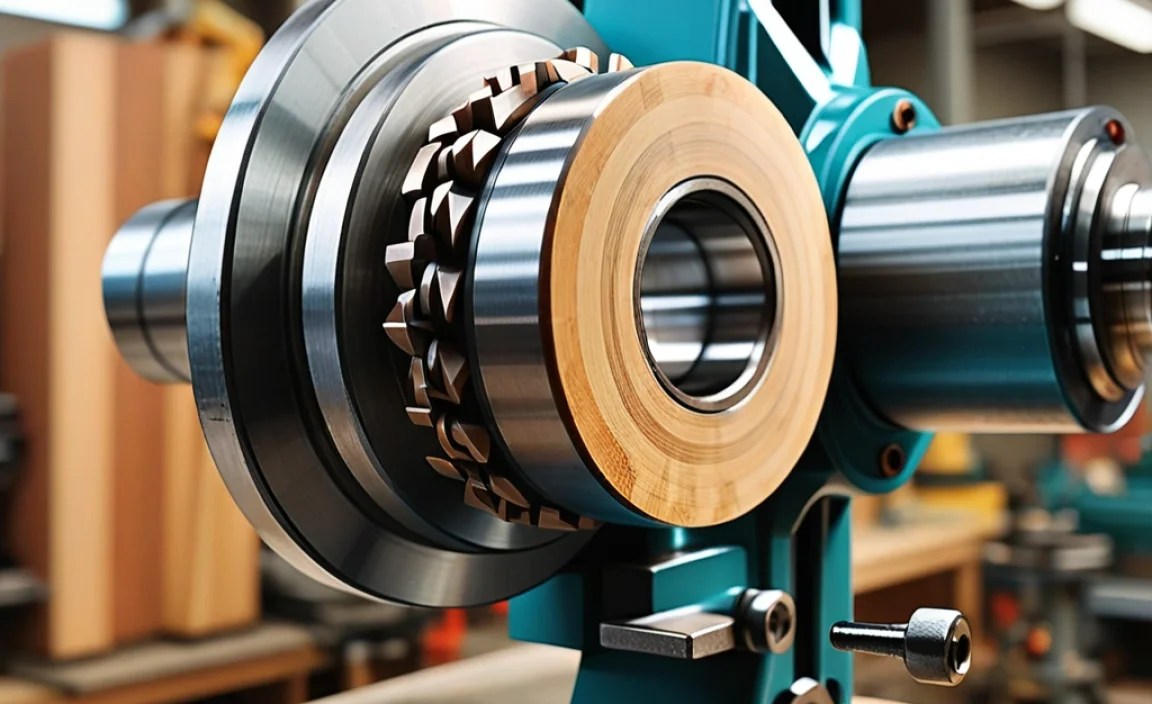
Most wood lathes use sealed ball bearings. These are robust and designed to last, but they aren’t immortal. The headstock typically contains one or two bearings that support the spindle. The exact configuration can vary between lathe models, so it’s always a good idea to consult your lathe’s manual.
Key components you’ll be working with:
- Headstock: The main housing that contains the motor and spindle.
- Spindle: The rotating shaft that holds your workpiece via the chuck.
- Bearings: Usually deep-groove ball bearings that allow the spindle to rotate freely.
- Bearing Retainers/Seats: Parts of the headstock casting that hold the bearings in place.
- Bearing Seals: Some bearings are sealed to keep out dust and debris, which is common in woodworking environments.
For a deeper understanding of spindle mechanics and bearing types, you can explore resources like Machinery Lubricants’ article on bearing types, though remember wood lathes often involve simpler setups than heavy industrial machinery.
Gathering Your Tools and Materials

Before you start, make sure you have everything ready. This will make the process go much smoother and prevent frustrating interruptions.
Essential Tools:
- Socket Set or Wrenches: For removing the headstock cover or any retaining bolts.
- Screwdriver Set: Phillips and flathead, depending on your lathe.
- Pry Bar or Large Flathead Screwdriver: For gently levering parts.
- Bearing Puller/Installer Kit: This is highly recommended for safely removing and installing bearings without damaging the spindle or headstock. A specific bearing installer set is ideal.
- Rubber Mallet or Soft Hammer: For gentle tapping.
- Allen Wrenches (Hex Keys): Often needed for specific bolts.
- Wire Brush: To clean out any debris or rust.
- Shop Rags: For cleaning.
- Safety Glasses: Always protect your eyes!
- Gloves: To protect your hands.
- Pen and Paper (or Phone Camera): To note screw locations or take pictures as you disassemble.
Materials:
- Replacement Bearings: This is the most critical part! Ensure you have the correct part numbers for your specific lathe model.
- Bearing Lubricant (Optional, if bearings are not sealed): If your new bearings are not sealed or if you’re installing them and they require it, a good quality bearing grease is needed.
- Penetrating Oil (Optional): If parts are seized or rusty.
- Thread Locker (Optional): For reassembling any bolts that might benefit from it.
Pro Tip: Before you disassemble anything, take clear photos of each step. This visual record is incredibly helpful for reassembly, especially if you’re new to this process.
Step-by-Step: Replacing Headstock Bearings

This is where we get hands-on. Remember to work slowly and deliberately. Safety first, always!
Step 1: Safety First and Preparation
Disconnect Power: Crucially, unplug your lathe from the power source. Double-check that it’s indeed off and cannot be accidentally started.
Clear Your Workspace: Ensure you have enough room to work around the headstock and lay out your tools and parts logically.
Consult Your Manual: If you have your lathe’s service manual, now is the time to refer to it. It will show you local part numbers and specific disassembly sequences for your model.
Step 2: Accessing the Headstock Bearings
This step varies the most by lathe model:
- Remove the Belt Guard: Most lathes have a protective cover over the belt and pulley system. This usually involves a few screws or clips.
- Remove the Headstock Cover: Some lathes have an external cover that needs to be removed to access the spindle and bearings. Look for screws around the headstock.
- Remove the Drive Pulley/Chuck Mount: This is often the trickiest part. You might need to:
- Hold the spindle stationary. Some lathes have a pin or bolt designed for this (e.g., a spindle lock). If not, you might need to gently wedge something between the headstock and the pulley to stop it from turning if it uses a set screw, or use two wrenches if it’s a nut.
- Unscrew the pulley or chuck mounting thread. This is often a left-hand thread (meaning you turn it clockwise to loosen), but always check your manual.
Important Note: If your lathe has a spindle lock mechanism, use it correctly. Forcing it or not having it secured can lead to damage.
Step 3: Removing the Old Bearings
Once the spindle or retaining mechanisms are clear:
- Identify Bearing Placement: You’ll likely see the bearings pressed into the aluminum or cast iron housing of the headstock.
- Using a Bearing Puller: This is the safest method.
- For bearings pressed into a housing (not on a shaft): Use a bearing separator or an internal/external jaw puller that can grip the outer or inner race of the bearing.
- For bearings shrunk onto a spindle: You may need a puller that attaches to the spindle and leverages against the headstock casting or a special bearing installer tool with a flange.
- Gentle Persuasion (Use with Extreme Caution): If a bearing puller isn’t an option or isn’t working, you might be able to carefully tap the bearing out if there’s an accessible edge or a designated knockout hole. Use a soft-faced hammer or a block of wood to distribute the force. Never hammer directly on the bearing cage or rollers, as this will damage them. Work around the perimeter, tapping gently.
- Levering (Last Resort): A very carefully applied pry bar can sometimes help start a stubborn bearing, but there’s a high risk of damaging the headstock casting.
If you are struggling, stop. It’s better to seek advice or take it to a professional than to risk damaging your lathe. Resources like Woodworkers Institute often have forums where you can find model-specific advice.
Step 4: Cleaning and Inspection
With the old bearings out, take advantage of the access:
- Clean the Bearing Bores: Use a clean rag and possibly a solvent to thoroughly clean out the areas where the bearings sat. Remove any dirt, old grease, or rust. A wire brush can be useful here, but be gentle on aluminum housings.
- Inspect the Headstock Casting: Look for any cracks or damage to the housing where the bearings are seated.
- Inspect the Spindle: Check the spindle itself for any damage, scoring, or wear where the bearings made contact.
Step 5: Installing the New Bearings
This is the reverse of removal, but requires precision.
- Align the New Bearing: Carefully place the new bearing into its bore, ensuring it is perfectly square and not at an angle.
- Using a Bearing Installer Tool: This is the preferred method. Use a tool with an appropriately sized driver head that matches the outer race of the bearing. Apply steady, even pressure. You should feel the bearing seat firmly into its housing. A light tap with a rubber mallet on the installer tool might be needed if it’s a tight fit and you don’t have a press.
- “Shrink Fitting” (If Applicable): Some bearings are installed by heating the headstock housing or cooling the bearing. This is less common in wood lathe headstocks and can be risky if not done correctly. If your manual suggests this, extreme care is needed. For most hobbyist lathes, pressing is the method.
- Installing the Second Bearing (if applicable): If your lathe has two bearings, install the second one similarly, ensuring it’s aligned and seated properly.
Crucial: Never hammer directly on the inner race of the new bearing, especially if it’s not fully seated. This can damage the bearing’s internal structure. Heat transfer (heating the housing) or precise pressing is key.
Step 6: Reassembly
This is the reverse of your disassembly:
- Reinstall the Pulley/Chuck Mount: Screw on the pulley or mount the chuck thread. Remember if it was a left-hand thread! Ensure it’s snug but don’t overtighten.
- Re-secure the Headstock Cover: Bolt or screw the cover back into place.
- Replace the Belt Guard: Fasten the belt guard securely.
- Check Spindle Rotation: With the power still off, try to turn the spindle by hand. It should feel smooth, quiet, and free of any binding or grinding.
Step 7: Testing and Final Checks
Now for the moment of truth:
- Reconnect Power: Plug your lathe back in.
- Initial Start-up: Turn on the lathe at its lowest speed setting. Listen carefully. The noise should be significantly reduced or gone. Check for excessive vibration.
- Gradual Speed Increase: Slowly increase the speed, continuing to listen and observe for any anomalies.
- Test with Wood (Optional but Recommended): If everything seems good, mount a small piece of scrap wood and run it at a medium speed to ensure stable operation.
If you still hear noises or feel vibrations, immediately turn off the lathe and re-check your work. There might be a bearing not fully seated, a loose part, or an issue with another component.
Common Issues and Troubleshooting
Even with careful work, you might encounter a hiccup. Here’s how to address some common problems:
Problem: New Bearings Still Feel Rough or Noisy
- Cause: Imperfect installation. The bearing might be slightly out of square, or debris could have entered during installation.
- Solution: Re-remove the bearing and inspect it and the bore for damage or debris. Ensure the bore is perfectly clean before reinstalling, using the proper pressing technique.
Problem: Bearing Won’t Come Out
Cause: It’s seized in place due to rust or extreme pressure.
- Solution: Try applying a penetrating oil and letting it soak. Some mechanics use heat from a heat gun (not an open flame, as this can damage aluminum) to expand the housing slightly. If it’s still stuck, consider seeking professional help or using a more aggressive puller setup.
Problem: Headstock Casting is Damaged
Cause: Previous forceful removal, corrosion, or manufacturing defect.
- Solution: Minor imperfections might be cleaned up. Significant cracks or damage can be problematic and may require professional repair (like TIG welding specialized alloys) or replacement of the headstock housing if possible.
Problem: New Bearings Seem Too Loose in the Bore
Cause: The housing bore has been slightly enlarged by wear or previous damage.
- Solution: This is a more complex repair. Sometimes, a bearing or race can be “stitched” with a welding machine to build up the bore slightly, then machined back to size. Alternatively, specialized bearing retaining compounds like Loctite can be used, but their effectiveness depends on the severity of the wear.
For more in-depth troubleshooting on machine tools, NIST’s Advanced Manufacturing resources can offer broader insights into machine maintenance, though specific lathe issues are often best found in user forums or model-specific repair guides.
Maintaining Your Lathe for Longevity
Replacing the bearings is a great repair, but an ounce of prevention is worth a pound of cure. Here’s how to keep your lathe running smoothly:
- Regular Cleaning: Wood dust is abrasive. Keep your lathe clean, especially around the headstock and ways.
- Protect from Moisture: Humidity can cause rust on metal parts and even affect bearings.
- Periodic Inspection: Listen for unusual noises and feel for vibrations regularly. Don’t wait until it’s a major problem.
- Proper Lubrication: Follow your lathe manufacturer’s recommendations for lubricating any external moving parts.
- Avoid Overloading: Don’t try to take cuts that are too aggressive for your lathe or the workpiece. This puts unnecessary stress on the motor, drive train, and bearings.
FAQ: Wood Lathe Headstock Bearing Replacement
Q1: How do I know if my wood lathe bearings are bad?
A: Listen for grinding, squealing, or humming noises coming from the headstock. You might also feel excessive vibration when the lathe is running, or the spindle might feel rough when you turn it by hand.
Q2: Can I use a hammer to remove old bearings?
A: It’s strongly discouraged. Hammering can damage the bearing, the spindle, or the headstock housing. A proper bearing puller is the safest and most effective tool for removal.
Q3: What kind of bearings do I need for my wood lathe?
A: You’ll need to identify the specific part number of the bearings used in your lathe model. This information is usually found in the lathe’s owner’s manual. They are typically standard sealed ball bearings (e.g., 6203, 6204, etc.), but the exact size and type are critical.
Q4: Is it safe to replace headstock bearings myself?
A: Yes, for most hobbyist lathes, it’s a manageable DIY task. Safety is paramount – always disconnect power before starting. If you’re uncomfortable at any point, seek help from a more experienced individual or a professional.
Q5: How can I prevent damage to the new bearings during installation?
A: Use a proper bearing installer tool and ensure the bearing is perfectly square to the bore before applying pressure. Never hammer directly on the inner race of the bearing. Gentle, even pressure is key.
Q6: My lathe is old and I can’t find the manual. How do I find out the bearing size?
A: You can try looking up your lathe model online; sometimes PDFs of manuals are available. Failing that, you may need to carefully remove the old bearings first to physically measure them or take them to a bearing supply store for identification.
Q7: What is a bearing splitter, and when would I use one?
A: A bearing splitter is a tool that slides behind a bearing and has a sharp edge to grip it, allowing a larger puller to be attached to remove bearings that are pressed onto a shaft. You would use this if.
