Wood lathe tailstock problems, like misalignment or sticking, can halt your projects. This guide offers simple fixes for common issues, ensuring smooth operation and accurate turning. Get your tailstock working perfectly again with these easy troubleshooting steps.
Welcome to Lathe Hub! If you’re new to the wonderful world of woodturning, you’ve likely discovered how essential a well-functioning tailstock is. It supports your workpiece, handles drilling tasks, and generally makes your life easier at the lathe. However, sometimes, this trusty component can decide to be a bit stubborn. You might notice wobbles, difficulty moving it, or it just not lining up right. Don’t let these common wood lathe tailstock problems get you down! As your guide, I’m here to break down exactly what might be going wrong and how to fix it, step-by-step. We’ll get your tailstock back in tip-top shape so you can get back to creating amazing things. Let’s dive in!
Why Your Wood Lathe Tailstock Matters

The tailstock might seem like a simple part of your wood lathe, but it plays a critical role in successful turning. It’s the anchor that supports the opposite end of your workpiece from the headstock. Without a properly aligned and secure tailstock, accurate cuts become nearly impossible, not to mention the significant safety hazards that arise. Accurate support ensures your wood spins true, preventing vibrations and enabling clean finishes. It’s also where you mount drill bits for creating mortises or tenons, making it a multifunctional workhorse. Understanding how to keep it in perfect working order is fundamental for any woodturner, from hobbyists just starting out to those looking to refine their skills.
Common Wood Lathe Tailstock Problems and Solutions

Let’s face it, even the best equipment can act up. Fortunately, most wood lathe tailstock problems are quite common and have straightforward solutions. We’ll cover the most frequent culprits and how to tackle them confidently.
Problem 1: Tailstock Misalignment
This is one of the most frustrating issues. If your tailstock isn’t perfectly aligned with the headstock’s center, your workpiece will wobble, leading to an uneven finish and potential danger. It’s like trying to spin a wobbly top – nothing good comes of it!
What Causes Misalignment?
- Impact: The tailstock can get knocked out of alignment by an accidental tool hit or a crashing workpiece.
- Loose Lock: If the tailstock lock nut isn’t fully tightened, vibrations can gradually shift its position.
- Wear and Tear: Over time, components can wear, leading to subtle shifts.
- Base Issues: The ways (tracks) the tailstock moves on might have debris or be damaged.
How to Troubleshoot and Fix Misalignment:
- Visual Check: First, ensure your lathe bed is clean and free from debris. Gently move the tailstock to one end of the bed and the headstock to the other.
- Alignment Rod Method: A simple and effective way to check alignment is to use a live center in the tailstock and a dead center in the headstock (or vice-versa). Bring the tailstock up so the centers just touch. Lock it down. Now, place a long piece of stock between the centers. Spin it by hand to see if it’s a consistent diameter along its length, or if there’s a noticeable taper indicating misalignment.
- The String Method: Mount a piece of scrap wood between the centers. Position the tailstock so the tailstock center is just shy of touching the wood. Measure the distance from the wood’s surface to the tailstock’s center point. Now, move the tailstock to the other end of the bed and repeat the measurement. If the distances are different, your tailstock is misaligned.
- Using a Tailstock Alignment Tool: Many lathes come with or can be fitted with a tailstock alignment gauge. These tools attach to the lathe bed and have a dial indicator that shows you precisely how far your tailstock is off.
- Adjusting the Tailstock: Most tailstocks can be adjusted. Look for adjustment screws or plates on the base of your tailstock. These are usually tightened or loosened to ‘toe in’ or ‘toe out’ the tailstock to match the headstock’s angle. Consult your lathe’s manual for specific instructions, as the method varies between manufacturers. For instance, some Delta, Shopsmith, or Jet models have specific adjustment points. A good resource for understanding lathe basics and alignment can be found at Woodworking Network.
- Tighten Securely: Once aligned, ensure the tailstock lock lever or nut is very securely tightened. This prevents it from shifting during operation.
Problem 2: Tailstock Won’t Move
You need to reposition your tailstock, but it’s stuck fast. This can be incredibly frustrating when you’re in the middle of a project. Typically, this isn’t a major mechanical failure but a result of debris, lack of lubrication, or overtightening.
What Causes a Stuck Tailstock?
- Debris: Sawdust, wood chips, or metal shavings (if you’ve used it for metalworking) can get lodged between the tailstock and the lathe bed’s ways.
- Lack of Lubrication: The ways need to be clean and lightly lubricated for smooth movement.
- Overtightened Lock: If the tailstock lock is cranked down too hard, it can bind on the ways.
- Bent Ways: In rare cases, the lathe bed itself could be bent or damaged, preventing smooth travel.
How to Troubleshoot and Fix a Stuck Tailstock:
- Clean the Ways: First and foremost, thoroughly clean the ways of your lathe bed. Use a soft cloth and a good cleaner. Ensure no sawdust or grit is present.
- Loosen the Lock: Ensure the tailstock locking wheel or lever is completely released. Sometimes, binding can occur if it’s only partially loosened.
- Gentle Persuasion: Try to gently rock the tailstock back and forth. Sometimes, this is enough to break the seal if it’s stuck due to old grease or slight debris. Avoid brute force, as this can damage the ways.
- Lubrication: Apply a thin layer of way lubricant or a good quality machine oil to the lathe bed ways. This will help the tailstock slide smoothly. A light machine oil is often sufficient for wood lathes.
- Check for Obstructions: Ensure no tools, chucks, or other objects are interfering with the tailstock’s movement.
- Minor Tapping: If it’s still stuck, a very light tap with a rubber mallet on the side of the tailstock casting (not the quill) might help to dislodge it. Work carefully.
- Consult Manual: If the tailstock still refuses to budge, consult your lathe’s manual. There might be specific procedures for releasing a jammed tailstock. For general lathe maintenance, resources from organizations like the Occupational Safety and Health Administration (OSHA) on machine safety can provide useful context for how critical proper function is.
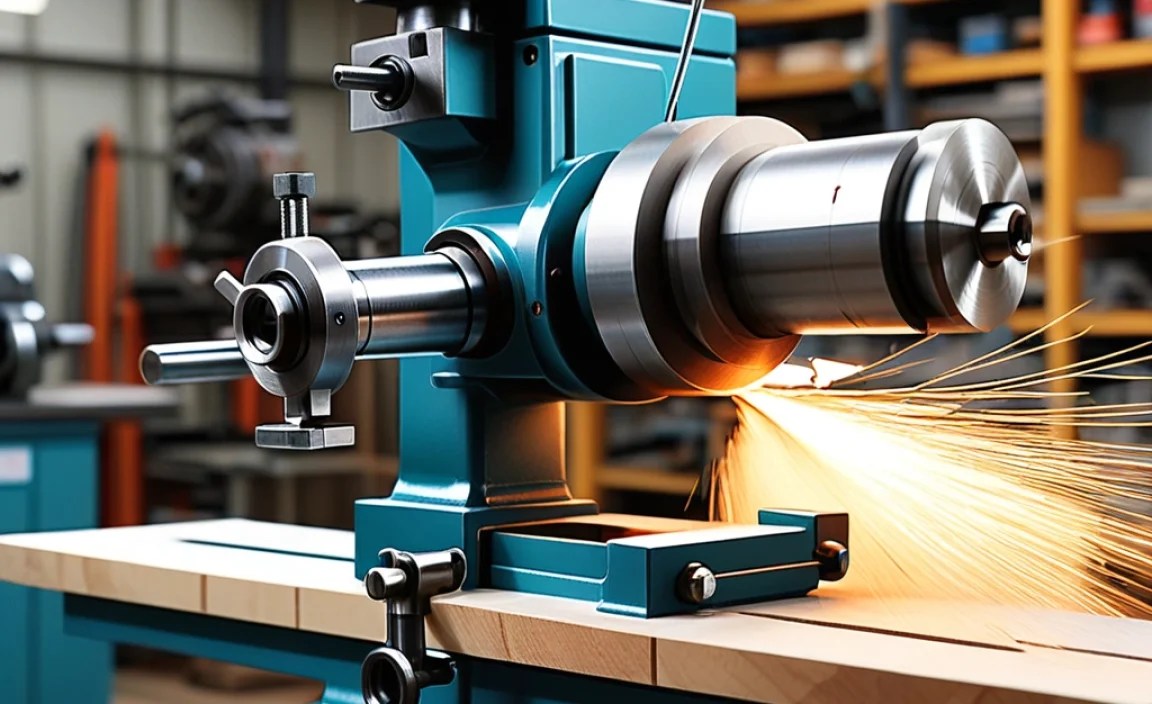
Problem 3: Tailstock Quill is Stuck or Loose
The quill is the part of the tailstock that extends and retracts, holding your center or drill chuck. If it’s not moving smoothly or is too loose, it makes setting up and holding your work difficult.
What Causes Quill Issues?
- Debris: Sawdust and grit can accumulate inside the quill housing.
- Lack of Lubrication: The quill mechanism needs to be kept clean and lightly oiled.
- Overtightened Lock Nut: The nut that locks the quill in position might be too tight.
- Bent Quill: A bent quill will cause it to bind.
- Worn Parts: In older or heavily used lathes, the internal mechanisms can wear.
How to Troubleshoot and Fix Quill Problems:
If the Quill is Stuck:
- Clean Around the Quill: Remove any visible debris from the area where the quill enters the tailstock body.
- Release the Lock: Ensure the quill lock (usually a screw or lever) is fully loosened.
- Lubricate: Apply a light machine oil or WD-40 around the quill where it emerges from the tailstock body. Let it soak for a few minutes.
- Gentle Turning: Try to slowly turn the handwheel that extends/retracts the quill while gently pulling or pushing on the quill itself. Again, no brute force!
- Extend Fully and Clean: If you can get it to move a little, try to extend it as far as it will go. This will expose more of the quill shaft. Clean the entire exposed shaft thoroughly. Retract it and clean again. Repeat this several times.
- Disassembly (Advanced): If it’s still stuck, you may need to consult your manual for safe disassembly of the tailstock to access the quill mechanism. This is more involved and should only be attempted if you are comfortable with basic mechanics.
If the Quill is Loose:
- Tighten the Quill Lock: The most obvious solution is to ensure the quill lock (the screw or lever that holds the quill in place) is tightened sufficiently. Experiment with how tight you need it to hold without making it difficult to adjust.
- Check Quill Lock Screw Threads: Inspect the screw you use to lock the quill. If the threads are damaged or the ‘shoe’ or pad that presses against the quill is worn down, it won’t grip effectively. You may need to replace the screw or pad.
- Internal Adjustment: Some lathes have internal adjustments that can tighten the fit of the quill within its bore. This is typically a more advanced repair and requires consulting your manual.
- Shims: In some very specific cases, experienced users might add a very thin shim to improve the fit, but this is generally not recommended for beginners as it can easily lead to other problems.
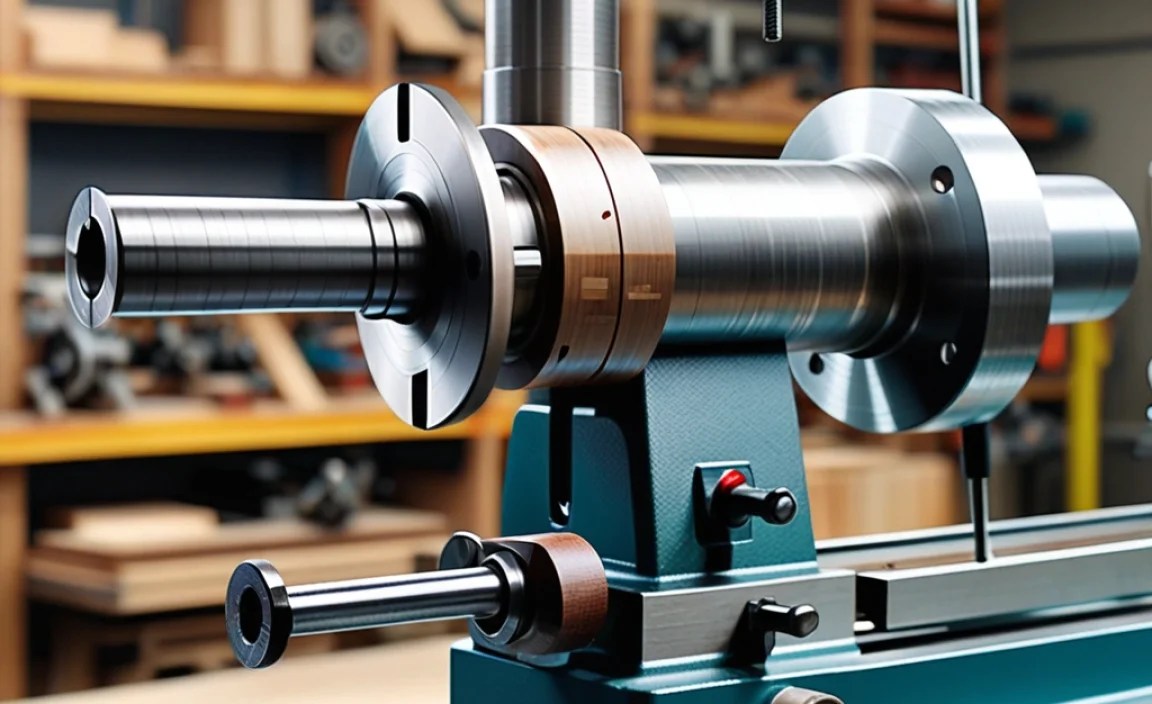
Problem 4: Tailstock Center Wobbles or is Bent
You’ve put a new center in your tailstock, and it still wobbles, or perhaps you suspect the center itself is the issue. A bent or damaged center will ruin your turning.
What Causes a Wobbling Center?
- Bent Center: The most common cause is a bent center point. This can happen from dropping it or during a severe lathe crash.
- Damaged Socket: The socket in the tailstock quill where the center is inserted might be damaged or have debris.
- Loose Center: Many centers are held in by friction or a taper. If it’s not seated properly, it will wobble.
- Bent Quill (Less Common): If the quill itself is bent, any center inserted into it will wobble.
How to Troubleshoot and Fix a Wobbling Center:
- Remove and Inspect the Center: Take the center out of the tailstock quill. Visually inspect it for any bends, chips, or damage to the point or the Morse taper shank.
- Roll the Center: Place the shank of the center on a hard, flat surface and try to roll it. If it wobbles, the center is definitely bent and needs to be replaced.
- Clean the Quill Socket: Thoroughly clean the socket in the tailstock quill. Use a clean cloth and, if necessary, a little bit of solvent to remove any old grease, dust, or burrs.
- Check the Taper: Ensure the Morse taper shank of the center is clean and free from any debris. A compromised taper will prevent a solid fit.
- Re-insert Securely: Re-insert the center. For Jacobs-style chucks that sometimes use a Morse taper to hold them, ensure they are seated firmly. For standard live or dead centers, they should typically insert snugly into the socket. If the center has a tang or tang slot, ensure it’s properly engaged if your lathe requires it.
- Test with a Different Center: If you have a spare center, try using that one. This will help determine if the problem is with the original center or the tailstock itself.
- Check Quill Straightness: If different centers still wobble, and you’ve meticulously cleaned the socket, the quill itself might be bent. This is a more serious issue and might require professional repair or replacement of the tailstock/quill assembly.
Problem 5: Tailstock Doesn’t Hold Position Under Load
You’ve tightened your tailstock down, but as soon as you start turning, it creeps or moves. This compromises accuracy and is a major safety risk. The tailstock needs to be absolutely secure.
What Causes Slipping Tailstock?
- Insufficient Locking Force: The tailstock lock isn’t tightened enough to overcome the forces of turning.
- Worn Ways or Gibs: If the surfaces that connect the tailstock to the lathe bed are worn, they can’t grip properly.
- Damaged Lock Mechanism: The lever, cam, or screw that tightens the tailstock onto the ways might be worn or damaged.
- Contaminated Ways: Oil or grease on the ways can cause slippage (this is counter-intuitive, but clean, dry ways often grip better for locking).
How to Troubleshoot and Fix a Slipping Tailstock:
- Exaggerate Tightening: First, try tightening the tailstock lock with significantly more force. Ensure you’re using the lever or wheel as intended. Sometimes beginners are too gentle.
- Clean and Dry the Ways: Thoroughly clean the lathe bed ways and the mating surfaces on the tailstock base. Ensure they are completely free of oil, grease, or polishing compounds. For wood lathes, a clean, dry grip is often best for the tailstock lock.
- Inspect the Ways for Damage: Look closely at the lathe bed ways and the tailstock base. Are there any deep gouges, burrs, or significant wear marks? Damage here can prevent a solid lock. For minor burrs, a very fine file or polishing stone might help, but significant damage may require professional attention. For a deeper understanding of machine tool maintenance, looking at resources for metalworking machines, such as those from Maschinensucher, can offer principles applicable to robust tool design and care.
- Inspect the Locking Mechanism: Examine the tailstock lock lever, cam, or screw. Is there visible wear on the part that contacts the lathe bed? A worn cam or screw thread won’t apply enough pressure. Replacement parts might be necessary.
- Check Gibs/Contact Plates: Some tailstocks have adjustable gibs or pressure plates on the bottom that press against the ways. If these are worn or loose, they won’t provide adequate friction. Consult your manual to see if your lathe has these and how to adjust or replace them.
- Consider a T-Handle Lock: If your lathe has a basic screw-down lock, upgrading to a cam-lock or a more robust T-handle assembly might be an option if compatible, providing greater locking force.
Tailstock Maintenance Checklist
Preventative maintenance is key to avoiding many of these problems. Here’s a quick checklist to keep your tailstock in top condition:
- Regular Cleaning: Wipe down the ways and tailstock base after each use.
- Lubrication: Apply a light coat of appropriate lubricant to the ways occasionally. For wood lathes, a good quality paste wax or specific way oil works well.
- Quill Care: Extend the quill fully periodically, clean it, and apply a light lubricant.
- Check Lock Tightness: Always ensure your tailstock lock is secure before starting any turning.
- Inspect Centers: Keep your centers clean and check them for damage.
- Annual Check: Once a year, it’s a good idea to check for any obvious wear or damage on the tailstock and its components.
Special Considerations: Different Lathe Types
While the principles are similar, specific designs can influence tailstock troubleshooting:
Benchtop Wood Lathes
These are typically smaller and lighter. Their tailstocks might be simpler, with basic cam locks or screw-down mechanisms. Misalignment can be more pronounced due to lighter construction. Cleaning and a firm lock are paramount.
Larger Floor-Standing Wood Lathes
These often have more robust ways and heavier tailstocks, sometimes with more sophisticated locking mechanisms. While generally more stable.
