Wood lathe speed vs diameter charts help you find the right RPM for safe and effective turning based on your wood’s size. Bigger diameters need slower speeds to prevent wobbling and splintering. This guide simplifies choosing the correct speed, ensuring cleaner cuts and better results for your projects.
Ever found yourself staring at a chunky piece of wood on your lathe, unsure if the spindle is spinning too fast or too slow? It’s a common puzzle for woodturners, especially when you’re starting out. Too much speed can lead to rough surfaces, dangerous catches, or even a ruined workpiece. Too little, and you might be battling tear-out and inefficient carving. Getting the speed right is key to making beautiful things safely. In this guide, we’ll break down the simple logic behind wood lathe speed vs. diameter charts and show you exactly how to pick the perfect RPM for your project, making your turning experience smoother and more enjoyable. Let’s dive in and make your lathe work smarter, not harder!
Understanding Wood Lathe Speed and Why It Matters

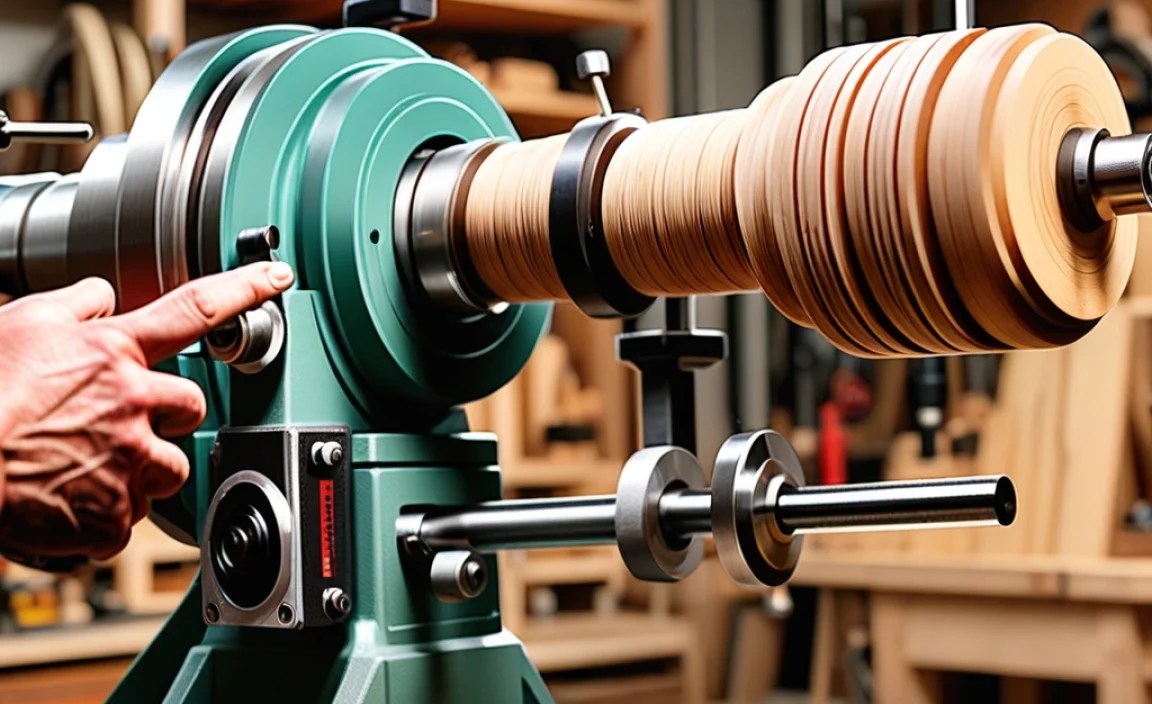
At its heart, woodturning is about shaping wood as it spins. The speed at which it spins, measured in revolutions per minute (RPM), is crucial. It’s not just about how fast you can carve; it’s about controlling the forces at play and ensuring the wood remains stable and safe. Imagine a tiny pencil peeking out of your chuck – it can spin quite rapidly without much fuss. Now, picture a massive 12-inch diameter kiln-dried oak trunk. If you tried to spin that at the same high RPM, it would likely tear itself apart, vibrate uncontrollably, or even break free. This is where the relationship between the wood’s diameter and the lathe’s speed becomes a vital safety and quality concern.
The core principle is simple: as the diameter of the workpiece increases, the surface speed also increases, assuming the RPM stays the same. Surface speed is the actual speed of the wood moving past your cutting tool. A larger diameter means more wood is passing by at the same rate per revolution. Too much surface speed causes friction, heat, and can lead to a violent “catch” where the tool digs in too aggressively. Conversely, very slow speeds can make it harder to get a clean cut, often leading to a fuzzy, torn surface that requires a lot of sanding. For beginners, understanding this balance is the first step to mastering the lathe.
Surface Speed vs. RPM: The Key Difference
It’s easy to get confused between RPM and surface speed. Your lathe’s dial shows you the RPM – how many times the spindle (and thus the wood) rotates in one minute. However, what directly affects your cutting experience is the surface speed, usually measured in feet per minute (fpm) or meters per minute. Think of it this way: a 1-inch diameter rod spinning at 1,000 RPM has a much lower surface speed than a 6-inch diameter log spinning at the same 1,000 RPM.
Here’s a way to visualize it:
- Imagine two race cars on a track. One car is on the inner lane, and the other is on the outer lane.
- Both cars must complete a lap in the same amount of time (this is like RPM – one revolution).
- The car in the outer lane has a much longer distance to cover for each lap.
- Therefore, the outer lane car is moving much faster along the track (this is like surface speed).
In woodturning, the “outer lane” is the edge of a larger diameter blank, and the “inner lane” is the edge of a smaller diameter blank. For safe and effective turning, we aim for a consistent, optimal surface speed, which means the RPM needs to be adjusted based on the wood’s diameter.
Factors Influencing the Ideal Speed
While a chart is an excellent starting point, it’s not the only thing to consider. Several factors can influence the ideal speed for your turning session:
- Wood Type: Hardwoods generally tolerate higher speeds than softwoods. Green (freshly cut) wood, which is wetter and softer, might require slower speeds than dry, seasoned wood.
- Wood Condition: Is the wood perfectly round and balanced, or is it irregular? Irregular shapes will vibrate more and likely need lower speeds.
- Tool Sharpness: A sharp gouge or scraper cuts cleanly and efficiently, allowing or even requiring slightly higher speeds than a dull tool, which will tear and grab.
- Turning Operation: Rough turning or removing a lot of material might start at a lower speed, while finishing cuts at the final diameter can often handle higher speeds.
- Lathe Stability: A heavy, stable lathe is less prone to vibration and can handle higher speeds more safely than a lightweight or wobbly one.
- Wood Density: Denser woods can sometimes generate more heat at higher speeds.
The Wood Lathe Speed vs. Diameter Chart: Your Best Friend

This brings us to the star of the show: the wood lathe speed vs. diameter chart. These charts are invaluable tools that provide a recommended range of RPMs for different wood diameters. They are typically based on general safety guidelines and provide a good starting point for most turning situations.
The idea is to maintain a relatively consistent maximum surface speed for safety and efficient cutting. They are often presented in tables, making it easy to find the right speed for the diameter you’re working with.
How to Use a Wood Lathe Speed Chart
Using the chart is straightforward:
- Measure Your Wood: Determine the widest diameter of your workpiece. If it’s an irregular shape, use the widest point that will be rotating.
- Find the Diameter on the Chart: Locate your measured diameter on one axis of the chart (usually the horizontal or vertical).
- Read the Corresponding Speed: Follow across to find the recommended RPM range for that diameter.
- Set Your Lathe: Adjust your lathe to a speed within that recommended range. It’s always best to start at the lower end of the range, especially if you’re new to the material or shape.
Remember, the chart gives you a starting point. You might need to adjust slightly based on the factors mentioned earlier.
Typical RPM Ranges and Surface Speeds
While charts vary slightly, there’s a general consensus on recommended surface speeds for safety. A commonly cited safe surface speed range for beginners and general woodturning is between 2,000 and 3,500 feet per minute (fpm). For hardwoods, some experienced turners work up to 4,000-5,000 fpm, but this requires confidence, sharp tools, and a stable lathe.
Let’s look at how RPM changes with diameter to maintain an approximate surface speed. This is a simplified example, and actual charts will be more detailed.
Example: Aiming for ~3,000 fpm Surface Speed
The formula to calculate surface speed is: Surface Speed (fpm) = Diameter (inches) × π × RPM / 12
Rearranging this to find RPM: RPM = (Surface Speed × 12) / (Diameter × π)
Let’s plug in 3,000 fpm and π ≈ 3.14:
RPM = (3000 × 12) / (Diameter × 3.14)
RPM = 36000 / (Diameter × 3.14)
Now, let’s see the RPM for different diameters:
| Wood Diameter (inches) | Approximate RPM for ~3000 fpm | General Recommended Range (fpm) |
|---|---|---|
| 2″ | ~1910 | 3500 – 5000+ |
| 4″ | ~955 | 3000 – 4000 |
| 6″ | ~637 | 2000 – 3000 |
| 8″ | ~477 | 1500 – 2500 |
| 10″ | ~382 | 1200 – 2000 |
| 12″ | ~318 | 1000 – 1600 |
As you can see, to keep the surface speed consistent, the RPM must decrease significantly as the diameter increases. This is why using a chart is so important!
Creating Your Own Wood Lathe Speed Chart (or Using Recommendations)

Many lathe manufacturers provide recommended speed charts, which are excellent resources. You can also find many online charts specific to woodturning. It’s wise to consult a few different sources and see if there’s a general consensus for the types of wood and projects you typically undertake.
Here’s a general guide that incorporates many sources and emphasizes safety for beginners. This chart aims for a range that prioritizes safety and good cutting for a variety of woods.
Beginner-Friendly Wood Lathe Speed Chart
| Wood Diameter Range (inches) | Recommended Lathe Speed (RPM) | Notes for Beginners |
|---|---|---|
| 0-2 | 1800 – 3000+ | Higher speeds are generally okay for small, balanced pieces. Start lower and increase if smooth. |
| 2-4 | 1200 – 2000 | Good balance for many spindle turnings. Watch for vibration. |
| 4-6 | 800 – 1500 | Bowls and larger spindles. Lower speeds are safer. |
| 6-8 | 600 – 1000 | Larger bowls, platters. Vibration is a big concern; check balance. |
| 8-10 | 450 – 800 | Very large pieces or unbalanced rough forms. Use with caution. |
| 10-12+ | 300 – 600 | Challenging speeds for most home lathes. Ensure absolute stability and control. Consider taking multiple passes. |
This chart is a guide. If your lathe has a continuous variable speed control, you can often dial in a speed directly. If you have a belt-driven lathe with pulleys, you’ll be selecting specific speed ranges based on pulley positions and motor speed. Always refer to your lathe’s manual for its specific speed capabilities and recommendations.
Safe Practices for Speed Setting
No matter what chart you use, safety should always be your top priority. Here are some key practices:
- Start Slow: When in doubt, always start with your lathe set to the slowest speed in the recommended range for your diameter.
- Listen and Watch: Pay attention to any unusual noises or excessive vibration. If you hear or feel anything concerning, stop the lathe immediately and reduce the speed.
- Gradual Adjustments: Avoid making drastic speed changes. If you need to adjust, do so gradually.
- Check for Balance: Unbalanced workpieces (like a roughly cut blank or a piece of green wood with irregular shape) will vibrate significantly at higher speeds. These must be turned at much lower RPMs.
- Tool Sharpness: Sharp tools cut more efficiently and require less force, contributing to safer turning at appropriate speeds. Dull tools can catch and cause dangerous “kicks.”
- Secure Mounting: Ensure your workpiece is securely mounted in the chuck or between centers. A loose piece can fly off.
- Never Stand Directly Behind Large Rotating Work: Always position yourself slightly to the side.
Practical Applications: Turning Different Projects
Let’s consider how speed settings might look for common projects:
Spindle Turning (e.g., Table Legs, Newel Posts)
Spindle turnings are typically long and relatively narrow. As you turn them down, the diameter changes. You might start with a blank that’s 4-6 inches in diameter and gradually reduce it to 1-2 inches.
- Initial Roughing: Start at a speed appropriate for the initial, largest diameter (e.g., 800-1000 RPM for a 5-inch blank).
- As Diameter Reduces: As you hollow out the spindle and the diameter decreases, you can safely increase the speed (e.g., to 1500-2000 RPM for a 3-inch diameter, and even higher for 2 inches or less).
- Finishing Passes: For final smoothing touches, especially with very sharp tools, you might use speeds within the higher end of the range for the final diameter.
It’s critical to re-evaluate and adjust your speed as the workpiece diameter changes significantly.
Bowl Turning (e.g., Salad Bowls, Decorative Bowls)
Bowl turnings start with a flat, often large-diameter disc of wood. The entire diameter is rotating at once.
- Roughing Out: For a 10-inch bowl blank, you might start at a relatively low speed, perhaps 600-800 RPM. This is crucial because the wood might not be perfectly round or balanced at this stage.
- Hollowing (First Few Passes): As you begin to hollow out the inside, the effective diameter might still be large, and vibration can be an issue. Keep speeds low, perhaps 500-700 RPM.
- Shaping the Exterior: Once the interior is somewhat hollowed and the blank is becoming more balanced, you might be able to slightly increase speed for shaping the exterior, but stay within safe limits for the widest diameter.
- Finishing the Rim: The rim will be the widest diameter. For a 12-inch bowl, you’ll want to stay in the 400-600 RPM range.
- Final Cuts: For very fine finishing cuts or scraping at the final diameter, some turners might push speeds slightly higher if conditions are perfect and they are confident.
Bowl turning often involves turning the piece around to shape the bottom. Remember to check the speed again for the new “widest diameter” when working on the base.
Understanding Wood Density and Green Wood

The type and condition of the wood play a significant role in determining safe turning speeds. Density and moisture content are key factors.
Hardwoods vs. Softwoods
- Hardwoods: Woods like oak, maple, cherry, and walnut are denser. They can typically handle higher speeds and cut more cleanly, provided they are well-seasoned (dry).
- Softwoods: Woods like pine, poplar, and fir are less dense. They are more prone to tear-out and can “catch” tools more easily, especially if they are knotty or irregular. It’s generally a good idea to use slower speeds with softwoods.
Green Wood Challenges
Green wood (freshly cut) is full of moisture and is much softer and more pliable than seasoned wood. This presents unique challenges and safety considerations:
- Lower Strength: Green wood is not as structurally sound as dry wood.
- Higher Vibration: Irregularities in the wood, combined with moisture, can lead to significant vibration, even at low speeds.
- Tool Loading: Wood chips can pack into the gouge more readily.
- Recommendation: Always turn green wood at lower speeds. This reduces the forces on the wood and makes it far safer. For larger pieces of green wood, speeds of 300-600 RPM are often recommended, even for smaller diameters, until the shape is established and it’s ready for drying.
For more guidance on turning green wood, resources like the US Forest Products Laboratory offer invaluable research on wood properties and behavior.
Troubleshooting Common Speed-Related Issues
Even with a chart, you might encounter issues. Here’s how speed relates to common problems:
- Excessive Vibration: This is the most common indicator that your speed is too high for the workpiece’s diameter, shape, or balance. Reduce speed immediately.
- Rough Surface Finish / Tear-Out: While tool sharpness is a primary cause.
