This wood lathe motor pulley repair guide provides clear, step-by-step instructions for diagnosing and fixing common pulley issues, ensuring your lathe runs smoothly and safely. Learn essential maintenance to keep your woodworking projects on track.
Is your wood lathe making strange noises or losing power? One of the sneakiest culprits might be its motor pulley. A worn or damaged pulley can throw off belt tension, cause vibrations, and even lead to a complete shutdown of your machine. But before you panic or consider expensive replacements, know that many common pulley problems are surprisingly easy to fix! As Daniel Bates, your guide from Lathe Hub, I’m here to break down how to tackle these issues head-on. We’ll walk through the simple checks and fixes you can do right in your workshop. Get ready to restore your lathe’s performance and get back to creating!
Understanding Your Wood Lathe’s Motor Pulley

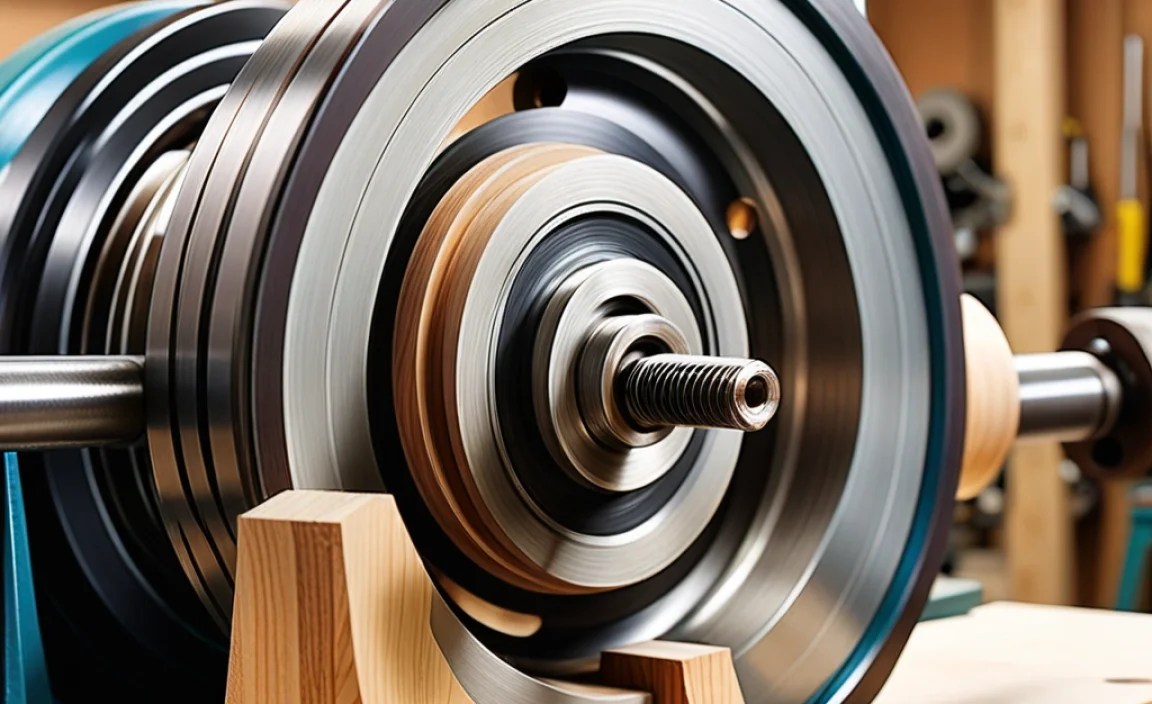
The motor pulley is a crucial component of your wood lathe. It’s a wheel attached directly to the motor shaft, and its job is to transmit rotational power to the drive belt, which then turns the headstock. Think of it as the first link in the chain of power transfer. Most wood lathe motor pulleys have multiple grooves, allowing you to change the spindle speed by moving the belt to different grooves. This versatility is fantastic, but it also means the pulley system can be subject to wear and tear over time.
A healthy motor pulley is smooth-running, securely attached, and free from cracks or excessive wear. When it starts to go bad, you might notice some tell-tale signs. Ignoring these can lead to more significant problems or even safety hazards, so it’s always best to address them proactively. Understanding the basic function helps us pinpoint where things might be going wrong.
Common Wood Lathe Motor Pulley Problems
Over time, wood lathe motor pulleys can develop a few common issues. Recognizing these early is key to a simple fix. Here are the most frequent culprits:
- Worn Grooves: The most common problem is wear inside the pulley grooves. As the belt rubs against the metal, it can create smoother, shallower grooves. This reduces friction, causing the belt to slip. You might hear squealing or notice jerky movements.
- Cracks or Chips: Metal pulleys, especially if they’ve been subjected to impact or extreme stress, can develop small cracks or chips. These imperfections can damage the belt and cause imbalance, leading to vibrations.
- Loose Pulley: The pulley is usually secured to the motor shaft with a set screw or a keyway. Over time, vibration can cause this connection to loosen, meaning the pulley might spin on the shaft or not engage properly.
- Bent Shaft: In rarer cases, the motor shaft itself might be bent. This isn’t a pulley problem directly, but a bent shaft will cause the pulley to wobble, leading to belt issues and vibrations.
- Rust and Corrosion: Exposure to moisture can cause rust on the pulley. While minor surface rust is often manageable, heavy corrosion can wear down the belt and affect its grip.
Wood Lathe Motor Pulley Repair Guide: Step-by-Step Fixes

Let’s get hands-on! This guide will walk you through diagnosing and repairing common issues. Remember, safety first! Always unplug your lathe before performing any maintenance.
Step 1: Safety First – Disconnect Power!
This is non-negotiable. Before you touch anything, make sure your wood lathe is completely disconnected from its power source. Unplug it from the wall socket. Double-check that the switch is in the ‘off’ position. This simple step prevents electrical shock and accidental startups.
Step 2: Inspect the Motor Pulley
With the power off, it’s time for a thorough inspection. You might need to remove a motor cover or a guard to get a clear view of the pulley. Here’s what to look for:
- Visual Check: Look for any obvious cracks, chips, or excessive damage in the grooves or on the face of the pulley.
- Belt Wear: Examine the drive belt. Is it also showing signs of wear, such as glazing, cracking, or fraying? A bad belt can be a symptom of a bad pulley, or vice versa.
- Pulley Securement: Gently try to wiggle the pulley. Does it feel loose on the motor shaft? Check the set screw (if accessible) to see if it’s tight.
- Groove Condition: Run your finger (carefully!) or a small tool inside the pulley grooves. Do they feel smooth and sharply defined, or are they rounded and worn down? Is there any rust or debris buildup?
Step 3: Dealing with Worn Grooves
Worn grooves mean less grip for the belt, leading to slippage and inconsistent speeds. Here are your options:
Option A: Cleaning and De-glazing
Sometimes, a simple cleaning can make a big difference. Use a wire brush, sandpaper (around 120-grit), or a specialized pulley cleaning tool to remove any built-up debris or glaze from the grooves. For stubborn residue, a bit of solvent like mineral spirits can help. After cleaning, re-inspect the grooves. If they still look rounded or significantly shallow, this might not be enough.
Option B: Belt Replacement
If the pulley grooves are just slightly worn, a new, properly tensioned belt might compensate. Belts wear out too, and a new one can provide better grip. Always replace belts in pairs if your lathe uses multiple belts.
Option C: Pulley Replacement (If worn beyond repair)
If the grooves are deeply worn, cracked, or if cleaning doesn’t solve the slipping issue, replacement is the best long-term solution. We’ll cover removal and installation later.
Step 4: Tightening a Loose Pulley
A loose pulley is a common and fixable problem. Most pulleys are secured to the motor shaft in one of two ways:
- Set Screw: Look for a small screw on the side of the pulley hub. This screw presses against the motor shaft to hold the pulley in place. Use an Allen wrench or screwdriver of the correct size to tighten this screw firmly. If there’s a keyway (a small slot in the shaft and pulley), ensure the set screw either tightens against the flat of the shaft or into the keyway to prevent rotational slip. For extra security, some set screws have a locking thread compound that can be applied.
- Keyway and Set Screw: Some pulleys use a small metal piece called a “key” that fits into a slot on both the motor shaft and the pulley. This key prevents the pulley from spinning independently. If the key is damaged or missing, or if the pulley and shaft have worn down, you might need to replace the key or even the pulley. Ensure the key is seated correctly and the set screw is tight.
If the set screw repeatedly loosens, consider using a small amount of blue Loctite (medium-strength threadlocker) on the set screw threads. Clean the threads on both the screw and the shaft bore for best adhesion, and allow it to cure before using the lathe. For more critical applications, red Loctite (high-strength) might be considered, but it makes future removal much more difficult.
Step 5: Addressing Cracks, Chips, and Corrosion
Minor surface rust can usually be cleaned off with steel wool or a wire brush. If the rust is deep or has pitted the surface, it can compromise the belt’s grip and may lead to premature belt wear. Sanding or using a file can sometimes smooth out minor pitting. However, for significant corrosion, cracks, or chips, the safest and most reliable solution is to replace the pulley.
Step 6: Removing the Old Pulley
This can be the trickiest part, especially if the pulley is seized onto the shaft.
- Loosen Set Screw: First, ensure the set screw is fully loosened or removed.
- Apply Penetrating Oil: Spray a good quality penetrating oil (like WD-40 or PB Blaster) around the shaft where it meets the pulley. Let it soak for at least 15-30 minutes, or even longer for stubborn parts.
- Use a Pulley Puller: The best tool for this job is a specialized pulley or gear puller. These tools grip the pulley from the outside and use a screw to press against the end of the motor shaft, safely pulling the pulley off. Place the puller arms under the pulley, center the pulling screw on the shaft, and slowly tighten it.
- Gentle Tapping: Sometimes, gentle tapping with a hammer on the edge of the pulley (use a block of wood to protect the pulley face) while the puller is engaged can help break it loose. Be cautious; avoid hitting the motor shaft directly or too hard.
- Heat (Use with Extreme Caution): As a last resort, a heat gun or propane torch can be used to expand the pulley slightly. Apply heat evenly to the pulley hub. WARNING: This should be done with extreme caution, especially on older motors, as excessive heat can damage motor windings or seals. Never use an open flame directly on painted surfaces or near flammable materials. Always have a fire extinguisher nearby. Let the pulley cool slightly before attempting to remove it with the puller.
Step 7: Installing the New Pulley
Once the old pulley is off, clean the motor shaft with a rag and perhaps some fine-grit sandpaper if there’s any rust or debris. Ensure the shaft is clean and smooth.
- Align with Shaft: Carefully slide the new pulley onto the motor shaft. If there is a keyway, make sure the key is in place in the shaft’s keyway and that the pulley groove aligns with it.
- Seat Properly: Push the pulley on as far as it will go by hand. It should be snug against the motor housing or any other stop on the shaft.
- Tighten Set Screw: Once the pulley is properly positioned, tighten the set screw firmly. If there’s a keyway, tighten the set screw against the flat of the shaft or into the key. Again, consider using a mild threadlocker like blue Loctite if you anticipate loosening issues.
- Check Clearance: Spin the pulley by hand to ensure it rotates freely and doesn’t wobble. Make sure it doesn’t contact any motor covers or other parts of the lathe.
Step 8: Reinstall Guards and Belt
If you removed any motor covers or safety guards, reinstall them now. Then, carefully re-install the drive belt onto the new (or cleaned) pulley, ensuring it sits correctly in the grooves.
Step 9: Test Run
Plug your lathe back in and cautiously start it. Listen for any unusual noises and observe the pulley and belt’s operation. Check for smooth rotation and proper speed. If everything sounds and looks good, you’ve successfully repaired your wood lathe motor pulley!
Essential Tools for Pulley Repair
Having the right tools makes any repair job smoother and safer. Here are some essentials:
| Tool | Description | Importance |
|---|---|---|
| Allen Wrenches / Screwdriver Set | For loosening and tightening set screws. | Essential for securing/unsecuring the pulley. |
| Wire Brush | For cleaning rust and debris. | Helps restore grip on pulleys and belts. |
| Sandpaper (120-grit) | For smoothing worn pulley grooves and cleaning shafts. | Improves surface for belt contact and proper seating. |
| Penetrating Oil | Like WD-40 or PB Blaster, to loosen seized parts. | Crucial for removing stubborn pulleys. |
| Pulley Puller / Gear Puller | A specialized tool to safely remove stuck pulleys. | Highly recommended to avoid damaging the motor or pulley. |
| Rag / Shop Towels | For cleaning surfaces and wiping away oil. | Keeps your workspace and parts clean. |
| Safety Glasses | Protect your eyes from debris. | Non-negotiable for workshop safety. |
| Work Gloves | Protect your hands. | Good for handling greasy parts or sharp edges. |
When to Get Professional Help

While most wood lathe motor pulley issues are beginner-friendly, there are times when it’s best to call in an expert:
- Bent Motor Shaft: If you suspect the motor shaft itself is bent (indicated by severe wobble), this is usually not a DIY repair. The motor might need professional servicing or replacement.
- Damaged Motor Housing: If the motor housing is damaged in a way that prevents proper pulley seating or alignment, it’s a sign of a more serious problem.
- Electrical Issues: If you’re uncomfortable with any step involving the motor or electrical components, or if you suspect an electrical fault, consult a qualified technician.
- Persistent Problems: If you’ve tried the fixes outlined here and the problem persists, there might be a more complex underlying issue with the motor or lathe.
For more information on motor maintenance, you can refer to resources from organizations like the Occupational Safety and Health Administration (OSHA), which provides guidelines on mechanical power transmission safety.
Maximizing Pulley Lifespan: Preventive Maintenance Tips
The best repair is often prevention! Keeping your wood lathe’s motor pulley in good condition extends its life and ensures reliable performance. Here are some easy preventive measures:
- Regular Cleaning: Periodically clean the pulley grooves with a wire brush or cloth to remove dust, chips, and belt residue. This maintains optimal belt grip.
- Inspect the Belt: Always check your drive belt during regular maintenance. A belt that is worn, glazed, or cracked will put undue stress on the pulley and can slip, causing further damage. Replace it proactively.
- Proper Belt Tension: Ensure your drive belt is neither too tight nor too loose. Excessive tension can strain the motor bearings and the pulley itself, while too little tension causes slipping, which wears down both the belt and the pulley grooves. Refer to your lathe’s manual for recommended tension.
- Avoid Overloading: Don’t push your lathe or motor beyond its capacity. Overloading can cause the belt to slip and generate excessive heat, both of which can damage the pulley.
- Protect from the Elements: Store your lathe in a dry environment. Moisture can lead to rust and corrosion on the pulley, weakening the metal and affecting performance.
- Lubricate (When Specified): Some motor shafts or pulleys may benefit from specific lubricants. Always consult your lathe’s manual to see if any lubrication is recommended and what type to use. Note: Most wood lathe pulleys and motor shafts are not designed for regular lubrication unless specified by the manufacturer.
FAQ: Wood Lathe Motor Pulley Woes
Q1: How do I know if my wood lathe motor pulley needs repair?
A: You’ll notice symptoms like the belt slipping (especially under load), squealing noises from the motor, excessive vibration coming from the motor, or jerky movement of the lathe. A visual inspection might reveal visible wear, cracks, or damage in the pulley grooves.
Q2: Can I use a pulley from a different tool or machine?
A: It’s best to use a pulley specifically designed for your wood lathe model or one with identical specifications (diameter, bore size, groove profile and number). Using the wrong pulley can cause belt misalignment, improper speed, or even damage to the motor or belt.
Q3: My pulley set screw keeps coming loose. What should I do?
A: First, ensure you’re tightening it sufficiently. If it continues to loosen, clean the threads of both the set screw and the shaft bore thoroughly and apply a small amount of blue (medium-strength) threadlocker before tightening. Allow it to cure as per the product instructions.
Q4: Is it safe to use a pulley with a small crack?
A: No, it’s not recommended. Even a small crack can worsen over time and lead to catastrophic pulley failure, which can be dangerous. It’s much safer to replace a cracked pulley immediately.
Q5: How much does it cost to replace a wood lathe motor pulley?
A: The cost varies greatly depending on the lathe model and the pulley itself. DIY repair is very inexpensive if you only need tools like a brush or sandpaper. A replacement pulley can range from $20 to $100 or more, and professional labor would add to that cost.
Q6: What is the difference between a stepped pulley and a variable speed pulley on a wood lathe?
A: A stepped pulley has multiple grooves of different diameters, allowing you to change speed by moving the belt to a different groove. A variable speed pulley often has one large cone.
