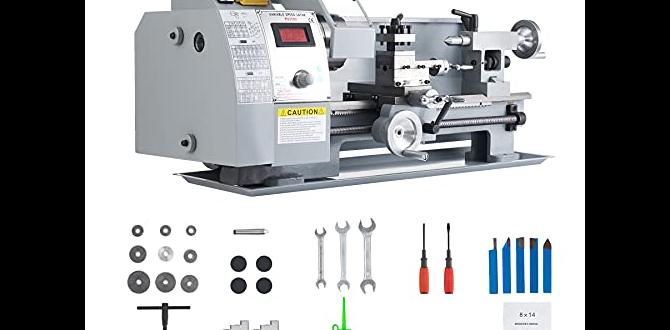
Wood lathe vibration noise can be fixed! This guide offers simple, effective solutions to silence your lathe, improve accuracy, and make woodworking more enjoyable and safe. Learn how to identify the cause and apply proven fixes for a smoother, quieter operation.
Wood Lathe Vibration Noise Solution: Proven Fix
Is your wood lathe shaking and rattling like a runaway train? That annoying vibration and noise can be a real buzzkill for any woodworking project. It’s not just irritating; it can also affect the quality of your work, leading to rough finishes and even dangerous situations. But don’t worry! Most wood lathe vibration issues are surprisingly easy to fix. As Daniel Bates from Lathe Hub, I’ve seen this problem countless times, and today, I’ll walk you through simple, proven solutions that will have your lathe purring like a kitten in no time.
We’ll cover everything from the simple checks you can do right now to more involved fixes that will make a big difference. Get ready to turn wood smoothly and quietly again!
Understanding Wood Lathe Vibrations
Wood lathes, especially when tackling larger or unbalanced workpieces, can develop vibrations. These shakes aren’t just a nuisance; they can make precise work impossible and even be a safety hazard. Recognizing the signs and understanding the common culprits is the first step to silencing your machine.
Why Does My Wood Lathe Vibrate?
Several factors can contribute to wood lathe vibration. It’s usually a combination of the workpiece, the lathe itself, and the environment it’s in. Let’s break down the most common causes:
- Unbalanced Workpiece: This is the biggest offender. If the wood you’re turning isn’t perfectly round or has uneven density, it will wobble on the headstock and tailstock. Think of a wobbly car tire – it creates a lot of shaking!
- Loosely Mounted Workpiece: Even a balanced piece of wood can vibrate if it’s not securely attached to the lathe’s spur drive and live center or between centers.
- Lathe Bed Issues: If the lathe bed isn’t stable, level, or is damaged, it can transmit vibrations. Rust, debris, or loose connections can all be factors.
- Tool Rest Placement: A tool rest that’s too far from the workpiece or incorrectly angled can act like a lever, amplifying vibrations.
- Out-of-Balance Faceplate or Drive Centers: If any rotating accessories attached to the spindle are not perfectly balanced, they will cause vibrations, especially at higher speeds.
- Motor or Belt Issues: Sometimes, the motor itself or the drive belt system can be the source of the vibration. Worn belts, misaligned pulleys, or an unbalanced motor can all contribute.
- Floor Instability: A lightweight lathe on a flexible floor can vibrate significantly. The floor acts like a drum, amplifying the shaking.
- Turning Inserts or Tools: Dull or damaged turning tools, especially certain types of inserts, can chatter and cause vibrations.
Quick Fixes: The First Line of Defense
Before diving into more complex solutions, let’s try some simple checks. Often, the solution is right under your nose (or rather, your lathe!).
1. Secure Your Workpiece Firmly
This is paramount. Your wood needs to be locked in place.
- Spur Drive and Live Center: Ensure your spur drive (on the headstock) is firmly seated into the wood, and the tailstock’s live center is providing consistent pressure. You shouldn’t be able to wiggle the workpiece by hand.
- Between Centers: If using a faceplate or between centers, make sure the wood is snug. The tailstock should be advanced enough to prevent movement but not so much that it’s straining the lathe.
- Faceplate Mounting: If using a faceplate, ensure all bolts are tight and that the faceplate itself is securely threaded or bolted to the headstock.
2. Balance Your Workpiece
This is crucial, especially for larger or irregularly shaped blanks.
- Rough Turning: For rough, off-center logs, turn the lathe on at its lowest speed. Use your gouge to round off the high spots. This drastically reduces imbalance.
- “Pumpkin” Center: Some woodturners turn a long, unbalanced blank into a rough octagonal or hexagonal shape first. This is called turning a “pumpkin.” It’s much more balanced than a completely irregular log.
- Marking High Spots: While the lathe is off, you can chalk the high spots of an unbalanced workpiece. Restart the lathe at a slow speed and see where the chalk rubs off. This helps you identify where to remove material.
3. Check Your Tool Rest
The tool rest is your support, and its position matters greatly.
- Proximity: The tool rest should be as close to the workpiece as possible without actually touching it during rotation. Aim for a gap of about 1/8 inch.
- Angle: For most turning, the tool rest should be positioned slightly angled, generally leaning towards the direction of cut. For roughing, a steeper angle can be helpful.
- Stability: Ensure the tool rest post is securely locked in place and that the rest itself is not wobbly on its post.
Troubleshooting Specific Vibration Sources
If the quick fixes don’t solve the problem, it’s time to investigate more deeply.
1. Lathe Bed and Base Stability
A solid foundation is vital for any machine. Vibrations can travel and amplify if the lathe itself isn’t stable.
Stabilizing Your Lathe
Here are several ways to ensure your lathe has a firm footing:
- Leveling: Use a spirit level to check if your lathe bed is perfectly level in both directions. Adjust the machine’s feet or shims underneath if necessary. An uneven bed can cause the headstock and tailstock to misalign, leading to vibration.
- Bolting to Floor/Workbench: For stationary lathes, bolting the machine directly to a sturdy workbench or the concrete floor is the best solution. This eliminates almost all floor-borne vibrations. You can use specialized mounting plates or simply drill holes and use heavy-duty bolts.
- Adding Weight: If bolting isn’t an option, add weight to the lathe’s base. Place heavy items like sandbags, lead weights, or even large, dense pieces of scrap metal on the base.
- Anti-Vibration Mats: A thick, dense rubber anti-vibration mat placed under the lathe can absorb a significant amount of shaking. Look for mats designed for heavy machinery. You can find good examples at industrial supply stores or even some hardware stores.
For example, the Occupational Safety and Health Administration (OSHA) emphasizes the importance of stable and properly maintained machinery for safety. A stable lathe is a safer lathe.
2. Drive and Tailstock Alignment
Misalignment between the headstock and tailstock is a common cause of vibration, especially when turning between centers.
Checking and Adjusting Alignment
Most wood lathes have an adjustment mechanism for tailstock alignment. Here’s how to check:
- Mount a piece of scrap wood or a test bar between the headstock and tailstock centers.
- Ensure the tailstock is locked securely.
- Using a dial indicator mounted on the tool rest or the lathe bed, measure the runout at the headstock end and then at the tailstock end of the workpiece.
- If there’s a significant difference, you’ll need to adjust the tailstock. Consult your lathe’s manual for specific instructions, as this varies by model. Many lathes have adjustment screws or bolts on the tailstock assembly.
3. Motor and Drive System
The heart of your lathe is its motor and drive system. Any issues here will directly translate into vibrations.
Motor Mounts and Belts
- Motor Mounts: Check that the motor is securely mounted to its bracket and that the bracket is firmly attached to the lathe. Loose motor mounts are a prime source of vibration. Tighten any bolts you find.
- Drive Belts: Inspect your drive belts for signs of wear, cracking, or glazing. A worn belt can be uneven and cause vibration. Also, check if the belt is the correct tension – too loose and it can slip and wobble; too tight and it can put undue stress on bearings. Refer to your manual for proper belt tension.
- Pulleys: Ensure the motor drive pulley and the headstock pulley are clean, free of debris, and firmly attached to their respective shafts. If a pulley is loose or damaged, it will cause serious imbalance.
- Bearing Check: While you’re checking the drive system, spin the headstock and tailstock spindles by hand (with the belt removed). Listen for any grinding or roughness, which could indicate worn bearings are causing vibration.
4. Rotating Accessories
Items like faceplates, chucks, and drive centers spin with your workpiece. If they’re not balanced or are damaged, they’ll shake things up.
Faceplates, Chucks, and Centers
- Inspect for Damage: Check all rotating accessories for dents, bends, or other damage. A bent faceplate or chuck body is a guaranteed source of vibration.
- Secure Attachment: Ensure your chuck or faceplate is screwed onto the headstock spindle tightly and correctly. A loose chuck is extremely dangerous.
- Balancing Holes (for some accessories): High-speed woodworking can sometimes require balancing certain accessories, particularly faceplates if they are substantial. Some accessories have small holes for adding balancing screws. If yours does, and you experience vibration at higher speeds, this is worth investigating.
- Drive Center Condition: A damaged or bent spur drive or live center can cause imbalance. Ensure they are clean and sharp.
The Woodworkers Institute provides excellent resources on maintaining and properly using accessories like faceplates.
Advanced Solutions for Stubborn Vibrations
If you’ve gone through the basic checks and are still battling vibrations, it’s time for some more advanced techniques.
1. Lathe Bed Cleanliness and Lubrication
A clean, well-maintained lathe bed allows the tool rest and banjo to move smoothly, which helps dampen vibrations.
Keeping Your Bed in Top Shape
- Cleanliness is Key: Regularly clean rust and debris from your lathe bed ways. A fine steel wool (0000 grade) can be used for minor rust, followed by a good quality metal polish. For tougher rust, a specialized rust remover might be needed.
- Lubrication: After cleaning, apply a light coat of machine oil or a silicone-based lubricant designed for machine ways. This ensures smooth movement of the banjo and tool rest. A smooth-moving banjo can absorb more vibration than a sticking one.
- Check for Dents/Damage: Inspect the bed ways for any significant dents or gouges. These can prevent proper contact with the banjo and tool rest, leading to instability. Minor dents can sometimes be carefully hammered out from underneath, but serious damage may require professional attention or replacement.
2. Tooling and Cutting Technique
The way you cut and the tools you use have a significant impact on vibration.
Improving Your Cutting Action
- Sharpen Your Tools: This is non-negotiable. Dull tools require more force, tear the wood, and chatter – all leading to vibration. Keep your chisels and scrapers razor-sharp.
- Correct Tool Angles: Ensure you’re using the correct bevel angles for your tools and the type of wood you’re working with.
- Scraping vs. Shearing: For beginners, scraping can sometimes produce less vibration than attempting complex shear cuts, especially with tougher woods. Learn the difference and when to use each.
- Feed Rate: Don’t try to remove too much material in a single pass. A slower, controlled feed rate with a sharp tool will result in a much smoother cut and less vibration.
- Turning Inserts: If you use carbide or ceramic turning inserts, ensure they are clean, sharp (or replaced if chipped/dull), and properly seated in their holders. A loose or chipped insert will definitely cause chatter.
3. Vibration Dampening Materials
Sometimes, you need to add materials that absorb shock and vibration.
DIY Dampening Solutions
Here are a few options:
- Heavy Rubber Mats: As mentioned earlier, placing a thick, dense rubber mat under the entire lathe can make a huge difference, especially if it’s on a stand or workbench.
- Sandbags/Weights: Placing heavy sandbags or lead weights on the legs of a lathe stand can significantly lower its center of gravity and absorb vibrations.
- Acoustic Foam (Limited Use): While not ideal for directly absorbing lathe vibrations, acoustic foam panels around the immediate workspace can help reduce the perceived loudness by absorbing sound waves. This won’t stop the physical shaking but can make the workshop environment more pleasant.
Table: Common Wood Lathe Vibration Issues and Solutions
Here’s a quick reference guide to help you diagnose and fix common vibration problems:
| Symptom | Likely Cause(s) | Proven Solution(s) |
|---|---|---|
| Severe shaking, especially when starting the lathe | Severely unbalanced workpiece, loose workpiece mounting | Secure workpiece firmly; rough turn unbalanced blanks to round |
| “Chatter” (rapid, rhythmic vibration) during cuts | Dull tools, incorrect tool angle, aggressive feed rate, unstable tool rest, damaged turning insert | Sharpen tools; adjust tool angle; slower feed rate; position tool rest closer; check/replace insert |
| Steady hum or rattle from the lathe itself (even without workpiece) | Loose motor mount, unbalanced pulley, worn belt, worn bearings, unstable lathe base | Tighten motor mount; clean/secure pulleys; check belt tension/condition; check bearings; level/secure lathe base |
| Vibration that increases with speed | Out-of-balance faceplate/chuck/pulley, bent accessory, tailstock misalignment | Inspect and secure accessories; check/adjust tailstock alignment |
| Lathe “walking” across the floor | Unstable floor, lightweight lathe stand, unleveled lathe | Bolt lathe to floor/bench; add weight to stand; level the lathe |
Frequently Asked Questions (FAQs)
What is the fastest way to check if my workpiece is balanced?
The fastest way is by feel and observation. Mount the workpiece, start the lathe at its lowest speed, and watch for extreme wobbling. If it’s jumping around, it’s unbalanced. You can also use the chalk method described earlier to identify high spots.
Is it safe to turn a very unbalanced log?
It can be, as long as you take precautions. Always start at the lowest speed setting. Use a very sharp gouge and remove material gradually. The goal is to round off the heavily unbalanced sections as quickly as possible to create a more stable, roughly cylindrical shape before increasing speed.
My lathe is vibrating, but there’s no wood on it. What could be wrong?
This indicates an issue with the lathe itself. Check motor mounts, drive pulleys, the drive belt for wear or tension, and listen for any rough sounds from the headstock or tailstock bearings. Ensure the lathe is bolted down or on a very stable, level surface.
Can a damaged tool rest cause significant vibration?
Yes, if the tool rest or its post is bent, loose, or damaged, it might not provide adequate support. This instability can allow the tool to chatter more, leading to vibrations that travel back through the rest and into the lathe.
How often should I check my tailstock alignment?
It’s good practice to check your tailstock alignment periodically, especially if you frequently turn between centers or notice changes in how your workpieces are being finished at the tailstock end. A quick visual check once a month or after significant adjustments is generally sufficient for hobbyist use.
What kind of lubricant is best for my lathe bed?
Many manufacturers recommend a light machine oil or a specialized way lubricant. Avoid heavy greases, as they can attract sawdust and create a gummy mess. Silicone-based lubricants can also be effective and tend to stay cleaner. Always consult your lathe’s manual for the manufacturer’s recommendation.
Conclusion
Taming wood lathe vibration noise is not just about comfort; it’

