To get a genius Inconel 718 finish with a carbide end mill, focus on using the right tools, slow speeds, ample coolant, and a delicate touch. Precision and patience are key for Inconel, but the right carbide end mill makes it achievable for a smooth, burr-free surface.
Machining Inconel 718 can feel like a wrestling match. This superalloy is incredibly tough, resisting heat and deformation like a champion. When you’re aiming for a super smooth, mirror-like finish, it can be even more frustrating. But don’t throw in the towel just yet! With the right approach and the perfect carbide end mill, you can tackle Inconel 718 and achieve that brilliant finish you’re after. Let’s break down this challenge into simple steps, so you can get results you’ll be proud of.
We’ll cover everything you need to know, from picking the right tool to setting up your machine for success. You’ll learn how to handle this challenging material confidently, transforming those frustrating cuts into satisfyingly smooth finishes.
Why is Inconel 718 So Tricky to Finish?
Inconel 718 is a nickel-chromium superalloy. Its amazing strength also makes it incredibly difficult to machine. It work hardens rapidly, meaning the more you cut it, the harder the material becomes right under your tool. This makes it prone to tool wear, chatter, and poor surface finishes if not handled correctly. Achieving a mirror finish on Inconel 718 requires a special approach that respects its unique properties. It’s not like machining softer metals, so we need to be smart about our technique.
Choosing the Right Carbide End Mill for Inconel 718
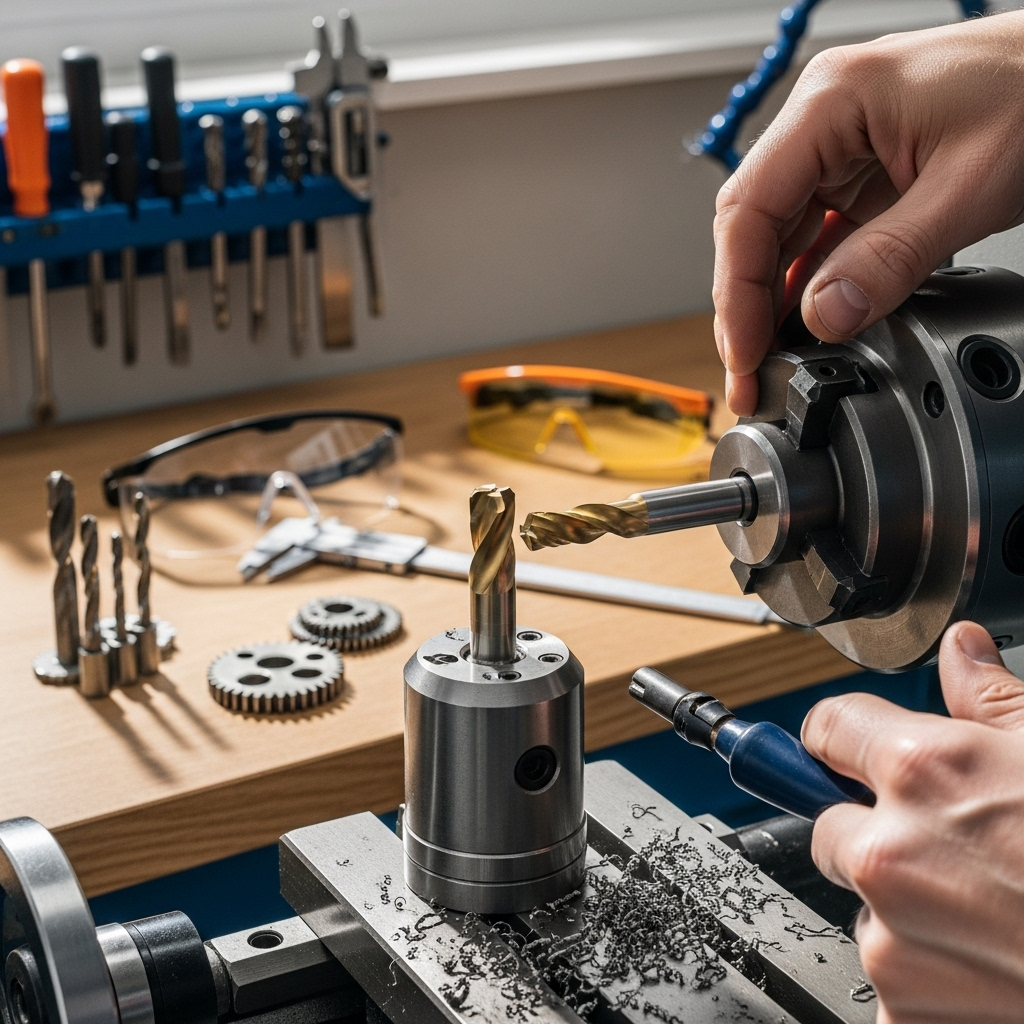
The carbide end mill is your best friend when it comes to Inconel 718. But not just any carbide end mill will do. We need one that’s specifically designed to handle tough materials and leave a beautiful finish.
Key Features to Look For:
- Material: High-quality solid carbide is essential. It resists heat and wear much better than high-speed steel (HSS). Look for sub-micron or nano-grain carbide for maximum toughness.
- Coatings: Advanced coatings play a huge role. Coatings like AlTiN (Aluminum Titanium Nitride), TiAlN (Titanium Aluminum Nitride), or specialized PVD (Physical Vapor Deposition) coatings are excellent for Inconel. They increase hardness, reduce friction, and improve heat resistance, all vital for Inconel.
- Geometry: The flute geometry matters. Look for tools with:
- High Helix Angle: A higher helix angle (often 30-45 degrees) helps to shear the material cleanly, reducing cutting forces and improving chip evacuation.
- More Flutes: Typically, 4 or 5 flutes are preferred for finishing Inconel. While more flutes can mean a slightly rougher finish on softer materials, they help break up chips and prevent re-cutting in tough alloys like Inconel. For a mirror finish, a higher number of flutes can be beneficial for chip control.
- Sharp Edges: The cutting edges must be incredibly sharp to slice through the material rather than rubbing and creating heat.
- Corner Radius: A small corner radius (or no radius for a square end) can be optimized. For a ‘genius finish,’ a very fine radius can help support the cutting edge and prevent chipping.
- Specific Design for Superalloys: Some end mills are marketed specifically for difficult-to-machine materials. These often have optimized flute designs, specific carbide grades, and advanced coatings tailored for Inconel, Invar, or other aerospace materials.
- Reduced Neck/Z-Carb: For deep pockets or challenging geometries, a reduced neck diameter (or a “Z-Carb” style with a neck relief) can provide the necessary clearance to avoid rubbing against the walls of the cut, especially important for achieving a burr-free finish.
Example Product: Carbide End Mill 3/16 Inch 8mm Shank Reduced Neck for Inconel 718 Mirror Finish
When you’re searching for the perfect tool, a description like “carbide end mill 3/16 inch 8mm shank reduced neck for Inconel 718 mirror finish” tells you a lot. The 3/16-inch diameter is great for finer details and shallower cuts. The 8mm shank provides good rigidity. The “reduced neck” is crucial for clearing your workpiece walls in deeper cuts, preventing rubbing and ensuring a clean finish. Specifying “for Inconel 718 mirror finish” means the manufacturer has likely optimized the carbide grade, flute form, and coating for exactly this challenging application.
Setting Up Your Machine for Success
The best end mill in the world won’t perform miracles if your machine isn’t set up correctly. Precision and stability are paramount when dealing with Inconel 718.
Key Machine Setup Considerations:
- Rigidity: Ensure your milling machine is rigid and free from excessive play. Worn bearings or loose components will lead to chatter, which is the enemy of a good finish. A solid machine foundation is vital.
- Tool Holder: Use a high-quality, precision tool holder. A shrink fit holder or a high-precision collet chuck (like a hydraulic or side-lock holder) is far superior to standard R8 collets for this application. It minimizes runout and vibration, ensuring the tool spins true.
- Spindle Speed (RPM): This is where we need to think differently than with mild steel. For Inconel, you’ll typically need much lower spindle speeds. High speeds generate excessive heat, which Inconel loves to absorb, leading to rapid tool wear and poor finishes.
- Feed Rate: Similar to spindle speed, the feed rate needs to be carefully controlled. Too high a feed rate can overload the tool, while too low can cause rubbing and heat buildup. You want to achieve a chip load that allows the tool to efficiently cut and evacuate material.
- Coolant/Lubrication: Abundant and appropriate coolant is NON-NEGOTIABLE. Inconel 718 generates a lot of heat. Flood coolant, through-spindle coolant, or a high-quality MQL (Minimum Quantity Lubrication) system is essential. The coolant not only cools the cutting zone but also lubricates the cut and flushes away chips. A specialized coolant for high-temperature alloys is recommended.
Machining Parameters: The Heart of the Genius Finish

Getting the numbers right for spindle speed, feed rate, and depth of cut is crucial. These are guidelines, and you’ll often need to fine-tune them based on your specific machine, tooling, and setup. Always start conservatively and increase as you gain confidence.
Recommended Starting Parameters for Carbide End Milling Inconel 718
These are general guidelines for a solid carbide end mill designed for superalloys.
| Operation | Tool Diameter | Spindle Speed (RPM) | Feed Rate (IPM) | Axial Depth of Cut (DOC) | Radial Depth of Cut (Stepover) | Chip Load per Tooth |
|---|---|---|---|---|---|---|
| Roughing | Various | 200 – 600 | 0.003 – 0.008 in/tooth | 0.050 – 0.150 in | 25% – 50% of diameter | 0.001 – 0.002 in |
| Finishing | 3/16 inch (4.76mm) | 150 – 400 | 0.0015 – 0.004 in/tooth | 0.010 – 0.030 in | 10% – 25% of diameter | 0.0005 – 0.001 in |
Note: The “Feed Rate” in the table is often calculated as “Feed Rate per Tooth” multiplied by the number of flutes and the spindle speed. For example, if your target chip load per tooth is 0.001 inch, you have a 4-flute end mill running at 200 RPM, your feed rate would be: 0.001 in/tooth 4 flutes 200 RPM = 80 IPM. Always verify your machine’s capabilities.
Understanding Chip Load
Chip load is the thickness of the material removed by each tooth of the end mill on each revolution. This is arguably the most critical parameter for achieving good tool life and finish. A chip load that’s too small causes rubbing and heat. A chip load that’s too large can overload the tool and cause breakage or poor finish. For a mirror finish, you’re aiming for a very small, consistent chip load.
Cutting Strategies for a Genius Finish
- High-Quality Coolant is Paramount: Use a high-performance synthetic or semi-synthetic coolant designed for aerospace alloys. Ensure a strong flow directly to the cutting zone. Through-spindle coolant can be a game-changer if your machine supports it. Learn more about coolant types and applications from resources like the Machinery Lubricants resource.
- Minimize Vibration (Chatter): Chatter is the enemy of a smooth finish.
- Ensure your workpiece is securely clamped.
- Use the shortest possible tool extension.
- Employ a rigid tool holder setup.
- Adjust your feed rate and spindle speed. Sometimes, a small change in RPM can dramatically reduce chatter.
- Consider climb milling where possible, as it can reduce cutting forces and climb over the hardened layer. However, be mindful of chip evacuation.
- Gentle Passes for Finishing: For the final finishing passes, you’ll want to use very light depths of cut (axial and radial). The goal is to shave off a thin layer to achieve that mirror surface.
- Chip Evacuation: Inconel tends to produce stringy chips. Ensure your flutes are clear and your coolant flow is strong enough to wash chips away. Chips re-cutting can ruin a finish and damage the tool.
- Tool Path: For simple surfaces, a standard contour or pocketing tool path is fine. For complex 3D surfaces, ensuring your CAM software generates smooth, efficient tool paths with consistent stepovers is critical.
Step-by-Step Guide for Machining Inconel 718 (Beginner Focus)
Let’s walk through the process of getting that great finish.
- Inspect Your Tooling: Before you start, examine your carbide end mill. Ensure it’s sharp, free from any nicks or chips, and has its coating intact. A damaged tool will only cause problems. Make sure it’s the correct type for Inconel as discussed earlier.
- Secure the Workpiece: Mount your Inconel 718 workpiece very securely. Use clamps that don’t obstruct your tool path. Ensure the workpiece is perfectly flat and stable. Any movement will lead to chatter and a poor finish.
- Set Up Your Machine:
- Install your chosen rigid tool holder and insert the end mill.
- Ensure your coolant system is ready and tested.
- Check for vibration or play in your machine’s axes. Address any issues.
- Program/Set Tooling Parameters:
- Input the recommended starting parameters for spindle speed, feed rate, and depths of cut into your CNC controller or set them manually on your manual machine.
- Crucially, start with a conservative depth of cut and radial stepover for finishing passes. For a 3/16 inch end mill, try an axial DOC of 0.015 inches and a radial stepover of 15-20%.
- Calculate your chip load per tooth to ensure you’re in the effective range.
- Initiate Cutting (Gentle Start):
- Turn on your coolant flow BEFORE the tool touches the workpiece.
- Start the spindle at your set speed.
- Begin the feed. Listen to the machine and the cut.
- If you hear any ringing, squealing, or rapid chatter, STOP IMMEDIATELY. Re-evaluate your parameters or setup.
- Observe the Cut: Watch the chips being produced. They should be small and well-formed, not long and stringy. The surface finish should look consistent.
- Make Finishing Passes: Once you’ve achieved the desired shape with lighter roughing passes, make very light finishing passes. For Inconel, these should be a “skimming” cut. A depth of cut as shallow as 0.005 to 0.010 inches for the final pass is not unusual for a mirror finish.
- Clean and Inspect: After the cut, carefully clean the workpiece to remove any coolant residue and chips. Inspect the surface for the desired mirror finish. Look for any marks, burrs, or unevenness.
- Iterate and Refine: If the finish isn’t perfect, don’t get discouraged. Gently adjust your parameters. Try slightly increasing the spindle speed (if possible without causing chatter), slightly decreasing the feed rate, or using a shallower depth of cut. Small adjustments can make a big difference.
Troubleshooting Common Issues

Even with the best intentions, you might run into a few snags. Here’s how to deal with them.
Issue: Chatter/Vibration
- Cause: Most often due to machine rigidity, tool holder runout, loose workpiece, or incorrect cutting parameters (feed/speed combination).
- Solution: Increase machine rigidity if possible. Use a precision tool holder. Secure workpiece tighter. Reduce depth of cut or stepover. Adjust spindle speed or feed rate to find a “sweet spot” that avoids resonance.
Issue: Poor Surface Finish (Rough or Galled)
- Cause: Insufficient coolant, dull tool, incorrect chip load (too small), too much heat, rubbing instead of cutting.
- Solution: Increase coolant flow. Use a sharper, more appropriate tool. Increase feed rate slightly or decrease depth of cut to achieve ideal chip load. Reduce cutting speed to generate less heat. Ensure tool isn’t rubbing by checking DOC/stepover.
Issue: Tool Breakage
- Cause: Excessive feed force, too deep a cut, poor chip evacuation leading to tool overload, chatter, or hitting interrupted features.
- Solution: Reduce depth of cut and feed rate. Ensure proper chip evacuation. Use a more rigid setup. Program gentle lead-ins and lead-outs. Use a tool with a stronger corner geometry if necessary.
Issue: Excessive Heat Build-up
- Cause: High spindle speed, insufficient coolant, shallow chip load causing rubbing, incorrect coating on the tool.
- Solution: Reduce spindle speed. Increase coolant flow and ensure it’s directed at the cutting edge. Adjust feed rate or depth of cut for a more effective chip. Consider a different tool coating if possible.
For detailed information on material properties and machining best practices for Inconel 718, consult resources from organizations like NASA or established metal suppliers who often provide machining guides on their websites.
FAQ: Your Carbide End Mill & Inconel 718 Questions Answered
Q1: What is the best type of end mill for Inconel 718?
For Inconel 718, a solid carbide end mill with a specialized coating (like AlTiN or TiAlN) and a high helix angle (30-45 degrees) is highly recommended. Tools specifically designed for difficult-to-machine superalloys offer the best performance and longevity.
Q2: Can I use a standard end mill for Inconel 718?
While you might be able to make cuts with a standard high-quality carbide end mill, it’s not ideal. Inconel 718’s hardness and tendency to work harden will quickly wear down a standard tool, leading to poor surface finish, excessive heat, and likely tool breakage. A specialized tool is a much better investment.
Q3: Why do I need so much coolant for Inconel 718?
Inconel 718 generates a tremendous amount of heat during machining due to


