Yes, a mini metal lathe is an absolute essential for anyone looking to craft unique, custom rings from metal or wood. It offers precision, control, and the ability to create intricate designs far beyond what hand tools can achieve, making it a genius addition to any maker’s toolkit.
Turning smooth, perfectly formed rings can be a surprisingly rewarding experience, but it often feels like a puzzle for beginners. You might see amazing handcrafted rings and think, “How on earth do they do that?” The truth is, with the right tools and a little guidance, you can too! Many makers get frustrated trying to achieve consistent shapes and smooth finishes with basic tools. It’s like trying to sculpt a tiny masterpiece with a butter knife – possible, but incredibly difficult and time-consuming. This guide is here to demystify the process. We’ll show you how a specific tool, the mini metal lathe, is not just helpful, but a genius essential for ring-making. Get ready to learn how this powerful machine can unlock your creative potential and help you craft beautiful rings with confidence.
Why a Lathe is the Genius Essential for Ring Making
When you think about making rings, your mind might jump to jewelry pliers or small hand files. While those have their place, they simply can’t match the precision and efficiency a lathe brings to the table, especially for creating consistent, professional-looking results. A lathe is essentially a power tool that spins a workpiece (in our case, the material for your ring) while a cutting tool is applied to shape it. For ring making, this means being able to precisely remove material to achieve the perfect inner diameter, outer diameter, and the desired profile.
Precision and Consistency
Imagine trying to make 10 identical rings with only hand tools. It would be incredibly challenging to get them all to the same size and shape. A lathe removes the guesswork. Once you set up your tools and workpiece, the lathe spins them at a controlled speed, allowing you to make very fine adjustments with your cutting tools. This ensures that every ring you make, from the first to the last, will have a consistent, professional finish. This level of precision is what separates amateur attempts from truly beautiful, wearable art.
Versatility in Materials
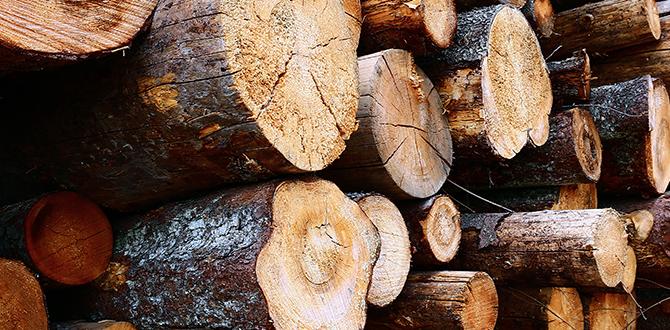
Lathes aren’t just for metal! While metal is a popular choice for durable rings, a lathe can also be used to shape beautiful wooden rings, often combined with metal cores for added strength. You can work with a wide variety of materials, each offering unique aesthetic possibilities. From exotic hardwoods to durable metals like brass, aluminum, or even stainless steel, your creative options are vast. The ability to switch between materials on the same machine makes a lathe an incredibly versatile tool for any maker.
Efficiency and Speed
Hand-carving or filing a ring takes a significant amount of time and effort. A lathe drastically speeds up the material removal process. What could take hours with hand tools can often be accomplished in minutes on a lathe. This doesn’t mean you’re sacrificing quality; rather, you’re leveraging the efficiency of a machine designed for precise material shaping. This efficiency is key for hobbyists who want to create multiple pieces or for those looking to start a small business selling their creations.
Complex Designs Made Simple
Want to add decorative grooves, a stepped profile, or a specific curve to your ring? A lathe makes intricate designs achievable. By using different cutting tools and carefully controlling the lathe’s movement, you can create profiles and textures that would be nearly impossible, or at least extremely challenging, to achieve by hand. This opens up a world of design possibilities, allowing you to create truly unique and personalized rings.
Choosing the Right Lathe for Ring Making
The term “lathe” can bring to mind large, industrial machines. However, for ring making, especially for beginners, a smaller, more accessible option is usually best. We’re mostly talking about mini metal lathes here. These compact machines offer plenty of power and precision for the task without taking up your entire workshop.
Mini Metal Lathes: The Sweet Spot
Mini metal lathes are specifically designed for smaller projects, hobbyists, and home workshops. They typically have a small footprint, are relatively affordable, and are easier to learn on than their larger counterparts. For ring making, you’ll want a lathe that offers:
- Sufficient Spindle Speed Control: The ability to adjust the speed of the spinning workpiece is crucial for different materials and cutting depths.
- Good Accuracy and Rigidity: Even a small lathe needs to be stable and precise. Look for solid construction.
- Appropriate Swing and Bed Length: While rings are small, ensure the lathe can accommodate your material blank comfortably. A common “swing” size (the maximum diameter the lathe can handle over the bed) of around 7-10 inches is usually more than enough.
- Standard Tool Post: This allows you to use common cutting tools.
What to Look For in a Ring-Making Lathe
When shopping for a lathe specifically for rings, consider these features:
| Feature | Importance for Ring Making | Beginner Considerations |
|---|---|---|
| Variable Speed Control | Essential for working with different materials (wood vs. metal) and for fine-tuning cuts. | Look for readily accessible speed adjustment, ideally with a digital readout. |
| Accuracy & Repeatability | Crucial for achieving precise inner and outer diameters and consistent shapes. | Higher quality machines will offer better accuracy out of the box. |
| Chuck/Faceplate Compatibility | You’ll need a way to securely hold your ring material blank. A chuck or a faceplate is necessary. | Ensure included or easily available chucks/faceplates are suitable for ring blanks. |
| Tool Rest (for wood) or Tool Post (for metal) | To support your cutting tool as you shape the material. | A stable, adjustable tool rest or a robust tool post is key. |
| Rigidity & Stability | A sturdy machine reduces vibration, leading to smoother cuts and better precision. | Weighs are often an indicator of rigidity; look for cast iron construction. |
| Size/Footprint | Consider your available workshop space. Mini lathes are designed for small spaces. | Compact designs are ideal for hobbyists and small workshops. |
Popular Mini Lathe Brands for Beginners
Several brands offer excellent mini metal lathes that are suitable for ring making. While specific models change, reputable manufacturers include Grizzly Industrial, Harbor Freight (e.g., their Central Machinery line), and Precision Matthews. Always read reviews and compare specifications before making a purchase. For general guidance on choosing a metal lathe, resources like Machinery Magazine offer valuable insights into what to look for.
Essential Tools and Accessories for Ring Making on a Lathe
Once you have your lathe, you’ll need a few specific tools and accessories to actually make rings. Don’t worry, it’s not an overwhelming list for beginners.
For Metal Ring Making
When working with metal, precision is paramount. You’ll be dealing with harder materials, so your tools need to be up to the task.
- Collet Chuck or 3-Jaw Chuck: This is how you’ll hold your ring blank (a cylindrical piece of metal). A collet chuck offers the most precision for holding small, consistent diameters, which is ideal for pre-made ring tubes. A 3-jaw chuck is more versatile and can often hold irregularly shaped blanks.
- Solid Carbide Turning Tools: For metal, solid carbide tools are often preferred because they hold their edge better and can handle the tougher material. You’ll want a few basic shapes for turning the outside, parting off, and drilling the inside (if you’re starting wider than your blank).
- Drill Bits: If you’re drilling the inside of a solid metal block, you’ll need appropriate drill bits for the desired inner diameter.
- Measuring Tools: Digital calipers are a must-have for precise measurement of inner and outer diameters.
- Safety Gear: Safety glasses are non-negotiable. Hearing protection is also recommended.
- Cutting Fluid/Lubricant: This helps keep your tools cool and lubricated, extending their life and leading to cleaner cuts, especially important for metals.
For Wood Ring Making
Wood offers a different set of challenges and requires different tools. The process is often more sculptural.
- Jaw Chuck or Faceplate: To securely hold your wooden blank. Jaw chucks are very versatile.
- Wood Turning Gouges: These are the primary tools for shaping wood. You’ll want a few basic types:
- Roughing Gouge: To quickly shape the raw blank into a round form.
- Spindle Gouge: For general turning and shaping.
- Detail Gouge: For finer details and undercuts.
- Parting Tool: To cut the ring off the blank or to create grooves.
- Scrapers: Used for fine finishing and to get very smooth surfaces.
- Lathe Sanding Kit: Progressing through different grits of sandpaper as the wood turns.
- Safety Gear: Safety glasses and a full face shield are highly recommended when turning wood. Hearing protection.
- Wood Finishes: Oils, lacquers, or waxes to protect and beautify the finished wood.
Shared Accessories
Some accessories are useful for both metal and wood turning:
- Steady Rest / Follower Rest: For longer or thinner pieces, these support the workpiece from underneath, preventing wobble and vibration. While rings are usually short, they can be helpful for larger blanks or if you’re adding a metal liner to a wooden ring.
- Knurling Tool (Optional): For adding textured grip patterns.
- Cutting and Polishing Compounds: For achieving a mirror finish on metal.
Step-by-Step Guide: Making a Simple Metal Ring (Beginner Focus)
This guide outlines the basic steps for making a simple metal ring using a mini metal lathe. We’ll assume you’re starting with a pre-formed metal tube, which is the easiest entry point for beginners. This method is common for wedding bands and everyday wearable rings.
Step 1: Preparing Your Material Blank
For this example, let’s say you have a piece of “ring tubing” – a sturdy hollow tube of your chosen metal (e.g., titanium, stainless steel, brass, copper). You’ll need a piece slightly longer than your desired finished ring width, and with an inner/outer diameter close to what you want. For beginners, it’s often best to start with tubing that has an inner diameter already close to your target finger size, and then use the lathe to refine the outer wall thickness and shape.
Step 2: Mounting the Blank on the Lathe
This is a critical step for safety and success. You need to hold the tube securely.
- Clean the Chuck/Faceplate: Ensure the jaws of your chuck or the face of your faceplate are clean and free of debris.
- Mount the Chuck/Faceplate: Attach your chosen chuck or faceplate securely to the lathe’s spindle.
- Secure the Blank:
- Using a Collet Chuck: Select the correct size collet for your tubing, insert it into the chuck mechanism, then insert your tubing into the collet and tighten. This provides the most concentric hold.
- Using a 3-Jaw Chuck: Open the jaws wide enough to insert your tubing. Insert the blank, then carefully close the jaws, ensuring the tubing is centered. Tighten firmly, but avoid crushing the material.
- Check for Runout: Use a dial indicator or a felt-tip marker to check if the blank is centered. Ideally, it should spin true with minimal wobble.
Step 3: Setting Up Your Cutting Tool
For metal, you’ll use a solid metal turning tool. You’ll be shaping the outside of the tube.
- Install the Tool: Insert your carbide turning tool into the tool post.
- Position the Tool: Bring the cutting edge of the tool right up to the rotating blank. For external turning, the height of the tool should be centered on the workpiece’s rotational axis.
- Set Cutting Depth: You’ll typically make multiple shallow passes rather than one deep cut. Start by setting a very shallow depth of cut—a tiny amount to simply kiss the surface and remove any oxidation or imperfections.
Step 4: Turning the Outer Diameter
Now, you’ll start removing material from the outside of the ring blank.
- Start the Lathe: Begin at a relatively slow spindle speed. For most metals, this might be in the 500-1500 RPM range, depending on the metal and tool. Adjust based on the sound and vibration.
- Engage the Cutting Tool: Slowly feed the cutting tool into the spinning material. Use the lathe’s carriage feed (either handwheel or automatic) to move the tool along the length of the blank.
- Make Shallow Passes: Remove only a small amount of material with each pass. This helps prevent chatter (vibration) and ensures a smoother finish.
- Shape the Profile: As you make passes, you’ll be reducing the outer diameter. You can also use different tool bits to create a desired profile (e.g., a slight dome, a flat profile, or beveled edges).
- Measure Frequently: Use your digital calipers to check the outer diameter as you go.
Step 5: Refining the Inner Diameter (If Necessary)
If your tubing’s inner diameter isn’t perfect, or if you’re starting from a thicker-walled blank and need to bore it out, you’ll use a boring tool.
- Install Boring Tool: Replace your turning tool with a suitable boring tool (often a carbide-tipped bar).
- Set Depth and Speed: Similar to turning, start with shallow cuts and appropriate spindle speeds.
- Bore to Size: Carefully feed the boring tool into the inside of the ring. Measure frequently with calipers.
Step 6: Parting Off or Finishing the Ends
Once the desired outer diameter is achieved, you’ll need to part the ring off the main blank if you’re making multiple rings, or just finish the ends if it’s a single piece.
- Use a Parting Tool: A thin, sharp parting tool is used to carefully cut the ring free from the stock material.
- Watch Clearance: As the cut gets deeper, the piece you’re cutting off can grab the tool. Be ready to stop the lathe.
- Finishing Ends: If you’re not parting off, use a standard turning tool or a facing tool to make the ends of the ring perfectly flat and smooth.
Step 7: Final Shaping and Polishing
This is where you refine the look and feel.
- Chamfer Edges: Use a filing tool or a specialized chamfering tool to slightly round off the inner and outer edges. This makes the ring much more comfortable to wear.
- Sanding: Start with coarser grit sandpaper and progress to very fine grits (e.g., 400, 600, 1200 grit and higher) to remove tool marks and achieve a smooth surface.
- Polishing: For metal, use polishing compounds and buffing wheels (applied either by hand or on the lathe) to achieve a mirror-like shine. Start with a coarser compound and move to finer ones.
- Clean Up: Thoroughly clean the ring and the lathe to remove any metal dust or residue.
Step-by-Step Guide: Making a Simple Wooden Ring
Turning wooden rings offers a different aesthetic and slightly different techniques. This assumes you’re starting with a solid block or a thick-walled wooden tube.
Step 1: Preparing the Wooden Blank
You’ll typically start with a block of hardwood. For beginners, denser woods like maple, cherry, or walnut are good choices. You might also be using a pre-made wooden “ring blank” which is a short, thick tube.
Step 2: Mounting the Blank on the Lathe
For wood, a jaw chuck is ideal, or you can face-mount your blank to a faceplate if it’s wide enough. This holds the wood securely and centered.
- Attach Chuck/Faceplate: Mount your chuck or faceplate to the lathe spindle.
- Mount Wood Blank:
- Faceplate: Screw your wood block onto the faceplate. Ensure it’s centered.
- Jaw Chuck: