Quick Summary:
The tailstock for lathe is a crucial accessory that supports long workpieces, drills holes precisely, and can even act as a thread-cutting aid. Understanding its function and proper use is key for any machinist to achieve accurate and stable results on their lathe.
Welcome to Lathe Hub! If you’re new to the world of lathes, you’ve probably heard about the tailstock. It might seem like just another part of the machine, but this humble component is incredibly useful. Sometimes, getting it set up just right can feel a bit puzzling. Don’t worry, though! We’re going to break down exactly what the tailstock is, why it’s so important, and how to use it effectively. By the end of this guide, you’ll feel confident using your tailstock for all sorts of tasks, from perfectly centered drilling to supporting those longer projects. Let’s get to it!
What is a Tailstock for Lathe? Your Essential Guide
As a fellow machinist and tool enthusiast, I know how overwhelming it can feel when you’re starting out. There are so many parts to a lathe, and each one has its own job. Today, we’re focusing on the tailstock – a real workhorse that’s often misunderstood. Think of it as your lathe’s loyal helper, ready to lend support when you need it most.
The tailstock is the part of the lathe that typically sits on the opposite end of the headstock. Its primary role is to provide support for longer workpieces that might otherwise flex or vibrate excessively during machining. But its usefulness extends far beyond just holding up a long piece of wood or metal. It’s also your go-to for accurate drilling, reaming, and even tapping operations.
Using the tailstock correctly can significantly improve the quality and accuracy of your work. It helps reduce chatter, ensures consistent cuts, and allows for operations that would be impossible with the headstock alone. This guide will walk you through everything you need to know, from its basic anatomy to advanced techniques, ensuring you get the most out of this essential lathe accessory.
The Anatomy of a Tailstock
Before we dive into how to use it, let’s get familiar with the parts of a typical lathe tailstock. Knowing these components will make understanding its functions much easier.
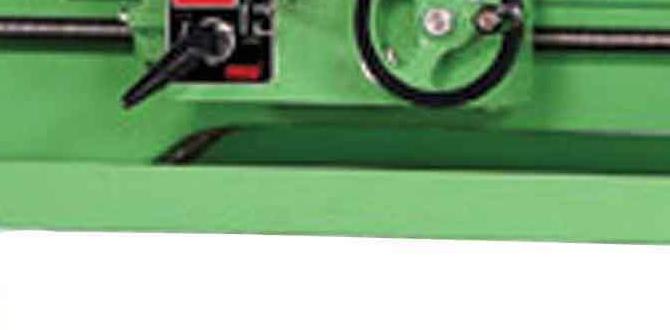
- Tailstock Casting: This is the main body of the tailstock. It’s a heavy casting that slides along the lathe bed.
- Quill: This is the part that extends and retracts from the main casting. It’s like a sleeve that moves in and out.
- Quill Feed Handle: This is the handle you turn to extend or retract the quill. It’s usually a star-shaped wheel or a lever.
- Quill Lock: A lever or screw that clamps the quill in place, preventing it from moving once you’ve set its position.
- Tailstock Base/Saddle: This is the part that slides on the lathe bed. It has a locking mechanism to secure the entire tailstock in a specific position.
- Center Hole: The end of the quill has a tapered hole (usually a Morse taper) designed to hold various accessories like centers, drill chucks, and reamers.
- Set-Over Adjustment (Optional): Some tailstocks have screws on the base that allow you to slightly offset the tailstock’s alignment to the headstock. This is crucial for turning long tapers.
Why is the Tailstock So Important? Key Functions
The tailstock isn’t just an optional attachment; it’s a fundamental part of many lathe operations. Here’s why it earns its place on every lathe:
- Supporting Workpieces: On long or slender workpieces, the tailstock provides a stable point of contact, preventing the material from bowing or vibrating. This leads to smoother cuts and less stress on your lathe.
- Drilling and Reaming: When you need to drill a hole precisely in the center of a workpiece, the tailstock is your best friend. It holds a drill bit or reamer firmly and allows for controlled advancement into the material.
- Taper Turning: For creating angled surfaces (tapers), the tailstock can be offset from the headstock’s center line. This allows the tool to cut along a different axis, creating the desired angle.
- Threading: While the headstock drives the main rotation, the tailstock can hold a die stock or tap, providing support and alignment for cutting internal or external threads.
- Knurling: Similar to threading, knurling tools can be held in the tailstock to add a textured grip to your workpiece.
Setting Up the Tailstock: Step-by-Step
Getting your tailstock ready for a project is a straightforward process. Follow these steps carefully for accuracy and safety.
- Prepare Your Lathe: Ensure the lathe bed is clean and free of debris. This allows the tailstock base to slide smoothly.
- Position the Tailstock: Place the tailstock base onto the lathe bed. Slide it towards the workpiece area, but don’t lock it down yet.
- Mount Your First Center (for workpiece support):
- If you’re supporting a long workpiece, you’ll need a dead center or a live center. A live center rotates with the workpiece, minimizing friction.
- Insert the center into the tailstock quill’s Morse taper socket. Tap it in gently with a piece of wood or a rubber mallet. It should fit snugly.
- If it’s a live center, ensure it’s properly greased.
- Align with the Headstock:
- If you are centering the tailstock perfectly with the headstock, you’ll want to align the centers.
- Rotate the headstock manually. Adjust the tailstock’s position until the two centers are perfectly aligned. You can use a dial indicator or a piece of paper to check for alignment. A common method is to bring the tailstock quill close to the headstock center, then use a piece of paper. If the paper slides between them with equal resistance on both sides, they’re aligned.
- For drilling or operations that require dead-center alignment, this step is critical.
- Lock the Tailstock in Place: Once aligned, tighten the tailstock locking mechanism firmly. This secures the entire tailstock base to the bed.
- Advance the Quill: Use the quill feed handle to move the quill forward until the tip of the center just contacts the workpiece.
- Apply Tailstock Compound: For drilling, you’ll insert a drill chuck or a drill bit into the tailstock quill. Then, use the quill feed handle to advance the drill into the workpiece.
- For workpiece support, you might need to advance the quill further to apply pressure. It’s a balance – too little pressure and it won’t help, too much and you could damage the workpiece or centers. Start with light pressure and increase as needed.
- Lubricate: Apply a bit of cutting fluid or lubricant if you’re drilling or reaming to reduce heat and friction.
Using Different Tailstock Accessories
The tailstock’s Morse taper (usually MT#2 or MT#3) is a standardized fitting, allowing it to hold a variety of tools and accessories. Here are some common ones:
1. Centers
As mentioned, centers are essential for supporting workpieces. There are a few types:
- Solid Center (Dead Center): This is a simple, pointed cone that remains stationary. It’s used when you don’t need the center itself to rotate. It’s good for light duty and when the workpiece is driven solely by the headstock chuck.
- Live Center: This center has bearings and rotates with the workpiece. It’s the preferred choice for most operations because it eliminates friction and heat buildup, which can seize the workpiece.
- Half Center: Offers a balance between support and clearance, useful for specific turning operations.
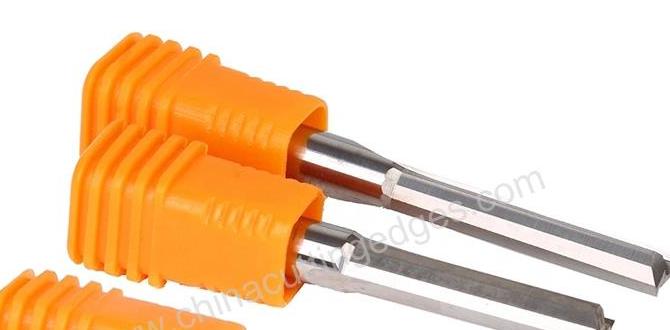
2. Drill Chucks
A drill chuck allows you to hold standard twist drills, reamers, and other straight-shank tools. They are inserted directly into the tailstock quill.
- How to Use: Insert the drill chuck into the tailstock quill, securing it with the quill lock. Insert your drill bit into the chuck and tighten it by hand or with a chuck key. Align the tailstock with your workpiece mark, lock the tailstock, and then use the quill feed handle to advance the drill. For drilling, it’s common practice to retract the drill periodically to clear chips, especially in deeper holes.
3. Reamers
Reamers are used to create precise, smooth holes. They are typically used after drilling a pilot hole. Reamers are generally only pushed, not twisted, by the tailstock.
- How to Use: Insert the reamer into the drill chuck or directly into the tailstock quill if it has a Morse taper that matches. Align carefully and advance slowly using the quill feed. Reaming is a finishing operation, so maintain consistent pressure.
4. Taps and Die Stocks
The tailstock can hold tap wrenches or die stocks to help you cut internal (taps) or external (dies) threads.
- Tapping: Insert a tap into a tap wrench, then insert the tap wrench into the tailstock quill. Align the tap with the pre-drilled hole. Advance using the quill feed. For threads, it’s crucial to advance, turn the tap slightly back (about a quarter turn) to break the chip, and repeat. This prevents the tap from binding or breaking.
- Die Threading: For external threads, mount a die stock in the tailstock. Align it with the workpiece end, and advance it to start the thread. The headstock will drive the rotation.
Lathe Tailstock Alignment: Getting it Square
For straight turning operations, the tailstock center must be perfectly aligned with the headstock center. Misalignment can lead to inaccurate diameters, especially on longer pieces.
Methods for Alignment:
- Visual Alignment with Paper: As mentioned before, this is a quick and effective method for many home and small workshop setups. Bring the tailstock quill close to the headstock center (or vice-versa). Insert a piece of paper between them. Gently move the tailstock base perpendicular to the headstock center. Try to slide the paper back and forth. If the paper binds on one side more than the other, adjust the tailstock base. The goal is for the paper to slide with consistent, slight resistance all the way around.
- Using a Dial Indicator: This is the most precise method. Mount a dial indicator in the headstock (like a test indicator). Align it with the tailstock spindle (quill). Move the tailstock base so that the indicator reads zero at the top and bottom of the tailstock spindle’s travel. This ensures the tailstock spindle is perfectly parallel to the lathe bed.
When to Deliberately Misalign (Set-Over):
Sometimes, you want the tailstock to be misaligned. This is for turning tapers. Many tailstocks have adjustment screws on the base for this purpose. By loosening the clamp bolts on the tailstock base and adjusting these screws, you can offset the tailstock’s centerline relative to the headstock’s centerline. This creates an angled turning path for the cutting tool, resulting in a tapered surface.
A good resource for understanding lathe alignment and other fundamental machining principles can be found on government educational sites, such as those from university engineering departments or technical colleges.
For example, many university materials science or mechanical engineering departments offer resources and guides on machining practices. A quick search for “university machining principles PDF” can yield excellent, often free, downloadable guides. Another reliable source for safety and operational standards in machining is the Occupational Safety and Health Administration (OSHA), which provides guidelines for safe machine operation.
Troubleshooting Common Tailstock Issues
Even with the best intentions, you might run into a few snags when working with your tailstock. Here are some common problems and how to fix them:
| Problem | Possible Cause | Solution |
|---|---|---|
| Tailstock won’t slide smoothly on the bed. | Debris or burrs on the lathe bed or tailstock base. | Clean the lathe bed ways and the mating surfaces of the tailstock base. Lightly lubricate the ways. |
| Quill is stiff to extend or retract. | Lack of lubrication, dirt in the quill mechanism, or a slightly bent quill. | Clean and lubricate the quill. Ensure the quill lock is not overtightened. If bent, it may require professional repair. |
| Tailstock keeps slipping or loosening during operation. | Tailstock clamp is not tightened sufficiently. Worn clamp mechanism. | Ensure the tailstock clamp is fully tightened. Check for wear on the clamp shoes or bed. |
| Drilled holes are not centered. | Tailstock not properly aligned with the headstock. Workpiece shifting. | Realign the tailstock carefully. Ensure the workpiece is securely held by both headstock and tailstock. If using a drill chuck, ensure it grips the drill firmly. |
| Tailstock center won’t hold a drill or accessory. | Morse taper is dirty or damaged. Inserted accessory is not fully seated. | Clean the Morse taper socket in the quill and the taper on the accessory. Insert firmly. |
Maintenance and Care for Your Tailstock
Just like any part of your lathe, the tailstock needs a little attention to keep it working at its best. Regular maintenance is key to accuracy and longevity.
- Cleaning: After each use, especially when working with metal or cutting fluids, wipe down the tailstock casting, quill, and bed ways. Remove any swarf, dust, or oil residue.
- Lubrication: Periodically lubricate the tailstock bed ways with a suitable machine way lubricant. The quill mechanism itself should also be lubricated. A light machine oil is often sufficient for the quill.
- Check Tapers: Regularly inspect the Morse taper socket in the quill and any accessories for damage, nicks, or dirt. A clean, undamaged taper ensures a secure and accurate fit.
- Tighten Gibs (if applicable): Some tailstocks have gib adjustments to take up play between the quill and the main body. If your quill feels loose and wobbly, you may need to adjust these gibs. Consult your lathe’s manual for specific instructions.
- Address Wear: If you notice significant play in the quill or the tailstock base clamp, it might indicate wear. Minor wear can sometimes be compensated for with gib adjustments, but significant wear might require replacement parts or professional service.
Frequently Asked Questions About Lathe Tailstocks
Here are some answers to common questions beginners have about tailstocks.
What is the primary purpose of a lathe tailstock?
The tailstock’s primary purpose is to provide support for long workpieces, prevent them from sagging or vibrating, and to hold tools like drills and reamers for centered operations.
Can I use the tailstock for drilling off-center?
No, the tailstock is designed for drilling precisely in the center of a workpiece. For off-center drilling on a lathe, you would typically use a milling attachment or a positioning jig.
How tight should I tighten the tailstock when supporting work?
You should tighten it firmly enough to provide support without deforming or crushing the workpiece. For wood, this is usually light pressure; for metal, it can be firmer, but always start gently and increase as needed. The goal is to stop vibration, not to hold the workpiece against the cutting force.
What is a “live center” vs. a “dead center”?
A dead center is fixed and does not rotate; it’s often used for light-duty support. A live center has bearings and rotates with the workpiece, reducing friction and heat. Live centers are generally preferred for most turning operations where the tailstock is supporting the workpiece.
How do I set up the tailstock for turning a taper?
To turn a taper, you deliberately misalign the tailstock by offsetting its base from the headstock center line, usually using set-over adjustment screws. The amount of offset depends on the angle and length of the taper you want to create.
My tailstock doesn’t seem to align perfectly. What should I do?
Check for debris on the lathe bed. Ensure the tailstock clamp is properly tightened. If it consistently misaligns, use a dial indicator for precise alignment or a paper test. If you suspect damage or significant wear, consult your lathe’s manual or a qualified technician.
Can I use the tailstock to cut threads on the outside of a piece?
Yes, you can. You would