A 1/8-inch carbide end mill with a 1/2-inch shank and standard length is an excellent choice for achieving high Material Removal Rates (MRR) when machining bronze. Its sharp carbide edges and robust design allow for efficient cutting, producing clean finishes and boosting productivity in your workshop.
Working with metal can feel a bit daunting when you’re just starting out. You might have heard terms like “MRR” or specific tool names that sound like they belong in a sci-fi movie. Don’t worry, we’re here to make it simple! Today, we’re going to dive into something called a “carbide end mill,” specifically a 1/8-inch one, and explore how it can seriously speed up your work when you’re cutting bronze. It’s like having a super-efficient tool in your hand that makes tough jobs feel much easier. We’ll break down exactly what it is, why it’s great for bronze, and how you can start using it for impressive results.
What is a Carbide End Mill?
Think of an end mill as a fancy drill bit that can also cut sideways. Unlike a drill bit, which mostly just bores holes, an end mill has cutting edges on its sides and tip. This means it can be used for a variety of operations on a milling machine. It can cut slots, shape profiles, create pockets, face off surfaces, and even do intricate contouring.
The “carbide” part refers to the material it’s made from: tungsten carbide. This material is incredibly hard and durable, much harder than high-speed steel (HSS). This hardness is what allows carbide end mills to cut tougher materials and at higher speeds without wearing down quickly. They are the workhorses of many machine shops for good reason.
Why a 1/8-Inch Carbide End Mill for Bronze?
Bronze is a fantastic material to work with—it’s strong, corrosion-resistant, and has a pleasing aesthetic. However, it can also be a bit “gummy” to machine, meaning it can load up on cutting tools if the right setup isn’t used. This is where a 1/8-inch carbide end mill shines, especially when you’re looking for high Material Removal Rates (MRR).
Material Removal Rate (MRR) is simply how much material your tool can remove in a given amount of time. A higher MRR means you can cut faster and more efficiently, saving you time and effort. A 1/8-inch carbide end mill is ideal for several reasons:
- Size Matters: The 1/8-inch diameter is small enough for detailed work and for getting into tight corners on smaller projects. Yet, it’s substantial enough for effective chip evacuation in softer metals like bronze, preventing the “gummy” material from clogging the flutes.
- Carbide’s Edge: As mentioned, carbide’s hardness means it can maintain a sharp edge even under the demands of cutting bronze. This sharpness cuts cleanly, reducing the tendency for bronze to deform or stick to the cutter.
- Heat Resistance: Machining generates heat. Carbide handles heat much better than HSS, allowing for faster cutting speeds without the tool softening or degrading quickly. This directly contributes to a higher MRR.
- Flute Design: Many carbide end mills designed for non-ferrous metals like bronze have specific flute geometries (the spiral grooves on the tool). These are often polished and designed to help the chips escape easily, further reducing the risk of clogging and allowing for aggressive cuts.
Understanding the “Bronze MRR Performance” Keyword
When you see a product description or search for a carbide end mill that mentions “Bronze MRR Performance,” it means the tool has been designed and tested specifically for machining bronze with the goal of achieving high material removal. This typically involves:
- Material Coating: Some end mills might have a coating (though less common for standard bronze cutting) designed to reduce friction and improve chip flow.
- Sharpness and Geometry: The cutting edges are optimized to be exceptionally sharp for clean shearing of bronze. The flutes are designed for efficient chip evacuation.
- Edge Preparations: A slight radius or chamfer on the cutting edge can increase its durability against chipping when encountering harder inclusions sometimes found in bronze alloys.
A “1/8 inch carbide end mill 1/2 shank standard length for bronze high mrr” search term is very specific. It tells you exactly what you need: a 1/8-inch diameter cutting tool, made of carbide, with a 1/2-inch shank (the part that fits into the tool holder or collet), a standard length, and suitable for high-speed cutting of bronze.
Why Choose a Standard Length End Mill?
For most beginner and intermediate projects, a standard length end mill is perfectly suitable. They offer a good balance between reach and rigidity. Shorter end mills are generally more rigid but have less reach. Longer end mills offer more reach but can be prone to vibration or chatter, especially when cutting aggressively. For 1/8-inch tools especially, standard length offers a good compromise for most common milling tasks on bronze.
Essential Setup for Using Your 1/8-Inch Carbide End Mill on Bronze
Before you even touch a piece of bronze with your new end mill, proper setup is crucial. This ensures safety, accuracy, and the longevity of your tool.
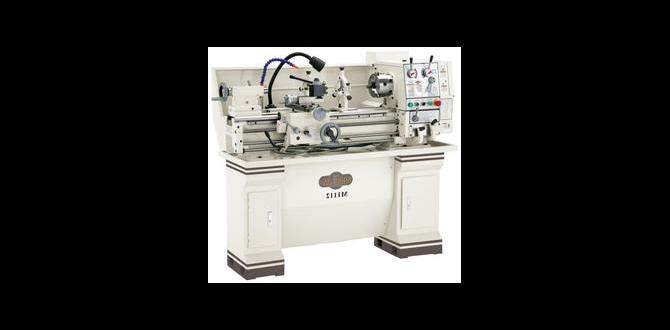
1. Your Milling Machine and Workholding
You’ll need a milling machine capable of holding the end mill securely. This could be a small desktop CNC, a manual milling machine, or even a drill press with milling capabilities (though a true milling machine is recommended for best results). The workpiece (your bronze) needs to be clamped down firmly. Common methods include:
- Vise: A sturdy milling vise is the most common and secure way to hold your workpiece. Make sure it’s clean and the jaws are parallel to the milling machine’s axes.
- Clamps: For larger or irregularly shaped pieces, clamp kits can be used to bolt the workpiece directly to the milling machine’s table.
A good reference for workholding principles can be found from resources like NIST, highlighting the importance of secure fixturing in manufacturing.
2. Tool Holder and Collet
The end mill needs to be held by a tool holder, which then fits into the milling machine’s spindle. For small diameter end mills like 1/8-inch, you’ll likely use a 1/2-inch shank collet chuck or a set of end mill holders. A collet offers the best concentricity and grip for small shank tools.
Ensure the collet nut is tightened properly. A tool that slips in the holder can break, damage the workpiece, or worse, become a projectile. Always use the correct size collet for your end mill’s shank diameter.
3. Coolant or Lubricant
While some machinists can dry-mill bronze with carbide, it’s generally highly recommended to use a cutting fluid or lubricant. Bronze can get hot and “gummy,” leading to chip welding (where chips stick to the cutting edge) and premature tool wear.
- Flood Coolant: A full flood system is ideal for high MRR operations.
- Mist Coolant: A mist system delivers a fine spray of coolant and air, which is very effective for both cooling and chip evacuation.
- Cutting Fluid/Oil: For manual machines, a simple application of specialized cutting oil or even a light vegetable oil can make a significant difference.
A light application of cutting fluid helps to keep the tool and workpiece cool, lubricates the cut, and flushes away chips. You can often find beginner guides on metalworking fluids from institutions like Southern Manufacturing.
Setting Your Cutting Parameters for Bronze
This is vital for achieving good MRR and a clean finish. Cutting parameters include spindle speed (RPM), feed rate, and depth of cut. For a 1/8-inch carbide end mill on bronze, here are some starting points. Note: Always consult the end mill manufacturer’s recommendations if available, as geometries vary.
Spindle Speed (RPM)
Surface speed is the speed of the cutting edge as it moves through the material. Carbide tools can generally run much faster than HSS. For bronze with a 1/8-inch carbide end mill, a good starting range for surface speed is often between 200 to 500 surface feet per minute (SFM).
To convert SFM to RPM, use the formula:
RPM = (Surface Speed 3.82) / Tool Diameter (inches)
Let’s calculate for a midrange SFM of 350:
RPM = (350 3.82) / 0.125 (1/8 inch) = 1337 / 0.125 = 10,696 RPM
This is a very high RPM, often requiring a VFD (Variable Frequency Drive) on your spindle. If your machine doesn’t go this high, don’t worry. You can still achieve good results at lower RPMs by adjusting your feed rate. A common starting point for many machines might be 3,000-6,000 RPM, and you’d compensate with feed.
Feed Rate
Feed rate is how fast the tool is advanced into or through the material. For high MRR, you want a robust feed rate. Chip load is the thickness of the chip produced by each cutting edge. A common recommendation for a 1/8-inch carbide end mill on bronze is a chip load of 0.001 to 0.003 inches per tooth.
The formula for feed rate is:
Feed Rate (IPM) = Chip Load Number of Flutes Spindle Speed (RPM)
Let’s assume a 2-flute end mill, a chip load of 0.002″, and a more achievable spindle speed of 4,000 RPM:
Feed Rate = 0.002 2 4000 = 16 IPM
If your machine can go faster, say 8,000 RPM:
Feed Rate = 0.002 2 8000 = 32 IPM
This shows how adjusting RPM and feed works together. Notice how a higher RPM allows for a higher feed rate to maintain the same chip load. The goal is to produce consistent chips, not dust or stringy, gummy material.
Depth of Cut
For aggressive MRR, you’ll want to take a decent depth of cut. However, this depends greatly on the rigidity of your setup—your machine, workholding, and the end mill itself.
Axial Depth of Cut (Plunging/Drilling): When feeding the end mill straight down, start conservatively. Maybe 0.050″ to 0.100″ (1-2x the tool diameter). High-performance plunge cuts often use specialized tools or techniques.
Radial Depth of Cut (Side Milling): This is how much of the tool’s diameter engages with the material side-on. With a 1/8″ end mill, you can often get away with taking a significant radial cut, sometimes up to half the tool’s diameter (0.060″) or more, especially in climb milling. For high MRR, especially in slots or pockets, you might even opt for “adaptive” or “peel” milling strategies where the tool engages with a smaller radial depth but a deeper axial depth, taking many small steps around the perimeter.
Recommended Cutting Strategies for High MRR on Bronze
Achieving high MRR isn’t just about the tool; it’s about how you use it. Here are some strategies:
1. Climb Milling vs. Conventional Milling
Climb Milling: The tool rotates in the same direction as it’s being fed into the material. The cutting edge engages the material at the top of the cut and finishes at the bottom. This generally results in:
- Cleaner surface finish.
- Reduced cutting forces, leading to less stress on the tool and workpiece.
- Better chip evacuation.
- Reduced backlash issues on manual machines.
Conventional Milling: The tool rotates in the opposite direction of the feed. The cutting edge engages the material at the bottom of the cut and finishes at the top. This can cause:
- Higher cutting forces.
- Heavier chip load on the edge.
- Tool rubbing, especially with backlash.
For high MRR on bronze, climb milling is generally preferred. Always ensure your machine’s backlash is properly compensated for if using conventional milling, especially on older manual machines.
2. Slotting and Pocketing Techniques
When cutting a slot or pocket, the 1/8-inch end mill will be engaged radially with the wall of the pocket. To maximize MRR, consider these:
- Full Slotting: If your slot is exactly 1/8″ wide, you can just mill it out directly.
- Oversized Pockets: If you can make the pocket larger than 1/8″, you can use a larger-diameter end mill for faster material removal. However, for the purpose of this article, we’re focusing on the 1/8″ end mill.
- Adaptive/Peel Milling: This is a high-MRR strategy common in CNC machining. Instead of taking a large bite, the tool takes many small radial steps around the perimeter of the pocket, with a substantial axial depth of cut. This keeps the chip load light but achieves rapid material removal by continuously cutting. The tool essentially “peels” away material in layers.
3. Finishing Passes
To achieve a really smooth finish after roughing out the bulk of the material, perform a “finishing pass.” This involves taking a lighter cut with a higher spindle speed and a slightly lower feed rate. For example, after a roughing pass at 0.002″ chip load, a finishing pass might be at 0.0005″ chip load with a slightly increased RPM and possibly a shallow depth of cut (e.g., 0.010″).
Benefits of Using a 1/8 Inch Carbide End Mill on Bronze
Let’s summarize why this tool setup is so effective:
| Benefit | Explanation |
|---|---|
| Increased Productivity | Higher MRR means less time spent machining. |
| Reduced Tool Wear | Carbide’s hardness and heat resistance lead to longer tool life compared to HSS. |
| Improved Surface Finish | Sharp carbide edges cut cleanly, reducing burrs and improving the final look of the workpiece. |
| Versatility | Can be used for slotting, profiling, pocketing, and chamfering. |
| Cost-Effectiveness (Over Time) | While carbide tools can have a higher upfront cost, their longevity and efficiency often make them more economical for production work. |
| Better for “Gummy” Materials | Designed to handle materials like bronze that can clog standard tools if not set up correctly. |
Safety First!
Machining involves powerful tools and high speeds. Always prioritize safety. Here’s a quick checklist:
- Wear Safety Glasses: Always, no exceptions. Metal chips can fly at high speeds.
- No Loose Clothing or Jewelry: These can get caught in rotating machinery.
- Secure Workpiece: Ensure your bronze is clamped down firmly.
- Proper Tool Holders: Use the correct, tightened collet or holder for your end mill.
- Know Your Machine: Understand the emergency stop and how to operate the machine safely.
- Coolant Management: If using coolant, ensure it’s managed properly to avoid slips and ensure good visibility.
- Chip Evacuation: Keep an eye on chip buildup. If chips start packing, stop the machine and clear them safely.
For more in-depth safety best practices, resources like OSHA provide essential guidelines for