Quick Summary
Mastering PVC trochoidal milling with a TiAlN ball nose end mill is straightforward. This guide simplifies the process, ensuring smooth, efficient cuts and superior finishes on your PVC projects. We’ll cover tool selection, machine setup, and proven techniques for a flawless outcome.
Working with plastics like PVC can be tricky. Sometimes, you need to make curved cuts or pockets, and getting a clean finish can feel like a puzzle. That’s where trochoidal milling comes in, especially when paired with the right tool. Many beginners find this technique a bit daunting, but it doesn’t have to be! With a few simple tips and the right approach, you can achieve amazing results on your PVC parts. This guide is designed to break down trochoidal milling with a ball nose end mill into easy, manageable steps. We’ll show you how to make complex shapes and get that smooth, professional finish you’re looking for, all while keeping things safe and straightforward.
This article will guide you through everything you need to know, from choosing the perfect TiAlN ball nose end mill to setting up your machine and executing the cuts perfectly. Get ready to tackle your PVC projects with confidence!
What is Trochoidal Milling and Why Use It for PVC?
Trochoidal milling, sometimes called a “high-speed milling” or “adaptive clearing” strategy, is a method of machining that uses a circular, or trochoidal, path. Instead of a traditional straight-line cut, the tool moves in a series of overlapping circles. This strategy is incredibly effective because it keeps the chip load consistent and reduces the forces exerted on the cutting tool and the workpiece. This means less tool breakage, longer tool life, and a smoother finish.
For PVC and other plastics, trochoidal milling offers several advantages:
- Reduced Heat Buildup: Plastics can melt or deform easily due to heat. Trochoidal milling takes smaller, continuous cuts, which helps to dissipate heat more effectively than large, single-pass cuts. This prevents melting and sticking.
- Improved Surface Finish: The continuous, overlapping motion results in a very smooth and consistent surface finish, which is often desirable for plastic parts.
- Reduced Tool Wear: By maintaining a consistent chip load, the cutting tool isn’t subjected to sudden impacts or heavy loads, leading to less wear and tear.
- Efficient Material Removal: It’s an excellent way to clear out material quickly and efficiently, especially in pockets and contours.
The unique motion of trochoidal milling is ideal for plastics because it minimizes the risk of the plastic gumming up the tool or melting. It’s like a gentle, continuous dance that removes material smoothly without overheating or stressing the material or the cutter.
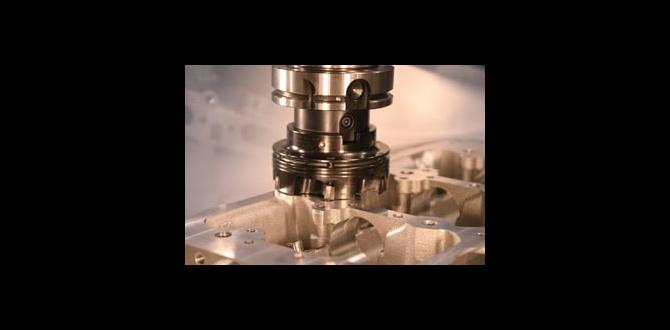
The TiAlN Ball Nose End Mill: Perfect for PVC
When it comes to milling plastics like PVC, the choice of cutting tool is crucial. A ball nose end mill is specifically designed for creating curved surfaces, fillets, and pockets, making it a versatile choice. When you add a TiAlN (Titanium Aluminum Nitride) coating, you get a tool that’s even better suited for the job.
Here’s why a TiAlN ball nose end mill is a great match for PVC trochoidal milling:
- Ball Nose Geometry: The rounded tip is perfect for creating smooth contouring and can navigate curves effortlessly. It’s also excellent for leaving a desirable surface finish in pockets.
- TiAlN Coating: This advanced coating provides several benefits:
- Increased Hardness and Wear Resistance: TiAlN is one of the hardest coatings available, significantly extending the life of the end mill.
- Reduced Friction: The coating creates a slicker surface, which helps prevent plastic from sticking or welding to the cutting edge.
- Higher Temperature Resistance: It can withstand higher cutting temperatures, which is beneficial when dealing with materials that can generate heat.
- Lubricity: The coating offers a degree of built-in lubrication, further aiding in chip evacuation and reducing heat.
- Specific For PVC: While often used in metals, a TiAlN coating’s ability to resist heat and friction makes it surprisingly effective on plastics like PVC, especially when combined with the controlled cutting of trochoidal milling. The smooth surface of the coating helps plastic chips slide away rather than build up.
For trochoidal milling in PVC, a 35-degree TiAlN ball nose end mill is often recommended. The 35-degree helix angle provides a good balance between efficient chip evacuation and tool rigidity. While you might see angles like 30 or 45 degrees, 35 degrees is a sweet spot for many general-purpose applications in plastics. Always check the manufacturer’s recommendations for specific materials.
Choosing the Right Size
The diameter of your ball nose end mill will depend on the size of the features you want to create. For pockets, a good rule of thumb for trochoidal milling is to use an end mill that is roughly 30-50% of the width of the pocket. This ensures the tool can easily make its circular path without hitting the walls unnecessarily and allows for efficient material removal. For example, if you’re milling a 0.5-inch wide slot, a 0.150″ to 0.250″ diameter ball nose end mill would be a good starting point.
Setting Up Your Machine for PVC Trochoidal Milling
Before you even think about pressing the start button, proper machine setup is key to success and safety. This ensures your tool, material, and machine are ready for the task.
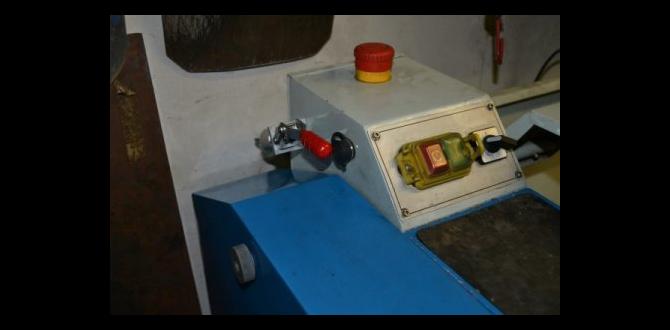
Secure Your Workpiece
PVC can be prone to vibration if not held down firmly. Use a reliable method to clamp your PVC workpiece securely. Depending on the size and shape of your part, this could be:
- Clamps: Standard C-clamps or specialty milling clamps work well for larger pieces. Ensure they don’t interfere with the tool path.
- Vise: A milling vise is ideal for smaller parts, offering a very secure grip.
- Double-Sided Tape: For very thin or small pieces, strong double-sided VHB (Very High Bond) tape can sometimes be used, but ensure it’s robust enough for the cutting forces.
Make sure the PVC is seated flat and stable to prevent any movement during the machining process. Any shifting can lead to inaccurate cuts or tool breakage.
Tool Holder and Spindle Speed
- Tool Holder: Use a high-quality collet chuck or end mill holder. This ensures the end mill is held concentricity and securely. Runout (wobble) on the tool can lead to uneven cuts and increased wear.
- Spindle Speed (RPM): This is critical for plastics. You generally want to run at higher speeds for plastics than for metal. For PVC, a good starting point for a 1/8″ to 1/4″ diameter ball nose end mill might be anywhere from 10,000 to 20,000 RPM. The exact speed depends on the specific PVC type, the end mill’s fluting (if any), and the depth of cut.
- Why High RPM? Higher RPMs create a shearing action rather than a rubbing action, which helps prevent melting.
- Experimentation is Key: Always consult your end mill manufacturer’s recommendations and be prepared to adjust.
Feed Rate and Depth of Cut
This is where trochoidal milling really shines. The strategy relies on taking small, controlled steps.
- Feed Rate: This is the speed at which the tool moves through the material. For trochoidal milling in PVC, you want a feed rate that allows the tool to effectively shear the material without overloading. A good starting point might be from 10 to 40 inches per minute (IPM), depending on your machine’s rigidity and the tool size. You’ll often set this based on the chip load your CAM software calculates.
- Depth of Cut (Axial and Radial):
- Axial Depth of Cut: This is how deep the tool cuts into the material along the Z-axis. For PVC, aim for shallow depths, perhaps 0.010″ to 0.050″ (0.25mm to 1mm), depending on the tool diameter and rigidity.
- Radial Depth of Cut: This is how much the tool is engaged with the material sideways. In trochoidal milling, this is typically a small percentage of the tool’s diameter, often around 10-30%. The CAM software handles this by stepping the tool radially.
Important Note: Always start conservatively. It’s better to take lighter cuts and increase them if the machine and tool handle it well, rather than pushing too hard and breaking an end mill or damaging your workpiece.
Coolant and Lubrication
While some plastics can be machined dry, using a coolant or lubricant can significantly improve results with PVC, especially during trochoidal milling.
- Flood Coolant: If your machine has a flood coolant system, use it! A water-based coolant is generally suitable for PVC.
- Mist Coolant: A mist coolant system provides a fine spray of lubricant and coolant, which is very effective for plastics.
- Lubrication Stick/Spray: For smaller machines or manual operations, a specific plastic cutting lubricant stick or spray can be applied directly to the cutting area. This reduces friction and helps prevent melting.
- Air Blast: A blast of compressed air can help clear chips and cool the cutting zone. This is often used in conjunction with other methods.
The goal is to keep the cutting edge cool and the chips flowing away to prevent them from welding to the end mill.
Step-by-Step Trochoidal Milling Process for PVC
Now that your machine is set up, let’s walk through the process of performing trochoidal milling on PVC using your TiAlN ball nose end mill. This guide assumes you are using CAM software to generate the toolpaths, as this is the most common and efficient way to achieve trochoidal milling.
Step 1: Design Your Part and Features
First, create your 3D model or 2D drawing of the part you want to machine in your CAD software. Identify the areas that require contouring, pockets, or fillets. Ensure your design is suitable for machining, considering tool access and the limitations of the cutting tool. Ball nose end mills are perfect for creating smooth transitions and rounded internal corners.
Step 2: Generate Toolpaths in CAM Software
This is where the magic of trochoidal milling happens. Most modern CAM (Computer-Aided Manufacturing) software has built-in strategies for trochoidal milling. Here’s a general workflow:
- Select the Machining Operation: Choose an adaptive clearing, high-speed roughing, or contouring operation that supports trochoidal milling.
- Define Tool Parameters:
- Select or define your TiAlN ball nose end mill, entering its diameter, number of flutes, and any relevant coating information.
- Set the spindle speed (RPM) and feed rate (IPM or mm/min) based on our earlier recommendations and manufacturer data.
- Set Cutting Parameters:
- Axial Depth of Cut: Enter your desired depth of cut for each pass (e.g., 0.020 inches).
- Radial Width (Stepover): Set this to a percentage of the tool diameter (e.g., 25%). This is crucial for trochoidal milling, as the software will automatically calculate the circular stepover.
- Stepdown Method: Ensure the software is set to use a trochoidal or adaptive clearing strategy.
- Define Machining Boundaries: Specify the exact areas you want to machine. This might be a pocket, a contour, or a specific feature.
- Simulate Toolpaths: ALWAYS simulate your toolpaths in the CAM software. This is your chance to visually inspect the cuts, check for potential collisions, and ensure the material is being removed as expected. The simulation will show the tool moving in its distinctive circular, overlapping path.
Many CAM packages have excellent tutorials on their trochoidal or adaptive clearing strategies. Some popular examples of CAM software include Autodesk Fusion 360, SolidWorks CAM, Mastercam, and HSMWorks. These programs offer advanced simulation and toolpath generation capabilities, making complex machining accessible.
Step 3: Transfer G-Code to CNC Machine
Once you are satisfied with the simulation, post-process your toolpaths to generate the G-code specific to your CNC machine controller. Transfer this G-code file to your machine. Double-check the machine’s work coordinate system (WCS) is set correctly for your fixturing.
Step 4: Perform a Dry Run
Before engaging the material, it’s highly recommended to perform a dry run. With the spindle off (or at a very low RPM if your controller allows for safe movement at low RPM), jog your machine through the entire program. Watch the tool path carefully to ensure it’s moving correctly, that it won’t collide with clamps or fixtures, and that it’s within the expected boundaries of your workpiece.
Step 5: Machine the PVC Part
With the dry run complete and all safety checks in place, you’re ready to cut.
- Install the End Mill: Securely install your TiAlN ball nose end mill into the collet holder and then into the spindle.
- Set Z-Zero: Accurately set your Z-axis zero point on the surface of the PVC workpiece.
- Apply Coolant/Lubrication: Start your coolant system, mist, lubricant, or air blast.
- Start the Program: Begin the G-code program.
- Monitor the Cut: Stay near the machine and closely monitor the cutting process. Listen for any unusual sounds (chattering, grinding), watch for excessive heat or smoke, and observe the chip formation. The chips should be small and clean, not melted or stringy.
- Emergency Stop: Be ready to hit the emergency stop button if anything looks or sounds wrong.
Step 6: Inspect the Finished Part
Once the machining is complete, carefully remove the finished part from the machine. Inspect it for dimensional accuracy, surface finish, and any signs of melting or damage. The areas machined with trochoidal milling should be smooth and free from burrs.
Tips and Troubleshooting for PVC Trochoidal Milling
Even with the best setup, you might encounter challenges. Here are some common issues and how to address them:
Issue 1: Melting or Gumming
Cause: Too much heat buildup, insufficient chip evacuation, or incorrect cutting parameters.
Solution:
- Increase spindle speed.
- Decrease feed rate slightly.
- Increase coolant/lubrication flow or mist.
- Decrease axial depth of cut.
- Ensure radially the stepover is appropriate for the tool and material.
- Check that your Tialn coating is intact, as wear can increase friction.
Issue 2: Chatter or Vibration
Cause: Loose workpiece, dull or improperly held tool, incorrect feed/speed, machine rigidity issues.
Solution:
- Ensure the PVC is clamped very securely.
- Check the end mill is sharp and properly seated in its holder.
- Use a more rigid tool holder if possible.
- Adjust feed rate—sometimes increasing it slightly can help “outrun” the chatter.
- Reduce radial depth of cut.
- Verify tool runout is minimal.
<h3 id="issue