Unlock True Wood Lathe Precision: 5 Genius Faceplate Tips Every Beginner Needs! Master accurate faceplate work for perfect bowls, platters, and more. Get started right, every time, with these essential techniques from Lathe Hub.
Working with a wood lathe can be incredibly rewarding, but sometimes getting pieces perfectly centered and stable on the faceplate feels like a frustrating puzzle. If you’ve ever experienced wobbles, uneven cuts, or just that nagging feeling your work isn’t quite right, you’re not alone. Achieving precision with your wood lathe often comes down to mastering a few key techniques, and the faceplate is central to many projects. Don’t worry, it’s not as complicated as it seems! With a few simple adjustments and smart approaches, you can get repeatable, accurate results every time. Get ready to transform your faceplate work from guesswork to genius. We’ve got five incredibly useful tips coming right up that will boost your confidence and your craftsmanship.
Why Your Wood Lathe Faceplate Needs Precision

A wood lathe faceplate might seem like a simple piece of metal, but it’s a critical component for any project that requires mounting a workpiece securely and centrally for turning. Think bowls, platters, clock faces, or any large, flat-faced item. When your faceplate setup is precise, your lathe operates smoothly, your cuts are clean, and your finished piece is balanced and true. On the flip side, a sloppy faceplate connection can lead to:
Vibration and Wobble: This makes turning difficult, dangerous, and results in a poor finish.
Uneven Wood Removal: You might find yourself taking off more material than you intended on one side.
Compromised Safety: A loose workpiece is a serious hazard.
Frustration: It can quickly kill the joy of woodworking.
Mastering precision with your faceplate takes your lathe projects from hobby-level to something you can be truly proud of. It’s about building a solid foundation for all your turned creations.
The Lathe Hub 5 Genius Tips for Wood Lathe Faceplate Precision

Let’s dive into the practical ways you can ensure your wood lathe faceplate work is spot-on. These tips are designed to be easy to implement, even if you’re new to the lathe.
Tip 1: The Foundation – Choosing and Preparing Your Faceplate

Before you even think about mounting wood, your faceplate itself needs to be in good shape.
Selecting the Right Faceplate
Size Matters: Choose a faceplate that is appropriately sized for your workpiece. A faceplate that’s too small won’t provide enough support, and one that’s too large can be cumbersome and unnecessarily heavy. As a general rule, the faceplate should be roughly one-third to one-half the diameter of the workpiece.
Thread Compatibility: Ensure the faceplate threads match your lathe’s spindle threads exactly. Mismatched threads are impossible to attach securely and are a major safety risk. Check your lathe’s manual or measure your spindle.
Material and Quality: Most faceplates are made of cast iron or steel. Investing in a good quality faceplate from a reputable manufacturer like those found on Rockler or Woodcraft will give you a more durable and precise tool.
Preparing Your Faceplate
A new faceplate might look good, but a quick check and clean is always a good idea.
Inspect Threads: Run a nut onto the faceplate threads and off again. Does it spin smoothly? If there’s any resistance or rough patches, the threads might be damaged or have debris. Clean them with a wire brush or a thread chaser if necessary.
Flatness Check: Place a known flat straightedge across the face of the faceplate. Are there any obvious warps or dips? While minor imperfections are common, a significantly warped faceplate will prevent a flush contact with your wood.
Screw Holes: Ensure the screw holes are clear. They should be countersunk or have clearance for the screws you’ll use to attach your wood.
Why this matters: Starting with a clean, correctly threaded, and flat faceplate is the first, crucial step. Any imperfections here will only be amplified when you mount your wood.
Tip 2: The Key – Accurate Workpiece Centering (Beyond Eyeballing!)
This is where many beginners struggle, and it’s the single most important factor for smooth turning. Eyeballing the center of your wood is rarely accurate enough for precise faceplate work.
Methods for Accurate Centering
The Diagonal Method (for Square/Rectangular Blanks):
1. Take your square or rectangular piece of wood.
2. Use a ruler or tape measure to draw a diagonal line from one corner to the opposite corner.
3. Do this for both diagonals.
4. The point where the two lines intersect is the geometric center of your wood. Mark this clearly with a pencil.
The Compass and Center Finder Tool:
1. If your wood is still somewhat irregular (e.g., a rough-cut circle), a compass can help. Set the compass to the rough radius and draw a circle. Draw another slightly larger one. The center of these circles will be close to the wood’s center.
2. A dedicated center finder tool is invaluable here. These tools have a weighted needle that will hang plumb from the center point when placed on the object. Simply place the tool on your wood blank, find the point where the needle hangs vertically, and mark it. You can find these at most woodworking supply stores.
Using Your Faceplate Holes:
1. Place your prepared wood blank onto your faceplate.
2. Mark the locations of the screw holes from the faceplate onto the wood.
3. Now, use the diagonal method on your wood blank itself. The intersection of the diagonals is your center.
4. Instead of aligning the center of your wood with the center of the faceplate visually, you’re now using the marked screw hole locations and the wood’s center to ensure accurate alignment.
Attaching the Wood to the Faceplate

Once you’ve accurately marked the center of your wood and identified where the screw holes will go, it’s time to attach.
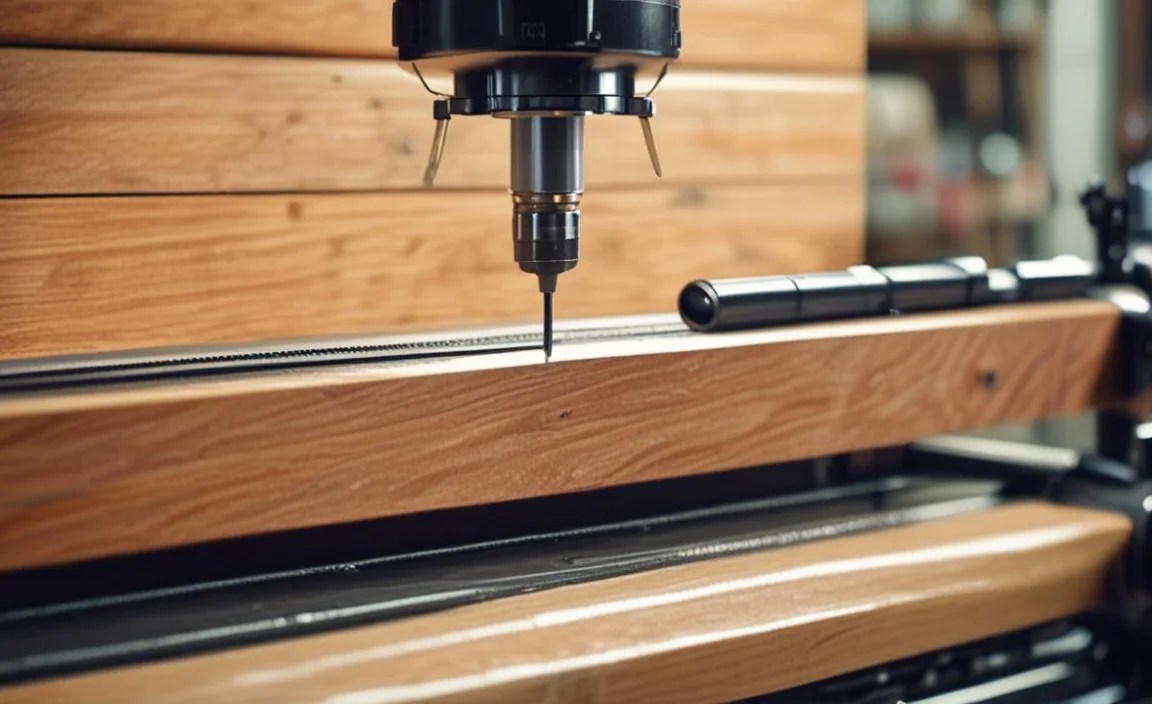
Pre-Drilling is Essential: Drill pilot holes into your wood workpiece at the marked center point using a drill bit that matches the diameter of your faceplate screws. This prevents the screws from splitting the wood, especially near the edges, and makes them easier to drive.
Countersinking: For a flush mount, you’ll likely want to countersink the pilot holes on the face of the workpiece so the screw heads sit flush or slightly below the surface. This is critical for getting a good, stable mounting surface against the faceplate.
Screw Selection: Use appropriate wood screws. They should be long enough to get a good grip but not so long that they poke through the other side of your workpiece. Stainless steel or coated screws resist rust.
The Crucial Step: Aligning the Faceplate with the Wood’s Center
This is where the “precision” really happens.
1. Place the wood blank onto your faceplate assembly.
2. Align the center mark on your wood directly over the center of the faceplate.
3. Carefully drive in your screws, ensuring the wood remains perfectly centered as you tighten them.
4. It’s often best to tighten screws incrementally and in a star pattern (like changing a car tire) to ensure even pressure.
Why this matters: An off-center workpiece will vibrate violently, leading to a poor finish, potential tool damage, and significant safety risks. Accurate centering is non-negotiable for quality faceplate turning.
Tip 3: The Perfect Fit – Ensuring Full and Flat Contact

Even with a centered workpiece, if the wood isn’t making solid, flat contact with the faceplate, you’re inviting trouble.
Achieving Flush Mounting
Flat Wood Surfaces: The side of your wood that will mount to the faceplate must be as flat and true as possible. If you’re starting with rough lumber, you might need to flatten one side on a jointer or with a belt sander or even a router sled for larger pieces. Wood that has cupped or warped will never sit perfectly flat against the faceplate.
Recessing the Faceplate (Optional but Recommended): For the absolute best results, especially for items like bowls that will have a prominent back, consider recessing the faceplate slightly into the back of your workpiece.
1. Use a router with a circle-cutting jig or a large Forstner bit to create a shallow recess on the back of your workpiece, matching the outer diameter of your faceplate.
2. The depth should be just enough for the faceplate to sit flush with the wood surface once attached.
3. This creates a very strong mechanical lock and ensures the faceplate is perfectly seated.
Consider a Screw Chuck: For very thin or delicate faceplate work where you can’t afford to drill deeply into the main workpiece, a screw chuck can be a good alternative. It’s a large screw mounted into a threaded adapter that screws into the faceplate. You then screw this into the back of your workpiece. This requires careful pilot drilling for the screw chuck.
Tightening the Screws Correctly

Firmly, But Not Overtightened: You want the wood to be held securely, but you don’t want to over-tighten screws to the point where you strip the wood fibers or distort the workpiece. Once the screws are snug and the wood feels solid against the faceplate, you’re done.
Check for Gaps: After tightening, run your finger around the edge where the wood meets the faceplate. You shouldn’t feel any significant gaps.
Table: Faceplate Mounting Checklist
| Item | Check Status (✓ / X) | Notes |
| Faceplate threads clean | | Smooth nut rotation? |
| Faceplate is flat | | Straightedge check. |
| Workpiece mounting surface | | Flat and true? |
| Center accurately marked | | Diagonal or center finder used? |
| Pilot holes drilled | | Correct size, preventing splits. |
| Holes countersunk (face) | | Screws will sit flush. |
| Screws are appropriate | | Correct length and type. |
| Wood sits flush on plate | | No significant gaps. |
| Screws tightened securely | | Firm, but not stripped. |
Why this matters: A full, flat contact ensures that the forces of the lathe are distributed evenly, minimizing vibration and stress on the workpiece. It’s the difference between a stable cut and a chattering disaster.
Tip 4: The Dynamic Balance – Understanding and Mitigating Imbalance

Even with perfect centering and a flat mounting surface, wood is rarely perfectly uniform. This natural imbalance is amplified at lathe speeds.
What Causes Imbalance?
Irregular Grain: Knots, figured grain, or dense-growth rings can create uneven density, leading to imbalance.
Uneven Stock: If your wood blank wasn’t perfectly square or round to begin with, it will naturally be unbalanced.
Faceplate Weight: The faceplate itself adds weight to one side.
Mitigation Techniques
Use a Faceplate First if Possible: For projects like bowls or platters, if you can, turn the back (the part that will eventually mount to the faceplate) first. Get it as flat and concentric as possible before transferring it to the faceplate.
Rough Turning and Balancing:
1. Mount your wood on the faceplate.
2. Using a slow speed on your lathe (start with the lowest setting), carefully bring your tool to the wood.
3. Turn away excess material to create a rough, somewhat circular shape. Don’t aim for perfection yet.
4. Once you have a basic shape, turn off the lathe.
5. Observe how the workpiece settles. Does it gravitate to a particular position? This indicates the heaviest side.
6. For significantly unbalanced pieces, you can sometimes add temporary counterweights. This is more common with larger faceplate blanks or when turning very green wood. However, it’s generally better to shape the wood for better inherent balance.
The “Slow and Steady” Approach: Always start faceplate turning at a slow speed, especially with larger blanks or irregularly shaped pieces. Gradually increase speed as you remove material and the workpiece becomes more balanced. A common rule of thumb is to increase speed as the diameter decreases and the shape becomes more symmetrical. The Wood Magazine Lathe Speed Chart or your lathe’s manual can provide safe starting points.
Weight Distribution: When attaching your wood to the faceplate, try to distribute the screw locations somewhat evenly around the center. This helps maintain better balance during the initial stages of turning.
Table: Lathe Speed Considerations (General Guidelines)
| Workpiece Diameter (Approx.) | Initial Speed (RPM) | Balanced Speed (RPM) | Notes |
| 4-8 inches | 500-800 | 1200-2500 | Start slow, increase as shape refines. |
| 8-12 inches | 400-600 | 1000-2000 | Crucial to start very slow, significant imbalance likely until shaped. |
| 12-18 inches | 300-500 | 800-1500 | Imbalance is a major factor. Shape carefully to achieve balance. |
| 18+ inches | 200-400 | 600-1200 | Always start at your slowest speed. Requires significant material removal. |
Note: These are general guidelines. Always prioritize safety and listen to your lathe – if it’s vibrating excessively, slow down! Consult your lathe manufacturer’s recommendations.
Why this matters: A properly balanced workpiece allows for smooth, controlled cuts, reducing stress on your tools, your lathe, and yourself.
Tip 5: The Safe Exit Strategy – Reverse Mounting and Tailstock Support

Once you’ve turned the “face” of your workpiece, you’ll likely need to turn the back. Since the faceplate is now on the back, you need a way to securely mount it to the lathe again. This is often overlooked by beginners.
Reverse Mounting Techniques
Using Jaws on a Four-Jaw Chuck: If you have a four-jaw chuck, this is often the easiest method.
1. Turn the “face” of your workpiece (the part you were working on) as perfectly as possible.
2. Carefully unscrew the workpiece from the faceplate.
3. With the faceplate still mounted on the spindle, re-mount your chuck.
4. Now, grip the outer edge of the faceplate itself with the chuck’s jaws.
5. Ensure the jaws are gripping securely.
6. With the faceplate now gripped firmly, you can remount your workpiece to the faceplate. You’ll need to re-center it as accurately as possible if it’s not perfectly symmetrical. If it’s a bowl, you can use a jam chuck or a vacuum chuck system to hold the inside for turning the outside. Or, if you’re remounting to turn the back, you’ll use the faceplate to hold it.
Using a Jam Chuck: A jam chuck is a custom-made “sacrificial” piece of wood (often MDF or a soft hardwood) that is bored out to fit snugly over your faceplate or the back of your workpiece after it’s attached to the faceplate. They are often mounted on a spur center or between centers.
1. Turn a chuck with an internal diameter that will tightly grip the faceplate or the back of your workpiece.
2. Mount this jam chuck securely on your lathe.
3. Gently coax your faceplate-mounted workpiece into the jam chuck. The friction should hold it securely for turning.
Custom Faceplate Adapters: Some wood turners create custom adapters that screw into their faceplate and provide a mounting point for a chuck or other holding devices.
Using the Tailstock for Support (Crucial!): When reverse mounting, especially if the workpiece is still somewhat unbalanced or if you are using a less secure method like a jam chuck, the tailstock can provide invaluable support.
1. Carefully align your workpiece on the faceplate.
2. Advance the tailstock center to just kiss the back of the workpiece (away from the faceplate).
3. Tighten the tailstock quill lock.
4. Begin turning at a very slow speed.
5. As you remove material and the workpiece becomes more balanced, you can gradually retract the tailstock. For many finished pieces, the tailstock can be removed entirely.
Safety First with Reverse Mounting: Always start at the slowest possible speed. Inadequate support during reverse mounting is a common cause of accidents. If there’s any doubt, slow down, use more support, or reconsider your mounting method.
