A wood lathe indexing head is a vital accessory for precise woodturning. This tutorial explains how to use it for creating evenly spaced cuts, fluting, reeding, and other decorative patterns on your workpiece, making complex designs accessible for beginners.
Welcome to Lathe Hub! Ever looked at a beautifully fluted table leg or a perfectly spaced decorative pattern on a turned piece and thought, “How did they do that?” Often, the secret weapon is a wood lathe indexing head. While it might look a bit intimidating at first, it’s actually a straightforward tool that opens up a world of creative possibilities for your woodturning projects. This guide will break down exactly what an indexing head is, why you need one, and how to use it step-by-step. Get ready to add precision and professional flair to your lathe work!
What Exactly is a Wood Lathe Indexing Head?

Simply put, a wood lathe indexing head is a device that attaches to your lathe and allows you to precisely divide a workpiece into a specific number of equal sections. Think of it like a very accurate protractor for your lathe. Instead of rough eyeballing it, the indexing head uses a pin and a plate with notches (or a graduated dial) to lock the workpiece in set positions. This ensures that when you make a cut, drill a hole, or apply a decoration, it will be perfectly at the same angle and distance from the previous one.
It’s invaluable for tasks like:
- Creating flutes and reeds (decorative grooves and raised sections).
- Dividing a piece for intricate patterns.
- Drilling evenly spaced holes around a cylinder.
- Ensuring symmetry on complex turnings.
- Achieving consistent results project after project.
Why is Precision Important in Woodturning?

Woodturning, at its heart, is about symmetry and form. Even slight imperfections in spacing or angle can throw off the entire aesthetic of a piece. For beginner woodturners, achieving perfect symmetry can be one of the biggest challenges. The indexing head takes the guesswork out of these repetitive tasks. It’s not just about making things look pretty; it’s about control. Having control over the spacing and placement of elements on your turning means you can bring more complex and ambitious designs to life. Whether you’re crafting furniture components, decorative bowls, or functional items, the finish you achieve often hinges on precision.
For instance, if you’re turning a chair leg that will have four identical flutes, using an indexing head ensures each flute is 90 degrees apart. Without it, you might end up with one flute slightly wider or narrower than the others, or one positioned a bit off, which can be quite noticeable and detract from the overall quality of your work. It’s about making your work look deliberate and professional, not accidental.
Understanding the Parts of an Indexing Head
Most wood lathe indexing heads share a common design, though specific models may vary. Knowing the key components will help you understand how it works:
- Mounting Bracket: This is what attaches the indexing head to your lathe. It usually bolts onto the lathe bed or another sturdy part of the machine.
- Indexing Plate (or Disc): This is the core of the indexing head. It’s a flat disc with a series of holes drilled around its circumference. Many indexing plates have multiple rows of holes with different numbers of divisions (e.g., 24, 30, 36 divisions) to accommodate various project needs.
- Indexing Pin: A spring-loaded pin that fits into the holes on the indexing plate. When you rotate the workpiece, you move the pin from one hole to the next, ensuring exact positioning.
- Workpiece Spindle (or Arbor): This is the part that holds your wood. It often connects to your lathe’s headstock spindle via an adapter or directly. It might also have a chuck or faceplate attached to it to hold larger or irregularly shaped workpieces.
- Locking Mechanism: This secures the indexing plate and your workpiece in the desired position, preventing any accidental rotation while you’re working.
The magic happens when you combine the indexing plate with the pin. If your plate has a row of 24 holes, you can lock the workpiece into 24 equally spaced positions. The number of holes determines the number of divisions you can achieve.
Calculating Your Indexing Needs

The real power of an indexing head lies in its ability to divide your workpiece accurately. To do this, you need to know how many divisions you want and how to achieve them with your indexing plate. Most indexing heads come with a plate that allows for common divisions.
Let’s say you want to create a pattern with 8 evenly spaced cuts. You need to find a row of holes on your indexing plate that is divisible by 8. If you have a row of 24 holes, you could use every 3rd hole (24 holes / 8 divisions = 8 positions, move 3 holes each time). If you have a row of 32 holes, you would use every 4th hole (32 holes / 8 divisions = 8 positions, move 4 holes each time).
The general formula is:
Number of holes to move = (Number of holes in the chosen row) / (Desired number of divisions)
Here’s a quick look at common divisions and how you might achieve them with typical indexing plates:
| Desired Divisions | Common Hole Rows on Indexing Plates (Examples) | Holes to Move (if using 24-hole row) | Holes to Move (if using 32-hole row) | Holes to Move (if using 36-hole row) |
|---|---|---|---|---|
| 2 | Any even number | 12 | 16 | 18 |
| 3 | Any multiple of 3 | 8 | 10.67 (use 10 & 11, or plate with 30/33 holes) | 12 |
| 4 | Any multiple of 4 | 6 | 8 | 9 |
| 5 | Any multiple of 5 | 4.8 (use 4 & 5, or plate with 25/30 holes) | 6.4 (use 6 & 7, or plate with 30/35 holes) | 7.2 (use 7 & 8, or plate with 35/36 holes) |
| 6 | Any multiple of 6 | 4 | 5.33 (use 5 & 6, or plate with 30 holes) | 6 |
| 8 | Any multiple of 8 | 3 | 4 | 4.5 (use 4 & 5, or plate with 36 holes) |
| 10 | Any multiple of 10 | 2.4 (use 2 & 3, or plate with 20/25 holes) | 3.2 (use 3 & 4, or plate with 30 holes) | 3.6 (use 3 & 4, or plate with 30/36 holes) |
| 12 | Any multiple of 12 | 2 | 2.67 (use 2 & 3, or plate with 24/30 holes) | 3 |
| 16 | Any multiple of 16 | 1.5 (use 1 & 2, or plate with 16/24 holes) | 2 | 2.25 (use 2 & 3, or plate with 32/36 holes) |
Note: For divisions that don’t land on a whole number naturally (like 5 divisions on a 24-hole plate), you might need to use a plate with more holes or a specialized indexing attachment. Some advanced indexing heads allow you to set up geared systems to achieve virtually any number of divisions. For most beginner projects, the common divisions will suffice. Always check your indexing head’s manual for specific capabilities.
Step-by-Step: Using Your Wood Lathe Indexing Head
Let’s walk through the process of using your indexing head. We’ll assume you’re creating 8 evenly spaced flutes on a cylindrical workpiece.
Step 1: Mount the Indexing Head
First, securely attach the indexing head to your lathe. This typically involves bolting its mounting bracket to the lathe bed. Ensure it’s firm and won’t shift during operation. The exact mounting location might vary, but it usually positions the indexing plate just behind the headstock or tailstock, allowing access to the plate and pin.
Step 2: Mount Your Workpiece
This is a critical step for success. You need to mount your wood blank onto the indexing head’s spindle. This might be done using a chuck that grips the end of the blank, a faceplate screwed onto the wood, or by mounting the blank directly onto a spur center that fits into the indexing head spindle. For this example, let’s assume you’ve mounted your cylindrical wood blank securely in a chuck attached to the indexing head’s spindle.
Make sure the workpiece is centered as accurately as possible. Any off-center wobble will be amplified by the indexing head, leading to uneven results. This might involve using a trial-and-error method or a centering jig.
Step 3: Select Your Indexing Plate Row and Calculate Moves
For our example, we want 8 divisions. Let’s say your indexing plate has rows with 24, 30, and 36 holes. The 24-hole row is a good choice here because 24 is divisible by 8.
Calculation: 24 holes / 8 desired divisions = 3 holes per division.
This means after each cut, you will rotate the workpiece so the indexing pin moves exactly 3 holes along that 24-hole row.
Step 4: Engage the Indexing Pin
With your workpiece mounted and ready, and your indexing plate selected, insert the indexing pin into the first hole in the chosen row. This locks the workpiece in its starting position. Ensure the pin is fully seated in the hole for maximum stability.
Step 5: Make Your First Cut or Mark
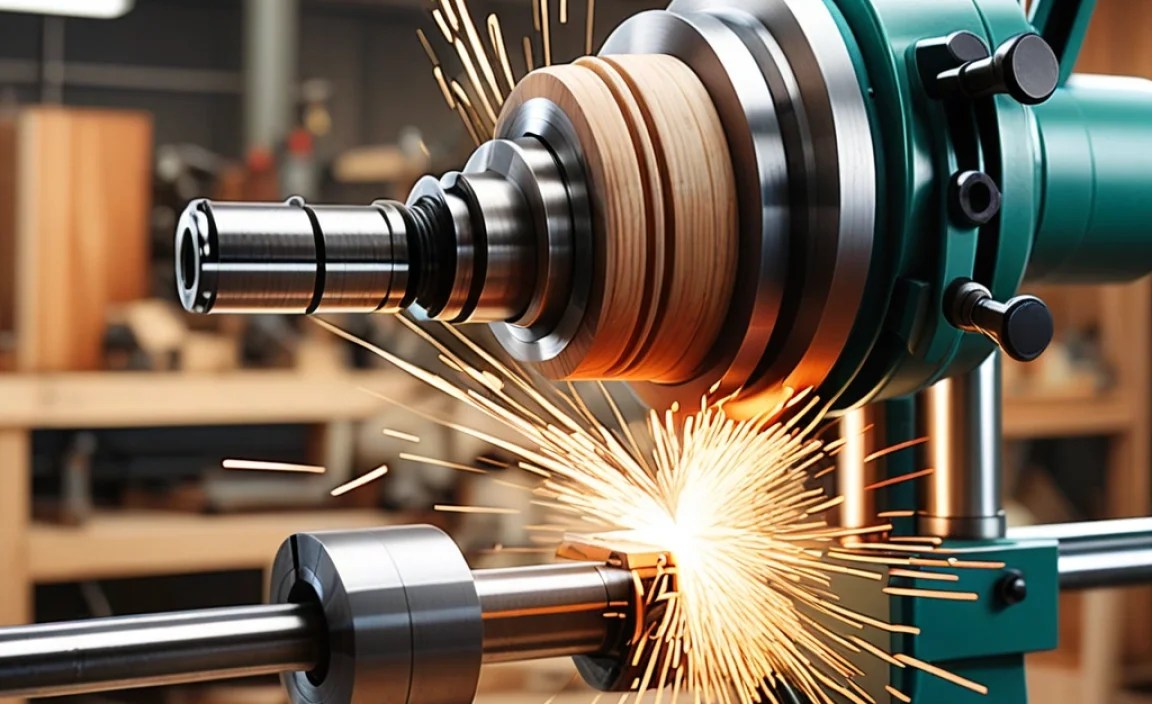
Now, with the workpiece locked, you can begin your operation. If you’re fluting, this is where you would bring your gouge or parting tool to the wood and make your first cut. If you’re marking for drilling, you’d use a pencil or scribe. For beginners, it’s often wise to make a shallow cut first to test the spacing and ensure everything is working as expected. A depth of just 1/8 inch or so for a flute is a good starting point.
Step 6: Rotate and Re-Engage
Once your first operation is complete, retract your tool. Then, you need to unlock the workpiece. This usually means pulling the indexing pin back slightly or disengaging a locking lever that holds the plate. Rotate the workpiece until the indexing pin can be inserted into the next set of holes required. In our example, you would rotate to the 3rd hole from the starting position. Again, ensure the pin is fully seated.
This is the crucial step: always rotate to the next designated hole. Do not guess or feel your way through it. The pin and holes are your guides.
Step 7: Repeat the Process
Continue making your cut or mark at this new position. After completing the operation, retract your tool, unlock the workpiece, and rotate it again to the next set of holes (another 3 holes in our example). Repeat this cycle – cut, unlock, rotate, re-engage – until you have completed all 8 desired divisions around the workpiece.
Step 8: Final Touches and Removing the Indexing Head
Once you’ve gone around the entire workpiece and completed all 8 divisions, you will naturally return to your starting position. You can then remove any indexing head markings or further refine your cuts. After you’re finished with the indexing process, you can safely disengage the indexing pin, unlock the workpiece from the indexing head’s spindle (if it’s held there), and remount it directly to your lathe’s headstock if further turning is required.
Applying Indexing to Different Woodturning Tasks
The indexing head isn’t just for flutes. Here’s how it can elevate other aspects of your woodturning:
Creating Reeds and Beads
Reeding is the opposite of fluting – it’s creating raised decorative sections. You can achieve reeding in a couple of ways with an indexing head:
- Method 1: Selective Parting. Cut grooves between your desired rounded sections. Use the indexing head to space the grooves precisely. You might need to set up a jig or a guide to help shape the resulting rounded “reeds” between the cuts.
- Method 2: Shaping Between Cuts. Use the index head to mark out locations where you will later shape the wood into raised sections. With the indexing head locked into position, you might use a scraper or a specialized tool to shape the wood to a uniform profile.
Beads are smaller, rounded ridges. You can achieve these by making multiple shallow cuts with a small parting tool or a specialized beading tool, using the indexing head to space each bead perfectly around the workpiece.
Drilling Evenly Spaced Holes
Need to drill holes around a decorative rim, a clock face, or a candle holder? The indexing head is your best friend here.
- Mount a drill chuck to your lathe’s tailstock (if it has one and it can be positioned correctly relative to the indexing head, or use a drill press setup if more convenient and precise).
- Set your workpiece to the desired number of divisions using the indexing head.
- Drill the first hole.
- Retract the drill, advance the indexing pin to the next position, and drill the next hole.
- Repeat until all holes are drilled.
This ensures perfectly uniform spacing, which is crucial for functional items where holes might be for fasteners, pins, or aesthetic purposes.
Creating Complex Geometric Patterns
Beyond simple flutes, you can use the indexing head to create more elaborate geometric designs. For example, you could flute a piece, then re-index to cut shallow grooves at different angles between the flutes, or create a spiraling effect by slightly advancing the tailstock (if using a tailstock-mounted tool) or rotating the indexing head very slightly between each division.
Segmented Turning
While not directly using the indexing head for positioning segments themselves (that’s usually done by glue-ups or faceplates), an indexing head can be useful for creating decorative elements on pre-segmented pieces. For example, you might want to add small decorative cuts or drilled holes around the rim of a segmented bowl. The indexing head ensures these are perfectly spaced.
It’s worth noting that for extremely precise scientific or engineering applications, especially with metalworking, the concept of dividing heads is even more sophisticated, often involving gear trains for fractional divisions. However, for woodworking, the pin-and-hole method on a basic indexing plate offers more than enough precision for most decorative and functional needs. Here’s a resource on Gear Manufacturing that delves into the principles of dividing, which underpin indexing technology: ManufacturingUSA: Gear Manufacturing.
Tips for Success and Troubleshooting
Even with the best tools, a few common pitfalls can trip up beginners. Here are some tips and tricks:
- Start Shallow: Always make your first pass shallower than you intend. This allows you to check spacing and your tool setup without committing to a deep cut you might regret.
- Cleanliness is Key: Keep your indexing plate and pin clean. Dust and debris can prevent the pin from seating fully, leading to inaccurate indexing.
- Check Your Pin: Ensure your indexing pin is not worn. A rounded or damaged pin can lead to sloppy fits and imprecise locking. Many modern indexing heads have replaceable pins.
- Workpiece Security: A loose workpiece is dangerous. Double-check that your blank is firmly mounted to the indexing head spindle and that the indexing head itself is securely attached to the lathe.
- Tool Sharpness: Sharp tools make cleaner cuts and require less force, reducing the chance of the workpiece shifting.
- Gradual Rotation: When rotating the workpiece, do so smoothly. Avoid jerky movements that could dislodge the pin or damage the indexing plate holes.
