Fixing inaccurate wood lathe tailstock alignment is crucial. Ensuring your tailstock is perfectly aligned with the headstock prevents bent workpieces, tool chatter, and difficult cuts, guaranteeing smooth, professional results for your turning projects.
Fixing Wood Lathe Tailstock Alignment Issues: A Beginner’s Essential Guide

A woodworking lathe is a fantastic tool for shaping beautiful pieces, but sometimes things just don’t turn out right. One common culprit for frustration? A tailstock that’s not quite lined up. When your tailstock is slightly off, it can lead to sad, oval-shaped bowls, wobbly spindles, and a general feeling of “why isn’t this working?” It’s a very common issue, especially for those new to woodturning. Don’t worry, though! With a few simple checks and adjustments, you can get your tailstock back in perfect alignment. This guide will walk you through exactly how to do it, so you can get back to making amazing things with confidence.
Why Tailstock Alignment Matters
Think of your wood lathe as a perfect straight line. The headstock spindle (where the motor powers the rotation) and the tailstock spindle (the part that supports your workpiece at the other end) should be parallel to each other and perfectly perpendicular to the bed ways. When they are, your wood spins true and you get clean, consistent cuts.
When the tailstock is out of alignment, even by a tiny amount, it creates a V-shaped wobble. This means:
- Bent or Oval Workpieces: Especially noticeable on longer stock, your piece will end up wider at the tailstock end than at the headstock end.
- Difficult Sanding: You’ll find high spots and low spots that are a nightmare to sand evenly.
- Tool Chatter: The tool can jump and vibrate, leaving rough marks and making it hard to achieve a smooth finish.
- Increased Risk of Kickback: An improperly supported workpiece can be more prone to dangerous kickback.
Getting this alignment right transforms your turning experience from frustrating to fulfilling. It’s a fundamental skill that unlocks better results every time you turn.
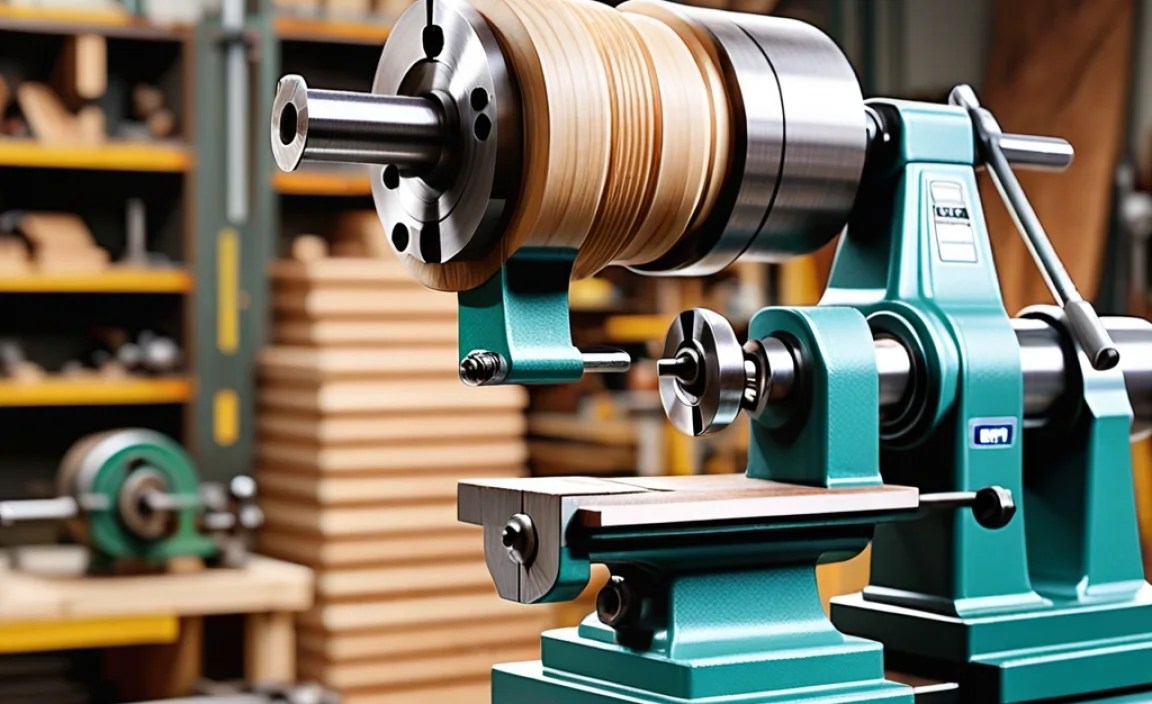
Understanding Your Lathe’s Tailstock

Before we start adjusting, let’s get familiar with the tailstock. Most wood lathe tailstocks have a few key components:
- Tailstock Body: The main housing that slides along the lathe bed.
- Quill: The movable part that extends from the tailstock body, usually with a Morse taper socket to hold a center or drill chuck.
- Quill Advance Handle: This lever or wheel moves the quill in and out.
- Tailstock Lock: A lever or knob that secures the tailstock body to the lathe bed.
- Tailstock Adjustment Screws/Bolts: These are the crucial parts for aligning the tailstock. They are often located at the rear of the tailstock body.
Common Signs of Misalignment

How do you know if your tailstock is out of whack? Here are the tell-tale signs:
- The Bowl Test: Turn a simple, symmetrical cylinder, then turn it 90 degrees and turn another cylinder. If the two turned sections don’t meet perfectly at the “corners,” your tailstock is likely misaligned. If one side is wider than the other, it’s a clear indicator.
- Chipped Ends: When you turn a piece between centers, if the ends of the wood look chipped or uneven where the center points were, it suggests the tailstock isn’t supporting the wood squarely.
- Splitting Wood: If the wood starts to split near the tailstock center, especially when applying pressure, misalignment could be forcing the center off-axis.
- Vibrations and Chatter: An unbalanced or improperly supported workpiece is a primary cause of those annoying vibrations and chatter marks as you turn.
- Drilling Issues: If you drill a hole with a bit in the tailstock, and the hole isn’t perpendicular to the workpiece end, your tailstock is off.
Tools You’ll Need
Gathering the right tools makes the process much smoother. Here’s what you’ll likely need:
- Accuracy Tools:
- Dial Indicator and Magnetic Base: This is the most precise way to check and set alignment.
- Feeler Gauges: Useful for smaller adjustments and quick checks.
- Accurate Ruler or Measuring Tape: For basic measurements.
- Wrenches/Allen Keys: To loosen and tighten tailstock adjustment screws. Check your lathe’s manual for the correct sizes.
- Center Punch: To mark your workpiece during tests.
- Calipers: For precise diameter measurements.
- A Piece of Scrap Wood: For the bowl test or other visual checks.
- Dial Caliper: A digital dial caliper can also be very useful for precise measurements.
Two Proven Methods for Tailstock Alignment
There are a couple of reliable methods to align your tailstock. We’ll cover the most common and accurate ones.
Method 1: The Dial Indicator Method (Most Accurate)
This is the professional’s choice because it’s incredibly precise. A dial indicator measures tiny movements, allowing you to achieve near-perfect alignment.
- Prepare the Lathe:
- Ensure your lathe is clean and free of debris.
- Move the tailstock away from the headstock, about halfway down the bed.
- Lock the tailstock securely in place.
- Retract the tailstock quill fully.
- Mount the Dial Indicator:
- Place the magnetic base of your dial indicator onto the lathe bed ways.
- Position the indicator so its probe can touch the outer diameter of the headstock spindle (or a Morse taper plug inserted into the headstock spindle, if available). Ensure the probe is at a consistent height and perpendicular to the spindle for accurate readings.
Expert Tip: If your lathe has a removable faceplate or chuck adapter, you might be able to mount the indicator on that for even more stable readings. Many beginners find it easier to attach the base to the bed ways.
- Zero the Indicator:
- Gently extend the quill and bring the dial indicator’s probe into contact with the headstock spindle. You want a slight deflection on the indicator – just enough to get a reading.
- Set the dial indicator to zero.
- Rotate the Headstock:
- Slowly rotate the headstock by hand through a full 360-degree turn.
- Watch the dial indicator. Note the highest and lowest readings.
Why? The spindle itself might have a slight runout. We want to account for this and align the tailstock relative to the spindle’s true center of rotation.
- Measure Tailstock Alignment:
- Now, you need to check the tailstock. Turn the headstock by hand so there is a clear gap where the tailstock currently sits.
- Move the tailstock assembly until the quill is positioned directly in front of the headstock spindle.
- Critical Step: Mount the dial indicator’s magnetic base onto the tailstock quill. Position the probe to touch the headstock spindle at the exact same height and position as when you measured the headstock spindle itself.
- Retract the quill slightly so the probe makes contact, but not too forcefully.
- Rotate the headstock by hand through a full 360 degrees again.
- Note the highest and lowest readings on the dial indicator.
- Calculate and Adjust:
- Let’s say your headstock spindle showed a total runout (high minus low reading) of 0.002″.
- Now, let’s say the tailstock measurement showed a total runout of 0.010″ when touching the same spindle. This means the tailstock is significantly out of alignment.
- The goal is to make the tailstock reading match the headstock reading as closely as possible.
- Locate the tailstock alignment adjustment screws. These are usually at the rear of the tailstock body. You’ll typically have two screws that push against a plate.
- Loosen the central tailstock locking bolt that clamps the tailstock carriage to the bed ways. It shouldn’t be tight, just snug enough so it doesn’t move unless you want it to.
- Make small adjustments to the alignment screws. One screw will move the tailstock left, the other right (relative to the ways). Experiment to see which screw does what.
- Here’s the math: If your tailstock is high on one side and low on the other, you want to split the difference. Let’s say your tailstock reading went from +0.005″ to -0.005″ (a total difference of 0.010″). Your headstock read +0.001″ to -0.001″ (a total difference of 0.002″). You want to adjust the tailstock so its readings are closer to +0.001″ to -0.001″.
- Make a small adjustment with the screws, tighten the tailstock lock just enough to hold it, and re-measure. Repeat this process, making tiny adjustments, until the dial indicator shows a minimal difference – ideally less than 0.001″ total runout, matching your headstock spindle’s inherent runout.
- Final Lock and Test:
- Once you’ve achieved good alignment, tighten the tailstock lock bolt firmly.
- Remove the dial indicator.
- Perform a test cut or the bowl test described earlier to confirm your alignment.
Method 2: The Paper/Ruler Test (Simpler, Less Precise)
This method is less precise than the dial indicator but is a quick and effective way to get your tailstock aligned well enough for most basic turning tasks. It’s great if you don’t have a dial indicator.
- Set Up:
- Mount a dead center in the headstock and a corresponding live center (or a matching dead center) in the quill of the tailstock.
- Position the tailstock and headstock centers so they are just touching.
- Lock the tailstock firmly to the lathe bed.
- Ensure the quill is extended so the centers engage properly.
- The Paper Glide Test:
- Gently extend the tailstock quill so the centers nearly touch, and place a thin piece of paper (like copier paper) between the points.
- Retract the quill slightly. Try to slide the paper out. It should offer a little resistance but slide relatively freely.
- Now, position the tailstock so the quill is fully extended and the centers are firmly engaged.
- Try to slide the paper again. If the tailstock is aligned, the tails of the paper should be evenly gripped. You should be able to slide the paper out without it tearing or being excessively loose.
- You’re looking for the quill to center the force on the spindle. If the paper tears or gets stuck on one side, the tailstock is misaligned.
- The Ruler/Caliper Test:
- Mount a piece of round stock (at least 1 inch in diameter and 12 inches long) between the headstock and tailstock centers.
- Use your tailstock quill to advance the center and secure the workpiece. Don’t overtighten.
- Lock the tailstock down.
- Using a ruler or calipers, measure the diameter of the workpiece at the headstock end and at the tailstock end (near the quill).
- If the tailstock is aligned, these two measurements should be identical. If the tailstock end is significantly larger, it indicates the tailstock is “leading” the headstock, meaning it’s high. If it’s smaller, the tailstock is “trailing,” meaning it’s low.
- Adjusting:
- You’ll need to loosen the tailstock lock and use the adjustment screws (usually at the rear of the tailstock body) to pivot the entire tailstock body slightly.
- Find the adjustment screws. There are typically two, set into a plate on the tailstock base.
- Loosen the main clamp bolt or lever that secures the tailstock to the bed ways.
- If your tailstock end measurement is larger than your headstock end measurement (tailstock is high): You need to adjust the screws to pivot the tailstock downwards at the tailstock end.
- If your tailstock end measurement is smaller than your headstock end measurement (tailstock is low): You need to adjust the screws to pivot the tailstock upwards at the tailstock end.
- Make very small adjustments. Loosen one screw and tighten another to pivot the tailstock.
- Tighten the tailstock lock bolt again, remount your workpiece or centers, and re-measure.
- Repeat until the measurements are the same or the paper test indicates good alignment.
- Final Check:
- Once you’re satisfied, firmly tighten the tailstock lock.
- Turn a scrap piece of wood between centers to confirm. It should turn a true cylinder.
Adjusting Tailstock Alignment: A Visual Guide
Here’s a table summarizing the adjustment process for common tailstock types. Your lathe manual is the best source for your specific model, but this covers the general principles.
| Lathe Type | Adjustment Point | How to Adjust | Notes |
|---|---|---|---|
| Delta/Shop Fox Style (Common) | Rear of Tailstock Body | Two hex screws on a plate. Loosen main lock bolt, pivot tailstock by turning these screws (one tightens, one loosens for each direction). | These screws often push against a fixed point. Making one tighter while loosening another pivots the tailstock. |
| Powermatic/Jet Style (Common) | Rear of Tailstock Base | Similar to Delta, often with two bolts that are threaded to push/pull against the lathe bed ways bracket. Loosen main lock, then adjust these bolts. | Ensure the main lock is loose enough for movement, but tight enough to hold after adjustment. |
| Older/Misc. Lathes | Varies | Some may have a simpler bolt system, others might have eccentric bushings. Check your manual. | If you have very old or unusual lathe, consult original documentation or niche forums. |
The key is always to loosen the primary lock (that clamps the tailstock to the bed) enough to allow movement, make tiny adjustments with your alignment screws, then re-tighten the lock and re-measure. Patience is crucial here; small, repeated adjustments are far better than big, rushed ones.
Pro Tips for Perfect Alignment
Beyond the basic steps, here are some tips from seasoned woodturners to ensure your alignment is spot-on:
- Cleanliness is Key: Always ensure the lathe bed ways and the bottom of the tailstock base are impeccably clean. Dirt, dust, or metal shavings can throw off your measurements and cause the tailstock to sit unevenly.
- Lock it Down Firmly: Once aligned, don’t be shy about tightening the tailstock lock. A loose tailstock is dangerous and will shift during cuts.
- Regular Checks: Alignment can shift over time, especially with heavy use or if the lathe is moved. Make it a habit to perform a quick alignment check periodically, perhaps every few months or before starting a critical project like a large bowl.
- Use the Right Centers: Ensure your headstock spur center and tailstock center (live or dead) are in good condition and properly seated. Worn centers can contribute to perceived alignment issues.
- Consider a Live Center: For many applications, a live center in the tailstock is superior to a dead center because it spins with the wood, reducing friction and wear. However, even live centers need proper tailstock alignment.
- Headstock Spindle Runout: Even a perfectly aligned tailstock can’t fix a warped or bent headstock spindle. If your headstock spindle has significant runout, you may need professional repair. The dial indicator method helps you determine if the problem is your tailstock or your headstock.
- Bed Way Condition: The flatness and parallelism of your lathe’s bed ways are also critical. If they are damaged or worn unevenly, achieving perfect alignment can be.
