Proper wood lathe motor alignment ensures smooth operation, reduced vibration, and longer tool life, making your woodworking projects more enjoyable and precise.
Ever feel a tremor running through your workshop when you fire up your wood lathe? Or notice those annoying little squeaks and groans that just don’t sound right? More often than not, these are signs that your wood lathe’s motor might need a little tuning. Don’t worry, it’s a common issue, and getting it sorted is much easier than you might think. A well-aligned motor is the heart of your lathe, and by following a few simple steps, you can get it running like a dream. Let’s jump in, and I’ll show you exactly how to get your motor perfectly aligned, leading to smoother cuts and a quieter workspace.
Why Wood Lathe Motor Alignment Matters

Think of your wood lathe motor as the engine for your creative endeavors. When it’s not perfectly aligned with the lathe’s headstock and tailstock, it’s like trying to drive a car with a wobbly wheel. Things just don’t run smoothly. Misalignment can lead to a surprising number of problems:
- Increased Vibration: This is the most obvious sign. You’ll see and feel the lathe shaking, which can make it difficult to achieve clean cuts and can be downright distracting.
- Excessive Noise: Those rattling, grinding, or squealing noises? Often caused by the motor and drive components not being in sync.
- Premature Wear and Tear: Constant vibration and strain can wear down bearings, belts, and other motor components much faster than usual. This means costly repairs or premature replacement of parts.
- Reduced Power Transfer: When the drive belt isn’t running true, it can slip, leading to a loss of power and making it harder to turn larger or denser woods.
- Safety Concerns: A heavily vibrating lathe can become unstable, increasing the risk of accidents. Loose or worn components can also be a hazard.
- Inconsistent Results: For precision work, you need a stable platform. Vibration can lead to uneven surfaces, chatter marks, and inaccurate dimensions.
Getting the alignment just right is a fundamental step in ensuring your lathe operates safely, efficiently, and delivers the kind of results you’re aiming for. It’s a crucial part of routine maintenance that many beginners overlook, but it makes a world of difference.
Tools You’ll Need for Motor Alignment

Before we get started, let’s gather the essential tools. You likely have most of these in your workshop already:
- Wrench Set: For loosening and tightening mounting bolts.
- Screwdrivers: Both Phillips and flathead, depending on your motor mount screws.
- Measuring Tape or Ruler: For checking distances and ensuring symmetry.
- Straight Edge: A metal ruler or a dedicated straight edge tool is useful for checking belt-to-pulley alignment.
- Level: A small spirit level can help ensure your motor base is truly flat.
- Flashlight: To see into those nooks and crannies.
- Shop Rags: For cleaning any dust or grease.
- Owner’s Manual: Always good to have for your specific lathe model.
Some lathes might have specific adjustments or require specialized tools, so always check your lathe’s manual. But for most common adjustments, this basic toolkit should get you through.
Common Types of Wood Lathe Motor Mounts
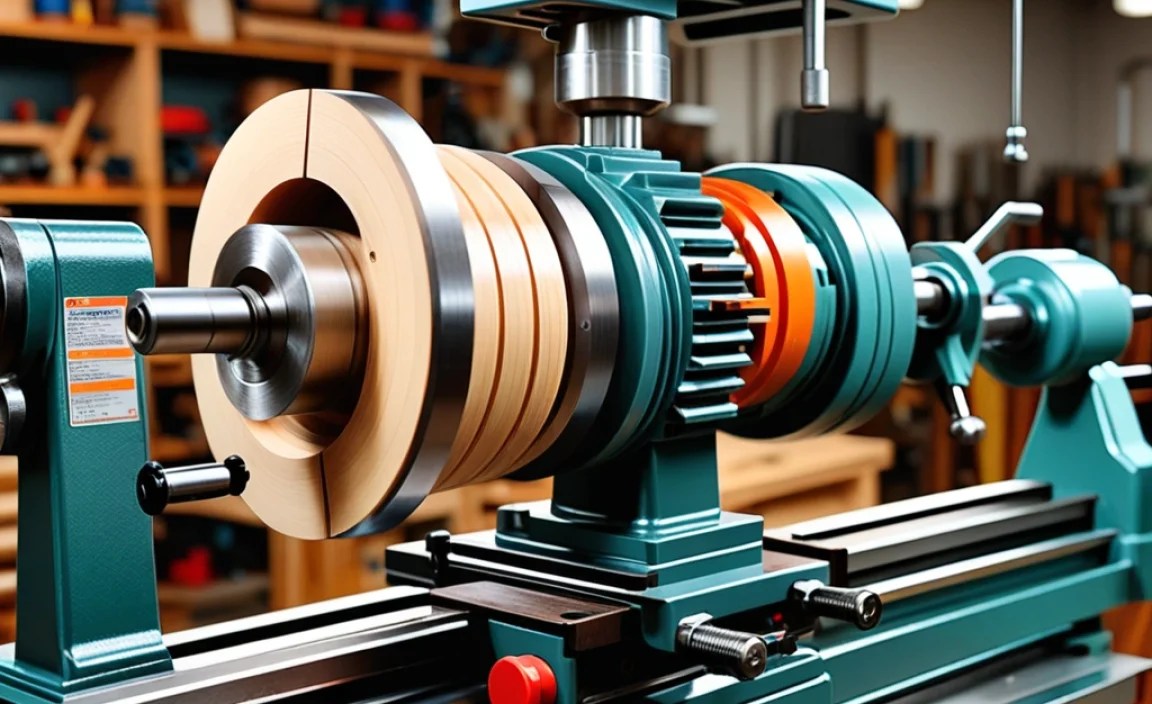
Wood lathes vary in design, and so do their motor mounting systems. Understanding your type is the first step to effective alignment. Here are a few common setups:
Swinging Arm Mounts
These are very common on smaller to mid-sized lathes. The motor is often mounted on an arm that can pivot or swing. This movement allows you to adjust the belt tension and, crucially, the alignment. They usually have adjustment slots and bolts that allow for fine-tuning the motor’s position relative to the headstock.
Fixed Base Mounts with Slotted Holes
On some lathes, the motor sits on a fixed base, but the mounting bolts pass through slotted holes. These slots provide the necessary play to slide the motor slightly forward or backward, or side-to-side, to achieve proper belt alignment and tension.
Integrated Motor Units
Higher-end or industrial lathes might have motors that are more fully integrated into the lathe’s base. These are less common for beginners and often require professional servicing for alignment if issues arise, but they are typically very stable and well-aligned from the factory.
Belt Guard Accessibility
Regardless of the mount type, ensure you can easily access the belt and pulleys by opening or removing the belt guard. This is essential for visual inspection and making adjustments.
Step-by-Step Guide to Wood Lathe Motor Alignment
Alright, let’s get down to business! Follow these steps carefully, and you’ll have your lathe running smoothly in no time. Safety first – always unplug your lathe before making any adjustments.
Step 1: Safety Check and Preparation
Unplug the Lathe: This cannot be stressed enough. Before you touch anything, ensure the lathe is completely disconnected from its power source. Use zip ties or tape to secure the plug so it can’t be accidentally plugged back in while you’re working.
Clean the Area: Remove any accumulated dust, wood shavings, or grease from the motor, pulleys, and surrounding areas. A clean workspace is a safer workspace and makes it easier to see what you’re doing.
Locate Adjustment Points: Familiarize yourself with how your motor is mounted. Find the bolts or nuts that allow you to move the motor. These are usually located on the mounting bracket or base.
Step 2: Initial Visual Inspection
Open the Belt Guard: Carefully remove or open the belt guard to expose the motor pulley and the headstock pulley (or cone pulley, depending on your lathe). If you’re unsure how to do this, consult your lathe’s manual.
Check Pulley Alignment (The String Method): This is a simple but effective trick.
- Take a piece of string (or a thin cord).
- Drape it around the outside edges of the motor pulley and the headstock pulley.
- Gently pull the string taut so it sits against the very edge of both pulleys.
- Visually inspect where the string touches the pulleys. Ideally, the string should touch the flat face of both pulleys evenly.
- If the string has a significant gap on one side of either pulley, or if it’s not touching the flat face of the pulley, your pulleys are out of alignment.
Check Pulley Alignment (The Straight Edge Method):
- Place a long, straight edge (like a metal ruler) across the face of the motor pulley.
- Check if it touches the face of the headstock pulley evenly.
- Repeat by placing the straight edge on the headstock pulley and checking against the motor pulley.
- Any significant gaps or rocking indicate misalignment.
Step 3: Adjusting Motor Position
Loosen Mounting Bolts: Slightly loosen the bolts that hold the motor in place. You don’t need to remove them, just loosen them enough so that you can slide the motor.
Make Gradual Adjustments:
- If using a swinging arm, you might pivot the arm slightly.
- If using slotted holes, gently push or pull the motor to slide it within the slots.
Reposition and Check: After each small adjustment, re-check the pulley alignment using the string or straight edge method. You’re looking for a point where the string or straight edge makes full, even contact with both pulleys. The goal is for the motor pulley to be perfectly in line with the headstock pulley, ensuring the belt runs true.
| Symptom | Likely Cause | Solution |
|---|---|---|
| Excessive vibration | Motor pulley not aligned with headstock pulley | Adjust motor position until pulleys are in line |
| Squealing belt noise | Belt too tight or misaligned | Adjust motor position for proper tension and alignment |
| Belt appears to “wobble” | Significantly misaligned pulleys | Precisely align motor and headstock pulleys |
| Uneven wear on belt edges | Pulleys are not running parallel | Correct motor alignment to ensure parallel pulleys |
Step 4: Setting Belt Tension
The “Snap-Back” Test: Once your pulleys are aligned, you need to set the belt tension. This is a balance – too tight and you strain the motor bearings; too loose and the belt slips.
- With the pulleys aligned, tighten the motor mounting bolts.
- Gently press the belt midway between the two pulleys.
- It should deflect about 1/2 inch (or about 1-1.5 cm).
- When you pluck the belt, it should have a firm, not loose, “snap-back.”
Two-Step Adjustment: Many swinging arm mounts operate on a principle where moving the motor backward (away from the headstock) tightens the belt, and moving it forward loosens it. You’re often making two adjustments simultaneously: aligning the pulleys and setting the tension. Start by getting the alignment near perfect, then fine-tune the position to achieve the correct tension while maintaining alignment.
Step 5: Final Checks and Testing
Re-tighten Everything: Once you’re happy with the alignment and tension, firmly tighten all motor mounting bolts. Ensure the motor is secure and won’t move during operation.
Reassemble Belt Guard: Put the belt guard back in its proper place. This is a critical safety feature.
Test Run: Plug the lathe back in and turn it on at its lowest speed.
- Listen for any unusual noises – grinding, squealing, excessive rattling.
- Feel for excessive vibration through the lathe bed.
- Gradually increase the speed. If everything sounds and feels smooth, you’ve likely succeeded!
Troubleshooting: If you still experience issues, double-check your alignment. Sometimes a very small adjustment can make a big difference. Also, inspect the belt itself – an old, cracked, or warped belt can cause problems even with perfect alignment.
Advanced Tips for Longevity and Performance
Once you’ve mastered the basic alignment, here are a few extra tips to keep your wood lathe running at its best:
- Regular Inspections: Make it a habit to check your motor alignment and belt tension periodically, especially if you notice any new noises or vibrations. A quick inspection might save you from a bigger problem down the line.
- Belt Material and Condition: The type and condition of your drive belt matter. Ensure you’re using the correct belt for your lathe and that it’s not worn, cracked, or glazed. Some rubber belts can become brittle over time.
- Pulley Surface: Make sure the surfaces of both the motor and headstock pulleys are clean and free from debris, rust, or damage that could affect belt contact. A smooth, clean surface ensures maximum grip.
- Motor Mount Tightness: Vibrations can gradually loosen bolts over time. Periodically check that your motor mounting bolts are snug.
- Balancing Rotating Parts: For high-speed lathes, the balance of the pulleys themselves can become a factor. While usually not an issue for typical woodworking speeds, significant damage or imbalance in a pulley could introduce vibration. Reputable manufacturers balance their pulleys.
- Consider Belt Upgrades: For some lathes, upgrading to a higher-quality, more durable belt can improve power transfer and reduce noise. Look for belts specifically designed for power transmission applications. For example, a V-belt designed for longevity and efficiency can be a good investment. You can find resources on proper belt sizing and types from organizations like BeltCorp, a leading industrial belt supplier.
Common Problems and How to Fix Them (Troubleshooting Table)
Even with the best intentions, you might run into a few snags. Here’s a quick guide to common issues and their solutions:
| Problem | Possible Causes | Solutions |
|---|---|---|
| Persistent Vibration | 1. Motor pulley and headstock pulley still slightly misaligned. 2. Drive belt is worn, cracked, or warped. 3. Motor bearings are failing. 4. Lathe bed or stand is not stable/level. |
1. Re-align pulleys with finer adjustments. 2. Replace the drive belt. 3. Inspect and replace motor bearings (may require professional help). 4. Ensure the lathe is on a stable, level surface. Shim if necessary. |
| Loud Squealing/Chirping | 1. Belt is too tight. 2. Belt is slipping due to dirt or wear. 3. Pulleys are not perfectly aligned, causing the belt to ride unevenly. |
1. Loosen belt tension by adjusting motor position. 2. Clean pulleys and belt. Inspect belt for wear and replace if needed. 3. Fine-tune pulley alignment. |
| Belt Slips Under Load | 1. Belt tension is too loose. 2. Motor pulley and headstock pulley are not parallel. 3. Belt is significantly worn or damaged. |
1. Adjust motor position to increase belt tension. 2. Ensure pulleys are perfectly aligned. 3. Replace the belt with a new, correctly sized one. |
| Motor Runs Hot | 1. Belt is too tight, causing excessive friction and strain. 2. Motor is overloaded or has internal issues. 3. Poor ventilation around the motor. |
1. Loosen belt tension. 2. Reduce workload on the lathe; if persistent, have motor serviced. 3. Ensure motor has adequate airflow. |
Frequently Asked Questions (FAQ)
Q1: How often should I check my wood lathe motor alignment?
A: It’s a good idea to check it at least once a year, or any time you notice increased vibration, noise, or a change in performance. Regular quick checks are better than waiting for problems to arise.
Q2: Can I use a standard ruler as a straight edge for alignment?
A: Yes, a metal ruler or a long, flat piece of wood can work for basic alignment checks. For more precision, a dedicated machinist’s square or straight edge tool is recommended.
Q3: What happens if I don’t align my motor properly?
A: You’ll likely experience increased vibration, premature wear on your belt and motor, more noise, and inconsistent results in your turning. In severe cases, it can even be a safety hazard.
Q4: Is it normal for the belt to have some slack?
A: Yes, a slight amount of slack is necessary. Too tight a belt strains bearings. The “snap-back” test, aiming for about 1/2 inch deflection, is a good general guideline for proper tension.
Q5: My lathe has a variable speed control. Does that affect motor alignment?
A: Variable speed controls themselves don’t directly affect the mechanical alignment of the motor and pulleys. However, the pulleys and belts involved in a variable speed system still need to be perfectly aligned for the system to work efficiently and quietly.
Q6: Can I just tighten the belt to fix a slipping issue?
A: Tightening the belt might temporarily stop slipping, but it’s often a symptom of misalignment or a worn belt. If the pulleys aren’t aligned, the belt will not run true, leading to uneven wear and continued slipping. Always address alignment first.
Conclusion
Taking the time to properly align your wood lathe’s motor is a fundamental step that pays huge dividends. It’s not just about making your workshop quieter; it’s about ensuring the longevity of your tool, achieving better results on your projects, and most importantly, working safely. By following these steps, understanding your lathe’s mounting system, and performing regular checks, you can keep your wood lathe running smoothly for years to come. So, next time you hear an unusual noise or feel a tremor, you’ll know exactly where to start. Happy turning!
