Wood lathe spindle thread repair is achievable for beginners by carefully cleaning threads, using thread chasers, or applying epoxy filler for minor damage, ensuring your lathe is safe and functional.
Hey there, fellow woodturners! Daniel Bates from Lathe Hub here. Ever faced that frustrating moment when your wood lathe spindle threads are a bit rough, damaged, or just plain stubborn? It’s a common hiccup, especially with older machines or after a few ambitious projects. Damaged threads can make attaching faceplates, chucks, and other essential accessories a real headache, and worse, they can be a safety concern. But don’t worry! Today, we’re going to lay out a straightforward, proven approach to tackle wood lathe spindle thread repair. We’ll walk through simple fixes that even a beginner can handle, bringing your lathe back to its full, reliable glory.
Why Wood Lathe Spindle Threads Matter

Your wood lathe’s spindle is its heart. The threaded end is where you connect vital accessories like your chuck for holding workpieces and faceplates for larger, irregular items. These threads need to be clean and well-formed to ensure a secure, vibration-free connection. When they get damaged, it’s not just an aesthetic issue; it can lead to:
- Unsecure Mounts: A loose chuck or faceplate can cause workpieces to fly off the lathe, posing a serious safety risk.
- Difficulty in Attachment: Grinding or cross-threading when trying to attach accessories can worsen the damage and waste your time.
- Reduced Precision: Worn or damaged threads can introduce runout or vibration, affecting the quality of your turned work.
- Increased Wear: Forcible engagement with damaged threads can accelerate wear on both the spindle and the accessory’s internal threads.
Fortunately, most common spindle thread issues aren’t catastrophic. They often stem from simple wear and tear, accidental nudges, or inadequate cleaning. With the right approach, you can often restore them to good working order.
Assessing the Damage: What Are You Dealing With?

Before jumping into repairs, it’s crucial to accurately assess the damage. Grab a good light source, like a headlamp or a work light, and a magnifying glass if you have one. Rotate the spindle slowly, inspecting every part of the threads. Generally, you’ll encounter one of these common problems:
- Dirt and Debris: The most common issue! Metal filings, sawdust, and old grease can accumulate, making threads feel rough or difficult to engage.
- Minor Nicks and Dings: Small dents or flattened thread crests, often from accidental impact during transport or storage.
- Galled or Scored Threads: More significant abrasion or tearing of the thread material, often caused by trying to force a connection or by running the lathe with a loose attachment.
- Cross-Threading: When an accessory is screwed on at an angle, damaging multiple threads.
- Rust: Especially common on older or neglected lathes, rust can eat away at the threads, weakening them and making them feel gritty.
Your approach to repair will depend heavily on the type and severity of the damage. For most beginner-friendly fixes, we’ll focus on dirt, minor nicks, and light rust.
Essential Tools for Spindle Thread Repair

Having the right tools on hand will make the repair process smoother and more effective. Here’s a list of what you might need:
- Safety Gear: Safety glasses are non-negotiable. Gloves can also be helpful.
- Wire Brushes: Brass or nylon brushes are best for delicate cleaning without damaging the steel. Steel brushes can be used for stubborn rust but with caution.
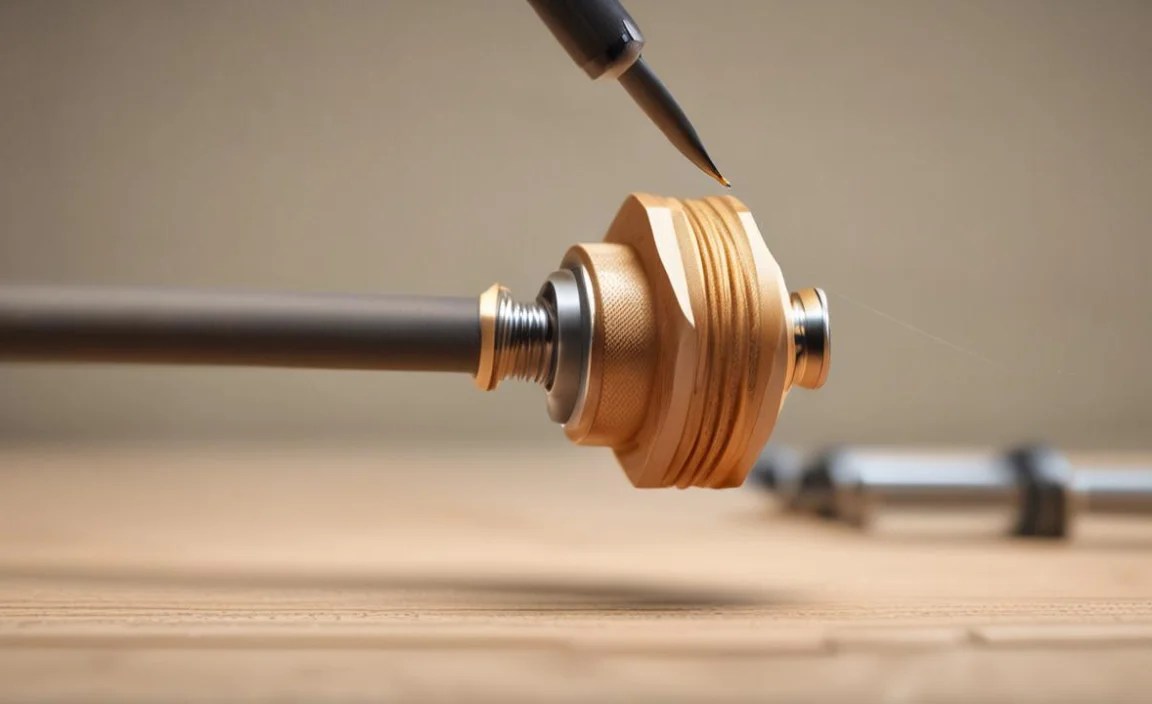
- Thread Chasers: These specialized tools mimic the original threads and are designed to clean, re-form, and remove burrs without cutting new threads. They are invaluable for spindle thread repair.
- Thread Files: These small, hardened files have specific V-shaped teeth designed to match thread profiles (e.g., inch or metric threads).
- Penetrating Oil: Helps loosen rust and grime.
- Cleaning Solvents: Like mineral spirits or brake cleaner for degreasing.
- Clean Rags: For wiping away debris and solvents.
- Touch-Up Paint or Cold Blue (Optional): For aesthetic repair after minor rust removal.
- Epoxy Wood Filler (for very minor surface damage/nicks): A two-part epoxy designed for metal or wood applications.
- Calipers (Optional but Recommended): To measure thread pitch and diameter if you need to identify the thread specification.
Step-by-Step Guide to Wood Lathe Spindle Thread Repair

Let’s break down the repair process. We’ll start with the simplest fixes and move to slightly more involved methods.
Step 1: Thorough Cleaning – The Foundation of Repair
This is the most critical step and often solves the problem entirely. Grime, metal shavings, and old lubricant can simulate thread damage.
- Safety First: Put on your safety glasses and gloves. Ensure the lathe is completely powered off and the headstock is stable.
- Initial Debris Removal: Use a dry brush (brass or nylon) to sweep away loose sawdust and large chips.
- Apply Penetrating Oil: Spray a generous amount of penetrating oil onto the spindle threads. Let it sit for 10-15 minutes to work its way into any grime or light rust.
- Brush Vigorously: Use your brass or nylon wire brush to scrub the threads thoroughly. Work the brush in the same direction as the threads, getting into all the gaps.
- Wipe Clean: Use clean rags to wipe away the loosened debris and oil. You’ll likely see a lot of black gunk come off.
- Repeat if Necessary: For heavily soiled spindles, you might need to repeat steps 2-5 a couple of times.
- Solvent Clean (Optional but Recommended): For a deeper clean, spray some mineral spirits or brake cleaner onto a rag and wipe down the threads. This removes any remaining oily residue.
- Final Wipe: Wipe the threads dry with a clean, lint-free rag.
After cleaning, try screwing on your chuck or a spare nut. If it engages smoothly and tightens securely, congratulations! You’ve successfully repaired your spindle threads. If not, proceed to the next steps.
Step 2: Using a Thread Chaser
A thread chaser is designed to clean, recondition, and remove minor burrs without removing significant material. It’s like a tap, but it doesn’t cut new threads; it cleans and reforms existing ones. You’ll need a chaser that matches your spindle’s thread specification.
Identifying Thread Size:
Most wood lathes use standard threads. Common sizes include:
- 1″ x 8 TPI (Threads Per Inch): Very common for many South Bend, Grizzly, and Jet lathes.
- 3/4″ x 10 TPI, 3/4″ x 16 TPI: Found on some smaller or older import lathes.
- M33 x 3.5mm: Increasingly common on newer, higher-end lathes (like some Vicmarc and Powermatic models).
If you’re unsure, check your lathe’s manual. You can often measure the major diameter (the widest part of the thread) and count the number of threads within one inch (TPI) or the distance between two adjacent thread crests (pitch in mm).
How to Use a Thread Chaser:
- Safety First: Ensure the lathe is off and stable. Wear safety glasses.
- Apply Lubricant: Apply a light machine oil or cutting fluid to the spindle threads and the thread chaser. This helps the chaser move smoothly and prevents galling.
- Position the Chaser: Carefully align the thread chaser with the spindle threads. It should feel like you’re starting to thread an accessory on. For a standard “right-hand thread” (which most are), you’ll turn the chaser clockwise to thread it onto the spindle.
- Gentle Turning: Slowly and gently turn the chaser onto the spindle. You are not trying to force it; you are allowing the chaser’s teeth to ride in the existing grooves and clean/reform them.
- Back and Forth Motion: After threading it on a short distance, back the chaser off slightly. Then thread it on a bit further. Repeat this back-and-forth motion. This helps clear chips and prevents the chaser from binding.
- Work Progressively: Continue this process, working the chaser along the length of the spindle threads.
- Clean and Inspect: Remove the chaser and thoroughly clean the spindle threads again with a clean rag. Inspect the threads for improvements.
- Test Fit: Carefully try to screw on your chuck or an accessory. It should thread on much more smoothly.
If you don’t have a dedicated thread chaser, a die that matches your spindle’s thread specification can be used. However, dies are designed to cut threads, so use extreme caution and very light pressure. The goal is to gently re-form, not to materially remove the threads. Always turn the die clockwise to engage and then back off slightly frequently to clear chips.
Step 3: Using a Thread File for Minor Nicks and Dents
For small dents, flattened spots, or slightly damaged thread crests that a chaser might not fully correct, a thread file is the tool of choice.
The Power of Thread Files:
Thread files are small, thin files with specially shaped teeth that match the profile of specific thread types. They allow you to precisely clean up individual threads without damaging the surrounding material. You’ll need a file that matches your spindle’s thread pitch (e.g., a 1″ x 8 TPI thread file).
How to Use a Thread File:
- Safety First: Wear safety glasses.
- Identify the Damaged Thread: Carefully examine the spindle to locate the specific area of damage.
- Align the File: Position the V-shaped teeth of the thread file into the damaged thread groove. The file should sit at the correct angle relative to the thread’s slope.
- Gentle Filing: Gently file the damaged section. Use short, controlled strokes. You are aiming to remove only the burr or the small deformed protrusion, not to cut away good material.
- Work One Groove at a Time: Focus on repairing one affected groove before moving to another.
- Check Progress Frequently: After a few strokes, wipe the area clean and visually inspect. Your goal is to smooth the damaged spot so that an accessory can pass over it without interruption.
- Smooth Edges: After filing, a quick pass with a soft wire brush can help remove any fine metal dust.
This is a delicate process. Patience is key. It’s better to file too little than too much. If you’re unsure about the angle, practice on a spare piece of threaded rod first.
Step 4: Dealing with Minor Galling or Scoring (Advanced/Careful Application)
If you have slightly deeper scores or signs of minor galling (where metal has been scraped and slightly deformed), you might consider a very careful approach using a thread chaser aggressively or, as a last resort for very small imperfections, a specialized epoxy filler.
Re-chasing for Galling:
If the galling is light, try using your matched thread chaser again. This time, you might need to apply slightly more pressure and potentially use a cutting fluid. Work the chaser on and off repeatedly. The goal is to shave down the high spots created by the galling. Clean thoroughly and inspect. This is a riskier step and can worsen the threads if done improperly.
Epoxy Filler for Very Minor Nicks:
For very small, isolated nicks or gouges that don’t span multiple threads and are only on the surface, a small amount of high-quality, two-part metal epoxy filler might be considered. This is a more advanced repair and requires precision:
- Clean Thoroughly: The area must be immaculately clean and degreased.
- Fill the Nick: Mix a tiny amount of epoxy filler according to the manufacturer’s instructions. Carefully apply a small amount to only the damaged area with a fine tool (like a toothpick or a small palette knife). Do not get epoxy into the undamaged thread grooves.
- Shape While Wet: If possible, try to feather the epoxy smooth while still wet, ensuring it doesn’t protrude above the original thread profile.
- Cure Fully: Allow the epoxy to cure completely as per the manufacturer’s instructions. This can take 24 hours or more.
- Very Light Filing/Sanding: Once fully cured, you may need to very gently file or sand the epoxy down to match the surrounding thread profile. Use a thread file or fine-grit sandpaper wrapped around a small dowel. The goal is to make the repaired spot flush with the original thread. This step is critical and difficult to get perfect.
- Clean Again: Thoroughly clean the spindle threads.
Important Note on Epoxy: This is a last resort for cosmetic or very minor surface damage. It’s easy to misapply epoxy and create a bigger problem. For significant damage, replacement is often the better, safer option.
When to Consider Professional Help or Replacement

Sometimes, the damage to your wood lathe spindle threads is simply beyond a DIY fix. If you encounter any of the following, it’s time to pause and consider your options:
- Deeply Damaged or Missing Threads: If large sections of threads are torn away, or several threads are completely missing, a simple repair is unlikely to be effective or safe.
- Bent Spindle: If the damage is a result of a heavy impact, the spindle itself might be bent. This is a more complex issue requiring specialized machinery to fix, or replacement.
- Extensive Rust Damage: If rust has significantly weakened the spindle material or corroded away substantial portions of the threads, replacement is usually the safest path.
- Uncertainty or Lack of Confidence: If you’re not comfortable with any of the repair steps or are unsure about the thread type, it’s better to seek advice or consider replacing the spindle rather than risking damage or an unsafe setup.
For significant damage, you have a couple of options:
- Spindle Replacement: Many lathe manufacturers offer replacement spindles. This is often the most straightforward solution for severely damaged spindles. Check with your lathe’s manufacturer or a reputable lathe parts supplier.
- Professional Machining: A local machine shop might be able to repair or re-thread your spindle, but this can be expensive and may not always be cost-effective compared to buying a new spindle, especially for common lathe models. They might be able to use a lathe with advanced tooling to cut new threads accurately.
Consulting the manufacturer of your lathe is always a good first step when considering replacement parts.
Maintaining Your Spindle Threads for Longevity
The best repair is preventative maintenance. Once your threads are in good shape, keep them that way with these simple habits:
- Regular Cleaning: After every few uses, or whenever you switch accessories, give your spindle threads a quick clean with a wire brush and a rag. Removing sawdust and metal filings promptly prevents them from becoming embedded.
- Proper Storage: When accessories are removed, protect the spindle threads. Some lathes come with thread protectors, or you can fashion a simple one from plastic or wood. Store accessories with their threads clean and ideally lightly oiled or greased.
- Gentle Installation: Always start threading accessories onto the spindle by hand. Feel for the threads to engage smoothly. Never force an accessory if it feels like it’s binding or cross-threading. Back it off and try again.
- Appropriate Lubrication: A very light application of machine oil or a specialized spindle lubricant on the threads can help prevent rust and ensure smooth engagement. Don’t overdo it, as excess lubricant can attract dust.
- Use the Right Accessories: Ensure your chucks, faceplates, and other accessories are designed for your lathe’s spindle thread size and type.
A little bit of care goes a long way in keeping your lathe’s spindle threads in excellent condition, ensuring safe and efficient operation for years to come.
