Wood lathe spindle turning projects are perfect for beginners, offering a straightforward path to create beautiful, functional items like table legs, candleholders, and decorative accents using fundamental lathe techniques and essential tools.
Turning spindles on a wood lathe might seem tricky at first, but it’s one of the most rewarding ways to start your woodworking journey. Many beginners find themselves overwhelmed by complex projects. But what if you could make something truly impressive with just a few basic tools and simple steps? This guide is your starting point. We’ll break down essential spindle turning projects, show you the tools you absolutely need, and guide you through the process so you can build confidence and create amazing things for your home or as gifts. Get ready to transform a simple piece of wood into something special!
What Are Wood Lathe Spindle Turning Projects?

Wood lathe spindle turning projects are fundamental woodworking tasks where you use a wood lathe to shape wood along its longest axis. Think of turning a round table leg, a sleek candlestick, or the balusters on a staircase. These projects focus on cylindrical shapes, allowing you to practice essential lathe techniques like parallel turning, tapering, beading, and parting off. They’re often considered “essentials” because they build the core skills needed for more intricate work later on.
The beauty of spindle turning for beginners lies in its accessibility. You don’t need a massive workshop or incredibly specialized knowledge to get started. With a few key tools and a focus on understanding wood movement and tool control, you can quickly achieve satisfying results. These projects are not just about making objects; they’re about developing a feel for the wood, mastering your lathe, and understanding the principles of shaping round forms safely and effectively.
This approach is perfect for anyone looking to get hands-on with their woodworking. Whether you want to add custom details to furniture, create unique home decor, or simply learn a valuable new skill, spindle turning offers a clear and achievable path. We’ll cover the must-have tools, some beginner-friendly project ideas, and the techniques that will make your turning smooth, precise, and enjoyable.
Why Start with Spindle Turning Projects?
Spindle turning is the bedrock of many woodworking disciplines that involve a lathe. It teaches you control, consistency, and how to read the grain of the wood. Projects like these are ideal for several reasons:
- Skill Development: They help you master fundamental cuts like scraping, shearing, and paring, which are transferable to all types of lathe work.
- Tool Familiarity: You’ll become comfortable selecting, sharpening, and using basic turning chisels.
- Material Efficiency: Spindle turning often uses smaller stock, making it economical for practice and experimentation.
- Immediate Gratification: You can complete simple projects in a single session, providing a boost of confidence.
- Foundation for Furniture: Many furniture components, such as legs, stretchers, and decorative elements, are turned spindles.
Essential Tools for Spindle Turning

To get started with wood lathe spindle turning projects, you don’t need a mountain of gear. A few key pieces of equipment will get you turning safely and effectively. Investing in good quality tools from the start will make your learning process much smoother and more enjoyable. Here are the essentials:
1. The Wood Lathe
This is the heart of your operation. For beginners, a benchtop or standalone lathe with variable speed control is ideal. Look for a lathe that has enough power for the types of wood you plan to turn and a bed length that accommodates your desired project sizes. Features like a robust headstock, tailstock for support, and a tool rest are crucial.
A good starting point is often a lathe with a spindle thread of 1″ x 8 TPI (Threads Per Inch) or 3/4″ x 10 TPI, as this is a common size for chucks and faceplates.
2. Turning Chisels (Gouges and Skew Chisels)
These are your primary shaping tools. While a full set can be extensive, a beginner needs a few core pieces:
- Spindle Gouge: Typically 1/2″ or 5/8″ size. This is your workhorse for most shaping, creating hollows, coves, and beads. Its flute shape allows for controlled cuts.
- Roughing Gouge: A heavier, wider gouge (often 1″ or larger) used to quickly turn square stock into a rough cylinder before using other chisels for finer shaping.
- Skew Chisel: A 1/2″ or 5/8″ skew is incredibly versatile. It can produce smooth, tear-out-free surfaces, create tapers, and be used for detail work. Mastering the skew is a significant milestone in turning.
- Parting Tool: Essential for cutting stock to length or creating decorative grooves. A 1/4″ or 3/8″ parting tool is a good start.
Remember that sharp chisels are safer and more effective. Invest in a good sharpening system, such as water stones, diamond plates, or a powered grinder with a jig. Regularly honing your tools will make a world of difference.
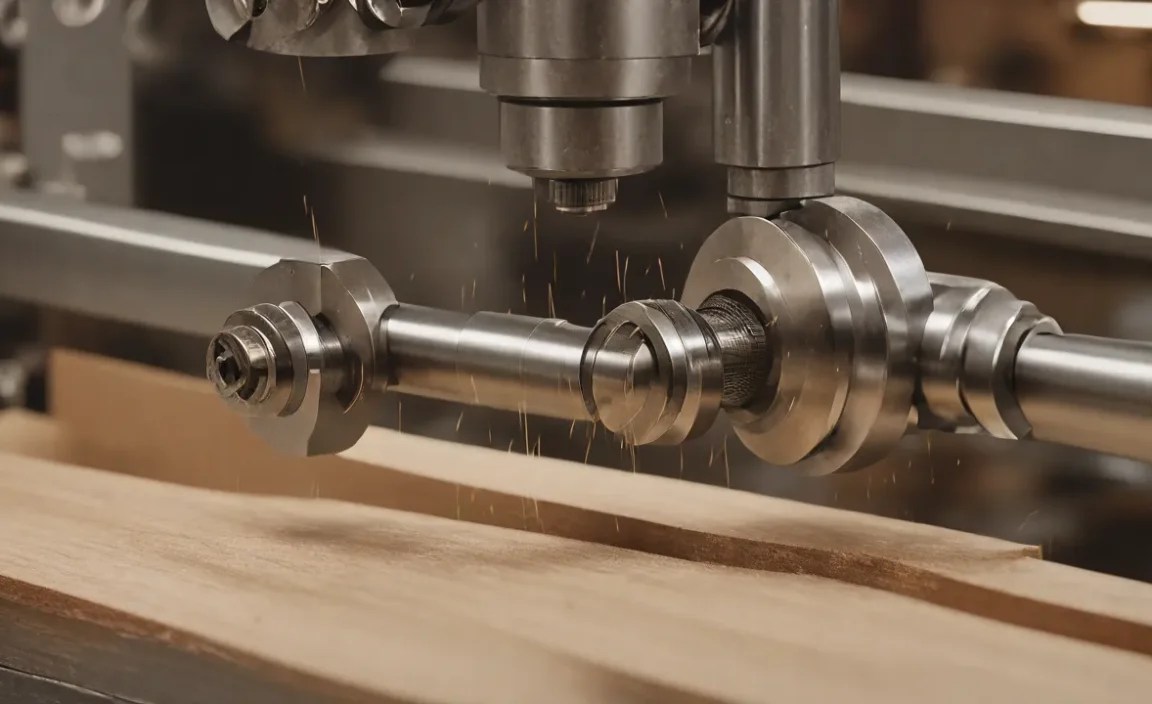
3. Drive Center and Live Center (for Spindle Turning)
For spindle turning, you’ll typically mount your wood between the headstock (which drives the wood) and the tailstock (which supports the wood). This requires specific hardware:
| Component | Purpose | Description |
|---|---|---|
| Drive Center (or Spur Drive) | Engages the wood from the headstock. | Has spurs that dig into the wood end, transferring rotation from the headstock spindle to the workpiece. |
| Live Center | Supports the wood from the tailstock. | Has a bearing that allows the point to spin freely with the wood, reducing friction and preventing burning. Essential for longer spindles. |
4. Faceplate or Screw Chuck
For projects like bowls or larger discs, you’d use a faceplate or screw chuck. However, for basic spindle turning, you’re usually mounting between centers. These are more relevant for face-grain turning.
5. Wood
Softer hardwoods like poplar, pine, or basswood are excellent for beginners as they cut easily. As you gain confidence, you can move to more challenging woods like maple, cherry, or walnut. Ensure your wood is dry and free of major defects.
6. Safety Gear
This is non-negotiable. Always wear:
- Safety Glasses or Face Shield: Eyes are invaluable. A full face shield offers superior protection from flying chips.
- Dust Mask or Respirator: Wood dust can be harmful.
- Hearing Protection: Lathes can be noisy.
- No Loose Clothing, Jewelry, or Gloves: These can get caught in the lathe. Tie back long hair.
A good stance is also important for safety and control. Stand where you can see the tool at all times, with your feet shoulder-width apart and slightly staggered. Never stand directly in front of the spinning workpiece.
Beginner-Friendly Wood Lathe Spindle Turning Projects

Now that you have a handle on the tools, let’s dive into some specific projects that are perfect for honing your spindle turning skills. These projects allow you to practice essential techniques on manageable pieces of wood.
Project 1: The Simple Candleholder
A classic starter project that teaches you how to create different diameters and smooth transitions. It’s functional and a great way to practice holding your tools steady.
Steps:
- Prepare the Wood: Select a block of wood, approximately 2-4 inches in diameter and 6-8 inches long. Square it up slightly if needed.
- Mount the Wood: Mount a drive spur into the headstock. Insert a live center into the tailstock. Place your wood between centers and advance the tailstock to make firm contact. Lock the tailstock. Engage the spur into the wood slightly.
- Roughing: With the lathe at a slow speed (around 500-800 RPM, depending on wood size), use the roughing gouge with a sweeping cut from the tailstock end towards the headstock to turn the square stock into a rough cylinder. Reduce the speed as the wood becomes rounder.
- Establish Diameters: Using your spindle gouge or skew chisel, begin to mark out the different diameters for the base, stem, and top of your candleholder. Make light, controlled cuts. For smooth transitions, aim to leave slightly convex (curved outward) surfaces between different diameters.
- Shape the Details: Refine these diameters. Practice creating simple beads (a convex curve) and coves (a concave curve). Use your skew chisel for smooth, shallow tapers to connect different sections.
- Create the Top and Base: Hollow out a small recess on the top for the candle. For stability, ensure the base is flat and wide enough.
- Sanding: While the piece is still on the lathe at a moderate speed (around 1000-1200 RPM), sand from coarse grit (120) to fine grit (220 or 320). Turn off the lathe to advance to the next grit. For a super smooth finish, try sanding with the grain while the lathe is stopped.
- Parting Off: Use your parting tool to cut the candleholder free from the waste wood at the base, leaving just enough to hold it securely. You’ll need to clean up the nub left by the drive spur later. A chuck with a jam chuck adapter or careful sanding can do this. For a simple candleholder, a flat base is fine, and you can sand the drive spur mark away gradually.
Project 2: Table Leg or Chair Spindle
These projects often involve longer, more cylindrical pieces, perhaps with some decorative elements. They’ll help you manage longer stock and ensure consistent diameter over greater lengths.
Steps:
- Select Stock: Choose kiln-dried hardwood, at least 1-2 inches square and the desired finished length plus a few inches for mounting and cleanup. For longer pieces, ensure wood is well-balanced and free from significant defects that could cause imbalance.
- Mounting: Mount the wood between centers as described for the candleholder. For longer pieces, consider supporting the middle with a traveling steady rest to prevent vibration and bending, especially during roughing.
- Rough to Cylinder: Use a roughing gouge to create a consistent cylinder. Work from tailstock to headstock. If using a steady rest, rough the sections outside the steady rest first, then move the steady rest and proceed.
- Establish Profile: Use calipers or a measuring tape to mark out major diameter changes for your table leg or spindle design.
- Turning the Profile: Use a combination of spindle gouges and skew chisels to shape the profile. Practice creating parallel sections, gentle tapers, and decorative elements like beads, coves, or reeds. The skew chisel is excellent for achieving smooth, straight tapers and clean shoulders.
- Achieving Parallelism: For furniture components, consistent diameter along parallel sections is crucial. Use calipers to check your measurements frequently. The tailstock center can sometimes create a slight taper away from it; be mindful of this and make adjustments.
- Sanding: Sand thoroughly in stages, working through grits from 120 to 320. Ensure all tool marks are removed. After sanding, a light scraping cut with a sharp skew can sometimes reveal a finer finish.
- Parting Off and Cleanup: Part the spindle from the waste wood at both ends. The areas where the drive spur and live center entered will need cleanup. This can be done by turning a jam chuck, using a chuck with jaws to grip the part, or by carefully sanding the ends flat.
Project 3: Decorative Drawer Pulls or Knobs
Small, quick projects that are perfect for practicing precise detail work and creating matching sets. You can also practice tenon turning here, which is essential for attaching things.
Steps:
- Prepare Blanks: Cut small blocks of wood, maybe 1-1.5 inches square and 3-4 inches long.
- Mounting: For small knobs, you might mount the wood on a screw-in faceplate or a screw chuck. Alternatively, you can turn a tenon on one end and mount it between centers.
- Shape the Knob: Use your spindle gouge and skew to create the desired shape – spherical, conical, or a more complex profile. Practice creating smooth curves and clean transitions.
- Creating a Tenon: If the knob needs to be attached to a drawer face with a screw, you’ll typically turn a small tenon on the back of the knob that can be drilled and tapped or have a screw inserted through it. For mounting on the lathe to shape the back, you’ll likely turn a tenon to be held by a chuck. A jam chuck or a specialized knob-holding jig can also be used.
- Drilling: After parting off, you can drill a clearance hole for a screw or tap threads for a machine screw for attachment.
- Sanding and Finishing: Sand to a smooth finish. Apply a light Danish oil, wax, or clear lacquer to protect and enhance the wood.
Tips for Achieving an Excellent Finish
The finish is what makes your turned pieces shine. Here’s how to achieve that professional look:
- Sharp Tools: This cannot be stressed enough. Dull tools tear wood, leave rough surfaces, and are dangerous.
- Controlled Cuts: Take light, shaving cuts rather than trying to remove large amounts of material at once. Let the tool do the work.
- Tool Rest Placement: Ensure the tool rest is close to the wood (1/8″ maximum gap) and at the correct height (typically just slightly below the cutting edge or center line for scrapers and at the center line for gouges and skews when shearing).
- Sanding Technique: Start with a coarser grit (like 120 or 150) to remove all tool marks. Gradually move to finer grits (220, 320, 400). Sand with the lathe turning at a moderate speed (800-1200 RPM). After sanding, you can try a “sheen scraping” with a very sharp skew or scraper held at a negative rake angle to burnish the wood and bring out a deep luster, especially on dense hardwoods.
- Burnishing: Some turners use a steel wool pad (0000 grade) after sanding to further smooth the surface before applying a finish.
- Finishing on the Lathe: Apply finishes like Danish oil, friction polish, or wax while the piece is still on the lathe at a relatively high speed. This helps the finish penetrate and cure evenly. Wipe off excess.
- Wipe Coats: For a smoother, more durable finish, consider applying multiple thin coats of a clear finish like lacquer or polyurethane.
A great resource for understanding wood finishing techniques is the U.S. Forest Products Laboratory, which has extensive research on wood properties and treatments. You can explore their publications on wood finishing at Forest Products Laboratory Publications.
Troubleshooting Common Spindle Turning Issues
Even with the best intentions, you might run into a few snags. Here’s how to deal with them:
Issue: Tear-out or Chipper Marks
Cause: Dull tools, too much force, wrong cutting angle, or working against the grain.
Solution: Ensure your tools are razor sharp. Use lighter, slicing cuts, especially when working on highly figured or end-grained sections. For end grain, a shear cut with a skew chisel is often your best bet. If everything seems right, slow down the lathe speed slightly.
Issue: Wobbly or Vibrating Workpiece
Cause: Imbalanced wood, loose tailstock, wood not seated properly, or a bent workpiece.
Solution: Make sure the wood is centered and the tailstock is firmly engaged. For long pieces, use a steady rest. Always allow the wood to round out before taking aggressive cuts. Slightly dampen the wood with water to help the gouge slide over end-grain tears without digging in. This is more of a workaround than a fix for fundamental cuts.
Issue: Inconsistent Diameters on Long Spindles
Cause: Tool rest movement, inconsistent pressure, or wood flexing.
Solution: Keep the tool rest firmly in place. Use calipers frequently to check your diameter. For very long spindles, a steady rest is almost mandatory to maintain consistent diameter and prevent deflection. Learn to feel the resistance of the wood and adjust your cuts accordingly.
Issue: Burned Wood
Cause: Too much friction, dull tools, or stopping the lathe while the wood is still pressed against a stationary tool.
Solution: Keep tools sharp. Use light, scraping cuts when necessary, but primarily rely on shearing cuts. Never stop the lathe with the wood pressing against a stationary tool.
